Yamaha DGX-202 Owner's Manual
Yamaha DGX-202 Manual
 |
View all Yamaha DGX-202 manuals
Add to My Manuals
Save this manual to your list of manuals |
Yamaha DGX-202 manual content summary:
- Yamaha DGX-202 | Owner's Manual - Page 1
- Yamaha DGX-202 | Owner's Manual - Page 2
manual, on the name plate, or specifically recommended by Yamaha. This product should be used only with the components supplied or; a cart, rack, or stand that is recommended by Yamaha. If a cart, etc., is used, please observe all safety markings and instructions that accompany the accessory product - Yamaha DGX-202 | Owner's Manual - Page 3
approved by Yamaha may void your authority, granted by the FCC, to use the product. 2. IMPORTANT: When connecting this product to accessories and/or another product use only high quality shielded cables. Cable/s supplied with this product MUST be used. Follow all installation instructions. Failure - Yamaha DGX-202 | Owner's Manual - Page 4
manual to, the following: Power supply/AC power adaptor • Only use the voltage specified as serviceable parts. If it should appear to be malfunctioning, discontinue use immediately and have it inspected by qualified Yamaha service personnel. Water warning • Do not expose the instrument to rain, use - Yamaha DGX-202 | Owner's Manual - Page 5
discard used batteries according to local regulations. The illustrations and LCD screens as shown in this owner's manual are for instructional purposes only, and may be different from the ones on your instrument. G Regarding the song (or composition) "Just The Way You Are" included in this keyboard - Yamaha DGX-202 | Owner's Manual - Page 6
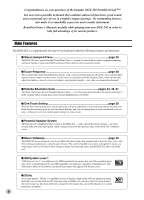
Owner's Manual carefully while playing your new DGX-202 in order to take full advantage of its various features. Main Features The DGX-202 is a sophisticated yet easy-to-use keyboard with the following features and functions: I Stereo Sampled Piano page 20 The DGX-202 has a special Portable Grand - Yamaha DGX-202 | Owner's Manual - Page 7
and Terminals 8 Setting Up 10 • Power Requirements 10 • Turning On the Power 11 • Accessory Jacks 11 Quick Guide 12 Step 1 Voices 12 Step 2 Songs 14 Step 3 Music Database 16 Panel Display Indications 18 Portable Grand 20 • Playing the Portable Grand 20 • Using the Metronome 20 DJ 22 - Yamaha DGX-202 | Owner's Manual - Page 8
@6 @7 @8 @9 q Power switch ([STANDBY/ON]) w [MASTER VOLUME] dial This determines the overall volume of the DGX-202. e [TOUCH] button This PORTABLE GRAND] button This instantly calls up the Grand Piano voice. (See 8 page 12.) > > f < < r f !3 [DEMO] button This is used to play the Demo song - Yamaha DGX-202 | Owner's Manual - Page 9
Song mode, this alternately starts and stops song playback. (See page 54.) @7 [TEMPO/TAP] button This button is used MIDI instruments and devices. (See page 67.) #2 SUSTAIN jack This is for connection to an optional FC4 or FC5 Footswitch for control over sustain, just like the damper pedal on a piano - Yamaha DGX-202 | Owner's Manual - Page 10
by Yamaha) to power your instrument from the AC mains. The use of other adaptors may result in irreparable damage to both the adaptor and the DGX202. • Unplug the AC Power Adaptor when not using the DGX-202, or during electrical storms. I Using Batteries For battery operation the DGX-202 requires - Yamaha DGX-202 | Owner's Manual - Page 11
the same way as a damper pedal on an acoustic piano - press and hold down the footswitch as you play the keyboard to sustain the sound. I Using the MIDI Terminals The DGX-202 also features MIDI terminals, allowing you to interface the DGX-202 with other MIDI instruments and devices. (For more - Yamaha DGX-202 | Owner's Manual - Page 12
092 001 zz r q Playing the Piano Simply by pressing the [PORTABLE GRAND] button, you can automatically select the Grand Piano voice. z Press the [PORTABLE GRAND] button. Playing along with the Metronome z Press the [METRONOME] button. GrandPno 001 x Play the keyboard. Want to find out more - Yamaha DGX-202 | Owner's Manual - Page 13
The DGX-202 has a huge total of 605 dynamic and realistic instrument voices. Let's try a few of them out now... q Press the [VOICE] button. w Select a voice. or BritePno 002 GrandPno 001 f r • You can also select the appropriate category by using the [ ]/[ ] buttons. e Play the keyboard - Yamaha DGX-202 | Owner's Manual - Page 14
a song. Just You 001 x Stop the Demo song. or or B Bailey 002 f r • The DGX-202 also has a Demo and DJ Cancel function that allows you to disable Demo song and DJ function. Set Demo and DJ Cancel in the Function mode (page 76). • You can also select the appropriate category by using the - Yamaha DGX-202 | Owner's Manual - Page 15
like a multi-track tape recorder, the DGX-202 lets you play and record the individual parts of your own song in real time. q Select the desired User song (201 - 205) for recording. or User 2 202 e Start recording by playing a melody on the keyboard. The DGX-202 starts recording as soon as you - Yamaha DGX-202 | Owner's Manual - Page 16
Quick Guide Step 3 Music Database zb x GrandPno 001 092 001 v z Music Database Here's a convenient feature that lets you instantly reconfigure the DGX-202 for playing in different music styles. If you 002 • You can also select the appropriate category by using the [ ]/[ ] buttons. f r 16 - Yamaha DGX-202 | Owner's Manual - Page 17
C3 - B4) Keys for entering the chord root (C5 - B5) c Specify the chord type of the chord (in this case, M7). Learning how to play a specific chord Example: G M7 Root note Chord type z Press the [DICTIONARY] button. Dict. v Play the notes of the chord as indicated in the keyboard diagram in - Yamaha DGX-202 | Owner's Manual - Page 18
Panel Display Indications The DGX-202 features a large multi-function display that shows all important settings for the instrument. The section below briefly explains the various icons and indications in the display. !4 Octave indicator q Notation e Beat marks r Song/Voice/Style/M.D.B. name and - Yamaha DGX-202 | Owner's Manual - Page 19
measure during playback of a song or style, and the currently set Tempo value for the song or style. !4 Octave indicator keyboard when the Style mode and auto accompaniment are on. Music Stand Insert the bottom edge of the included music stand into the slot located at the top rear of the DGX-202 - Yamaha DGX-202 | Owner's Manual - Page 20
This convenient function lets you instantly call up the Grand Piano voice. Playing the Portable Grand Press the [PORTABLE GRAND] button. GrandPno 001 Doing this automatically selects the special "Stereo Sampled Piano" Grand Piano voice. Using the Metronome 1 Call up the Tempo setting. Press the - Yamaha DGX-202 | Owner's Manual - Page 21
the Metronome. Press the [METRONOME] button. Portable Grand 148 1 Indicates the beat number in the meters. The Time Signature can be set in the Function mode (page 76). • The time signature changes automatically when a style or song is selected. Numeric keypad 01 02 03 04 : 15 0 Time signature - Yamaha DGX-202 | Owner's Manual - Page 22
voice. 2 Play the DJ style. Play keys in the accompaniment area of the keyboard. Accompaniment area • The DGX-202 has a Demo song and DJ Cancel function that allows you to disable Demo song and DJ function. Set Demo and DJ Cancel in the Function mode (page 76). • When the DJ style is selected, the - Yamaha DGX-202 | Owner's Manual - Page 23
been created with Yamaha's sophisticated AWM (Advanced Wave Memory) tone generation system. These include 480 XG voices and drum kits. The DGX-202 also has a or song. > r f < r f I Use the CATEGORY [ ]/[ ] buttons, dial or the SELECT [ ]/ [ ] buttons. G Select the voice CATEGORY Using the - Yamaha DGX-202 | Owner's Manual - Page 24
zeroes may be omitted. In this case, there is a short pause before the indication appears. Std.Kit1 109 G Using the [+]/[-] buttons Press the [+] button to select the next voice number, and press the [-] button to select the voice may sound higher or lower than another voice at the same key. 24 - Yamaha DGX-202 | Owner's Manual - Page 25
the [START/STOP] button. The last selected style, song or M.D.B. will be played. Playing Voices The following parameteres can play different drum and percussion instrument 110 Standard Kit 2 sounds from the keyboard. 111 Room Kit 112 Rock Kit 113 Electronic Kit • For more details, - Yamaha DGX-202 | Owner's Manual - Page 26
actually a convenient feature which automatically selects a suitable voice for you when you select a style. The voice is selected to best match the style or song you've called up. Select voice #000 (OTS). #000 OTS is selected. or GrandPno 000 Dual Voice The Dual Voice function lets you combine - Yamaha DGX-202 | Owner's Manual - Page 27
keyboard, and play one Voice with your left hand while your right plays another. For example, you could play bass with the left hand and play piano Voice is on. Setting the Split Point The Split Point determines the highest key for the split voice and sets the split point. Split Point • This - Yamaha DGX-202 | Owner's Manual - Page 28
stopped). DSP Type On/Off Harmony Type Harmony Volume I Calling up a One Touch Setting 1 Select the style. • One Touch Setting does not function in the Song mode. or 2 Press the ONE TOUCH SETTING button [1] or [2]. OTS 2 28 - Yamaha DGX-202 | Owner's Manual - Page 29
desired settings. Change the voice and make any other settings you want to use with the selected style and the One Touch Setting buttons. 3 Press and of the songs. This allows you to easily match the pitch of the DGX-202 to other instruments or singers, or play in a different key without changing - Yamaha DGX-202 | Owner's Manual - Page 30
DGX-202 responds to your playing strength, allowing you to customize the keyboard how lightly or strongly you play the keys. This lets you play over a normal of 80) is produced. Pitch Bend The DGX-202 has a [PITCH BEND] wheel that lets lets you set how the DGX-202 responds to your wheel playing, - Yamaha DGX-202 | Owner's Manual - Page 31
of the DGX-202. A total of twenty-six Harmony types are available. (See page 33.) Tremolo, Trill and Echo effects can be used even if accompaniment is off. There are five different Harmony Types that automatically create harmony parts (for notes played in the upper section of the keyboard) to match - Yamaha DGX-202 | Owner's Manual - Page 32
of other useful and dynamic 76). CATEGORY Effect Main Voice Dual Voice Split Voice SELECT DSP Type DSP Send Level DSP Send Level DSP Send Level • Each voice of the DGX-202 has its own independent DSP setting. • Fifty-one additional DSP Types are available when controlling the DGX-202 from a MIDI - Yamaha DGX-202 | Owner's Manual - Page 33
to the single-note melody played in the right hand. These types only sound when chords are played in the auto accompaniment area of the keyboard. Types 6 - 26 are rhythm-based effects and add embellishments or delayed repeats in time with the auto accompaniment. These types sound whether the auto - Yamaha DGX-202 | Owner's Manual - Page 34
Effects G Chorus Types No. Chorus Type 1 Chorus 1 2 Chorus 2 3 Flanger 1 4 Flanger 2 5 Off Display Name Chorus1 Chorus2 Flanger1 Flanger2 Off G DSP Types No. DSP Type 1 Hall 1 2 Hall 2 3 Room 1 4 Room 2 5 Stage 1 6 Stage 2 7 Plate 1 8 Plate 2 9 Early Reflection 1 10 - Yamaha DGX-202 | Owner's Manual - Page 35
by the chords you play. Auto accompaniment effectively splits the keyboard into two areas: The upper is used for playing a melody line, and the lower (set by default to keys F#2 and lower) is for the auto accompaniment function. The DGX-202 also features the convenient Dictionary function (page 45 - Yamaha DGX-202 | Owner's Manual - Page 36
numeric keypad. Style numbers can be selected in the same way as with the voices (page 24). You can use the numeric keypad to directly enter the style number, or use the [+]/[-] buttons to step up and down through the styles. Playing the Styles The panel buttons below function as style controls - Yamaha DGX-202 | Owner's Manual - Page 37
style is playing by tapping the [TEMPO/TAP] button twice at the desired tempo. I Using Sync Start The DGX-202 also has a Sync Start function that allows you to start the style by simply pressing a key on the keyboard. To use Sync Start, first press the [SYNC START] button (the beat marks all flash to - Yamaha DGX-202 | Owner's Manual - Page 38
style has its own two- or four-measure Intro section. When used with the auto accompaniment, many of the Intro sections also include special Intro section and accompaniment by playing any key on the keyboard. (When auto accompaniment is on, play a key or chord in the auto accompaniment area of the - Yamaha DGX-202 | Owner's Manual - Page 39
one of three ways: I Pressing the [START/STOP] button The style stops playing immediately. I Using an Ending section Press the [INTRO ENDING] button. The style stops after the Ending section is fi restart the style by simply playing a chord or key in the auto accompaniment area of the keyboard. 39 - Yamaha DGX-202 | Owner's Manual - Page 40
Sync Stop to on before starting the style automatically sets Sync Start to on as well. 8BtModrn 001 3 Play a chord on the keyboard (in the auto accompaniment area of the keyboard). The style starts as soon as you play a chord. 4 Stop the style by releasing the chord. Indicates that Sync Stop is - Yamaha DGX-202 | Owner's Manual - Page 41
the same tempo, even when changing styles.) 2 Change the value. Use the dial or numeric keypad to set the desired Tempo value, or use the [+]/[-] buttons to increase or decrease the value. or Restoring the Default Tempo Value Each song and style has been given a default or standard Tempo setting - Yamaha DGX-202 | Owner's Manual - Page 42
...and the Main A or B section begins here. Adjusting the Style Volume The playback volume of the style can be adjusted in the Function mode (page 76). This volume control affects only the Style volume. The volume range is 000 127. • Style Volume cannot be changed unless the Style mode is active - Yamaha DGX-202 | Owner's Manual - Page 43
by using Multi Fingering operation. You can change the chords of the accompaniment by playing keys in the auto accompaniment area of the keyboard using either all the notes of the chord. Whichever method you use, the DGX-202 "understands" what chord you indicate and then automatically generates - Yamaha DGX-202 | Owner's Manual - Page 44
C7sus4 C • Notes in parentheses can be omitted. • Playing two same root keys in the adjacent octaves produces accompaniment based only on the root. • A perfect fingerings listed are all in "root" position, but other inversions can be used - with the following exceptions: m7, m7b5, 6, m6, sus4, aug, - Yamaha DGX-202 | Owner's Manual - Page 45
a built-in "chord book" that shows you the individual notes of chords. It is ideal when you know the name of a certain chord and want to quickly learn how to play it. 1 Press the [DICTIONARY] button. Dict. 2 Specify the root of the chord. Press the key on the keyboard that corresponds to the - Yamaha DGX-202 | Owner's Manual - Page 46
chord (as indicated in the display) in the chord area of the keyboard. The chord name flashes in the display when the correct notes are held important note in the chord, because it anchors the sound harmonically by determining its "key" and forms the basis for how we hear the other notes of the chord - Yamaha DGX-202 | Owner's Manual - Page 47
use this shorthand to write out the chords of a song . First, write the root note of the chord in an uppercase letter. If you need to specify sharp or flat, indicate that to the right of the root. The chord type should be indicated to the right as well. Examples for the key the keyboard diagram - Yamaha DGX-202 | Owner's Manual - Page 48
Using the Music Database If you want to play in a certain genre of music but don't know which style and voice settings would be appropriate, simply select the desired genre from the Music Database. The DGX-202 automatically makes all appropriate panel settings to let you play in that music style! - Yamaha DGX-202 | Owner's Manual - Page 49
Using the Music Database In this example, we will select #208 "Xmas Walz" and play the Song "Silent Night". Auto accompaniment area 3 Play the chords with your left hand and the melody lines with your right hand along with the music. As - Yamaha DGX-202 | Owner's Manual - Page 50
Using the Music Database Data stored by the Music Database Each of the Music Database settings has been specially programmed to match the selected musical style - Yamaha DGX-202 | Owner's Manual - Page 51
Playing Songs The DGX-202 features a total of 105 songs. These include 100 songs that showcase the rich and dynamic sounds of the instrument, and 99 of these songs can be used with the educational Lesson feature (page 61), a powerful tool that makes learning songs fun and easy. A special Demo song - Yamaha DGX-202 | Owner's Manual - Page 52
step up and down through the song. Listening to the Flash Memory Song The DGX-202 can play a song loaded into its internal flash memory. To do this, you'll need to connect the DGX202 to a personal computer, and use the "Song Filer" software to transmit the song from the computer. For more information - Yamaha DGX-202 | Owner's Manual - Page 53
the measure num- ber and chords are shown in the display. • You can play along with the song using the currently selected voice, or even select a different voice for playing along. Simply call up the Voice mode while the song is playing back and select the desired voice. (See page 23.) 2 Stop the - Yamaha DGX-202 | Owner's Manual - Page 54
it easier to play and master the part. You may also want to slow down the Tempo while setting the A and B points; this makes it easier to accurately set the points. • You can also set the A-B Repeat function when the song is stopped. Simply use the [ r ] and [ f ] buttons to select the desired - Yamaha DGX-202 | Owner's Manual - Page 55
The DGX-202 lets you play a melody on the keyboard along with each of the songs, either with the original melody voice or one of your own selection. The convenient Melody Voice Change feature takes this one step further - it lets you replace the original voice used for the melody of the song with - Yamaha DGX-202 | Owner's Manual - Page 56
You can record and save up to five User songs. User 1 rEC 001 Song recording on the DGX-202 is similar to using a tape recorder; whatever you play on the keyboard is recorded in real time as you play it. Also, when you record subsequent parts to other tracks, you can hear the previously recorded - Yamaha DGX-202 | Owner's Manual - Page 57
song number for recording. Use the dial or numeric keypad to select the desired song: 201 - 205. If no song is manually selected, the DGX-202 automatically selects the first avail- able empty song number. Song Recording User 2 or 202 provided for recording your keyboard performance. Normally, you' - Yamaha DGX-202 | Owner's Manual - Page 58
on, play the first chord of the song in the auto accompaniment area of the keyboard. The accompaniment starts automatically and you can continue recording, playing other chords in time with the accompaniment. 5 Stop recording. After you've finished playing the part, press the [START/STOP] or [REC - Yamaha DGX-202 | Owner's Manual - Page 59
Clear operation (page 60). 1 Select the desired song. Press the [SONG] button, then use the numeric keypad or [+]/[-] buttons to select the desired song (201 - 205). User 2 202 2 While holding down the [A] button, press SONG MEMORY button [1]. All track indications in the display flash, indicating - Yamaha DGX-202 | Owner's Manual - Page 60
a new one. To erase the data of an entire song, use the Song Clear operation (page 59). 1 Select the desired song. Press the [SONG] button, then use the numeric keypad or [+]/[-] buttons to select the desired song (201 - 205). User 2 202 2 Press and hold down the button corresponding to the track - Yamaha DGX-202 | Owner's Manual - Page 61
the notes - any note can be used, as long as you play in rhythm. I Lesson 2 - Waiting In this lesson step, the DGX-202 waits for you to play the correct notes before continuing playback of the song. I Lesson 3 - Minus One This lesson step plays back the song with one part muted, letting you play and - Yamaha DGX-202 | Owner's Manual - Page 62
Song Lesson 2 Select the part you wish to work on (left or right) and the Lesson step. If you want to work on the right-hand part, press the [R] button; to work on the ] button to stop the Lesson. The DGX-202 exits from the Lesson feature automatically when the [START/STOP] button is pressed. - Yamaha DGX-202 | Owner's Manual - Page 63
number of a loaded song from computer (only SMF format 0). The track number of the song can be specified in the Function mode (page 76). Lesson 1 - and the use of the left hand, the DGX-202 actually has two different types of songs: 1) songs with normal left-hand chords, and 2) songs in which - Yamaha DGX-202 | Owner's Manual - Page 64
3 - Minus One This lesson step lets you practice one part of the song in rhythm at the proper tempo. The DGX-202 plays back the song accompaniment with one part muted (either the left part or the right)- letting you play and master the missing part yourself. The notes you are to play are shown - Yamaha DGX-202 | Owner's Manual - Page 65
starts automatically, and the appropriate notes appear in the display. In Lesson 3, listen carefully to the un-muted part, and play the muted part yourself. Song Lesson Lesson 4 - Both Hands Lesson 4 is a "Minus One" practice essentially the same as Lesson 3, except that both the left- and right - Yamaha DGX-202 | Owner's Manual - Page 66
, let's say you play a "C" quarter note using the grand piano sound on the DGX-202 keyboard. Unlike an acoustic instrument that puts out a resonated note, the electronic instrument puts out information from the keyboard such as "with what voice," "with which key," "about how strong," "when was it - Yamaha DGX-202 | Owner's Manual - Page 67
terminals of the DGX-202 are located on the rear panel. MIDI IN MIDI OUT Receives MIDI data from another MIDI device. Transmits the DGX-202's keyboard information as MIDI data to another MIDI device. • Special MIDI cables (sold separately) must be used for connecting to MIDI devices. They can - Yamaha DGX-202 | Owner's Manual - Page 68
, refer to the owner's manual for the software you are using. Viewing the Notation for MIDI Channel 1 • The DGX-202 has a special func- tion that lets you view the notes of the MIDI data (channel 1 only) on the display. UX16 USB Computer (sequencer software) MIDI IN OUT IN MIDI OUT DGX-202 68 - Yamaha DGX-202 | Owner's Manual - Page 69
This function lets you enable or disable keyboard control over the DGX-202's voices in the Function mode (page 76). This would come in handy, for example, when recording notes to MIDI sequencer. If you are using the sequencer to play back the voices of the DGX-202, you would want to set this to - Yamaha DGX-202 | Owner's Manual - Page 70
whether Keyboard performance data of the DGX-202 is transmitted via MIDI OUT or not. These settings can be made in the Function mode (page 76). Style Out This determines whether style data is transmitted via MIDI OUT or not. These settings can be made in the Function mode (page 76). Song Out - Yamaha DGX-202 | Owner's Manual - Page 71
PK CLUB website. Make sure that your computer has an Internet connection. Yamaha PK CLUB (Portable Keyboard Home Page) http://www.yamahaPKclub.com/ • Visit the Yamaha PK CLUB website for more information on the latest version of Song Filer (version 2.0.0 or higher) and how to install it. System - Yamaha DGX-202 | Owner's Manual - Page 72
on connecting the DGX-202 to a computer. • You cannot use the Song Filer's "Receive Files" function with the DGX-202. • For more information on using Song Filer, refer to the PDF manual included in the Song Filer application. • Never attempt to turn the power off while transmitting song data. Doing - Yamaha DGX-202 | Owner's Manual - Page 73
Mode The PC Mode lets you instantly reconfigure the MIDI control settings for use with a computer or MIDI device. G Default settings LOCAL ON/OFF EXTERNAL CLOCK KEYBOARD OUT STYLE OUT SONG OUT PC mode is on PC mode is off ON OFF ON OFF ON OFF I To turn the PC mode on or off - Yamaha DGX-202 | Owner's Manual - Page 74
has a variety of settings in the Function parameters. These give you detailed control over many of the DGX-202's features. Using the Function parameters 1 Press the Function button. OVERALL • To save the Function parameters and the Touch on/off status to internal memory (flash memory), press - Yamaha DGX-202 | Owner's Manual - Page 75
entire DGX-202 sound. * -100-100 This determines the pitch of the entire DGX-202 sound . * 000-127 This determines the highest key for with the Main voice. -2-2 This determines the octave range for the Split voice. Use this to set the * (octave) most suitable range for the Split (lower) - Yamaha DGX-202 | Owner's Manual - Page 76
determines whether Keyboard performance data of the DGX-202 is transmitted or not. Use the [+]/[-] buttons to change the setting. This determines whether style data is transmitted via MIDI OUT or not. Press the [+]/[-] buttons to set the Style Out to on or off. This determines whether Song data is - Yamaha DGX-202 | Owner's Manual - Page 77
when using the DGX-202 with a sequencer. (This may also sound like a "dual" layered sound of two voices, even when Dual is turned off.) When using the style with a sequencer, set MIDI Echo (or the relevant control) to "off." (Refer to the owner's manual of your particular device and/or software for - Yamaha DGX-202 | Owner's Manual - Page 78
procedure will usually restore normal operation if the DGX-202 freezes or begins to act erratically for any reason. All Mem CLr G Loaded Song Initializaion You can erase only the loaded song data by turning on the power while holding the highest (rightmost) black key on the keyboard. 78 - Yamaha DGX-202 | Owner's Manual - Page 79
and Song functions. • The Voice List includes MIDI program change numbers for each voice. Use these program change numbers when playing the DGX-202 via MIDI from an external device. • Some voices may sound continuously or have a long decay after the notes have been released while the sustain pedal - Yamaha DGX-202 | Owner's Manual - Page 80
126 127 128 Bank Select MSB LSB 0 0 0 1 0 18 0 40 0 41 0 0 0 1 0 0 MIDI Program Voice Name Change# PIANO 0 Grand Piano 0 Grand Piano KSP 0 Mellow Grand Piano 0 Piano Strings 0 Dream 1 Bright Piano 1 Bright Piano KSP 2 Electric Grand Piano 80 Voice No. 129 130 131 132 133 134 135 - Yamaha DGX-202 | Owner's Manual - Page 81
192 193 194 195 196 197 198 199 200 201 202 203 204 205 206 207 208 209 210 211 212 213 0 0 32 0 0 0 40 0 41 0 43 0 45 0 0 0 43 0 0 0 40 0 41 0 0 MIDI Program Voice Name Change# 16 DrawOrg2 16 60sDrawOrg3 16 Even Bar 16 16+2"2/3 16 Organ Bass 16 70sDrawOrg2 16 Cheezy - Yamaha DGX-202 | Owner's Manual - Page 82
305 306 346 347 348 349 350 351 352 353 354 355 Bank Select MSB LSB MIDI Program Voice Name Change# ENSEMBLE 0 0 48 Strings 1 0 3 48 Piccolo 0 0 73 Flute 0 0 74 Recorder 0 0 75 Pan Flute 0 0 76 Blown Bottle 0 0 77 Shakuhachi 0 0 78 Whistle 0 0 79 Ocarina SYNTH LEAD - Yamaha DGX-202 | Owner's Manual - Page 83
460 461 462 463 464 465 466 467 468 469 470 Bank Select MSB LSB MIDI Program Voice Name Change# 0 0 85 Voice Lead 0 24 85 Synth Aahs 0 64 102 Echo Bells 65 102 Big Pan 501 0 502 0 66 102 Synth Piano 67 102 Creation 503 0 504 0 68 102 Star Dust 69 102 Resonant & Panning - Yamaha DGX-202 | Owner's Manual - Page 84
0 561 64 0 1 Cutting Noise 2 3 String Slap 562 64 0 16 Flute Key Click 563 64 0 32 Shower 564 64 0 33 Thunder 565 64 0 34 Wind 64 0 64 0 64 0 64 0 64 0 64 0 64 0 64 0 MIDI Program Voice Name Change# 87 Starship 88 Burst 89 Roller Coaster 90 Submarine 96 Laugh 97 - Yamaha DGX-202 | Owner's Manual - Page 85
5 602 000/123/119 DJ Set 2 Bass Drum Soft Side Stick Snare M Hand Clap Snare H Hard Floor Tom L Hi-Hat Closed Floor Tom H Hi-Hat Pedal Low Tom Hi-Hat Open Mid Tom L Mid Tom H Crash Cymbal 1 High Tom Ride Cymbal 1 Chinese Cymbal Ride Cymbal Cup Tambourine FX01 Onemoretime Go Ohh2 - Yamaha DGX-202 | Owner's Manual - Page 86
Style List Style No. 001 002 003 004 005 006 007 008 009 010 011 012 013 014 015 016 017 018 019 020 021 022 023 024 025 026 027 028 029 030 031 032 033 034 035 036 037 038 039 040 041 042 043 044 045 046 047 Style Name 8Beat 8BeatModern 60'sGtrPop 8BeatAdria 60's8Beat 8Beat OffBeat 60'sRock - Yamaha DGX-202 | Owner's Manual - Page 87
190 Ceilidh 191 CielPari 192 Cl Polka 193 Comrades 194 Funiculi 195 HappyPlk 196 Herzlin 197 HornPipe 198 JinglBel 199 Kufstein 200 MexiHat 201 MickyFlt 202 NavyAway 203 RlBarrel 204 SnowWtz 205 StarMrch 206 WashPost 207 WdCuttrs 208 XmasWalz 87 - Yamaha DGX-202 | Owner's Manual - Page 88
uses one note. • The MIDI Note # and Note are actually one octave lower than keyboard F#6 8G68 88 Voice No. MSB/LSB/PC Keyboard MIDI Key Note# Note Note# Note Off 25 C# 4 60 C 3 73 C# 4 61 C# 3 74 D 4 62 D 3 75 D# 4 63 D# 3 76 E 4 64 E 3 77 F 4 65 F 3 78 F# 4 66 F# 3 79 G 4 67 G Pedal - Yamaha DGX-202 | Owner's Manual - Page 89
B5 C6 C#6 D6 D#6 E6 F6 F#6 G6 Voice No. MSB/LSB/PC Keyboard MIDI Key Note# Note Note# Note Off 25 C# 0 13 C# -1 26 D 59 B 2 72 C 4 60 C 3 73 C# 4 61 C# 3 74 D 4 62 D 3 75 D# 4 63 D# 3 76 E 4 64 E 3 77 F 4 65 F 3 78 F# 4 66 F# 3 79 G 4 67 G 3 80 G# 4 68 Hi-Hat Pedal Analog HH - Yamaha DGX-202 | Owner's Manual - Page 90
MIDI Implementation Chart YAMAHA [ Portable Grand™ ] Model DGX-202 MIDI 8nH After Key's x Part Volume Pan Expression Sustain Harmonic Content Release Time Attack Time Brightness Portamento Cntrl Effect Depth RPN Inc,Dec RPN LSB,MSB System Exclusive o *3 o *3 : Song Pos. x x Common : Song - Yamaha DGX-202 | Owner's Manual - Page 91
, and songs. • MIDI Master Tuning • System exclusive messages for changing the Reverb Type, Chorus Type, and DSP Type. *2 Messages for these control change numbers cannot be transmitted from the DGX-202 itself. However, they may be transmitted when playing the accompaniment, song or using the - Yamaha DGX-202 | Owner's Manual - Page 92
number indicated in the display.. * By using an external sequencer, which is capable of editing and transmitting the system exclusive messages and parameter changes, you can select the Reverb, Chorus and DSP effect types which are not accessible from the DGX-202 panel itself. When one of the effects - Yamaha DGX-202 | Owner's Manual - Page 93
batteries Dimensions (W x D x H) • 1178 x 412 x 153 mm (46-3/8" x 16-1/4" x 6") Weight • 8.7 kg (19 lbs. 3 oz.) Supplied Accessories • Music Stand • Owner's Manual • Song Book Optional Accessories • Headphones : HPE-150 • AC power adaptor : PA-5D • Footswitch : FC4, FC5 • Keyboard stand - Yamaha DGX-202 | Owner's Manual - Page 94
Receive cancel 70 MIDI terminals 67 Multi Fingering 43 Music Stand 19 O Octave 19 Octave, dual 26 Octave, main 25 Octave, split 27 One Touch Setting 28 P Pan, dual 26 Pan, main 25 Pan, split 27 PC 73 Pitch Bend Range 30 Portable Grand 20 Q Quick Guide 12 R recording, song 56 Reverb - Yamaha DGX-202 | Owner's Manual - Page 95
35 Sync Start 37 Sync Stop 40 T Tap 37 Tempo 20, 41 Time Signature 21 Touch Sensitivity 30 track (song 57 tracks, muting 58 Transpose 29 Troubleshooting 77 Tuning 29 U User songs 56 V Voice List 79 voices, Drum Kit 88 voices, selecting and playing........... 23 voices, XG 80 Volume - Yamaha DGX-202 | Owner's Manual - Page 96
to: the retailer selling the product, an authorized service center, or to Yamaha with an explanation of the problem. Please be prepared to provide proof purchase date (sales receipt, credit card copy, etc.) when requesting service and/or parts under warranty. 3. Shipping and/or insurance costs are - Yamaha DGX-202 | Owner's Manual - Page 97
(Madrid), Spain Tel: 91-639-8888 GREECE Philippos Nakas S.A. The Music House 147 Skiathou Street, 112-55 Athens, Greece Tel: 01-228 2160 SWEDEN Yamaha Scandinavia AB J. A. Wettergrens Gata 1 Box 30053 S-400 43 Göteborg, Sweden Tel: 031 89 34 00 DENMARK YS Copenhagen Liaison Office Generatorvej 8B DK - Yamaha DGX-202 | Owner's Manual - Page 98
Yamaha PK CLUB (Portable Keyboard Home Page, English only) http://www.yamahaPKclub.com/ Yamaha Manual Library http://www2.yamaha.co.jp/manual/english/ U.R.G., Pro Audio & Digital Musical Instrument Division, Yamaha Corporation © 2002 Yamaha Corporation V875140 ???PO???.?-01C0 Printed in China
-
 1
1 -
 2
2 -
 3
3 -
 4
4 -
 5
5 -
 6
6 -
 7
7 -
8
-
9
-
10
-
11
-
12
-
13
-
14
-
15
-
16
-
17
-
18
-
19
-
20
-
21
-
22
-
23
-
24
-
25
-
26
-
27
-
28
-
29
-
30
-
31
-
32
-
33
-
34
-
35
-
36
-
37
-
38
-
39
-
40
-
41
-
42
-
43
-
44
-
45
-
46
-
47
-
48
-
49
-
50
-
51
-
52
-
53
-
54
-
55
-
56
-
57
-
58
-
59
-
60
-
61
-
62
-
63
-
64
-
65
-
66
-
67
-
68
-
69
-
70
-
71
-
72
-
73
-
74
-
75
-
76
-
77
-
78
-
79
-
80
-
81
-
82
-
83
-
84
-
85
-
86
-
87
-
88
-
89
-
90
-
91
-
92
-
93
-
94
-
95
-
96
-
97
-
98
 |
 |