Yamaha DGX-500 Owner's Manual - Page 69
Select the Lesson Track, Lesson 1 — Timing, to select LESSON TRACK L or R.
 |
View all Yamaha DGX-500 manuals
Add to My Manuals
Save this manual to your list of manuals |
Page 69 highlights
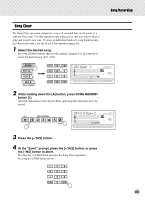
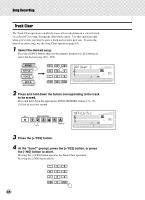
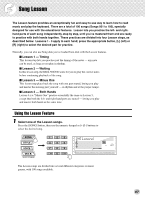
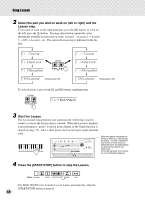
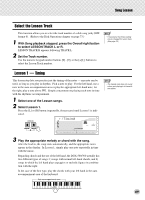
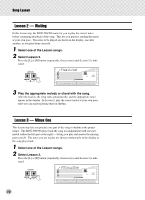
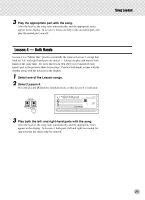
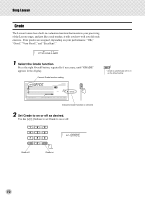
Song Lesson Select the Lesson Track This function allows you to select the track number of a disk song (only SMF format 0). (Refer to the Disk Operations chapter on page 73.) 1 With Song playback stopped, press the Overall right button to select LESSON TRACK L or R. LESSON TRACK R appears following TRACK L. 2 Set the Track number. Use the numeric keypad number buttons [0] - [9], or the [+]/[-] buttons to select the Lesson Track number. • If necessary, the Octave setting can be changed for lesson track. (See page 76.) Lesson 1 - Timing This lesson step lets you practice just the timing of the notes - any note can be used, as long as you play in rhythm. Pick a note to play. For the left hand, use a note in the auto accompaniment area or play the appropriate left-hand note; for the right, play a note above F#2. Simply concentrate on playing each note in time with the rhythmic accompaniment. 1 Select one of the Lesson songs. 2 Select Lesson 1. Press the [L] or [R] button (repeatedly, if necessary) until Lesson 1 is indicated. r1 Timing -01 • The melody note does not sound unless your playing is in time with the rhythm. 3 Play the appropriate melody or chord with the song. After the lead-in, the song starts automatically, and the appropriate notes appear in the display. In Lesson 1, simply play one note repeatedly in time with the music. Regarding chords and the use of the left hand, the DGX-500/300 actually has two different types of songs: 1) songs with normal left-hand chords, and 2) songs in which the left hand plays arpeggios or melodic figures in combination with the right. In the case of the first type, play the chords with your left hand in the auto accompaniment area of the keyboard. Auto accompaniment area 69
-
 1
1 -
2
-
3
-
4
-
5
-
6
-
7
-
8
-
9
-
10
-
11
-
12
-
13
-
14
-
15
-
16
-
17
-
18
-
19
-
20
-
21
-
22
-
23
-
24
-
25
-
26
-
27
-
28
-
29
-
30
-
31
-
32
-
33
-
34
-
35
-
36
-
37
-
38
-
39
-
40
-
41
-
42
-
43
-
44
-
45
-
46
-
47
-
48
-
49
-
50
-
51
-
52
-
53
-
54
-
55
-
56
-
57
-
58
-
59
-
60
-
61
-
62
-
63
-
 64
64 -
 65
65 -
 66
66 -
 67
67 -
 68
68 -
 69
69 -
 70
70 -
 71
71 -
 72
72 -
 73
73 -
 74
74 -
75
-
76
-
77
-
78
-
79
-
80
-
81
-
82
-
83
-
84
-
85
-
86
-
87
-
88
-
89
-
90
-
91
-
92
-
93
-
94
-
95
-
96
-
97
-
98
-
99
-
100
-
101
-
102
-
103
-
104
-
105
-
106
-
107
-
108
-
109
-
110
-
111
-
112
 |
 |