Yamaha DGX-500 Owner's Manual - Page 76
Save, Change the Track Octave Setting for a Disk Song Track
 |
View all Yamaha DGX-500 manuals
Add to My Manuals
Save this manual to your list of manuals |
Page 76 highlights
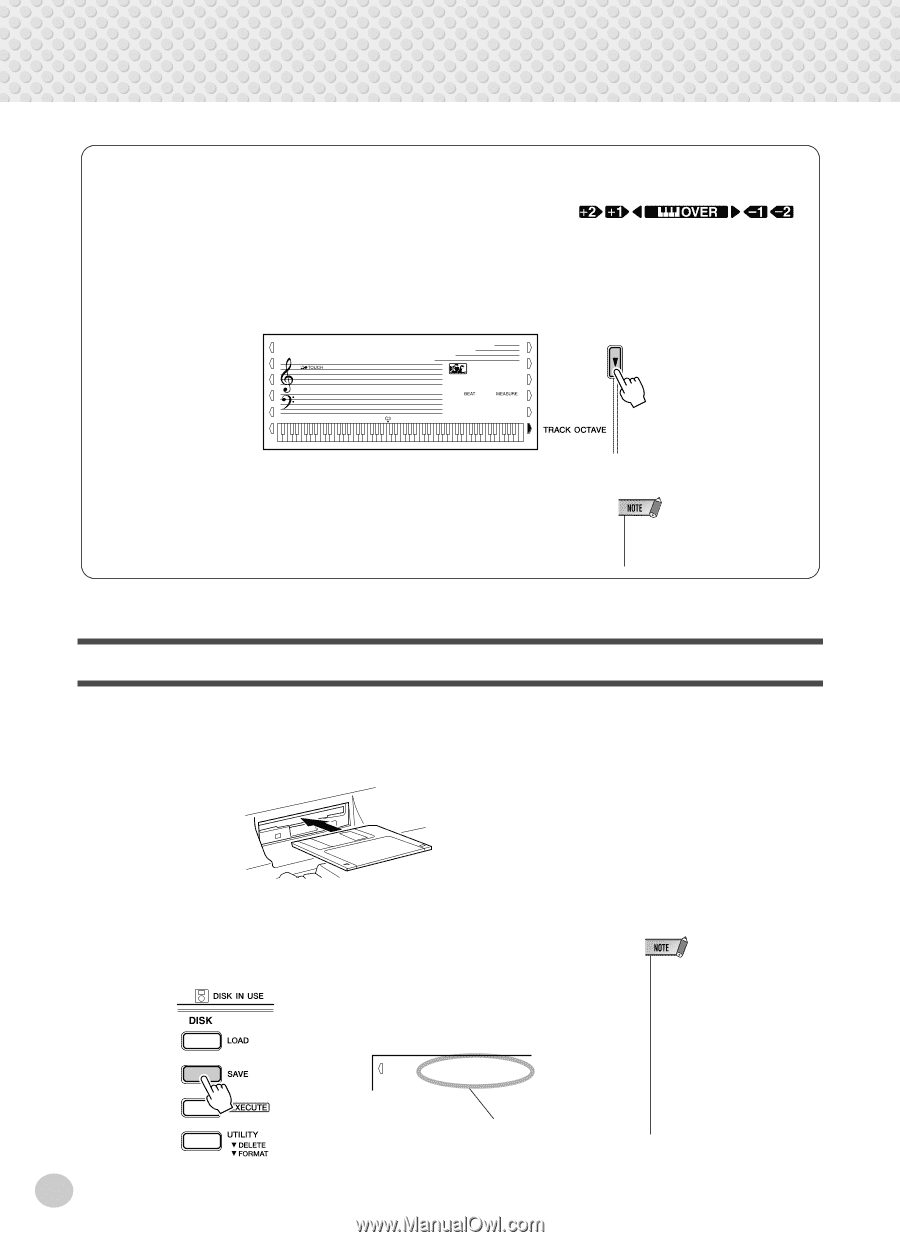
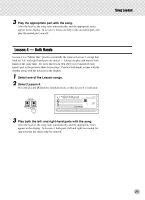
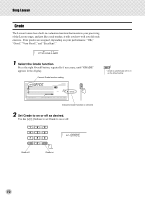
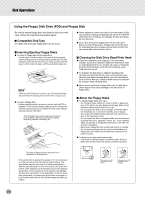
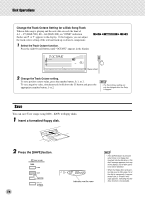
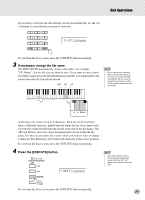
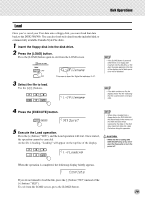
Disk Operations Change the Track Octave Setting for a Disk Song Track When a disk song is playing and the note data exceeds the limit of A-1 - C7 (DGX-500), E0 - G6 (DGX-300), an "OVER" indication flashes and Q or W appears in the display. If this happens, you can adjust the track octave setting of the relevant track up or down to compensate. 1 Select the Track Octave function. Press the right Overall button, until "OCTAVE" appears in the display 0 OCTAVE 001 2 Change the Track Octave setting. To set a positive octave value, press the number button, 0, 1, or 2. To set a negative value, simultaneously hold down the [-] button and press the appropriate number button, 1 or 2. • The Track Octave setting can only be changed when the Song is stopped. Save You can save User songs (song #201 - #205) to floppy disks. 1 Insert a formatted floppy disk. 2 Press the [SAVE] button. s-- UF_00nnn Indicates new file name 76 • If the [SAVE] button is pressed when there is no floppy disk inserted into the disk drive, a "No disk" message appears at the top of the display, and all disk operations will be disabled. • When the floppy disk's write-protect tab is set to ON ( page 74) or the disk is a purposely "copy-protected" disk, a "Protect" message appears, indicating that the Save function is not possible.
-
 1
1 -
2
-
3
-
4
-
5
-
6
-
7
-
8
-
9
-
10
-
11
-
12
-
13
-
14
-
15
-
16
-
17
-
18
-
19
-
20
-
21
-
22
-
23
-
24
-
25
-
26
-
27
-
28
-
29
-
30
-
31
-
32
-
33
-
34
-
35
-
36
-
37
-
38
-
39
-
40
-
41
-
42
-
43
-
44
-
45
-
46
-
47
-
48
-
49
-
50
-
51
-
52
-
53
-
54
-
55
-
56
-
57
-
58
-
59
-
60
-
61
-
62
-
63
-
64
-
65
-
66
-
67
-
68
-
69
-
70
-
 71
71 -
 72
72 -
 73
73 -
 74
74 -
 75
75 -
 76
76 -
 77
77 -
 78
78 -
 79
79 -
 80
80 -
 81
81 -
82
-
83
-
84
-
85
-
86
-
87
-
88
-
89
-
90
-
91
-
92
-
93
-
94
-
95
-
96
-
97
-
98
-
99
-
100
-
101
-
102
-
103
-
104
-
105
-
106
-
107
-
108
-
109
-
110
-
111
-
112
 |
 |