Yamaha DGX-500 Owner's Manual - Page 8
Panel Controls and Terminals - grand
 |
View all Yamaha DGX-500 manuals
Add to My Manuals
Save this manual to your list of manuals |
Page 8 highlights
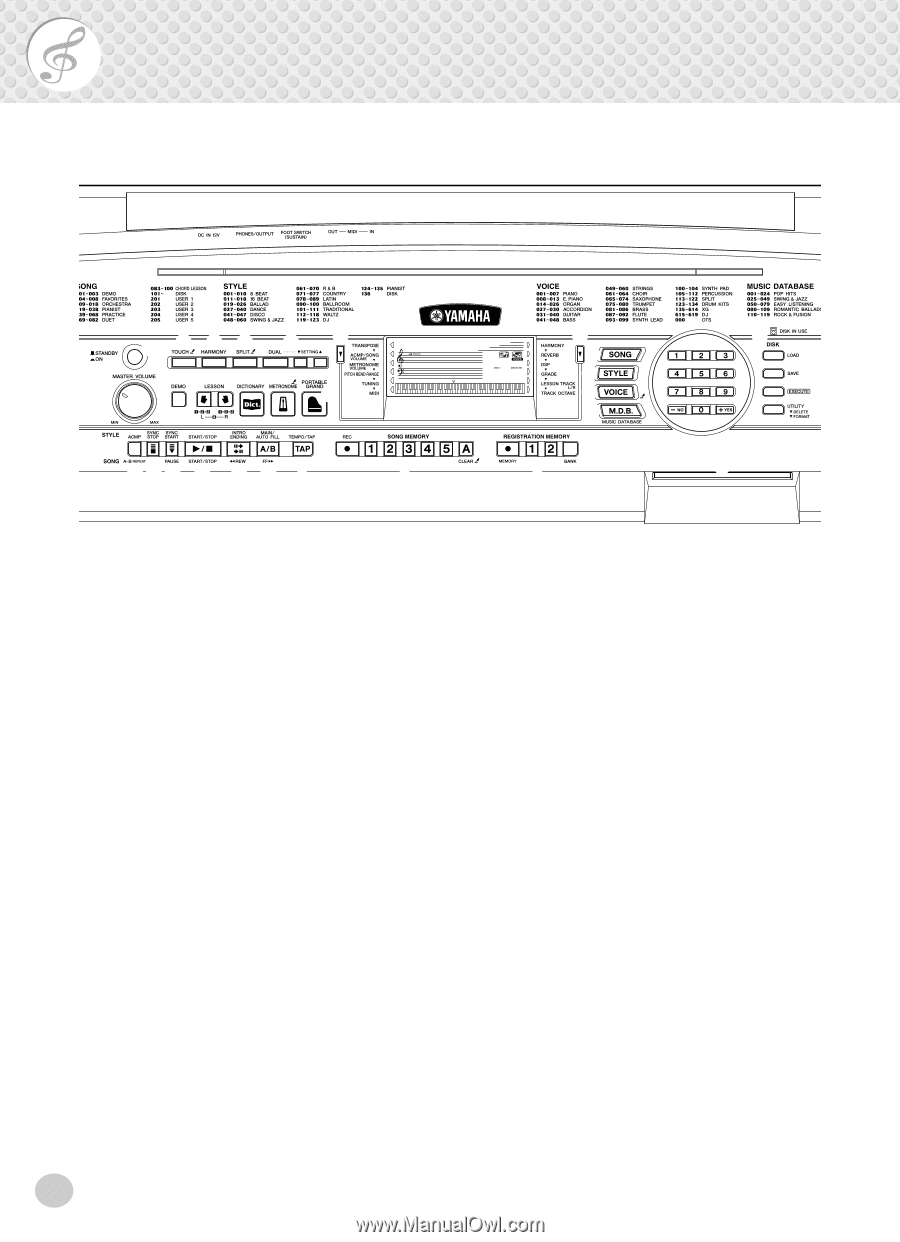
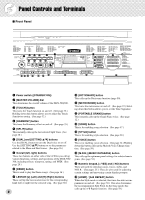
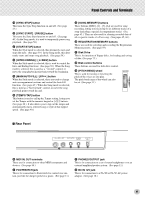
Panel Controls and Terminals I Front Panel q ert y u i o !0 !1 w !2 !8 !9 @0 @1 @2 @3 @4 001 Live!Gnd 001 u !3 !4 !5 !6 @5 @6 !7 @8 @7 q Power switch ([STANDBY/ON]) w [MASTER VOLUME] dial This determines the overall volume of the DGX-500/300. e [TOUCH] button This turns the Touch function on and off. (See page 32.) Holding down this button allows you to adjust the Touch Sensitivity setting. (See page 32.) r [HARMONY] button This turns the Harmony effect on and off. (See page 35.) t [SPLIT] button This instantly calls up the last selected Split Voice. (See page 28.) y [DUAL] and [SETTING L/M] buttons Use the [DUAL] button to turn the Dual voice on or off. Use the [SETTING L/M] buttons to set the parameters related to the Main and Dual voices. (See page 26.) u Overall (left, right) buttons These two buttons on either side of the LCD let you call up various functions, settings, and operations of the DGX-500/ 300, including effects, transpose, tuning, and MIDI. (See page 20.) i [DEMO] button This is used to play the Demo songs. (See page 14.) o LESSON [L] (Left) and [R] (Right) buttons These call up the Lesson exercises for the corresponding hand (left or right) for the selected song. (See page 68.) 8 !0 [DICTIONARY] button This calls up the Dictionary function (page 50). !1 [METRONOME] button This turns the metronome on and off. (See page 22.) Holding down this button allows you to set the Time Signature. !2 [PORTABLE GRAND] button This instantly calls up the Grand Piano voice. (See page 12.) !3 [SONG] button This is for enabling song selection. (See page 57.) !4 [STYLE] button This is for enabling style selection. (See page 38.) !5 [VOICE] button This is for enabling voice selection. (See page 24.) Holding down this button calls up the Melody Voice Change function. (See page 59.) !6 [M.D.B.] (MUSIC DATABASE) button This calls up the optimum panel settings for selected music genre. (See page 53.) !7 Numeric keypad, [+/YES] and [-/NO] buttons These are used for selecting songs, voices, styles, and M.D.B.. (See pages 25.) They are also used for adjusting certain settings and answering certain display prompts. !8 [ACMP] / [A-B REPEAT] button When the Style mode is selected, this turns the auto accompaniment on and off. (See page 39.) This also determines the Accompaniment Split Point. In the Song mode, this calls up the A-B Repeat function. (See page 58.)
-
 1
1 -
2
-
 3
3 -
 4
4 -
 5
5 -
 6
6 -
 7
7 -
 8
8 -
 9
9 -
 10
10 -
 11
11 -
 12
12 -
 13
13 -
14
-
15
-
16
-
17
-
18
-
19
-
20
-
21
-
22
-
23
-
24
-
25
-
26
-
27
-
28
-
29
-
30
-
31
-
32
-
33
-
34
-
35
-
36
-
37
-
38
-
39
-
40
-
41
-
42
-
43
-
44
-
45
-
46
-
47
-
48
-
49
-
50
-
51
-
52
-
53
-
54
-
55
-
56
-
57
-
58
-
59
-
60
-
61
-
62
-
63
-
64
-
65
-
66
-
67
-
68
-
69
-
70
-
71
-
72
-
73
-
74
-
75
-
76
-
77
-
78
-
79
-
80
-
81
-
82
-
83
-
84
-
85
-
86
-
87
-
88
-
89
-
90
-
91
-
92
-
93
-
94
-
95
-
96
-
97
-
98
-
99
-
100
-
101
-
102
-
103
-
104
-
105
-
106
-
107
-
108
-
109
-
110
-
111
-
112
 |
 |