Yamaha DGX-530 Owner's Manual - Page 105
Use Musicsoft Downloader, To Transfer Songs From the, Accessory CD-ROM To - usb midi driver
 |
UPC - 086792880303
View all Yamaha DGX-530 manuals
Add to My Manuals
Save this manual to your list of manuals |
Page 105 highlights
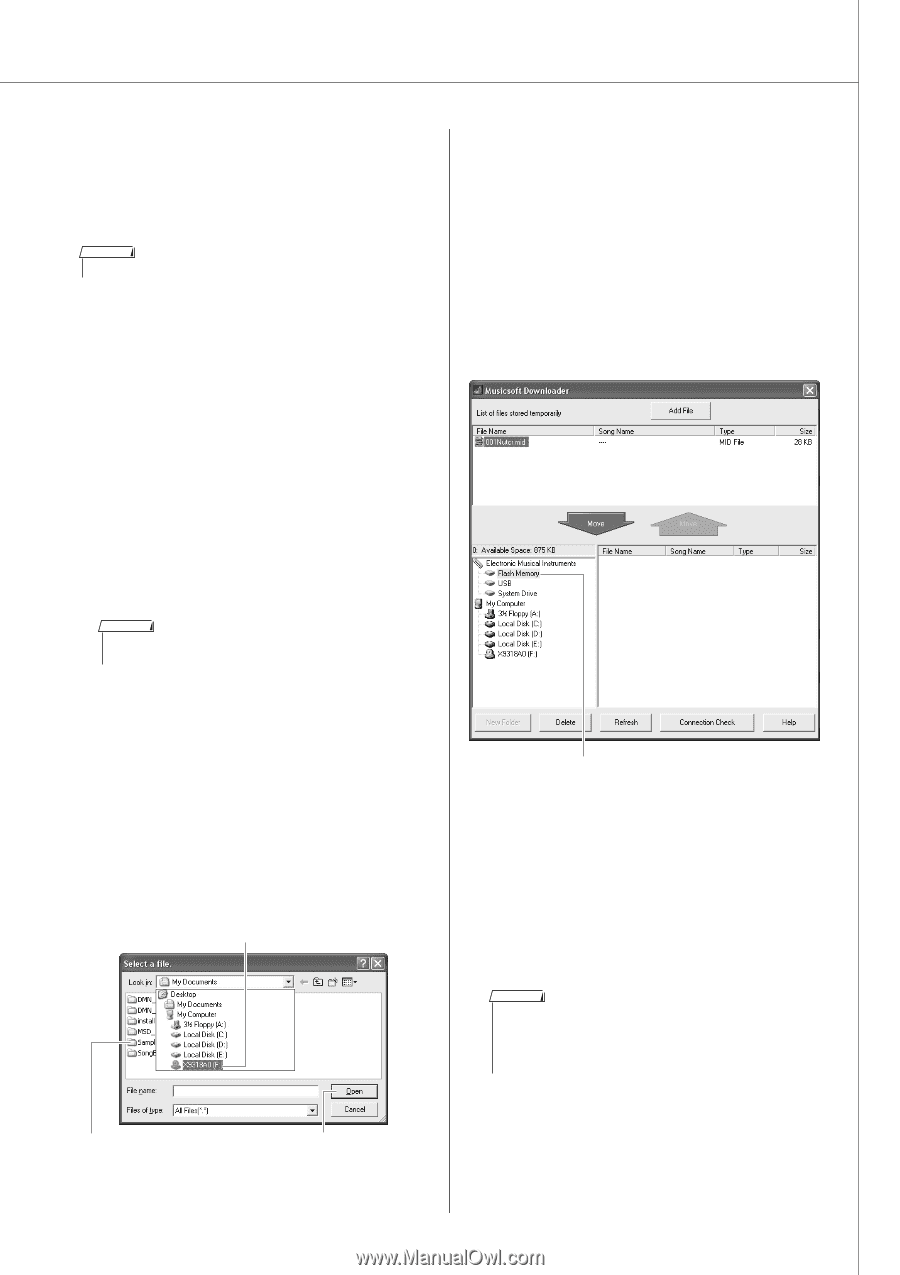
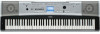
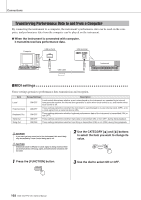
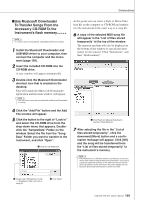
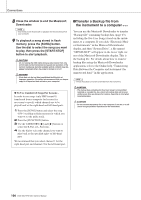
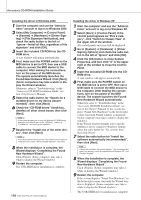
Connections ■Use Musicsoft Downloader To Transfer Songs From the Accessory CD-ROM To the Instrument's flash memory NOTE • If a song or style is being played, stop playback before proceeding. 1 Install the Musicsoft Downloader and USB-MIDI driver to your computer, then connect the computer and the instrument (page 109). 2 Insert the included CD-ROM into the CD-ROM drive. A start window will appear automatically. 3 Double-click the Musicsoft Downloader shortcut icon that is created on the desktop. This will launch the Musicsoft Downloader application and the main window will appear. NOTE • The instrument cannot be operated while the Musicsoft Downloader is running. At this point you can select a Style or Music Database file on the computer or CD-ROM and transfer it to the instrument in the same way as a song file. 6 A copy of the selected MIDI song file will appear in the "List of files stored temporarily" at the top of the window. The memory medium will also be displayed at the bottom of the window to specify the destination for the transfer. Click "Instrument", and then "Flash memory". 4 Click the "Add File" button and the Add File window will appear. 5 Click the button to the right of "Look in" and select the CD-ROM drive from the drop-down menu that appears. Doubleclick the "SampleData" Folder on the window. Select the file from the "SongData" Folder you want to transfer to the instrument, and click "Open". q Click the CD-ROM drive q Click "Electronic Musical Instruments", and then "Flash Memory" 7 After selecting the file in the "List of files stored temporarily", click the downward [Move] button and a confirmation message will appear. Click [OK] and the song will be transferred from the "List of files stored temporarily" to the instrument's memory. NOTE • Files transferred to a USB flash memory root directory or the instru- ment's flash memory using the Musicsoft Downloader-any location outside the USER FILES folder on the USB flash memory device- cannot be deleted via the instrument's file control display. Use the Musicsoft Downloader delete button to delete such files. w Double-click "SampleData" Folder → "SongData" Folder, and click a song file. e Click "Open" DGX-530/YPG-535 Owner's Manual 105
-
 1
1 -
2
-
3
-
4
-
5
-
6
-
7
-
8
-
9
-
10
-
11
-
12
-
13
-
14
-
15
-
16
-
17
-
18
-
19
-
20
-
21
-
22
-
23
-
24
-
25
-
26
-
27
-
28
-
29
-
30
-
31
-
32
-
33
-
34
-
35
-
36
-
37
-
38
-
39
-
40
-
41
-
42
-
43
-
44
-
45
-
46
-
47
-
48
-
49
-
50
-
51
-
52
-
53
-
54
-
55
-
56
-
57
-
58
-
59
-
60
-
61
-
62
-
63
-
64
-
65
-
66
-
67
-
68
-
69
-
70
-
71
-
72
-
73
-
74
-
75
-
76
-
77
-
78
-
79
-
80
-
81
-
82
-
83
-
84
-
85
-
86
-
87
-
88
-
89
-
90
-
91
-
92
-
93
-
94
-
95
-
96
-
97
-
98
-
99
-
 100
100 -
 101
101 -
 102
102 -
 103
103 -
 104
104 -
 105
105 -
 106
106 -
 107
107 -
 108
108 -
 109
109 -
 110
110 -
111
-
112
-
113
-
114
-
115
-
116
-
117
-
118
-
119
-
120
-
121
-
122
-
123
-
124
-
125
-
126
-
127
-
128
-
129
-
130
-
131
-
132
-
133
-
134
-
135
-
136
-
137
-
138
-
139
-
140
-
141
-
142
-
143
-
144
 |
 |