Yamaha DGX-640 Owner's Manual
Yamaha DGX-640 Manual
 |
View all Yamaha DGX-640 manuals
Add to My Manuals
Save this manual to your list of manuals |
Yamaha DGX-640 manual content summary:
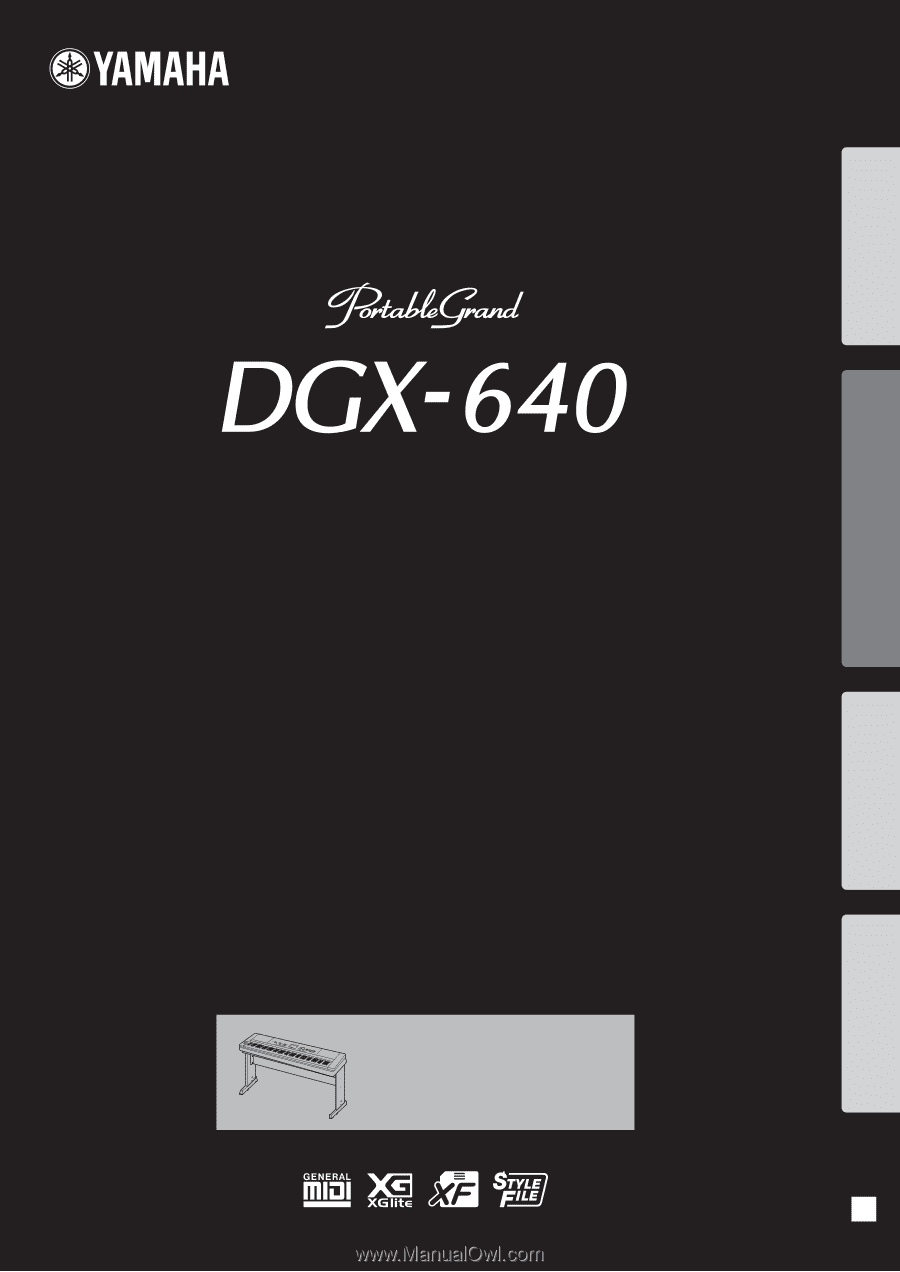
- Yamaha DGX-640 | Owner's Manual - Page 1
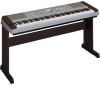
Setting Up Quick Guide Reference Appendix Owner's Manual Keyboard Stand Assembly For information on assembling the keyboard stand, refer to the instructions on page 10 of this manual. EN - Yamaha DGX-640 | Owner's Manual - Page 2
or; a cart, rack, or stand that is recommended by Yamaha. If a cart, etc., is used, please observe all safety markings and instructions that accompany the accessory product. SPECIFICATIONS SUBJECT TO CHANGE: The information contained in this manual is believed to be correct at the time of printing - Yamaha DGX-640 | Owner's Manual - Page 3
Yamaha Corporation of America Address : 6600 Orangethorpe Ave., Buena Park, Calif. 90620 Telephone : 714-522-9011 Type of Equipment : Digital Piano Model Name : DGX-640 contact your local municipality, your waste disposal service or the point of sale where you purchased the items. [For business - Yamaha DGX-640 | Owner's Manual - Page 4
discontinue use immediately and have it inspected by qualified Yamaha service personnel. Water warning • Do not expose the instrument to rain, use it , make sure that the AC outlet you are using is easily accessible. If some trouble or malfunction occurs, immediately turn off the power switch - Yamaha DGX-640 | Owner's Manual - Page 5
panel or keyboard. • When cleaning the instrument, use a soft, dry cloth. Do not use paint thinners data including but not limited to MIDI data and/or audio data is strictly prohibited except for your personal use. • This product incorporates and bundles computer programs and contents in which Yamaha - Yamaha DGX-640 | Owner's Manual - Page 6
is affixed to all software and hardware products that support GM System Level. XGlite As its name implies, "XGlite" is a simplified version of Yamaha's high-quality XG tone generation format. Naturally, you can play back any XG song data using an XGlite tone generator. However, keep in mind that - Yamaha DGX-640 | Owner's Manual - Page 7
section includes troubleshooting information and specifica- tions. Data List Voice List, MIDI Data Format, etc. MIDI Reference The MIDI Reference section contains MIDI related information. The MIDI Reference is available for downloading from the Yamaha Manual Library at: http://www.yamaha.co.jp - Yamaha DGX-640 | Owner's Manual - Page 8
of Instrument Voices Page 18 With the DGX-640, the instrument voice that sounds when you play the keyboard can be changed to violin, flute, harp, or any of an extensive range of voices. You can change the mood of a song written for piano, for example, by using violin to play it instead. Experience - Yamaha DGX-640 | Owner's Manual - Page 9
Guide About this Owner's Manual and Data List 7 Included Accessories 7 Special Features 8 Setting Up Setting Up 10 Keyboard Stand Assembly 10 Power Requirements 13 Connecting Headphones (PHONES/OUTPUT Jack) .....13 Connecting a Footswitch (SUSTAIN Jack 13 Connecting a Pedal Unit (PEDAL - Yamaha DGX-640 | Owner's Manual - Page 10
, the keyboard may drop, or may result in injury to the user. • To disassemble, reverse the assembly sequence given below. Have a phillips-head (+) screwdriver of the appropriate size ready. 1 The parts shown in the "Assembly Parts" illustration will be used. Follow the assembly instructions and - Yamaha DGX-640 | Owner's Manual - Page 11
on the upper surfaces of the stand bases. If you have trouble fastening the screws, use a screwdriver to rotate the joint connectors so that the connector pedal unit, attach the pedal unit before proceeding to the next step. Refer to the instructions provided with your pedal unit. Owner's Manual 11 - Yamaha DGX-640 | Owner's Manual - Page 12
screws 12 Owner's Manual 5 Install the keyboard to the stand. Fix the keyboard to the angle brackets, using the screws r. Post-assembly checklist Once you've assembled the stand, check the following points: • Are there any parts left over? If so, read the assembly instructions again and correct - Yamaha DGX-640 | Owner's Manual - Page 13
an AC outlet. CAUTION • Unplug the AC Power Adaptor when not using the instrument, or during electrical storms. 2 AC power adaptor 3 AC The PHONES/OUTPUT jack also functions as an external output. You can connect the PHONES/OUTPUT jack to a keyboard amplifier, stereo system, CAUTION 's Manual 13 - Yamaha DGX-640 | Owner's Manual - Page 14
effects, depending on how far down you press the pedal. * When using both the Footswitch and pedal unit, the last effect applied takes priority. Sostenuto (Center) Pedal If you play a note or chord on the keyboard and press the sostenuto pedal while the note(s) are held, those notes will sustain - Yamaha DGX-640 | Owner's Manual - Page 15
are not using the instrument for a long time, make sure you unplug the AC power adaptor from the wall AC outlet. NOTICE • Never attempt to turn the power off when a "WRITING!" message is shown in the display. Doing so can damage the flash memory and result in a loss of data. Owner's Manual 15 - Yamaha DGX-640 | Owner's Manual - Page 16
List (Data List) Style List (Data List) Setting Up q w ert y i o !1 !2 u !0 !3 !4 Front Panel q [ ](Standby/On) switch page 15 w [MASTER VOLUME] control page 15 e [DEMO button page 31 [START/STOP] button page 29 16 Owner's Manual !4 STYLE [ACMP ON/OFF] button page 25 [INTRO/ENDING/rit - Yamaha DGX-640 | Owner's Manual - Page 17
(Data List) !9 !6 !7 !8 @2 @3 @4 @5 @6 @0 #2 @1 @7 @8 @9 #0 #1 Rear Panel #3 #4 #5 #6 #7 #8 Rear Panel #3 CONTRAST knob page 37 #4 USB TO HOST terminal page 97 #5 SUSTAIN jack page 13 #6 PEDAL UNIT jack page 14 #7 PHONES/OUTPUT jack page 13 #8 DC IN jack page 13 Owner's Manual - Yamaha DGX-640 | Owner's Manual - Page 18
Instrument Voices Quick Guide In addition to piano, organ, and other "standard" keyboard instruments, this instrument has a large range of voices that includes guitar, bass, voice. NOTE • See the separate Data List for a complete list of the available voices. Select 117 Flute 18 Owner's Manual - Yamaha DGX-640 | Owner's Manual - Page 19
drum and percussion sounds are assigned to individual keys, via which they can be played. Details on assigning instruments to keys are provided in the Drum Kit List of the separate Data List. Play the Grand Piano Voice When you just want to play piano, all you have to do is press one convenient - Yamaha DGX-640 | Owner's Manual - Page 20
Guide Try Playing a Variety of Instrument Voices Play Two Voices Simultaneously-DUAL Once you press the [DUAL ON/OFF] button to turn the dual function on, a second voice will sound that will play in addition to the main voice when you play the keyboard dual voice (page 73). 20 Owner's Manual - Yamaha DGX-640 | Owner's Manual - Page 21
button to turn the split function on, you can play different voices to the left and right of the keyboard "split point". The main and dual voices can be played to the right of the split point, function, but you can easily select a different split voice (page 73). Quick Guide Owner's Manual 21 - Yamaha DGX-640 | Owner's Manual - Page 22
Quick Guide The Metronome The instrument includes a metronome with adjustable tempo and time signature. Play and set the tempo that the measure Adjusting the Metronome Tempo 1 Press the [TEMPO/TAP] button to call up the tempo setting. Tempo 2 Use the dial to select a tempo from 5 to 280. 22 Owner - Yamaha DGX-640 | Owner's Manual - Page 23
Guide Denominator (The length of one beat.) 2 Use the dial to select the number of beats Press the CATEGORY [r] and [f] buttons as many times as necessary to select the beat length function be changed while a style or song is playing. 4 Use the dial to select the beat length. Select the required - Yamaha DGX-640 | Owner's Manual - Page 24
the separate Data List. NOTE • You can also use the style files provided on the supplied CD-ROM (page 102). Quick Guide 3 Press the [START/STOP] button. The style rhythm will start playing. Press the [START/STOP] button a second time when you want to stop playback. 24 Owner's Manual NOTE • The - Yamaha DGX-640 | Owner's Manual - Page 25
Guide This icon appears when automatic accompaniment is on. When automatic accompaniment is on ... The area of the keyboard to the left of the split point (54: F#2) becomes the "auto accompaniment range" and is used only keyboard split point. Press the button a second time to turn the - Yamaha DGX-640 | Owner's Manual - Page 26
keyboard. Try playing the chord progression shown below. The accompaniment will change according to the lefthand notes you play. NOTE • Chords (page 27) • Looking Up Chords Using chords! Quick Guide Indicates the chord currently being played in the accompaniment range of the keyboard. 5 Manual - Yamaha DGX-640 | Owner's Manual - Page 27
Guide Chords For users who are new to chords, this chart features common chords. Since there are many useful chords and many different ways to use chord type, inversions can be used as well as in " the accompaniment range of the keyboard using only one, two, or keys to the left of it (three keys - Yamaha DGX-640 | Owner's Manual - Page 28
data that makes up a piece of music. You can simply enjoy listening to the 30 internal songs, or use them with just about any of the many Quick Guide The currently selected song number and name 2 Select a song. Select a song after referring to the Song List in the separate Data List. Use the Manual - Yamaha DGX-640 | Owner's Manual - Page 29
some of the instrument's many useful voices. • Use these songs to experience some data for the 30 internal songs are provided in the Songbook on the CD-ROM. The exceptions are songs 1 to 11 and 30. The scores for songs 9 to 11 are provided in the separate Data List. Quick Guide Owner's Manual - Yamaha DGX-640 | Owner's Manual - Page 30
Quick Guide Playing Songs Select and Play Songs on a USB Flash Memory MIDI songs stored on a Precautions when using the [USB TO DEVICE] terminal (page 91) IMPORTANT • In order to play data copied to a USB flash memory from a computer or other device, the data must be (page 71). 30 Owner's Manual - Yamaha DGX-640 | Owner's Manual - Page 31
be used. REW Press the fast reverse button to rapidly return to an earlier point in the song. FF Press the fast forward button to rapidly skip ahead to a later point in the song. PAUSE Press the pause button to pause playback. Play the Demo Song Press the [DEMO/BGM] button. The demo song - Yamaha DGX-640 | Owner's Manual - Page 32
Guide and lyric data. • When there are many lyrics they may be displayed in two rows a measure. • Some lyrics or chords may be abbreviated if the selected song has a lot of lyrics. • Small notes that are hard to read may be easier to read after you use the quantize function (page 88 Manual - Yamaha DGX-640 | Owner's Manual - Page 33
appear on the display. NOTE • Songs downloaded from the Internet or commercially available song files, including XF format files (page 6), are compatible with the lyrics display features as long as they are standard MIDI file format files containing lyric data. Lyrics display may not be possible - Yamaha DGX-640 | Owner's Manual - Page 34
Operation Reference Basic Operation Overall DGX-640 control is based on the following simple operations. 1 Press a button to select a basic function. 2 Use the dial to select an Select a voice you want to play on the keyboard. Select an auto-accompaniment style. Select a song you want to listen to or - Yamaha DGX-640 | Owner's Manual - Page 35
basic function, the item corresponding to that function will be listed in the display. You can then use the dial or the number buttons [0]-[9] to select the [0]-[9] The number buttons can be used to directly enter a song number or parameter value. Hundreds or tens digits that are "0" can be omitted - Yamaha DGX-640 | Owner's Manual - Page 36
select 53 different groups of functions. Press the CATEGORY button(s) as many times as necessary until the required function appears. You can then use the dial, the [+] and [-] buttons, or the number [0]-[9] This provides convenient direct access to a range of functions. 36 Owner's Manual Reference - Yamaha DGX-640 | Owner's Manual - Page 37
. Shows the selected bank number. Shows the memory numbers that contain data. A border appears around the selected number. Function ON/Off Icons Appears when DSP is on. Song Track Status Highlighted during user song recording. A border is off when track is muted. Reference Owner's Manual 37 - Yamaha DGX-640 | Owner's Manual - Page 38
Yamaha Education Suite You can select song you like and use Select a song from the Piano Solo, Piano Ensemble category! For this example turned off) on the keyboard. The right-hand part demos for performance assistant. The lesson function cannot be used with them. • You can also use Manual Reference - Yamaha DGX-640 | Owner's Manual - Page 39
on the display. The DGX-640 actually have 88 keys. In some songs that include very high or low notes, those notes may fall outside the displayed range and may not be shown on the display. In such cases an "over" indicator appear to the left or right of the graphic keyboard. Use the [+] or [-] button - Yamaha DGX-640 | Owner's Manual - Page 40
following the score marker 3 Stop the Lesson mode. You can stop the Lesson mode at any time by pressing the [START/STOP] button. 40 Owner's Manual Reference - Yamaha DGX-640 | Owner's Manual - Page 41
One] button to start Lesson 3. Song playback will begin automatically when Lesson 3 is selected. Play along while listening to the song. The score marker and keyboard marker in the display will indicate the notes to play. Marker Marker 3 Stop the Lesson mode. You can stop the Lesson mode at any - Yamaha DGX-640 | Owner's Manual - Page 42
via the FUNCTION Grade item (page 88). After the evaluation display has appeared, the lesson will start again from the beginning. Practice Makes Perfect-Repeat and Learn Use this feature when you want to start pressing a number button [1]-[9] during repeat playback. Reference 42 Owner's Manual - Yamaha DGX-640 | Owner's Manual - Page 43
only be used with songs that include chord and melody data. In order to find out if a song includes the required chord data, refer to the Song List in the separate Data List document. Refer to page 52 for more information on using performance assistant technology to help you play. Owner's Manual 43 - Yamaha DGX-640 | Owner's Manual - Page 44
Play Piano CHORD Type-Play with Both Hands Try out the performance assistant technology using the preset the performance assistant technology type appears. Select the Chord type by using the dial. 3 Select a song. For this example try keys you should play will be shown in the display. 44 Owner - Yamaha DGX-640 | Owner's Manual - Page 45
Play on the keyboard. The Easy Way to Play Piano Before After Try playing the score on the left with both hands. You can even play the same keys over and over: NOTE • The score for Ave Maria is provided in the separate Data List. You can stop song playback at any time by pressing the Manual 45 - Yamaha DGX-640 | Owner's Manual - Page 46
to Play Piano CHORD/FREE Type-Applying the Chord Type to the Left Hand Only Try out the performance assistant technology using the preset so that the performance assistant technology type appears. Select the Chord/Free type by using the dial. 3 Select a song. For this example try selecting the "011 - Yamaha DGX-640 | Owner's Manual - Page 47
The Easy Way to Play Piano 5 Play on the keyboard. Play to the right assistant technology Chord/Free type. NOTE • The score for Nocturne is provided in the separate Data List. Press the [SCORE] button if you want to see the score for the right- a different preset song. Reference Owner's Manual 47 - Yamaha DGX-640 | Owner's Manual - Page 48
The Easy Way to Play Piano MELODY Type-Play with One longer than a second so that the performance assistant technology type appears. Select the Melody type by using the dial. 3 Select a song. For this example try selecting the "012 For Elise". Song Score (page 32) Reference 48 Owner's Manual - Yamaha DGX-640 | Owner's Manual - Page 49
The Easy Way to Play Piano 6 Play on the keyboard. The marker will indicate the current position in the score during playback. If you play a key each time the marker appears above a note in the score you will be able to play the melody with the correct "original" rhythm. Appears when - Yamaha DGX-640 | Owner's Manual - Page 50
the performance assistant technology type appears. Select the Chord/Melody type by using the dial. 3 Select a song. For this example try selecting the "023 Rock Piano". 4 Display the score. Press the [SCORE] button twice to not sound. You can enjoy playing the melody yourself. 50 Owner's Manual - Yamaha DGX-640 | Owner's Manual - Page 51
The Easy Way to Play Piano 6 Play on the keyboard. Play to the right of the split with the rhythm of the song melody with your right hand. You can play any keys as long as you're playing to the right of the split point. At the Next try playing a different preset song. Owner's Manual 51 Reference - Yamaha DGX-640 | Owner's Manual - Page 52
your right ... or any other combination. External Songs and the performance assistant technology Songs downloaded from the Internet can also be used with the performance assistant technology as long as they include the required chord and/or melody data. Chord data Reference 52 Owner's Manual - Yamaha DGX-640 | Owner's Manual - Page 53
Using the Music Database You want to play music in your favorite style, but you're not sure how to select the best Database list will appear in the display. 2 Select a Music Database. Referring to the list on the panel or Music Database List in the separate Data List, use the Owner's Manual 53 - Yamaha DGX-640 | Owner's Manual - Page 54
data referring to the Song List in the separate Data List. 3 Listen to the song. Press the [START/STOP] button to begin playback of the song. Move on to the next step while the song is playing. NOTE • When playing song numbers 010 and 021 to 030 while using the Easy Song Arranger, melody tracks - Yamaha DGX-640 | Owner's Manual - Page 55
the [VOICE] button for longer than a second a voice list will appear. The Melody R and Melody L displays will Song Arranger uses song data you can't specify chords by playing in the accompaniment range of the keyboard. The Use the [START/ STOP] button to stop playback completely. Reference Owner - Yamaha DGX-640 | Owner's Manual - Page 56
using the dial. Track 1 is automatically selected NOTICE • If all User Songs (Song numbers 031-035) contain recorded data, Song 031 will automatically be selected. In this case, you will record over and erase any previous data you play the keyboard, recording will stored as a MIDI file in song - Yamaha DGX-640 | Owner's Manual - Page 57
to track that contains previouslyrecorded data the previous data will be overwritten and lost. NOTE • Style accompaniment is automatically turned on when you select the style track [A] for recording. • Style accompaniment cannot turned on or off while recording is in progress. Owner's Manual 57 - Yamaha DGX-640 | Owner's Manual - Page 58
track, be sure to turn the style track [A] off. To cancel recording to a selected track, press that track button a second time. 3 Recording will start when you play on the keyboard and the recorded track numbers in the Use the song clear or track clear (pages 60-61) function to delete unwanted data - Yamaha DGX-640 | Owner's Manual - Page 59
a MIDI file in song number 031-035. NOTICE • The recorded Song data will converting the song to a MIDI file and saving it later. tracks. By selecting an unrecorded track-track buttons [1]-[5], [A]-you can record the new track while listening to previously recorded tracks (the border around the track - Yamaha DGX-640 | Owner's Manual - Page 60
If you only want to clear a specific track from a user song use the Track Clear function. 2 Press and hold the track [1] button for longer than a second while holding the track [A] button. A confirmation message will appear on display while the song is being cleared. Reference 60 Owner's Manual - Yamaha DGX-640 | Owner's Manual - Page 61
song (031-035) you want to clear. 2 Press and hold the track button ([1]-[5], [A]) corresponding to the track you want to clear for longer than a second. A confirmation message will Press the [+] button to clear the track. The clear-in-progress message will appear briefly on the display while the - Yamaha DGX-640 | Owner's Manual - Page 62
the button. Bank number 3 Use the dial or the [1]-[8] number buttons to select a bank number from 1 to 8. NOTE • Data cannot be saved to the a Registration Memory number that already contains data, the previous data is deleted and overwritten by the new data. Bank number NOTICE • Do not turn - Yamaha DGX-640 | Owner's Manual - Page 63
button. A bank number will appear in the display when you release the button. Bank number 2 Use the dial or the [1]-[8] number buttons to select bank you want to recall. You can check Style settings are not available for Registration Memory when using the Song features. Owner's Manual 63 Reference - Yamaha DGX-640 | Owner's Manual - Page 64
the settings, use the Initialize operation Demo Cancel, Demo Group, Demo Play Mode, Language Selection, Panel Sustain, Master EQ type, Chord Fingering NOTE • You can save the settings as backup data to your computer, by using the Musicsoft Downloader key on the keyboard. The backed up data will - Yamaha DGX-640 | Owner's Manual - Page 65
turn Harmony off, press the [HARMONY ON/OFF] button again. 3 Use the dial to select a harmony type. Refer to the Effect Type List in the separate Data List for information about the available harmony types. Try playing the keyboard with the harmony function. The effect and operation of each Harmony - Yamaha DGX-640 | Owner's Manual - Page 66
to many of the same voices being played in unison. When you select a style or song the optimum chorus type for the voice used is keyboard. Refer to the Effect Type List in the separate Data List for information about the available reverb types. The currently selected chorus type. 3 Use Manual - Yamaha DGX-640 | Owner's Manual - Page 67
form of Digital Signal Processor ] button to call up the FUNCTION display. 3 Use the dial to turn DSP on or off. Press you use the [FF], [REW] buttons or A-B Repeat function during song playback. 2 Use the Use the dial to select a DSP type. Refer to the DSP Type List in the separate Data List - Yamaha DGX-640 | Owner's Manual - Page 68
sustain to the keyboard voices. Use it when you want pitch bend wheel can be used to add smooth pitch variations to notes you play on the keyboard. Roll the wheel upward page 87. 2 Use the CATEGORY [r] and [f] buttons to select the Sustain item. The current setting is displayed. 3 Use the dial to - Yamaha DGX-640 | Owner's Manual - Page 69
provided to give you the best possible sound when listening through different reproduction systems-the instrument's internal speakers, headphones, or an external speaker system. 1 Press the [FUNCTION] button. The currently selected function will appear in the display. 3 Use the dial to select the - Yamaha DGX-640 | Owner's Manual - Page 70
a bell accent, or plays only a click sound. 1 Press the [FUNCTION] button. 2 Use the CATEGORY [r] and [f] buttons to select the Bell item. One Touch Setting Sometimes selecting the this feature. 3 You can then use the [+] and [-] buttons to turn the bell sound on or off. Reference 70 Owner - Yamaha DGX-640 | Owner's Manual - Page 71
and some messages will be displayed in Japanese where appropriate. 1 Press the [FUNCTION] button. Metronome volume 3 Use the dial to set the metronome volume as required. 2 Press the CATEGORY [r] and [f] buttons a number is retained even when the power is turned off. Reference Owner's Manual 71 - Yamaha DGX-640 | Owner's Manual - Page 72
-127 000-127 000-127 000-127 -2-+2 000 (left)- 64 (center)- 127 (right) 000-127 000-127 3 Use the dial to set the value. Edited parameters can be saved to registration memory. If you select a different keyboard voice the parameters will be reset and the ideal settings for the selected voice will be - Yamaha DGX-640 | Owner's Manual - Page 73
Watch the displayed dual voice and rotate the dial until the voice you want to use is selected. The voice selected here becomes the dual voice. Press the [EXIT you want to use is selected. The voice selected here becomes the split voice which will play to the left of the keyboard split point. Press - Yamaha DGX-640 | Owner's Manual - Page 74
2 Use the CATEGORY [r] and [f] buttons to select the Transpose item. Transpose item 2 Use the CATEGORY [r] and [f] buttons to select the Tuning item. Tuning item Can be set between -12 and +12 3 Use Can be set between -100 and +100 3 Use the dial to set the tuning value between - - Yamaha DGX-640 | Owner's Manual - Page 75
Voice Settings Touch Response Sensitivity You can adjust the keyboard's sensitivity to dynamics in three steps. 1 Press the [FUNCTION] button. The currently selected function will appear in the display. 2 Use the CATEGORY [r] and [f] buttons to select the Touch Sensitivity item. The currently - Yamaha DGX-640 | Owner's Manual - Page 76
on page 24 of the Quick Guide. Here are some other ways you Ending Auto fill INTRO section This is used for the beginning of the Song. When selected Style. MAIN section This is used for playing the main part of the section A or B. ENDING section This is used for the ending of the Song. When the - Yamaha DGX-640 | Owner's Manual - Page 77
Start When the synchro start standby mode is engaged, style playback will begin as soon as you play a chord in the accompaniment range of the keyboard. You can disengage the synchro-start standby mode by pressing the [SYNC START] button again. Accompaniment range Reference Owner - Yamaha DGX-640 | Owner's Manual - Page 78
play while you are playing chords in the accompaniment range of the keyboard. Style playback will stop when you release the keys. To turn the function on, press the [SYNC STOP] will play while you are playing the keys Style playback will stop when you release the keys Reference 78 Owner's Manual - Yamaha DGX-640 | Owner's Manual - Page 79
. 1 Press the [FUNCTION] button. 2 Use the CATEGORY [r] and [f] buttons to select the Style Volume item. 2 Use the dial to select a tempo from 011 reset the value to the default tempo of a Style. You can change the tempo during style playback by pressing the [TEMPO/TAP] button just twice. 3 Use - Yamaha DGX-640 | Owner's Manual - Page 80
Auto-accompaniment) Functions Setting the Split Point The initial default split point is key number 54 (the F#2 key), but you can change it to another key using the procedure described below. 1 Press the [FUNCTION] button. 2 Use the CATEGORY [r] and [f] buttons to select the Split point item. Play - Yamaha DGX-640 | Owner's Manual - Page 81
Playing Styles Using the Entire Keyboard In "Play Use the dial to select 3 "AI Fingered". 2 Use the dial to select 2 "FullKeyboard". To reset the chord fingering to default setting, select 1 "Multi Finger". To reset the chord fingering to default setting, select 1 "Multi Finger". Owner's Manual - Yamaha DGX-640 | Owner's Manual - Page 82
Using "M7" (major seventh) key in the section of the keyboard labeled "CHORD TYPE". (The both as notation and in the keyboard diagram. Reference Notation of chord . Press the "G" key in the section of the keyboard labeled "ROOT". ( notes of chord (keyboard) To call up of the keyboard, checking the - Yamaha DGX-640 | Owner's Manual - Page 83
2 Use the dial to select a tempo from 011 to 280 quarter-note beats per minute. Press the [+] and [-] buttons simultaneously to instantly reset the 3 Use the dial to set the song volume between 000 and 127. NOTE • Song volume can be adjusted while a song is selected. Reference Owner's Manual 83 - Yamaha DGX-640 | Owner's Manual - Page 84
keyboard yourself, or simply mute tracks other than the ones you want to listen to. To mute a track, press the appropriate track button (TRACK [1]-[5], [A]) button. Press the same button a second time to disengage track muting. Track number with border ... track contains data MELODY L. Use the dial - Yamaha DGX-640 | Owner's Manual - Page 85
. 2 Press the CATEGORY [r] and [f] buttons as many times as necessary to select "Demo Play Mode". The currently selected repeat playback mode will . 3 Use the dial to select "Random". If you want to restore the normal playback mode, select "Normal". Demo Preset User Download USB Demo Song All - Yamaha DGX-640 | Owner's Manual - Page 86
in the list that begins on page 87. 2 Press the [FUNCTION] button. 4 Use the dial cases the [+] button will initiate execution of the selected function, and the [-] will cancel the selection. Direct numeric entry. Reference 3 Select a function. Press the CATEGORY [r] and [f] buttons as many Manual - Yamaha DGX-640 | Owner's Manual - Page 87
List 000 (left)- 64 (center)- 127 (right) 000-127 000-127 000-127 000-127 -2-+2 000 (left)- 64 (center)- 127 (right) 000-127 key for the Split voice and sets the Split "point"-in other words, the key . In the Full Keyboard mode normal chords played anywhere on the keyboard will be detected, Manual 87 - Yamaha DGX-640 | Owner's Manual - Page 88
the MIDI settings when you connect to a computer. Determines whether the instrument's keyboard controls the internal tone generator (ON) or not (OFF). Determines whether the instrument synchronizes to the internal clock (OFF) or an external clock (ON). Determines whether keyboard performance data of - Yamaha DGX-640 | Owner's Manual - Page 89
Demo Song will not play, even if the [DEMO/BGM] button is pressed. DEMO DEMO GROUP 1(Demo), 2(Preset), 3(User), 4(Download), 5(USB) Determines the repeat playback group. DEMO data; however, when no such setting exists, the setting here is used. * All these settings can be conveniently reset to - Yamaha DGX-640 | Owner's Manual - Page 90
data to and from them. Before using a USB device, read through the "Precautions when using Manual You can access file operations listed if you play the keyboard while the FILE CONTROL display cases: • During style or song playback. • During a lesson. • While data is being loaded from a USB flash - Yamaha DGX-640 | Owner's Manual - Page 91
support all commercially available USB devices. Yamaha cannot guarantee operation of USB devices that you purchase. Before purchasing a USB device for use with this instrument, please visit the following web page: http://music.yamaha.com/download/ NOTE • Other USB devices such as a computer keyboard - Yamaha DGX-640 | Owner's Manual - Page 92
a USB flash memory to be formatted contains no important data before carrying out the formatting procedure. 1 Use the CATEGORY [r] and [f] buttons to select the Format item. The display prompts you for confirmation. Reference 92 Owner's Manual 2 Press the [EXECUTE] button and the display prompts - Yamaha DGX-640 | Owner's Manual - Page 93
User File" containing the registration memory data to a USB flash memory device. The User File name will have a ".usr" extension which will not appear in the instrument's display. 1 Use the CATEGORY [r] and [f] buttons operation will depend on the condition of the USB flash memory. Owner's Manual 93 - Yamaha DGX-640 | Owner's Manual - Page 94
Saving and Loading Data Save a User Song to USB Flash Memory This operation saves a user song (song numbers 031- 035) to USB flash memory. 1 Use the CATEGORY [r] and [f] buttons to locate the User Song Save item. The SOURCE on the condition of the USB flash memory. Reference 94 Owner's Manual - Yamaha DGX-640 | Owner's Manual - Page 95
If you load a User File registration memory data will be overwritten by the newly loaded data. Save important data to a USB flash memory before loading data that will overwrite it. 1 Use the CATEGORY [r] and [f] buttons to or remove the USB flash memory during this operation. Owner's Manual 95 - Yamaha DGX-640 | Owner's Manual - Page 96
external device such as a computer. This operation does not erase the preset data. 1 Use the CATEGORY [r] and [f] buttons to locate the User Delete item. Only the [EXIT] button to return to the MAIN display. 96 Owner's Manual 2 Use the dial to select the file you want to delete. All user songs - Yamaha DGX-640 | Owner's Manual - Page 97
transfer of MIDI data or a file. Connecting a Personal Computer USB terminal USB TO HOST terminal USB cable Instrument MIDI Basics If you want to know more about MIDI and how to use it, refer to this introductory book. MIDI Basics is available for downloading from the Yamaha Manual Library at - Yamaha DGX-640 | Owner's Manual - Page 98
a computer, the instrument's performance data can be used on the computer, and performance data from the computer can be played on the instrument. MIDI settings These settings pertain to performance data transmission and reception. Item Local External Clock Keyboard Out Style Out Range/ Settings - Yamaha DGX-640 | Owner's Manual - Page 99
the USB-MIDI Driver included on the Accessory CD-ROM on your computer. Refer to the Accessory CD-ROM Installation Guide on page 102 for installation details. 2 Use the CATEGORY [r] and [f] buttons to select the Initial Send item. 3 Press [+/YES] to send, or press [-/NO] to cancel. Data that can - Yamaha DGX-640 | Owner's Manual - Page 100
Use Musicsoft Downloader To Transfer Songs From the Accessory CD-ROM To the Instrument's flash memory NOTE • If a song or style is being played, stop playback before pro- ceeding. 1 Install the Musicsoft Downloader and USB-MIDI driver the selected MIDI song file will appear in the "List of files - Yamaha DGX-640 | Owner's Manual - Page 101
, and then "System Drive", a file named "10PG88G.bup" will appear in the lower right corner of the Musicsoft Downloader display. This is the backup file. For details about how to transfer backup files using the Musicsoft Downloader application, refer to the Online help "Transferring Data Between the - Yamaha DGX-640 | Owner's Manual - Page 102
Do not attempt to use the disk on equipment other than a computer. • The screen displays as illustrated in this manual are for instructional purposes, and may appear somewhat different from the screens which appear on your computer. • Software such as the USB-MIDI driver may be revised and updated - Yamaha DGX-640 | Owner's Manual - Page 103
9-11 are provided in the separate Data List. SampleData SongData StyleData MDB MIDI 70 songs 5 style files 5 Music Database data These songs, styles, or data can be transferred to the instrument and played or used with the instrument's functions. In order to view PDF scores, you will need to - Yamaha DGX-640 | Owner's Manual - Page 104
Accessory CD-ROM Installation Guide System Requirements Data Musicsoft Downloader USB Driver for Windows OS Computer Windows 2000/XP Home Edition/XP Professional/Vista * Only 32-bit is supported. Windows 7 233 MHz or higher; Intel Pentium/Celeron Processor family (500 MHz or higher is - Yamaha DGX-640 | Owner's Manual - Page 105
the driver Open the "Control Panel" and double-click the "Yamaha USB-MIDI Driver" icon. A window appears and the driver version is indicated in the lower left of the window. NOTE • When using Windows XP x64/Vista/7, double-click the "Yamaha USB-MIDI Driver (WDM)" icon. Reference Owner's Manual 105 - Yamaha DGX-640 | Owner's Manual - Page 106
at the following web site. http://music.yamaha.com/download/ IMPORTANT • Only Musicsoft Downloader can be used to transfer files between this instrument and a computer. No other file transfer application can be used. Troubleshooting The driver cannot be installed. • Is the USB cable connected - Yamaha DGX-640 | Owner's Manual - Page 107
a program" window. 4 Select "Yamaha USB-MIDI Driver" or "Yamaha Musicsoft Downloader" from the list. 5 Click [Uninstall]. If the "User Account Control" window appears, click [Allow] or [Continue]. A dialog box appears. Follow the instructions to remove the software. Reference Owner's Manual 107 - Yamaha DGX-640 | Owner's Manual - Page 108
computers. • You may not use the SOFTWARE to distribute illegal data or data that violates public policy. • You may not initiate services based on the use of the SOFTWARE without permission by Yamaha Corporation. Copyrighted data, including but not limited to MIDI data for songs, obtained by means - Yamaha DGX-640 | Owner's Manual - Page 109
Troubleshooting Appendix For the Instrument Problem When the instrument is turned on or off, a popping sound is temporarily produced. When using a mobile phone, noise is produced. There is no sound even when the keyboard is played or when a song or style is being played back. Playing keys in the - Yamaha DGX-640 | Owner's Manual - Page 110
Song Clear or Track Clear of the user songs. Com Mode Displayed when the Musicsoft Downloader is started on the PC connected to the keyboard. This will not be displayed while the instrument is played back. Completed Indicates the specified job completion such as data saving and transmission - Yamaha DGX-640 | Owner's Manual - Page 111
been reached." Indicates that saving data cannot be executed since the folder to the "overwrite" position before use. The notation cannot be displayed, data is too large. to notation." There are too many files. Indicates that saving data listed in the table: the messages necessary to - Yamaha DGX-640 | Owner's Manual - Page 112
equivalent Dimensions (W x D x H) • 1,397 x 445 x 146 mm (55" x 17-1/2" x 5-3/4") with keyboard stand: 1,399 x 445 x 761 mm (55-1/16" x 17-1/2" x 29-15/16") Weight • 20.7kg (45 lbs. 10 oz.) with keyboard stand: 27.7kg (61 lbs. 1 oz.) Supplied Accessories • Data List • Music Rest • Accessory CD - Yamaha DGX-640 | Owner's Manual - Page 113
Accessories Data 96 Delete (User Song 60 Demo 31 Demo Cancel 89 Demo Group 85 Demo 88 Headphones 13 I Initial Send 99 Initialization 64 Intro 76 K Keyboard Out 98 Keyboard Messages 110 Metronome 22, 70-71 MIDI 98 Multi Finger 81, 87 Music PC Mode 98 Pedal Unit 14 performance assistant technology - Yamaha DGX-640 | Owner's Manual - Page 114
Synchro Stop 78 U USB TO DEVICE 30, 90 USB TO HOST 97 USB-MIDI Driver 103-105 User file 93 User File Save 93 User Song 56 V Voice 18 Response 75 Touch Sensitivity 75 Track 57 Track Clear 61 Transfer 98-99 Transpose 74 Troubleshooting 106, 109 Tuning 74 Appendix 114 Owner's Manual - Yamaha DGX-640 | Owner's Manual - Page 115
or operation or failure to follow instructions according to the Owner's Manual for this product; any shipment of the product (claims must be presented to the carrier); repair or attempted repair by anyone other than Yamaha or an authorized Yamaha Service Center; (b) any unit which has been altered - Yamaha DGX-640 | Owner's Manual - Page 116
116 Owner's Manual - Yamaha DGX-640 | Owner's Manual - Page 117
Owner's Manual 117 - Yamaha DGX-640 | Owner's Manual - Page 118
- Yamaha DGX-640 | Owner's Manual - Page 119
Yamaha representative or the authorized distributor listed below. NORTH AMERICA CANADA Yamaha Canada Music Ltd. 135 Milner Avenue, Scarborough, Ontario, M1S 3R1, Canada Tel: 416-298-1311 U.S.A. Yamaha INDONESIA PT. Yamaha Music Indonesia (Distributor) PT. Nusantik Gedung Yamaha Music Center, Jalan - Yamaha DGX-640 | Owner's Manual - Page 120
Yamaha Home Keyboards Home Page http://music.yamaha.com/homekeyboard/ Yamaha Manual Library http://www.yamaha.co.jp/manual/ U.R.G., Pro Audio & Digital Musical Instrument Division, Yamaha Corporation © 2010 Yamaha Corporation WT98820 XXXPOXXX.X-01A0 Printed in China
-
 1
1 -
 2
2 -
 3
3 -
 4
4 -
 5
5 -
 6
6 -
 7
7 -
8
-
9
-
10
-
11
-
12
-
13
-
14
-
15
-
16
-
17
-
18
-
19
-
20
-
21
-
22
-
23
-
24
-
25
-
26
-
27
-
28
-
29
-
30
-
31
-
32
-
33
-
34
-
35
-
36
-
37
-
38
-
39
-
40
-
41
-
42
-
43
-
44
-
45
-
46
-
47
-
48
-
49
-
50
-
51
-
52
-
53
-
54
-
55
-
56
-
57
-
58
-
59
-
60
-
61
-
62
-
63
-
64
-
65
-
66
-
67
-
68
-
69
-
70
-
71
-
72
-
73
-
74
-
75
-
76
-
77
-
78
-
79
-
80
-
81
-
82
-
83
-
84
-
85
-
86
-
87
-
88
-
89
-
90
-
91
-
92
-
93
-
94
-
95
-
96
-
97
-
98
-
99
-
100
-
101
-
102
-
103
-
104
-
105
-
106
-
107
-
108
-
109
-
110
-
111
-
112
-
113
-
114
-
115
-
116
-
117
-
118
-
119
-
120
 |
 |
EN
Owner’s Manual
Keyboard Stand Assembly
For information on assembling the
keyboard stand, refer to the instructions
on
page 10
of this manual.
Setting Up
Reference
Appendix
Quick Guide