Yamaha DM2000 Studio Manager V1.1 Owner's Manual
Yamaha DM2000 Manual
 |
View all Yamaha DM2000 manuals
Add to My Manuals
Save this manual to your list of manuals |
Yamaha DM2000 manual content summary:
- Yamaha DM2000 | Studio Manager V1.1 Owner's Manual - Page 1
Studio Manager for V1.1 Owner's Manual E - Yamaha DM2000 | Studio Manager V1.1 Owner's Manual - Page 2
Studio Manager for DM2000. Yamaha makes no representations or warranties with regard to the use of the software and documentation and cannot be held responsible for the results of the use of this manual and the software. Trademarks Macintosh is a registered trademark of Apple Computer, Inc. Windows - Yamaha DM2000 | Studio Manager V1.1 Owner's Manual - Page 3
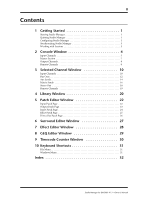
23 Insert Patch Page 24 Effect Patch Page 25 Direct Out Patch Page 26 6 Surround Editor Window 27 7 Effect Editor Window 28 8 GEQ Editor Window 29 9 Timecode Counter Window 30 10 Keyboard Shortcuts 31 File Menu 31 Windows Menu 31 Index 32 Studio Manager for DM2000 V1.1-Owner's Manual - Yamaha DM2000 | Studio Manager V1.1 Owner's Manual - Page 4
If no DM2000 is detected, a new Console window opens. The ONLINE indicator is displayed while Studio Manager is connected to a DM2000. When no DM2000 is detected, the OFFLINE indicator is displayed. Note: This version of Studio Manager supports DM2000 System Software V1.10 or later. If used with an - Yamaha DM2000 | Studio Manager V1.1 Owner's Manual - Page 5
: (Windows only) These pop-up menus are used to select the ports with which Studio Manager communicates with the DM2000. Console Device ID: Studio Manager can control any one of up to eight DM2000s, each with its own exclusive ID. Select the ID of the DM2000 that you want to control. Channel Select - Yamaha DM2000 | Studio Manager V1.1 Owner's Manual - Page 6
Sessions A Studio Manager Session consists of all DM2000 mix settings, card, in a Session, you must resynchronize Studio Manager beforehand (Console->PC). Note: In order to protect the communication port used by Studio Manager, DM2000 communication settings (e.g., MIDI, Remote Layer, Machine Control - Yamaha DM2000 | Studio Manager V1.1 Owner's Manual - Page 7
displayed. Many functions can be operated from here by clicking and dragging the various controls and parameters. This is explained in the following sections. Channels can be viewed in more detail on the Selected Channel window. See page 10 for more information. Studio Manager for DM2000 V1.1-Owner - Yamaha DM2000 | Studio Manager V1.1 Owner's Manual - Page 8
. M EQ button This button is used to turn on and off the Input Channel's EQ. N EQ curve This display shows the Equalizer's curve, which can be set by dragging. O DELAY button This button is used to turn on and off the Input Channel's Delay function. Studio Manager for DM2000 V1.1-Owner's Manual - Yamaha DM2000 | Studio Manager V1.1 Owner's Manual - Page 9
orange while the channel is on. Z Short channel name This is the channel's short name. To edit the name, click it and type. a Channel fader This is the Input Channel's fader. b Channel meter This meter displays the signal level of the Input Channel. Studio Manager for DM2000 V1.1-Owner's Manual - Yamaha DM2000 | Studio Manager V1.1 Owner's Manual - Page 10
2-Console Window Master Section 1 2 A ONLINE status indicator This indicator shows whether Studio Manager is online or offline. B Meters These meters display the output level of the Stereo Out when PAN CONTROL is set to "STEREO," or the Bus Outs used for surround processing when PAN CONTROL is - Yamaha DM2000 | Studio Manager V1.1 Owner's Manual - Page 11
orange O while the channel is on. N Short channel name This is the channel's short name. To edit the name, click it and type. P O Channel fader This is the Bus Out's fader. P Channel meter This meter displays the signal level of the Bus Out. Studio Manager for DM2000 V1.1-Owner's Manual - Yamaha DM2000 | Studio Manager V1.1 Owner's Manual - Page 12
Channel's fader. Note: When the remote target setting on the DM2000 is set to anything other than User Defined, the ON buttons and channel faders have no effect, and the name of the specified target is displayed in the channel's short name. 1 2 C D 5 Studio Manager for DM2000 V1.1-Owner's Manual - Yamaha DM2000 | Studio Manager V1.1 Owner's Manual - Page 13
below the Channel ID. To edit the name, click it and type. The INPUT PATCH parameter is used to select an input source. To select an input, click the parameter and choose from the list that appears. The LIBRARY button opens the Channel Library window. Studio Manager for DM2000 V1.1-Owner's Manual - Yamaha DM2000 | Studio Manager V1.1 Owner's Manual - Page 14
Channel. The INSERT button turns the Insert on and off. The OUT and IN parameters are used to specify the insert out destination and insert in source respectively. The POSITION parameter is used to specify the position of the Insert in the signal path. Studio Manager for DM2000 V1.1-Owner's Manual - Yamaha DM2000 | Studio Manager V1.1 Owner's Manual - Page 15
Input Channels. See "EQUALIZER section" on page 11 for more information. C DELAY section This section contains the delay controls for the currently selected Bus Out. The rotary control is used to set the delay time, and the ON button turns the Delay function on and off. Studio Manager for DM2000 V1 - Yamaha DM2000 | Studio Manager V1.1 Owner's Manual - Page 16
group functions for the currently selected Bus Out. Click the heart icon to pair and unpair the channel with its partner channel. Use the FADER GROUP buttons to add the channel to Fader groups, and use the MUTE GROUP buttons to add it to Mute groups. Studio Manager for DM2000 V1.1-Owner's Manual - Yamaha DM2000 | Studio Manager V1.1 Owner's Manual - Page 17
for the currently selected Aux Send. The rotary control is used to set the delay time, and the ON button turns the Delay function on and off. D Aux Send level section This section contains the AUTO, SOLO, and ON buttons and the channel fader for the currently selected Aux Send. E COMPRESSOR section - Yamaha DM2000 | Studio Manager V1.1 Owner's Manual - Page 18
group functions for the currently selected Aux Send. Click the heart icon to pair and unpair the channel with its partner channel. Use the FADER GROUP buttons to add the channel to Fader groups, and use the MUTE GROUP buttons to add it to Mute groups. Studio Manager for DM2000 V1.1-Owner's Manual - Yamaha DM2000 | Studio Manager V1.1 Owner's Manual - Page 19
Channels. See "EQUALIZER section" on page 11 for more information. E DELAY section This section contains the delay controls for the currently selected Matrix Send. The rotary control is used to set the delay time, and the ON button turns the Delay function on and off. Studio Manager for DM2000 - Yamaha DM2000 | Studio Manager V1.1 Owner's Manual - Page 20
J FADER GROUP & MUTE GROUP section This section contains the Fader and Mute group functions for the currently selected Matrix Send. Use the FADER GROUP buttons to add the channel to Fader groups, and use the MUTE GROUP buttons to add it to Mute groups. Studio Manager for DM2000 V1.1-Owner's Manual - Yamaha DM2000 | Studio Manager V1.1 Owner's Manual - Page 21
section This section contains the delay controls for the Stereo Out. The rotary control is used to set the delay time, and the ON button turns the Delay function on and off. D Balance & level section This section contains the balance control, AUTO and ON buttons, and channel fader for the Stereo Out - Yamaha DM2000 | Studio Manager V1.1 Owner's Manual - Page 22
currently selected Remote Channel. 2 Note: When the remote target setting on the DM2000 is set to anything other than User Defined, the ON buttons and channel faders have no effect, and the name of the specified target is displayed below the channel ID. Studio Manager for DM2000 V1.1-Owner's Manual - Yamaha DM2000 | Studio Manager V1.1 Owner's Manual - Page 23
Windows menu LIBRARY buttons on the Selected Channel window LIBRARY button on the Effects Editor window LIBRARY button on the GEQ Editor window LIBRARY buttons on the Patch Editor window The layout of the Library window is used to open Library files. JK Studio Manager for DM2000 V1.1-Owner's Manual - Yamaha DM2000 | Studio Manager V1.1 Owner's Manual - Page 24
DATA pane This pane displays the DM2000 memories in the currently selected Library. J CLEAR button This button clears the contents of the selected memory. K UNDO button This button undoes the last recall, store, copy, clear, swap, or titling operation. Studio Manager for DM2000 V1.1-Owner's Manual - Yamaha DM2000 | Studio Manager V1.1 Owner's Manual - Page 25
page. E LIBRARY button This button opens the Input Patch Library window. F Patchbay The patchbay is used to patch input ports to Input Channels. Active patches are indicated by a blue dot. To make a patch, click a square. To unpatch, click a blue dot. Studio Manager for DM2000 V1.1-Owner's Manual - Yamaha DM2000 | Studio Manager V1.1 Owner's Manual - Page 26
page. E LIBRARY button This button opens the Output Patch Library window. F Patchbay The patchbay is used to patch output ports to Output Channels. Active patches are indicated by a red dot. To make a patch, click a square. To unpatch, click a red dot. Studio Manager for DM2000 V1.1-Owner's Manual - Yamaha DM2000 | Studio Manager V1.1 Owner's Manual - Page 27
In Patchbay This patchbay is used to patch input ports to the Insert Ins of Input Channels, Bus Outs, Aux Sends, Matrix Sends, and the Stereo Out. Active patches are indicated by a blue dot. To make a patch, click a square. To unpatch, click a blue dot. Studio Manager for DM2000 V1.1-Owner's Manual - Yamaha DM2000 | Studio Manager V1.1 Owner's Manual - Page 28
to select input sources for internal effects processors #1 and #2. B LIBRARY button This button opens the Input Patch Library window. C Effects processors 3-8 inputs These parameters are used to select input sources for internal effects processors 3-8. Studio Manager for DM2000 V1.1-Owner's Manual - Yamaha DM2000 | Studio Manager V1.1 Owner's Manual - Page 29
type. C LIBRARY button This button opens the Output Patch Library window. D Patchbay The patchbay is used to patch output ports to the Direct Outs. Active patches are indicated by a red dot. To make a patch, click a square. To unpatch, click a red dot. Studio Manager for DM2000 V1.1-Owner's Manual - Yamaha DM2000 | Studio Manager V1.1 Owner's Manual - Page 30
position This is the current surround pan position. E DIV control This rotary control sets the amount of divergence (i.e., how the Center signal is fed to the Left, Right, and Center channels). F LFE control This rotary control sets the level of the LFE channel. Studio Manager for DM2000 V1.1-Owner - Yamaha DM2000 | Studio Manager V1.1 Owner's Manual - Page 31
. E MIX BALANCE control This control is used to adjust the balance between the wet and dry signals. When set to 0, only the dry signal is heard. When set to 100, only the wet signal is heard. F BYPASS button This button is used to bypass the currently selected effects processor. Studio Manager for - Yamaha DM2000 | Studio Manager V1.1 Owner's Manual - Page 32
the GEQ is on. G GEQ controls These sliders are used to boost and cut the level of each band. H LIMIT buttons These buttons determine the maximum amount of boost and cut for the currently selected GEQ. I EQ FLAT button This button resets all sliders to 0 dB. Studio Manager for DM2000 V1.1-Owner - Yamaha DM2000 | Studio Manager V1.1 Owner's Manual - Page 33
displays the current timecode position in hours, minutes, seconds, and frames, or measures, beats, and MIDI clocks, depending on the specified timecode source. It works in unison with the timecode counters on the DM2000 Automix Main and Memory pages. Studio Manager for DM2000 V1.1-Owner's Manual - Yamaha DM2000 | Studio Manager V1.1 Owner's Manual - Page 34
the Console window Opens the Selected Channel window Opens the Library window Opens the Patch Editor window Opens the Surround Editor window Opens the Timecode Counter window Opens the Effect Editor window Opens the Graphic Equalizer Editor window Studio Manager for DM2000 V1.1-Owner's Manual - Yamaha DM2000 | Studio Manager V1.1 Owner's Manual - Page 35
Studio Manager 1 F F.PAN button 11 FADER GROUP buttons 12, 13, 15, 17, 19 FILE pane 21 G GATE 11 GATE button 5 Gate curve 11 Gate library 20 Gate open/close indicators 5 Gate threshold 5 GEQ editor window 29 GEQ library 20 GEQ ON button 29 I Input Channels console window 5 selected channel window - Yamaha DM2000 | Studio Manager V1.1 Owner's Manual - Page 36
Studio Manager 1 LAYER buttons 7 Layer Select, preference 2 LFE control 6, 27 LIBRARY button 10, 12, 14, 16, 18, 22, 23, 24, 25, 26, 29 Library window 20 LIMIT buttons 29 LINK buttons 29 M Master section 7 Matrix Sends console window 8 selected channel window 16 Meters 7, 28 MIX BALANCE control - Yamaha DM2000 | Studio Manager V1.1 Owner's Manual - Page 37
R0 IP YAMAHA CORPORATION Pro Audio & Digital Musical Instrument Division P.O. Box 3, Hamamatsu, 430-8651, Japan
-
 1
1 -
 2
2 -
 3
3 -
 4
4 -
 5
5 -
 6
6 -
 7
7 -
8
-
9
-
10
-
11
-
12
-
13
-
14
-
15
-
16
-
17
-
18
-
19
-
20
-
21
-
22
-
23
-
24
-
25
-
26
-
27
-
28
-
29
-
30
-
31
-
32
-
33
-
34
-
35
-
36
-
37
 |
 |

Studio Manager
for
V1.1
Owner’s Manual
E