Yamaha DSP-A2 Owner's Manual - Page 10
Installing batteries in the remote controller, Notes about the remote controller, Battery replacement - reset
 |
View all Yamaha DSP-A2 manuals
Add to My Manuals
Save this manual to your list of manuals |
Page 10 highlights
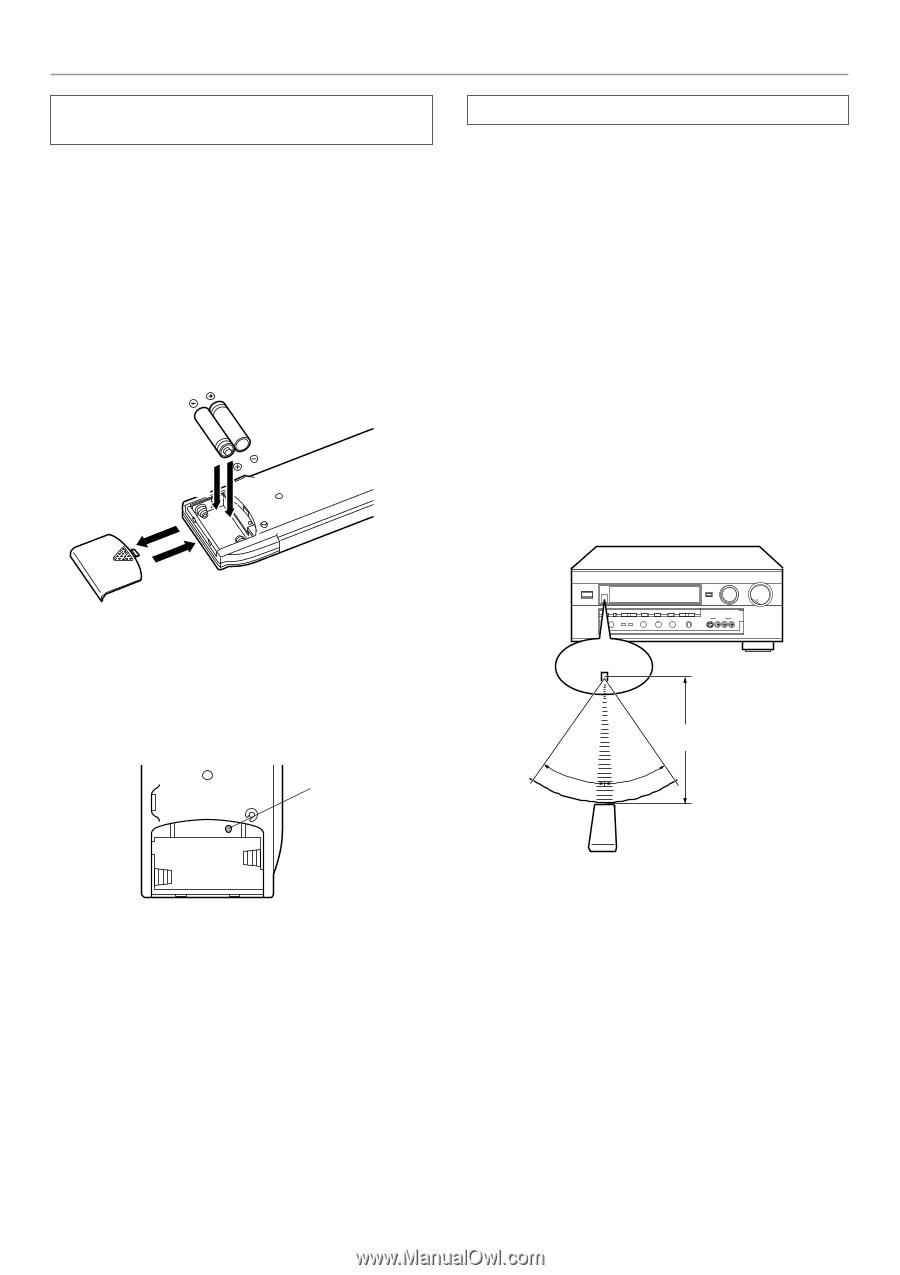
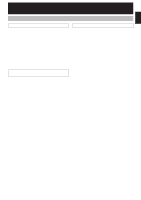
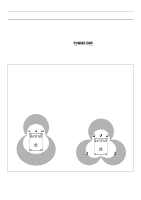
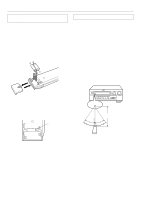
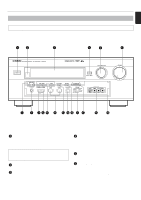
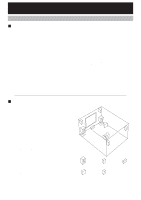
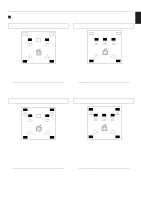
GETTING STARTED Installing batteries in the remote controller Since the remote controller will be used for many of this unit's control operations, you should begin by installing the supplied batteries. 1. Turn the remote controller over and slide the battery compartment cover in the direction of the arrow. 2. Insert the batteries (AA, LR6, UM-3 type) according to the polarity markings on the inside of the battery compartment. 3. Close the battery compartment cover. 2 1 3 Notes about the remote controller Battery replacement If you find that the remote controller must be used closer to the main unit, the batteries are weak. Replace both batteries with new ones. Notes q Use only AA, R6, UM-3 batteries. (It is recommended to use an LR6 type to use the remote controller for a long period of time.) q Be sure the polarities are correct. (See the illustration inside the battery compartment.) q Remove the batteries if the remote controller is not used for an extended period of time. q If batteries leak, dispose of them immediately. Avoid touching the leaked material and contact with clothing, etc. Clean the battery compartment thoroughly before installing new batteries. Remote controller operation range 4. After the batteries are inserted, press the RESET button before using the remote controller. RESET button Remote control sensor Within approximately 6 m (19.7 feet) 30° 30° Notes q The area between the remote controller and the main unit must be clear of large obstacles. q Do not expose the remote control sensor to strong lighting, in particular, an inverter type fluorescent lamp. Otherwise, the remote controller may not work properly. If necessary, position the main unit away from direct lighting. 8
-
 1
1 -
2
-
3
-
4
-
 5
5 -
 6
6 -
 7
7 -
 8
8 -
 9
9 -
 10
10 -
 11
11 -
 12
12 -
 13
13 -
 14
14 -
 15
15 -
16
-
17
-
18
-
19
-
20
-
21
-
22
-
23
-
24
-
25
-
26
-
27
-
28
-
29
-
30
-
31
-
32
-
33
-
34
-
35
-
36
-
37
-
38
-
39
-
40
-
41
-
42
-
43
-
44
-
45
-
46
-
47
-
48
-
49
-
50
-
51
-
52
-
53
-
54
-
55
-
56
-
57
-
58
-
59
-
60
-
61
-
62
-
63
-
64
-
65
-
66
-
67
-
68
-
69
-
70
-
71
-
72
-
73
-
74
-
75
-
76
-
77
-
78
 |
 |