Yamaha DSP-A2 Owner's Manual - Page 23
Speakers, How to Connect
 |
View all Yamaha DSP-A2 manuals
Add to My Manuals
Save this manual to your list of manuals |
Page 23 highlights
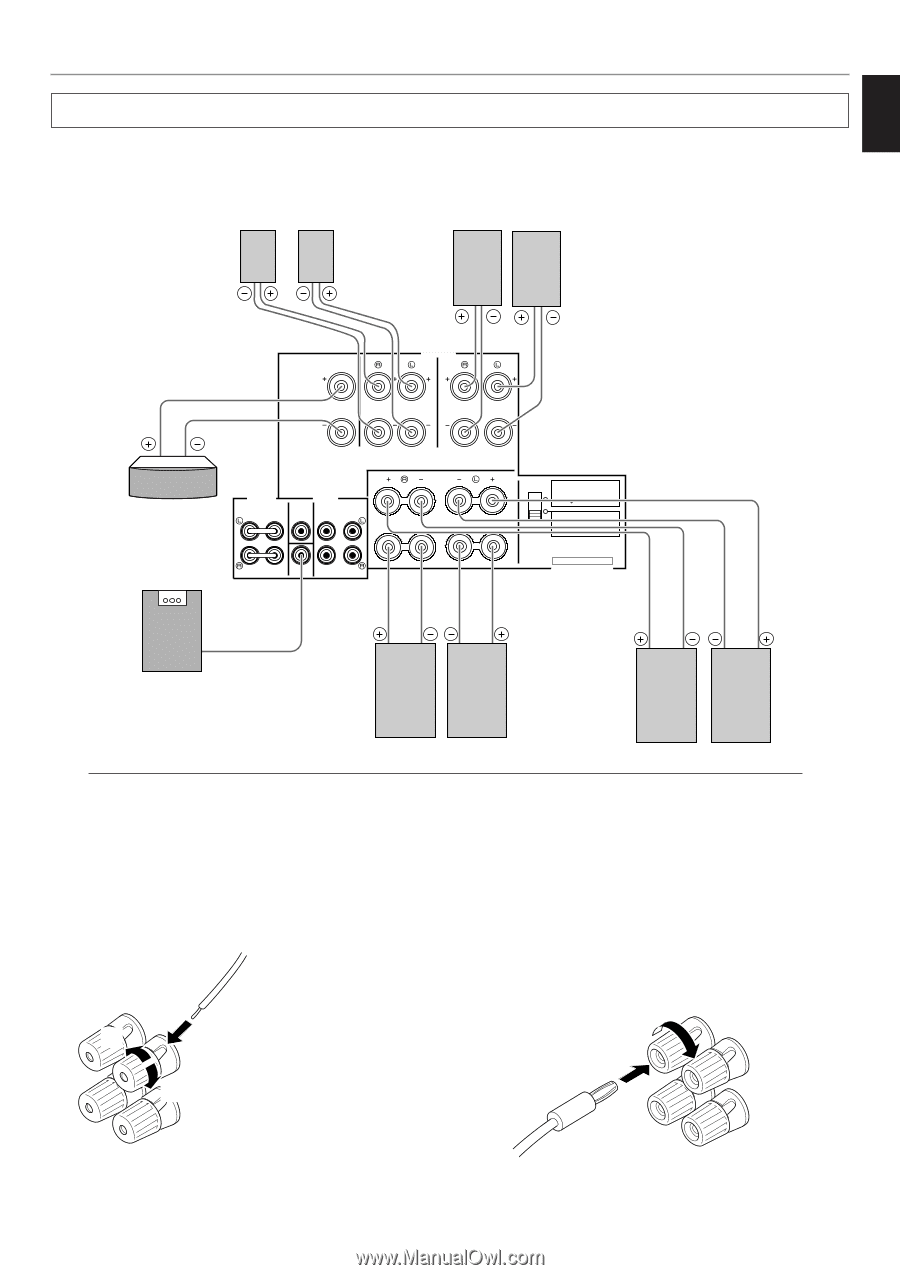
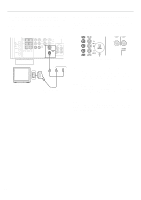
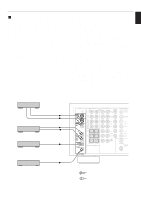
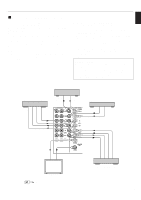
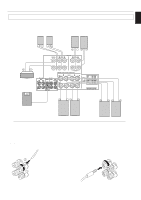
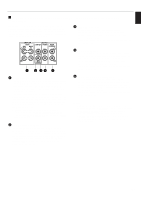
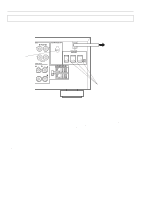
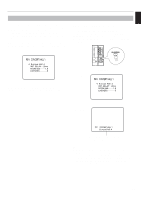
English Speakers Use speakers with the specified impedance shown on the rear of this unit. Front effect speakers Right Left Rear speakers Right Left CENTER FRONT SPEAKERS REAR Center speaker (SURROUND ) CAUTION SEE INSTRUCTION MANUAL FOR CORRECT SETTING. A MAIN A COUPLER MAIN PRE MAIN OUT IN OUTPUT CENTER FRONT REAR ( SURROUND ) B B SUB WOOFER CENTER : 4ΩMIN. / SPEAKER FRONT : 6ΩMIN. / SPEAKER REAR : 6ΩMIN. / SPEAKER MAIN A OR B: 4ΩMIN. / SPEAKER A B : 8ΩMIN. / SPEAKER CENTER : 8ΩMIN. / SPEAKER FRONT : 8ΩMIN. / SPEAKER REAR : 8ΩMIN. / SPEAKER MAIN A OR B: 8ΩMIN. / SPEAKER A B : I6ΩMIN. / SPEAKER SET BEFORE POWER ON IMPEDANCE SELECTOR PREPARATION Subwoofer system Right Left Main speakers B Right Left Main speakers A How to Connect: Connect the SPEAKERS terminals to your speakers with the wire of the proper gauge (keep as short as possible). If the connections are faulty, no sound will be heard from the speakers. Make sure that the polarity of the speaker wires is correct. That is the + and - markings are observed. If these wires are reversed, the sound will be unnatural and lack bass. Caution Do not let the bare speaker wires touch each other or any metal part of this unit. This could damage this unit or the speakers, or both. Red: positive (+) Black: negative (-) 2 1 3 Œ Loosen the knob. Insert the bare wire. [Remove approx. 5mm (1/4") insulation from the speaker wires.] Ž Tighten the knob and secure the wire. Banana Plug connections are also possible. Simply insert the Banana Plug connector into the corresponding terminal. 21
-
 1
1 -
2
-
3
-
4
-
5
-
6
-
7
-
8
-
9
-
10
-
11
-
12
-
13
-
14
-
15
-
16
-
17
-
 18
18 -
 19
19 -
 20
20 -
 21
21 -
 22
22 -
 23
23 -
 24
24 -
 25
25 -
 26
26 -
 27
27 -
 28
28 -
29
-
30
-
31
-
32
-
33
-
34
-
35
-
36
-
37
-
38
-
39
-
40
-
41
-
42
-
43
-
44
-
45
-
46
-
47
-
48
-
49
-
50
-
51
-
52
-
53
-
54
-
55
-
56
-
57
-
58
-
59
-
60
-
61
-
62
-
63
-
64
-
65
-
66
-
67
-
68
-
69
-
70
-
71
-
72
-
73
-
74
-
75
-
76
-
77
-
78
 |
 |