Yamaha EMX5000-20 Owner's Manual - Page 10
Power on, Sound output, STEP 2 - channel manual
 |
View all Yamaha EMX5000-20 manuals
Add to My Manuals
Save this manual to your list of manuals |
Page 10 highlights
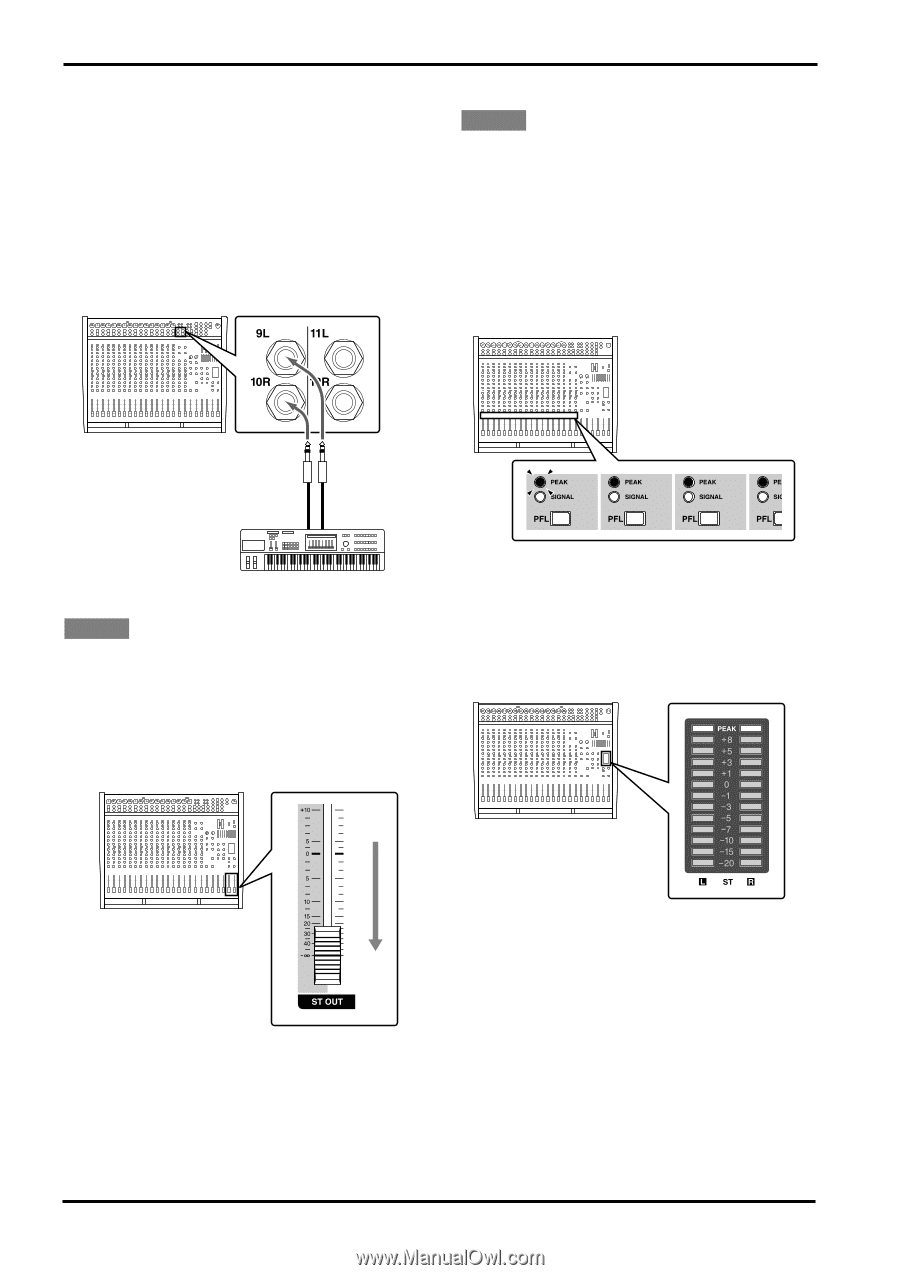
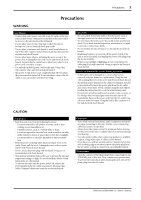
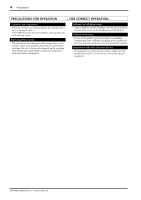
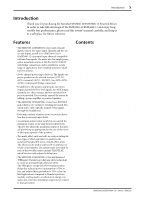
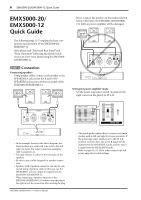
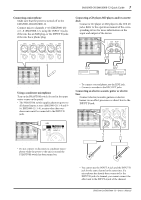
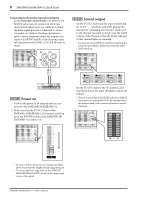
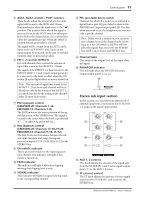
8 EMX5000-20/EMX5000-12 Quick Guide Connecting an electronic musical instrument To the EMX5000-20/EMX5000-12's LINE or ST SUB IN jacks, you can connect an electronic musical instrument such as a synthesizer, drum machine, signal processor connected to an electric guitar, etc. Refer to the diagram below to make a stereo connection from the output jacks (such as L/MONO and R) of an electronic musical instrument to the LINE or ST SUB IN jacks in stereo. STEP 3 Sound output Set the ST OUT fader and the input channel faders to the "-∞" position, and while playing the instrument (or singing into the mic) connected to the channel you want to check, raise the GAIN control of the channel so that the PEAK indicator of that channel lights occasionally. • Do not press the 26dB PAD switch if sound is input from the microphone. Otherwise, press the 26dB PAD switch on. EMX5000-20 (EMX5000-12) EMX5000-20 (EMX5000-12) Synthesizer, Drum machine, Guitar processor STEP 2 Power on 1 Turn on the power to all external devices connected to the EMX5000-20/EMX5000-12. 2 Make sure that the ST OUT fader of the EMX5000-20/EMX5000-12 is lowered, and then press the POWER switch of the EMX5000-20/ EMX5000-12 to turn it on. Set the ST OUT fader to the "0" position, and raise the faders of the input channels to adjust the volume. • Please be aware that if the PEAK indicator of the ST level meter is continuously lit for an extended time, the internal amp or the connected speakers may be damaged. EMX5000-20 (EMX5000-12) EMX5000-20 (EMX5000-12) • Be sure to follow the power up sequence specified above to prevent the speakers from being damaged. • To correct the low range, turn on the YAMAHA SPEAKER PROCESSING switch in the upper right corner of the panel. EMX5000-20/EMX5000-12-Owner's Manual
-
 1
1 -
2
-
3
-
4
-
 5
5 -
 6
6 -
 7
7 -
 8
8 -
 9
9 -
 10
10 -
 11
11 -
 12
12 -
 13
13 -
 14
14 -
 15
15 -
16
-
17
-
18
-
19
-
20
-
21
-
22
-
23
-
24
-
25
-
26
-
27
-
28
-
29
-
30
-
31
-
32
-
33
-
34
-
35
-
36
-
37
-
38
 |
 |