Yamaha EZ-20 Owner's Manual
Yamaha EZ-20 Manual
 |
View all Yamaha EZ-20 manuals
Add to My Manuals
Save this manual to your list of manuals |
Yamaha EZ-20 manual content summary:
- Yamaha EZ-20 | Owner's Manual - Page 1
Owner's Manual - Yamaha EZ-20 | Owner's Manual - Page 2
power supply (adapter). DO NOT connect this product to any power supply or adapter other than one described in the manual, on the name plate, or specifically recommended by Yamaha. This product should be used only with the components supplied or; a cart, rack, or stand that is recommended by Yamaha - Yamaha EZ-20 | Owner's Manual - Page 3
sight or chemical burns. • Before connecting the instrument to other electronic components, turn off the power for all components. Before turning the power on or off for all components, set all volume levels to minimum. Also, be sure to set the volumes of all components at their minimum levels and - Yamaha EZ-20 | Owner's Manual - Page 4
of the Yamaha EZ-20 PortaTone! You now own a portable keyboard that combines advanced functions, great sound and exceptional ease-of-use in a highly compact package. Its outstanding features also make it a remarkably expressive and versatile instrument. Read this Owner's Manual carefully while - Yamaha EZ-20 | Owner's Manual - Page 5
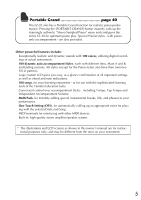
for realistic piano performance. Pressing the [PORTABLE GRAND] button instantly calls up the stunningly authentic "Stereo Sampled Piano" voice and configures the entire EZ-20 for optimum piano play. Special Pianist styles - with pianoonly accompaniment - are also provided. Other powerful features - Yamaha EZ-20 | Owner's Manual - Page 6
Contents Setting Up 8 Power Requirements 8 Using Headphones 9 Connecting a Keyboard Amplifier or Stereo System 9 Using a Footswitch 9 Using the MIDI Terminals 9 Panel Controls and Terminals.10 Quick Guide 12 Songs 12 Playing the Demo Songs 12 Playing a Single Song 13 Lesson 14 Using the - Yamaha EZ-20 | Owner's Manual - Page 7
MIDI Functions 58 About MIDI 58 MIDI Terminals 58 How Can MIDI be Used 59 Troubleshooting 60 Voice List 61 Sound Effects&Drum Kit List . 63 Style List & Multipads 64 MIDI Implementation Chart... 66 Specifications 69 Index 70 7 - Yamaha EZ-20 | Owner's Manual - Page 8
the EZ-20 is set to STANDBY. 2 Connect one end of the adaptor to the DC IN 12V jack on the rear panel of your EZ-20. 3 Connect the other end to a suitable electrical outlet. 2 PA-3B 3 outlet WARNING Use ONLY a Yamaha PA-3B AC Power Adaptor (or other adaptor specifically recommended by Yamaha) to - Yamaha EZ-20 | Owner's Manual - Page 9
system is automatically cut off when you insert a headphone plug into this jack. CAUTION Do not use headphones for a long time at high volume levels. Otherwise, you may damage your hearing. Connecting a Keyboard Amplifier or Stereo System Though the EZ-20 is equipped with a built-in speaker system - Yamaha EZ-20 | Owner's Manual - Page 10
and Terminals Front Panel 1 [MASTER VOLUME] dial 22 2 Power switch ([STANDBY/ON 22 3 [PORTABLE GRAND] button 40 4 [METRONOME] button 40 5 [DEMO [ABC/DoReMi] button 43 K [LIGHT ON/OFF] button 32 Rear Panel L MIDI IN,OUT terminals 9 M SUSTAIN jack 9 N PHONES/OUTPUT jack 9 O DC IN 12V jack 8 - Yamaha EZ-20 | Owner's Manual - Page 11
B 0 7 A 8 9 I J K LM NO 11 - Yamaha EZ-20 | Owner's Manual - Page 12
Guide 1 Quick Guide STEP Songs 12 212 Playing the Demo Songs Demo songs (001-100) showcase the sophisticated features and stunning sound of the EZ-20. Let's play the Demo songs now ] button, turn on the power to the EZ-20 while pressing and holding down the [DEMO] button. To activate the - Yamaha EZ-20 | Owner's Manual - Page 13
1 Start the Song. When the power of the EZ-20 is turned on, the song of "003: Linus And Lucy" is selected. For instructions on selecting songs, see page 28. Go Marching In 19 Tain't Nobody's Business If I Do 20 Happy Birthday To You Piano/Classical 21 Für Elise 22 Menuett (J.S. Bach) 23 Turkish - Yamaha EZ-20 | Owner's Manual - Page 14
lesson. When the power of the EZ-20 is turned on, the song of "003: Linus And Lucy" and the right-hand part are selected. Lesson 1: Timing This step lets you work on the timing of the notes. In Lesson 1, the particular note you play on the keyboard is unimportant. The EZ-20 checks your timing - Yamaha EZ-20 | Owner's Manual - Page 15
. The accompaniment continues playing in tempo. 2 When you're finished, stop the Lesson. ❋ Want to find out more? See page 35. Grade The EZ-20 has a built-in evaluation function that monitors your practicing and - like a real teacher - tells you how well you did each practice. Four grades are - Yamaha EZ-20 | Owner's Manual - Page 16
3 Quick Guide STEP Voices 11 2 1 1 Playing the Piano Simply by pressing the [PORTABLE GRAND] button, you can automatically reset the entire EZ-20 for piano play. 1 Press the [PORTABLE GRAND] button. The song and style are also set for piano performance. 2 Play the keyboard. ❋ Want to find - Yamaha EZ-20 | Owner's Manual - Page 17
. The ABC voice is selected. To select the DoReMi voice, press the [ABC/ DoReMi] again. ABC DoReMi Off 2 Play the keyboard. ❋ Want to find out more? See page 43. Selecting and Playing Other Voices The EZ-20 has a huge total of 100 dynamic and realistic instrument voices. Let's try a few of them out - Yamaha EZ-20 | Owner's Manual - Page 18
4 Quick Guide STEP Auto Accompaniment 347 6 1 2 Using the Auto Accompaniment Simply play chords with your left hand - and the EZ-20 automatically produces appropriate bass, chord and rhythm backing. Use your right hand to play melodies, and you'll sound like an entire band! For more - Yamaha EZ-20 | Owner's Manual - Page 19
the Sync Start function on. 7 Stop the auto accompaniment. 5 Play a chord with your left hand. The auto accompaniment starts as soon as you play the keyboard. ❋ Want to find out more? See page 53. ❋ Want to find out more? See page 46. 19 - Yamaha EZ-20 | Owner's Manual - Page 20
Continuation 4 Quick Guide STEP Auto Accompaniment 15 Looking up Chords in the Dictionary The convenient Dictionary function teaches you how to play chords by showing chord type (A2-Bb3) Keys for entering the chord root (C4-B4) G M7 Example: Root note Chord type 1 Press the [Dict.] button. 20 - Yamaha EZ-20 | Owner's Manual - Page 21
2 Specify the root note of the chord (in this case, G). 3 Specify the chord type of the chord (in this case, M7). 4 Play the chord by pressing the keys lighted up. The chord name flashes and a "congratulations" melody is played, when the chord is played properly. 5 To leave the Dictionary function, - Yamaha EZ-20 | Owner's Manual - Page 22
on To turn on the power, set the [STANDBY/ON] switch to the ON position. Even when the switch is in the "STANDBY" position, electricity is still flowing to the instrument at the minimum level. When you are not using the EZ-20 for a long time, make sure you unplug the AC power adaptor from the wall - Yamaha EZ-20 | Owner's Manual - Page 23
[OVERALL] button enable you to make EZ-20's global settings. ABC/DoReMi GRADE TALKING TRANSPOSE TUNING ACMP/SONG VOLUME METRONOME VOLUME 43 38 39 44 45 55, 31 41 If you press the [OVERALL] button - Yamaha EZ-20 | Owner's Manual - Page 24
appears.) Selects a song for playback or practice. Selects a voice to play on the keyboard. Select a style for accompaniment. • If you select a song or accompaniment, then select a voice, the EZ-20 indicates the following: [Song→Voice] Select a voice using the numeric keypad. The selected - Yamaha EZ-20 | Owner's Manual - Page 25
Numeric keypad Name & number indication (Song/Style/Voice) The top row of the display indicates the name and number of the currently-selected function. E.g., Selecting a song Song number Song name Selecting a number • To increment or decrement the number, use the numeric keypad or [+]/[-] buttons - Yamaha EZ-20 | Owner's Manual - Page 26
Panel Display Indications Accompaniment On indicator This appears when the auto accompaniment has been turned on. 26 ABC/DoReMi indicators These show the guide voice ("ABC" or "DoReMi") for the Lesson function. - Yamaha EZ-20 | Owner's Manual - Page 27
notes in a chord may not be displayed. Chord indicator This indicator indicates the name of the currently-played chord or a chord you play on the keyboard. Fingering guide During the Lesson, this guide suggests a fingering for playing the song. 27 - Yamaha EZ-20 | Owner's Manual - Page 28
Measure number If you select a song after another song has started playing, the EZ-20 will sequentially play songs in the category (e.g., Piano/Classical etc. See page 13.) that contains the selected song. Turning the power on while pressing and holding down the [DEMO] button will disable the Demo - Yamaha EZ-20 | Owner's Manual - Page 29
or the [+]/[-] buttons (page 25). Start and stop the song playback. Press the [START/STOP] button to start song playback. You can play the keyboard along with the playback. Press the [START/STOP] button to stop song playback. The playback will repeat until you press the [START/STOP] button. Other - Yamaha EZ-20 | Owner's Manual - Page 30
Press the numeric keypad or [+]/[-] buttons to change the tempo value. You can instantly restore the default setting by pressing both [+]/[-] buttons (When Tempo is selected). Tap Function You can set your own tempo intuitively. Press the [TEMPO/TAP] button four times for a four-beat song and three - Yamaha EZ-20 | Owner's Manual - Page 31
Level Adjust the song volume to balance with the level of the keyboard performance. Press the [OVERALL] button repeatedly until "SONG VOL" appears in the display. Current song volume Press the numeric keypad or [+]/[-] buttons to set the song volume (000-127). • You can instantly restore the default - Yamaha EZ-20 | Owner's Manual - Page 32
Selecting and Playing Songs Switching the Light Guide On and Off You can switch the Light Guide on the keyboard on or off. The Light Guide can be used as a keyboard guide during song playback or while you are using the Lesson or the Dictionary function. Press the [LIGHT ON/OFF] button to turn the - Yamaha EZ-20 | Owner's Manual - Page 33
This convenient function lets you instantly trigger various musical and rhythmic phrases as you play the EZ-20. There are a total of 19 different sounds or phrases. This function is assigned to the keyboard range of C1-F#2 only when you play back songs that support the function. Select a song that - Yamaha EZ-20 | Owner's Manual - Page 34
you to specify a phrase of a song (between point A and point B) and repeat it - while you play or practice along with it. While playing a song, set point A (the start point). During playback, press the [A-B REPEAT] button once, at the beginning point to be repeated. The A and B points can only be - Yamaha EZ-20 | Owner's Manual - Page 35
. Start the Lesson. When you press one of the LESSON [1]-[3] buttons, the Lesson song starts. The display indicates the notes to play and the Light Guide shows you which key to play. 35 - Yamaha EZ-20 | Owner's Manual - Page 36
play the correct notes before continuing playback of the song. When you play the correct note, the next note to play is indicated. Also, the EZ-20 can sing the next note to play using "A, B, C..." or "Do, Re, Mi..." (page 37). Lesson 3: Minus One ...This lesson step lets you practice playing the - Yamaha EZ-20 | Owner's Manual - Page 37
When the ABC/DoReMi Guide is activated, the EZ-20 sings the next note to play using "A, B, C..." or "Do, Re, Mi..." in Lesson 2. To change the guide voice (ABC or DoReMi), press the [ABC/DoReMi] button (page 43). Press the [OVERALL] button to select "ABC/DoReMi." Press the [+]/[-] buttons to turn - Yamaha EZ-20 | Owner's Manual - Page 38
grades are assigned, depending on your performance: "Try Again," "Good," "Very Good," and "Excellent." When the Talking function (page 39) is on, the EZ-20 also "announces" your grade. Press the [OVERALL] button repeatedly to select "GRADE". Press the [+]/[-] buttons to turn the Grade on or off. The - Yamaha EZ-20 | Owner's Manual - Page 39
Talking This feature "talks" to you through the speakers, "announcing" the Grade comments as well as the titles of the Lesson steps and the names of certain functions. Press the [OVERALL] button repeatedly to select "TALKING". Press the [+]/[-] buttons to turn the Talking on or off. Talking off - Yamaha EZ-20 | Owner's Manual - Page 40
practice playing "a real piano," by pressing the [PORTABLE GRAND] button. When you press the [PORTABLE GRAND] button, the EZ-20 configures all the settings for piano performance. The EZ-20 configures the following settings when you press the [PORTABLE GRAND] Voice 001 Grand Piano Style 089 Stride - Yamaha EZ-20 | Owner's Manual - Page 41
[METRONOME] button for more than one second to display the Metronome time signature setting, and use the numeric keypad or [+]/[-] buttons to change the time signature can adjust the volume of the Metronome sound independently of the other EZ-20 sounds. The volume range is 000-127. 1 Press the [ - Yamaha EZ-20 | Owner's Manual - Page 42
(#089-#096) blend two voices together for a rich, layered sound. ABC (Oboe) voice (#097), DoReMi (Oboe) voice (#098) When you play the keyboard, the EZ-20 "sings" the corresponding notes using ABC or DoReMi. If the Transpose value is adjusted (other than "00"), they sound using Oboe voice. Drum kit - Yamaha EZ-20 | Owner's Manual - Page 43
voice Simply by pressing the [ABC/DoReMi] button, you can select the ABC (Oboe) voice (#097) or DoReMi (Oboe) voice (#098). The setting is also valid for the guide voice for the Lesson function (page 37). 1. Press the [ABC/DoReMi] button repeatedly to select the ABC or DoRemi voice. Pressing the - Yamaha EZ-20 | Owner's Manual - Page 44
TRANSPOSE". Current Transpose value Press the numeric keypad or [+]/[-] buttons to set the desired Transpose value (-12 - +12). To transpose the pitch in the (negative) value. • You can instantly restore the default setting of "00" by pressing both [+]/[-] buttons simultaneously (when Transpose is - Yamaha EZ-20 | Owner's Manual - Page 45
be adjusted over a range of ±50. Press the [OVERALL] button repeatedly to select "TUNING". Current Tuning value Press the numeric keypad or [+]/[-] buttons to set the desired Tuning value (-50 - +50). To tune the pitch down, simultaneously press and hold the [-] button, and use the numeric keypad to - Yamaha EZ-20 | Owner's Manual - Page 46
accompaniment patterns - as well as voice set- tings appropriate for each pattern - for various popular music styles. A total of 100 different styles are available, in several different categories. With the auto accompaniment function, the EZ-20 automatically plays accompaniment parts (bass sound - Yamaha EZ-20 | Owner's Manual - Page 47
Start As soon as you press the [START/STOP] button, the rhythm part starts playing. When you play a chord in the accompaniment key range, the EZ-20 produces the bass and chords. Accompaniment key range When you press the [START/STOP] button, only the rhythm part of the selected accompaniment starts - Yamaha EZ-20 | Owner's Manual - Page 48
like to play. The rhythm part starts playing. Intro Sync start Press the [SYNC START] button. The EZ-20 enters Sync start waiting mode, and the icon flashes. Then press the [INTRO/ENDING] button. The EZ-20 waits for the sync start that begins with an Intro section. When you play a chord in the - Yamaha EZ-20 | Owner's Manual - Page 49
adjusted over a range of 40-240 bpm (beats per minute). Press the [TEMPO/TAP] button. Current Tempo value Press the numeric keypad or [+]/[-] buttons to set the desired value. You can also use the convenient Tap Tempo function to change the tempo by "tapping" a new one in real time. • When the - Yamaha EZ-20 | Owner's Manual - Page 50
Accompaniment Using Auto Accompaniment-Multi Fingering When it is set to on (page 47), the auto accompaniment conventionally playing all the notes of the chord. Whichever method you use, the EZ-20 "understands" what chord you indicate and then automatically generates the accompaniment. Single - Yamaha EZ-20 | Owner's Manual - Page 51
enclosed in parentheses are optional; the chords will be recognized without them. If the chord is inverted (i.e., C-E-G is played as G-C-E), the EZ-20 will still recognize it as a C chord. The chord recognition system also has the following rules and exceptions: • Major 6th chords are recognized - Yamaha EZ-20 | Owner's Manual - Page 52
button. Specify the root of the chord. Press the key on the keyboard that corresponds to the desired chord root (as printed on the panel). Pressing the chord (major, minor, seventh, etc.). Press the key on the keyboard that corresponds to the desired chord type (as printed on the panel). In this - Yamaha EZ-20 | Owner's Manual - Page 53
the notes of the GM7 chord, and the Light Guide indicates which keys to play on the keyboard. The chord name flashes in the display (and a are made up of three notes and are the most basic and common chords in most music. In this triad, the lowest note is the "root." The root is the most important - Yamaha EZ-20 | Owner's Manual - Page 54
are indicated in the chord name of the chord type as a number - the number being the distance of the note from the root. (See the keyboard diagram below.) For example, the minor 6th chord includes the 6th note of the scale, the major 7th chord has the 7th note of the - Yamaha EZ-20 | Owner's Manual - Page 55
the [OVERALL] button repeatedly until "ACMP VOL" appears in the display. Current Accompaniment volume value Press the numeric keypad or [+]/[-] buttons to set the desired Accompaniment Volume value (000-127). The value decreases and the volume level is lowered. The value increases and the volume - Yamaha EZ-20 | Owner's Manual - Page 56
consists of Intro, Main A/B (Fill-in), and Ending sections. Using different sections based on the structure of songs enables you to enhance musical expression. Intro Press the [INTRO/ENDING] button before you start playing to select an Intro section. The Intro section is followed by the - Yamaha EZ-20 | Owner's Manual - Page 57
from here... ...and the Main A or B section begins here. Ending When you press the [INTRO/ENDING] button at the end of the song, the EZ-20 plays the Ending section appropriate for the song, then stops the performance. Ritardando (rit.) If you press the [INTRO/ENDING] button during the Ending - Yamaha EZ-20 | Owner's Manual - Page 58
Functions The EZ-20 also features MIDI terminals, allowing you to interface the EZ-20 with other MIDI instruments and devices. About MIDI MIDI (Musical Instrument Digital Interface) is a worldwide standard that is built into many electronic musical instruments and other digital music related devices - Yamaha EZ-20 | Owner's Manual - Page 59
? In the simple, yet powerful MIDI application example below, the Yamaha QY100 Music Sequencer is used to record and play back performance data played on the EZ20 keyboard. Connect the MIDI IN of the EZ-20 to the MIDI OUT of the QY100 Connect the MIDI OUT of the EZ-20 to the MIDI IN of the QY100 - Yamaha EZ-20 | Owner's Manual - Page 60
Troubleshooting Problem When the EZ-20 is turned on or off, a popping sound is temporarily produced. • The volume level is low. • Tonal quality has degraded. • The display indication is turned off suddenly and the panel settings are reset. Noise is produced from the EZ20. There is no sound even - Yamaha EZ-20 | Owner's Manual - Page 61
of available notes for playing on the keyboard is correspondingly reduced. The same applies to the Split Voice and Song functions. • The Voice List includes MIDI program change numbers for each voice. Use these program change numbers when playing the EZ-20 via MIDI from an external device. • Some - Yamaha EZ-20 | Owner's Manual - Page 62
the songs of the EZ-20 and are selected automatically in song playback. However, they can be selected by a connected MIDI device; the corresponding bank select messages are: MSB = 00H, LSB = 00H. MIDI Program Change# Voice Name 0 Piano 3 Honky-tonk Piano 4 Electric Piano 1 5 Electric Piano - Yamaha EZ-20 | Owner's Manual - Page 63
Three Cat1 Four Go! Cat2 Electronic Bass Drum Electronic Snare Drum Electronic Floor Tom Shaker Electronic Low Tom Dog Electronic Mid Tom Claves Electronic High Tom Rim Shot Bass Drum 1 Bass Drum 2 1 Hi-Hat Close Bank MSB# Bank LSB# Program Change# Keyboard Note# Note 67 G3 68 - Yamaha EZ-20 | Owner's Manual - Page 64
9 16 Beat2 10 16 Beat Pop 11 16 Beat Shuffle 12 16 Beat Ballad BALLAD 13 Piano Ballad 14 8 Beat Ballad 15 6/8 Ballad 16 Fusion Ballad 17 Harp Arpeggio 18 Music Box DANCE 19 Techno 20 Euro Techno 21 Eurobeat 22 Euro House 23 Hip Hop 24 DancePop 25 70s Disco 26 Disco - Yamaha EZ-20 | Owner's Manual - Page 65
s Multi pads Keyboard Note# Note 36 C1 37 C#1 38 D1 39 D#1 40 E1 41 F1 42 F#1 43 G1 44 G#1 45 A1 46 A#1 47 B1 48 C2 49 C#2 50 D2 51 D#2 52 E2 53 F2 54 F#2 Multi Pads Want to play? Piano 1 Check this out! Piano 2 Excellent Very Good Piano 3 Good Piano 4 Try - Yamaha EZ-20 | Owner's Manual - Page 66
Implementation Chart 66 YAMAHA [ Portable Keyboard ] Model EZ-20 MIDI Implementation Chart Function... Transmitted Recognized Basic Default Channel Changed 1 - 7,10 x 1 - 7,10 x Date:26-JAN-2001 Version : 1.0 Remarks Mode Default Messages Altered 3 x Note 0 - 127 Number : True - Yamaha EZ-20 | Owner's Manual - Page 67
67 Prog Change : True # o 0 - 127 *3 o 0 - 127 *3 *3 System Exclusive o *4 o *4 : Song Pos. x x Common : Song Sel. x x : Tune x x System : Clock x Real Time: Commands x Aux :All Sound OFF x :Reset All Cntrls x :Local ON/OFF x :All Notes OFF x Mes- :Active Sense o sages: - Yamaha EZ-20 | Owner's Manual - Page 68
to Voice list. *3 For program change values, refer to the voice list. Program change and other like channel messages received will not affect the EZ-20 panel settings or what is being played on the keyboard. *4 < GM System on > F0H,7EH,7FH, 09H, 01H, F7H All data is restored to the default values - Yamaha EZ-20 | Owner's Manual - Page 69
5.0 kg Supplied Accessories • Music Stand • Owner's Manual • Song Book Optional Accessories • Headphones : HPE-150 • AC power adaptor : PA-3B • Footswitch : FC4, FC5 • Keyboard stand : L-2L, L2C * Specifications and descriptions in this owner's manual are for information purposes only. Yamaha Corp - Yamaha EZ-20 | Owner's Manual - Page 70
38 H Headphones 9 I Intro 56 L Lesson 35 Light Guide 32 M Main A/B 57 Metronome 40 MIDI 58 MIDI Implementation Chart 66 MIDI terminals 58 Multi Fingering 50 Multi Pads 33 Music Stand 9 N numeric keypad 25 O OVERALL 23 P PHONES/OUTPUT jack........ 9 Portable Grand 40 Q Quick Guide 12 - Yamaha EZ-20 | Owner's Manual - Page 71
the servicing of your unit and provide a tracking system if needed. 4. Your owners manual contains important safety and operating instructions. below. Model Serial Sales Slip Purchased from Date Retailer) YAMAHA CORPORATION OF AMERICA Electronic Service Division 6600 Orangethorpe Avenue - Yamaha EZ-20 | Owner's Manual - Page 72
Tel: 02-935-771 SPAIN/PORTUGAL Yamaha-Hazen Electronica Musical, S.A. Ctra. de la Coruna km. 17, 200, 28230 Las Rozas (Madrid) Spain Yamaha Corporation, Pro Audio & Digital Musical Instrument Division Nakazawa-cho 10-1, Hamamatsu, Japan 430-8650 Tel: 053-460-3273 Yamaha PK CLUB (Portable Keyboard - Yamaha EZ-20 | Owner's Manual - Page 73
- Yamaha EZ-20 | Owner's Manual - Page 74
Yamaha Manual Library (English versions only) http://www2.yamaha.co.jp/manual/english/ M.D.G., PAɾDMI Division, Yamaha Corporation © 2001 Yamaha Corporation V APˎˎˎ.ˎ-01A0 Printed in China
-
 1
1 -
 2
2 -
 3
3 -
 4
4 -
 5
5 -
 6
6 -
 7
7 -
8
-
9
-
10
-
11
-
12
-
13
-
14
-
15
-
16
-
17
-
18
-
19
-
20
-
21
-
22
-
23
-
24
-
25
-
26
-
27
-
28
-
29
-
30
-
31
-
32
-
33
-
34
-
35
-
36
-
37
-
38
-
39
-
40
-
41
-
42
-
43
-
44
-
45
-
46
-
47
-
48
-
49
-
50
-
51
-
52
-
53
-
54
-
55
-
56
-
57
-
58
-
59
-
60
-
61
-
62
-
63
-
64
-
65
-
66
-
67
-
68
-
69
-
70
-
71
-
72
-
73
-
74
 |
 |
Owner's Manual