Yamaha HTR-5280 Owner's Manual - Page 40
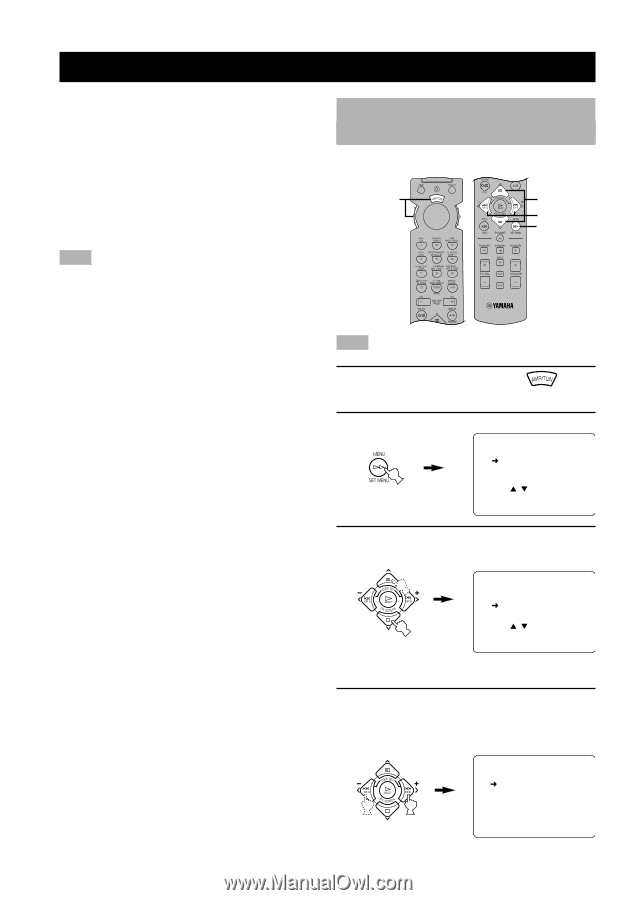
ADVANCED OPERATION, SET MENU, Press SET MENU to enter the SET MENU.
 |
UPC - 072874307073
View all Yamaha HTR-5280 manuals
Add to My Manuals
Save this manual to your list of manuals |
Page 40 highlights
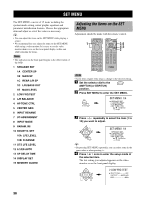
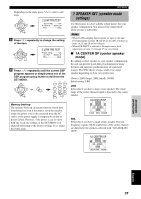
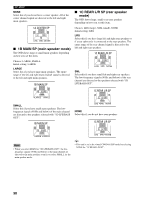
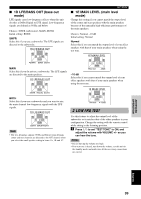
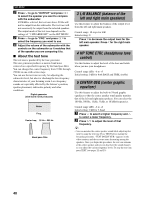
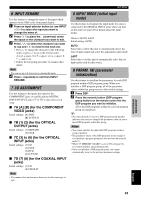
ADVANCED OPERATION SET MENU The SET MENU consists of 15 items including the speaker mode setting, center graphic equalizer and parameter initialization features. Choose the appropriate item and adjust or select the values as necessary. y • You can adjust the items on the SET MENU while playing a source. • We recommend that you adjust the items on the SET MENU while using a video monitor. It is easier to see the video monitor than it is to see the front panel display on this unit while adjusting the items. Note • The indication on the front panel display is the abbreviation of the OSD. 1 SPEAKER SET 1A CENTER SP 1B MAIN SP 1C REAR L/R SP 1D LFE/BASS OUT 1E MAIN LEVEL 2 LOW FRQ TEST 3 L/R BALANCE 4 HP TONE CTRL 5 CENTER GEQ 6 INPUT RENAME 7 I/O ASSIGNMENT 8 INPUT MODE 9 PARAM. INI 10 DOLBY D. SET 10A LFE LEVEL 10B D-RANGE 11 DTS LFE LEVEL 12 6.1/ES AUTO 13 SP DELAY TIME 14 DISPLAY SET 15 MEMORY GUARD Adjusting the Items on the SET MENU Adjustment should be made with the remote control. 1 3,6 4,5 2 Note • Some items require extra steps to change to the desired setting. 1 Set the selector dial to the AMP/TUN (or DSP/TUN) position. 2 Press SET MENU to enter the SET MENU. SET MENU 1/4 1 SPEAKER SET 2 LOW FRQ TEST 3 L/R BALANCE 4 HP TONE CTRL / :Up/Down -/+ Enter 3 Press u/d repeatedly to select the item (1 to 15) you want to adjust. SET MENU 1/4 1 SPEAKER SET 2 LOW FRQ TEST 3 L/R BALANCE 4 HP TONE CTRL / :Up/Down -/+ Enter y • By pressing SET MENU repeatedly, you can select items in the same order as when pressing d. 4 Press j or i once to enter the setup mode of the selected item. The last setting you adjusted appears on the video monitor or on the front panel display. 2 LOW FRQ TEST TEST TONE OFF OUTPUT MAIN L/R FRQ 88Hz 36
-
 1
1 -
2
-
3
-
4
-
5
-
6
-
7
-
8
-
9
-
10
-
11
-
12
-
13
-
14
-
15
-
16
-
17
-
18
-
19
-
20
-
21
-
22
-
23
-
24
-
25
-
26
-
27
-
28
-
29
-
30
-
31
-
32
-
33
-
34
-
 35
35 -
 36
36 -
 37
37 -
 38
38 -
 39
39 -
 40
40 -
 41
41 -
 42
42 -
 43
43 -
 44
44 -
 45
45 -
46
-
47
-
48
-
49
-
50
-
51
-
52
-
53
-
54
-
55
-
56
-
57
-
58
-
59
-
60
-
61
-
62
-
63
-
64
-
65
-
66
-
67
-
68
-
69
-
70
-
71
-
72
-
73
-
74
-
75
-
76
-
77
-
78
 |
 |