Yamaha HTR 6230 Owner's Manual - Page 14
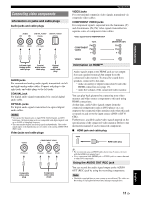
Connecting to the FRONT B, CENTER, and, Russia, Korea, and Asia models - subwoofer
 |
UPC - 027108933054
View all Yamaha HTR 6230 manuals
Add to My Manuals
Save this manual to your list of manuals |
Page 14 highlights
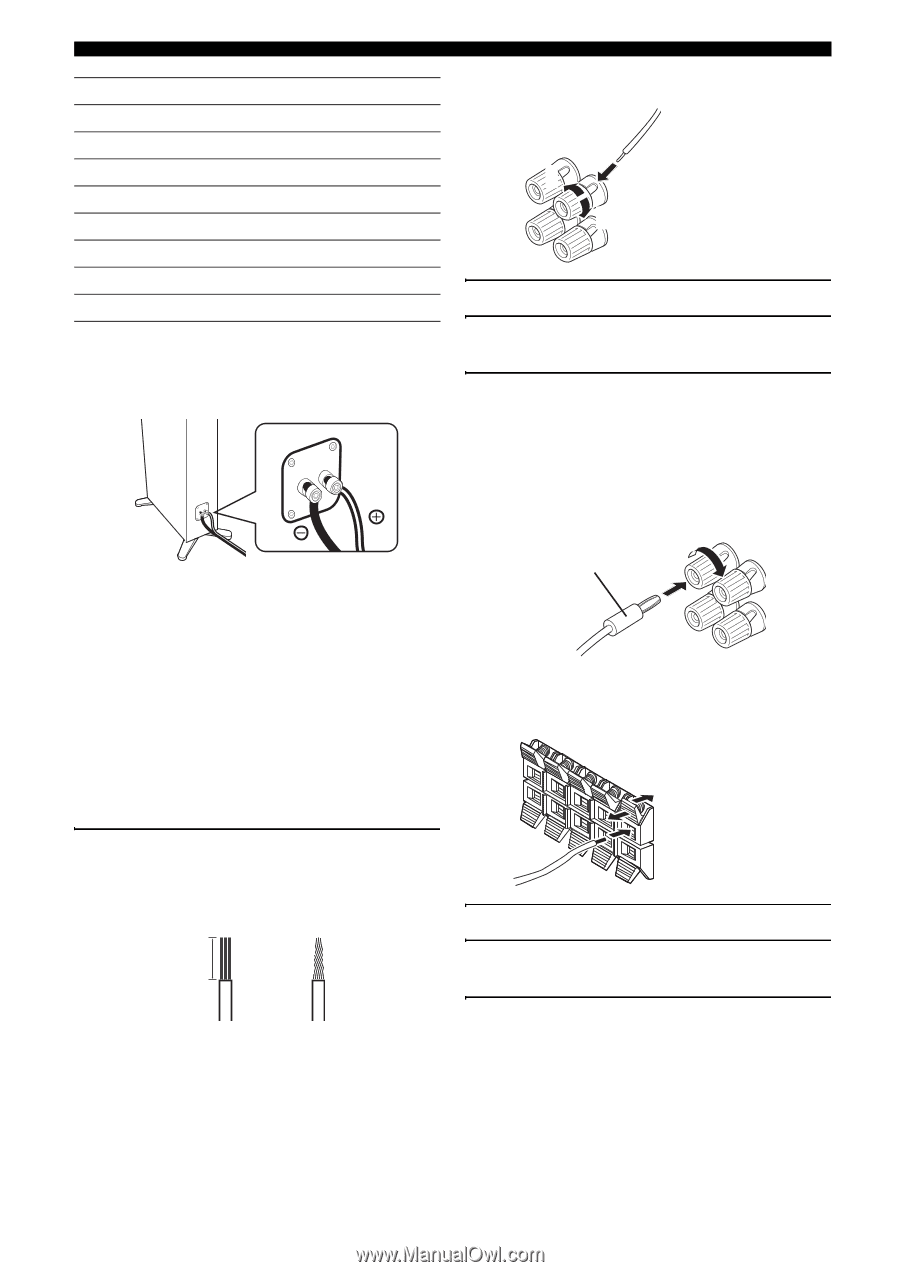
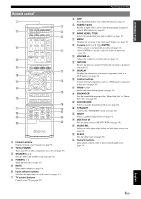
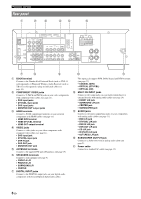
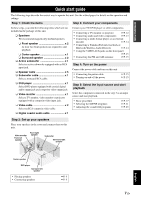
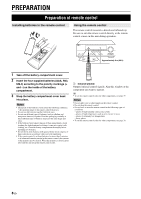
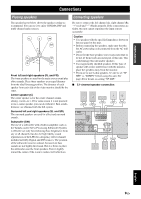
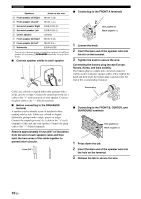
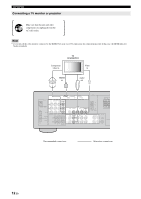
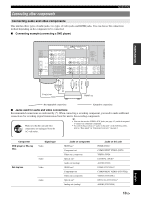
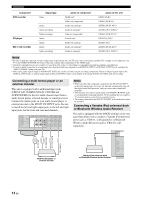
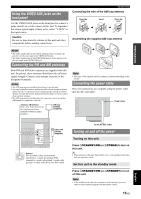
Connections Speakers a Front speaker (A) Right* b Front speaker (A) Left* c Surround speaker Right d Surround speaker Left e Center speaker f Front speaker (B) Right* g Front speaker (B) Left* h Subwoofer Jacks on this unit FRONT A (R) FRONT A (L) SURROUND (R) SURROUND (L) CENTER FRONT B (R) FRONT B (L) SUBWOOFER * You can select the front speaker set from Front speakers (A) and Front speakers (B) by pressing CSPEAKERS repeatedly. See page 18 for details. ■ Connect speaker cables to each speaker ■ Connecting to the FRONT A terminals 2 1 Red: positive (+) Black: negative (-) 3 1 Loosen the knob. 2 Insert the bare end of the speaker wire into the slit on the terminal. 3 Tighten the knob to secure the wire. Connecting the banana plug (except Europe, Russia, Korea, and Asia models) The banana plug is a single-pole electrical connector widely used to terminate speaker cables. First, tighten the knob and then insert the banana plug connector into the end of the corresponding terminal. Cables are colored or shaped differently, perhaps with a stripe, groove or ridge. Connect the striped (grooved, etc.) cable to the "+" (red) terminals of your speaker. Connect the plain cable to the "-" (black) terminals. ■ Before connecting to the SPEAKERS terminal A speaker cord is actually a pair of insulated cables running side by side. Cables are colored or shaped differently, perhaps with a stripe, groove or ridges. Connect the striped (grooved, etc.) cable to the "+" (red) terminals of this unit and your speaker. Connect the plain cable to the "-" (black) terminals. Remove approximately 10 mm (3/8") of insulation from the end of each speaker cable and then twist the bare wires of the cable together to prevent short circuits. 10 mm (3/8") Banana plug ■ Connecting to the FRONT B, CENTER, and SURROUND terminals Red: positive (+) Black: negative (-) 1 Press down the tab. 2 Insert the bare end of the speaker wire into the hole on the terminal. 3 Release the tab to secure the wire. 10 En
-
 1
1 -
2
-
3
-
4
-
5
-
6
-
7
-
8
-
 9
9 -
 10
10 -
 11
11 -
 12
12 -
 13
13 -
 14
14 -
 15
15 -
 16
16 -
 17
17 -
 18
18 -
 19
19 -
20
-
21
-
22
-
23
-
24
-
25
-
26
-
27
-
28
-
29
-
30
-
31
-
32
-
33
-
34
-
35
-
36
-
37
-
38
-
39
-
40
-
41
-
42
-
43
-
44
-
45
-
46
-
47
-
48
-
49
-
50
-
51
-
52
-
53
-
54
-
55
-
56
-
57
-
58
-
59
-
60
-
61
-
62
 |
 |