Yamaha MOX8 Owner's Manual - Page 42
Correcting wrong notes, With the recorded Song selected, press the [EDIT], button to enter Song Edit
 |
UPC - 086792950907
View all Yamaha MOX8 manuals
Add to My Manuals
Save this manual to your list of manuals |
Page 42 highlights
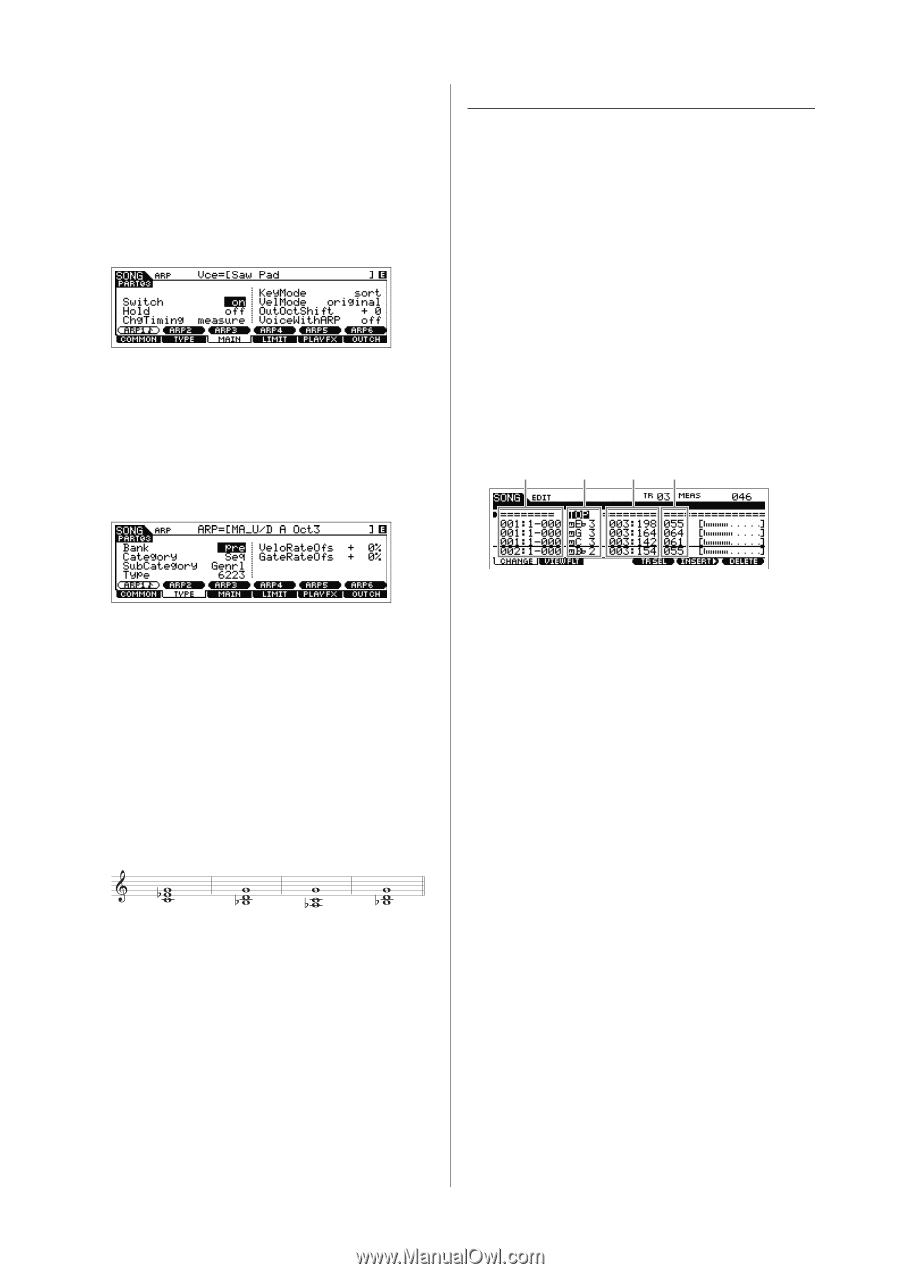
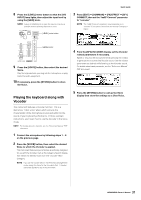
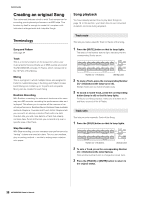
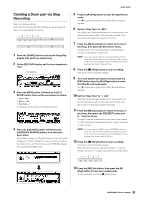
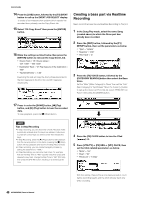
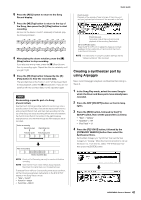
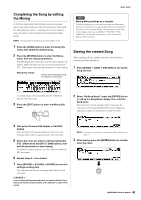
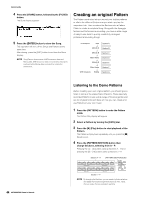
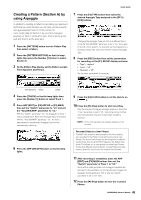
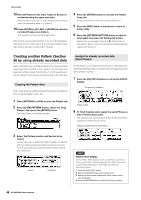
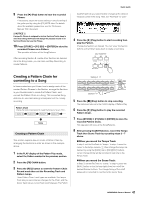
Quick Guide 5 Press ARP [EDIT] or [F3] ARP ED [F3] MAIN, then set the Switch parameter to "on" and set the "VoiceWithARP" parameter to "off." With the "Switch" parameter "on," the Arpeggio of Track 3 can be played back. If the "VoiceWithARP" parameter is set to "on," selecting the Arpeggio Type will change the Voice from the one selected in step 4. This is why you should set the "VoiceWithARP" parameter to "off" here. 6 Press [F2] TYPE [SF1] ARP1, then assign the Arpeggio Type to the [SF1] ARP1 button. On this display, set the parameters as below: • "Bank" = "Pre" • "Category" = "Seq" • "SubCategory" = "Genrl" • "Type" = "6223" Correcting wrong notes If you've played any wrong notes while recording and wish to correct them, press the [EDIT] button from the Song Play mode to go to the Song Edit mode. Song Edit lets you clean up and edit data of already recorded Songs or insert new data to the Songs. Check for any mistakenly recorded or wrong events on the event list display of the Song Edit mode, then correct them as needed. 1 With the recorded Song selected, press the [EDIT] button to enter Song Edit, then press the [F1] CHANGE button. The CHANGE display appears. 2 Press the desired Track number button (from [1] - [3]). The list of the MIDI events recorded to the selected Track in the previous section appears on the display. Location Notes Gate time Velocity If desired, assign different Arpeggio Types to the [SF2] - [SF6] buttons. 7 Press the [REC] button to return to the Song Record display. 8 Press the [P] (Top) button to move to the top of the Song then press the [F] (Play) button to start recording. The [F] (Play) button lamp lights and "RECORDING" appears at the top of the display, indicating that the Recording has already started. After the one-measure leadin count is finished, play the following notation. NOTE All the notes generated via Arpeggio playback will be recorded. 9 After playing the above notation, press the [J] (Stop) button to stop recording. If you play any wrong notes, press the [J] (Stop) button, then try recording again. Repeat as often as necessary until you get it right. 10 Press the [P] (Top) button, followed by the [F] (Play) button to hear the recorded data. The recorded data of Tracks 1, 2 and 3 will be played back. To stop playback, press the [J] (Stop) button. If you are not satisfied with the recorded data, try this operation again. NOTE The Song location at which you edit or input the event is indicated by measure, beat and clock. A quarter note (one beat when the time signature is set to "4/4") consists of 480 divisions. The length of each note (gate time) is indicated by Beat and Clock. For example, 001:000 is equivalent to a quarter note and 000:240 is equivalent to an eighth note. 3 Use the Cursor buttons to move the cursor to the location to be edited, then turn the [DATA] dial to edit the value. When you change the value at the current line, the entire line starts flashing. 4 Before moving the cursor to another line, press the [ENTER] button to fix the value. The edited event line stops flashing. 5 As necessary, correct the other data. If you find unnecessary notes (not described on the notation), move the cursor to the corresponding position then press the [F6] DELETE button. 6 After completing editing, press the [EXIT] button to return to the Song Play display. To confirm the recorded data, press the [P] (Top) button, followed by the [F] (Play) button to start playback. To stop playback, press the [J] button. 42 MOX6/MOX8 Owner's Manual
-
 1
1 -
2
-
3
-
4
-
5
-
6
-
7
-
8
-
9
-
10
-
11
-
12
-
13
-
14
-
15
-
16
-
17
-
18
-
19
-
20
-
21
-
22
-
23
-
24
-
25
-
26
-
27
-
28
-
29
-
30
-
31
-
32
-
33
-
34
-
35
-
36
-
 37
37 -
 38
38 -
 39
39 -
 40
40 -
 41
41 -
 42
42 -
 43
43 -
 44
44 -
 45
45 -
 46
46 -
 47
47 -
48
-
49
-
50
-
51
-
52
-
53
-
54
-
55
-
56
-
57
-
58
-
59
-
60
-
61
-
62
-
63
-
64
-
65
-
66
-
67
-
68
-
69
-
70
-
71
-
72
-
73
-
74
-
75
-
76
 |
 |