Yamaha P-255 Owner's Manual
Yamaha P-255 Manual
 |
View all Yamaha P-255 manuals
Add to My Manuals
Save this manual to your list of manuals |
Yamaha P-255 manual content summary:
- Yamaha P-255 | Owner's Manual - Page 1
ENGLISH FRANÇAIS P 255 DIGITAL PIANO PIANO NUMÉRIQUE PIANO DIGITAL Owner's Manual Mode d'emploi Manual de instrucciones ESPAÑOL EN Before using the instrument, be sure to read "PRECAUTIONS" on pages 4-5. FR Avant d'utiliser l'instrument, lisez attentivement la section « PRÉCAUTIONS D'USAGE » - Yamaha P-255 | Owner's Manual - Page 2
components supplied or; a cart, rack, or stand that is recommended by Yamaha. If a cart, etc., is used, please observe all safety markings and instructions that accompany the accessory product. SPECIFICATIONS SUBJECT TO CHANGE: The information contained in this manual is believed to be correct at - Yamaha P-255 | Owner's Manual - Page 3
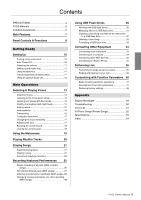
the tone 17 Boosting the overall sound 18 Locking the control panel 18 Using the Metronome 19 Playing Rhythm Tracks 20 Playing Songs 21 Supported song types 21 Playing a song 21 Convenient playback functions 23 Recording Keyboard Performances 25 Simple recording of all parts - Yamaha P-255 | Owner's Manual - Page 4
outlet. Then have the device inspected by Yamaha service personnel. - The power cord or plug becomes frayed or damaged. - It emits unusual smells or smoke. - Some object has been dropped into the instrument. - There is a sudden loss of sound during use of the instrument. CAUTION Always follow the - Yamaha P-255 | Owner's Manual - Page 5
and bundles computer programs and contents in which Yamaha owns copyrights or with respect to which it has license to use others' copyrights. Such copyrighted materials include, without limitation, all computer software, style files, MIDI files, WAVE data, musical scores and sound recordings - Yamaha P-255 | Owner's Manual - Page 6
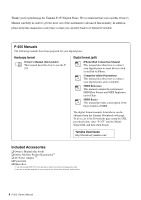
Online Member Product Registration*1 AC Power Adaptor *2 Footswitch Music Rest *1 You will need the PRODUCT ID on the sheet in order to fill out the User Registration form. *2 May not be included depending on your particular area. Please check with your Yamaha dealer. 6 P-255 Owner's Manual - Yamaha P-255 | Owner's Manual - Page 7
remotely control your digital piano for even more convenience and flexibility. By presenting various parameters on-screen, this app allows you to make settings in a visual, more intuitive manner. More details can be found on the following web site. http://www.yamaha.com/kbdapps/ P-255 Owner's Manual - Yamaha P-255 | Owner's Manual - Page 8
Use this button to record what you play on the keyboard. u [PLAY/STOP] button Page 22 Use this button to start and stop playback of Piano Songs (50 8 P-255 Owner's Manual o [TEMPO] button Pages 19, 20, 22 Use this button to adjust the instrument's tempo. !0 [METRONOME] button Page 19 Use this - Yamaha P-255 | Owner's Manual - Page 9
terminal to connect the instrument to an iPhone, iPad, or computer. @7 [PEDAL UNIT] terminal Page 12 Use this terminal to connect an optional pedal unit (sold separately). @8 [DC IN] jack Page 10 Use this jack to connect the power adaptor that came with your digital piano. P-255 Owner's Manual 9 - Yamaha P-255 | Owner's Manual - Page 10
adaptor. If you are going to use your instrument in a live music situation such as on-stage, please read the section Performing Live (page 36). 10 P-255 Owner's Manual Auto Power-Off The Auto Power-Off function automatically turns off your digital piano after a set period of inactivity in order - Yamaha P-255 | Owner's Manual - Page 11
keys. You can also connect either an FC3 Foot Pedal or an FC5 Foot Switch (sold separately). The FC3 supports half-damper playing. Setting up the music rest To set up the music rest, insert it into the groove at the back of the control panel. FC4 Half-damper playing Your digital piano - Yamaha P-255 | Owner's Manual - Page 12
the digital piano using a full set of three pedals. In such a case, please set up the instrument and pedal unit on an L-255 Keyboard Stand (sold selected, the pedal on the left will instead control the speed of the rotary speaker effect. Using pedals for Play and Stop operations You can configure - Yamaha P-255 | Owner's Manual - Page 13
your digital piano can adjust the loudness of Voices based on the strength of your playing, certain Voices do not support this Touch Sensitivity feature. Refer to the Voice List (page 51) for details. 2 Play the keyboard to hear how the selected Voice sounds. Listening to the Voice demo songs - Yamaha P-255 | Owner's Manual - Page 14
two Voices on the keyboard and play them together. By combining Voices of different types in this way, you can create a composite Voice of greater richness and texture. 1 Select the two Voices you wish to layer using the corresponding Voice buttons. Your digital piano will get the selected Voices - Yamaha P-255 | Owner's Manual - Page 15
the left side. Use the corresponding Voice button with the [SPLIT] button held down to make your selection. (Whenever the [SPLIT] button is being held down, the Voice button corresponding to the left side's Voice will light up.) Play the keyboard and listen to the sounds produced. When you activate - Yamaha P-255 | Owner's Manual - Page 16
the keyboard and song playback. In this way, you can match your playing to the key of digital piano would transpose it to the key of F major. Effect types Display Type Et1 Chorus Et2 Phaser Et3 Tremolo Et4 Rotary speaker OFF Off Description This setting can be used to make the Voice sound - Yamaha P-255 | Owner's Manual - Page 17
music. Tuning is set using Function parameter F1. Refer to page 41 for details. Adjusting the tone Using your digital piano's Equalizer function, you can adjust the tone of overall instrument by increasing or decreasing the gain in three different frequency bands. The [EQ] section of the control - Yamaha P-255 | Owner's Manual - Page 18
, you can use the Equalizer (EQ) to further accentuate the effect of the Sound Boost function (page 17). • If performing live as part of a band See page 36. • If singing and playing on your own See page 38. Locking the control panel As described below, your digital piano's Panel Lock function - Yamaha P-255 | Owner's Manual - Page 19
the Metronome Playing your digital piano along with the built-in metronome is a great way to perfect your timing. The following describes how to use this function. 1 Turn on the metronome. Press the [METRONOME applied, canceling any setting you have made on the instrument. P-255 Owner's Manual 19 - Yamaha P-255 | Owner's Manual - Page 20
digital piano's Rhythm function provides ten different rhythm tracks for you to play along with. The following describes how to use using the [-/NO] and [+/YES] buttons with the [TEMPO] button held down. Settings between 5 and 500 beats per minute (BPM) are supported Waltz 20 P-255 Owner's Manual - Yamaha P-255 | Owner's Manual - Page 21
This data is similar to sheet music in that it indicates the keys that should be played, as well as when and how hard they should be played, in order to reproduce a specific piece of music. Using this data, your digital piano's tone generator can recreate the sound of the recorded performance. MIDI - Yamaha P-255 | Owner's Manual - Page 22
are not found on your digital piano (such as XG or GM songs), they may not sound as originally intended. If MIDI channels 1 and 2 use piano sounds in such a case, you can mute all may need to change the character code using the corresponding Function parameter (page 40). 22 P-255 Owner's Manual - Yamaha P-255 | Owner's Manual - Page 23
(MIDI songs) Using your digital piano's A-B Repeat function using the other part as a guide. 3 Stop playback. A song will stop automatically after playing to the end, and in such a case sound will be played before returning to the A point in order to help you stay in time. P-255 Owner's Manual 23 - Yamaha P-255 | Owner's Manual - Page 24
your digital piano, you can configure either the center or left pedal to operate in the same way as the control panel's [PLAY/STOP] button using the corresponding Function parameter (page 40). This can be very useful if you wish to start or stop playback without removing your hands from the keyboard - Yamaha P-255 | Owner's Manual - Page 25
an audio song. This method does not support the recording of individual parts. Audio recordings created using your digital piano are saved in 44.1-kHz, 16-bit, be selected; alternatively, an S-type song number will be selected in the case of an MIDI-format Import Song. Meanwhile, if a Preset Song is - Yamaha P-255 | Owner's Manual - Page 26
select a Voice, use the corresponding Voice button (page 13). If necessary, you can also set the time signature (page 19), the Effect function (page 16), and other parameters. NOTE • Your digital piano also supports recording together with a rhythm track (page 20). In such a case, the rhythm track - Yamaha P-255 | Owner's Manual - Page 27
Recording Keyboard Performances Recording individual parts (MIDI songs) When recording in MIDI, you can record the left-hand and right-hand parts separately as described below. 1 Set up the digital piano for recording. : That part will start to play when you begin recording. P-255 Owner's Manual 27 - Yamaha P-255 | Owner's Manual - Page 28
Recording Keyboard Performances Deleting recorded parts individually (MIDI songs) Using the following procedure, you can individually delete the left and right parts of a recorded MIDI-format User Song. To delete both parts, carry out this procedure once for each. In the case of User Songs recorded - Yamaha P-255 | Owner's Manual - Page 29
leave Record mode. NOTICE • You should never turn off the digital piano while dashes ("-") are scrolling across the display. Failure to observe this precaution may result in all song data (page 21), including Import Songs, being deleted. Recording Keyboard Performances P-255 Owner's Manual 29 - Yamaha P-255 | Owner's Manual - Page 30
USB devices, refer to the owner's manual of the USB device. Compatible USB devices • USB flash memory Other USB devices such as a computer keyboard or mouse cannot be used. The instrument does not necessarily support all commercially available USB devices. Yamaha cannot guarantee operation of USB - Yamaha P-255 | Owner's Manual - Page 31
: • Song playback (page 21) • Recording (page 25) NOTE • Your digital piano can recognize and play a maximum of 999 Import Song files on a USB flash drive. Song folder Song file Song folder Song file Song folder Songs here are not playable. Song file Song folder P-255 Owner's Manual 31 - Yamaha P-255 | Owner's Manual - Page 32
not selected in Step 1. In such a case, return to Step 1 and select a User Song. NOTE • It will not be possible to copy a User Song if there is insufficient free space on the USB flash drive. In such a case, free up some memory by deleting any unnecessary files (page 33). 32 P-255 Owner's Manual - Yamaha P-255 | Owner's Manual - Page 33
. If you wish to cancel the Format operation, press the [-/NO] button while "For" or "n Y" is being shown. NOTICE • You should never turn off the digital piano or remove the USB flash drive while dashes ("-") are scrolling across the display. P-255 Owner's Manual 33 - Yamaha P-255 | Owner's Manual - Page 34
manual Computer-related Operations, which can be freely downloaded from the Yamaha web site. [USB TO HOST] terminal Digital piano Stereo mini-plug Headphones jack Stereo mini-plug Stereo audio cable Signal flow [L/L+R] and [R] AUX OUT jacks-Listening to the digital piano using external speakers - Yamaha P-255 | Owner's Manual - Page 35
the iPhone/iPad Connection Manual, which is freely available from the Yamaha web site (page 6). Apps Designed specifically for your digital piano, P-255 Controller is a free app that makes your instrument more convenient to operate. For more details of this and other supported applications, refer to - Yamaha P-255 | Owner's Manual - Page 36
live music club, performing arts venue, or the like. Stage setup and signal flow The sound from your digital piano will be sent to a PA mixer in order that its volume can be balanced with that of the other instruments. From there, the mixed sound is amplified and sent to the front-of-house speakers - Yamaha P-255 | Owner's Manual - Page 37
• Foot switch operating correctly as a sustain pedal (page 11). • Reverb turned off (the PA operator will normally add the right amount of reverb using the PA mixer). OFF Determine the best digital-piano volumes. When asked by the PA operator to output a sound, play the digital piano as you would - Yamaha P-255 | Owner's Manual - Page 38
See page 11.) P-255 rear panel Bundled foot switch Connect the instrument's output to the keyboard amplifier. Keyboard amplifiers normally require sound to be input in mono. For this reason, you should connect the digital piano's [L/L+R] AUX OUT jack to the amplifier's input using a standard mono - Yamaha P-255 | Owner's Manual - Page 39
three different types of sound boost. (See page 18.) 1 2 3 Check your settings. Once turned on, ensure that your digital piano is set up as follows. • Auto Power-Off function disabled (page 10) • Foot switch operating correctly as a sustain pedal (page 11) • Built-in speakers turned off if you - Yamaha P-255 | Owner's Manual - Page 40
sound settings String resonance depth Sustain sample depth Key-off sample volume Intro on/off status Ending on/off status Metronome volume Rhythm playback volume Audio song playback volume MIDI song playback volume Volume settings Speaker on/off status AUX OUT volume control Fixed - Yamaha P-255 | Owner's Manual - Page 41
digital piano along with other instruments or recorded music. NOTE • Audio song playback cannot be tuned. Using the [-/NO] and [+/YES] buttons, you can lower and raise the pitch of the A3 key in units of approximately 0.2 Hz. The tuning value is shown as a two-digit users. P-255 Owner's Manual 41 - Yamaha P-255 | Owner's Manual - Page 42
can change the nuances of musical compositions. Often used in the eras of Bach and Beethoven, they are detune Use this parameter to slightly detune the two Voices relative to one another in order to thicken their combined sound. • Available settings: -20 to 0 to 20 ( 42 P-255 Owner's Manual - Yamaha P-255 | Owner's Manual - Page 43
your digital piano, you can use this parameter to configure either the center or left pedal to operate in the same way as the control panel's using this parameter, you can adjust the depth of that effect. (*: Sold separately.) • Available settings: 1 to 10 • Default setting: 5 P-255 Owner's Manual - Yamaha P-255 | Owner's Manual - Page 44
. The volume of the song can then be set using the [-/NO] and [+/YES] buttons. F6.5 Speaker on/off status Using this parameter, you can specify whether the digital piano's built-in speakers should also produce sound when external speakers are connected (page 34). • Available settings: ON (As long - Yamaha P-255 | Owner's Manual - Page 45
be sent to the connected MIDI device. F7.4 Local control on/off status Using this parameter, you can specify whether or not the digital piano's internal tone generator is actually to produce sound in response to playing of the keyboard. Normally, you would have the tone generator respond to signals - Yamaha P-255 | Owner's Manual - Page 46
(but not the sound being played using the keyboard). This parameter can be used to turn on and off the exchange of MIDI Control Change messages as appropriate. NOTE • Refer to the MIDI Reference pdf manual for details of the Control Change data supported by your digital piano. • Available settings - Yamaha P-255 | Owner's Manual - Page 47
. • Do not manually change the backup file name by using a computer; doing so will render the file unloadable. F8.8 Auto Power-Off Using this parameter, you can set the period of inactivity after which the Auto Power-Off function (page 10) will automatically turn off the digital piano. • Available - Yamaha P-255 | Owner's Manual - Page 48
in all song data (page 21), including Import Songs, being deleted. NOTE • Default settings The term "default settings" as used in this manual refers to the settings from when you first turned on the digital piano-that is, the settings applied before shipment from the factory. 48 P-255 Owner's Manual - Yamaha P-255 | Owner's Manual - Page 49
flash drive cannot be used with your digital piano or the number of connected flash drives exceeds the supported limit. Refer to the section "Working with USB flash drives" (page 30). The control panel is locked (page 18). To unlock it, press the [EFFECT] and [SOUND BOOST] buttons together. Press - Yamaha P-255 | Owner's Manual - Page 50
a problem. The USB flash drive plugged into the digital piano freezes and/or stops working. If a message has been shown on the display, refer to the section Display Messages (page 49) for more information. If no message has been shown, the USB flash drive may be broken. 50 P-255 Owner's Manual - Yamaha P-255 | Owner's Manual - Page 51
Key-off sampling: This feature reproduces the delicate noises produced when keys are released. Sustain sampling: This feature reproduces an authentic sustain sound when the damper pedal is pressed. String resonance: This feature simulates the string resonance of a real piano. P-255 Owner's Manual - Yamaha P-255 | Owner's Manual - Page 52
50 Piano Songs (Preset Songs) Song No. P.01 P.02 P.03 P.04 P.05 P.06 P.07 P.08 P.09 P.10 P.11 P.12 P.13 P.14 P.15 P.16 P.17 P.18 P.19 P.20 P.21 P.22 P.23 P.24 P.25 P.26 P.27 P.28 P.29 P.30 P. éniz S.Joplin S.Joplin C.A.Debussy C.A.Debussy C.A.Debussy C.A.Debussy C.A.Debussy 52 P-255 Owner's Manual - Yamaha P-255 | Owner's Manual - Page 53
(MIDI) Songs (Audio) Overall Controls Storage Connectivity Amplifiers and Speakers Power Supply Dimensions (W x D x H) Weight Number of Keys Keyboard Type Touch Response Display Panel Language Piano Sound Piano Tone Sustain Samples Generation Key-off Samples Effects String Resonance - Yamaha P-255 | Owner's Manual - Page 54
pedal 11 T Tempo 19, 20 Tempo (MIDI song 22 Time signature 19 Touch sensitivity 17, 45 Transpose 16 Troubleshooting 50 Tuning 17, 41 Tuning system 41 U USB Flash Drives 30 User Songs 21 V Voice 13 Voice demo songs 13 Voice List 51 Volume 11 Volume settings 44 54 P-255 Owner's Manual - Yamaha P-255 | Owner's Manual - Page 55
equipment generates/uses radio frequencies and, if not installed and used according to the instructions found in the users manual, may Yamaha Corporation of America Address : 6600 Orangethorpe Ave., Buena Park, Calif. 90620 Telephone : 714-522-9011 Type of Equipment : Digital Piano Model Name : P-255 - Yamaha P-255 | Owner's Manual - Page 56
Users on Collection and Disposal of Old Equipment This symbol on the products, packaging, and/or accompanying documents means that used . By disposing of these products correctly, you will help to save service or the point of sale where you purchased the items. [For business users 255 Owner's Manual - Yamaha P-255 | Owner's Manual - Page 57
or operation or failure to follow instructions according to the Owner's Manual for this product; any shipment of the product (claims must be presented to the carrier); repair or attempted repair by anyone other than YAMAHA or an authorized YAMAHA Service Center; (b) any unit which has been - Yamaha P-255 | Owner's Manual - Page 58
58 P-255 Owner's Manual - Yamaha P-255 | Owner's Manual - Page 59
NORTH AMERICA CANADA Yamaha Canada Music Ltd. 135 Milner Avenue, Toronto, Ontario, M1S 3R1, Canada Tel: 416-298-1311 U.S.A. Yamaha Corporation of KONG Tom Lee Music Co., Ltd. 11/F., Silvercord Tower 1, 30 Canton Road, Tsimshatsui, Kowloon, Hong Kong Tel: 2737-7688 INDIA Yamaha Music India Pvt. Ltd. - Yamaha P-255 | Owner's Manual - Page 60
Yamaha Global Site http://www.yamaha.com/ Yamaha Downloads http://download.yamaha.com/ C.S.G., DMI Development Division © 2013 Yamaha Corporation 310POTO-A0 Printed in Japan ZG80540
-
 1
1 -
 2
2 -
 3
3 -
 4
4 -
 5
5 -
 6
6 -
 7
7 -
8
-
9
-
10
-
11
-
12
-
13
-
14
-
15
-
16
-
17
-
18
-
19
-
20
-
21
-
22
-
23
-
24
-
25
-
26
-
27
-
28
-
29
-
30
-
31
-
32
-
33
-
34
-
35
-
36
-
37
-
38
-
39
-
40
-
41
-
42
-
43
-
44
-
45
-
46
-
47
-
48
-
49
-
50
-
51
-
52
-
53
-
54
-
55
-
56
-
57
-
58
-
59
-
60
 |
 |

Manual de instrucciones
Mode d'emploi
Owner’s Manual
Before using the instrument, be sure to read “PRECAUTIONS” on pages 4–5.
Avant d’utiliser l’instrument, lisez attentivement la section « PRÉCAUTIONS D'USAGE » aux pages 4 et 5.
Antes de utilizar el instrumento, lea las “PRECAUCIONES”, en las páginas 4–5.
ES
FR
EN
P
255
PIANO NUMÉRIQUE
DIGITAL PIANO
PIANO DIGITAL
ENGLISH
FRANÇAIS
ESPAÑOL