Yamaha P-90 Owner's Manual
Yamaha P-90 Manual
 |
View all Yamaha P-90 manuals
Add to My Manuals
Save this manual to your list of manuals |
Yamaha P-90 manual content summary:
- Yamaha P-90 | Owner's Manual - Page 1
Owner's Manual Bedienungsanleitung Mode d'emploi Manual de instrucciones - Yamaha P-90 | Owner's Manual - Page 2
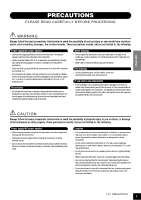
only with the components supplied or; a cart, rack, or stand that is recommended by Yamaha. If a cart, etc., is used, please observe all safety markings and instructions that accompany the accessory product. SPECIFICATIONS SUBJECT TO CHANGE: The information contained in this manual is believed to be - Yamaha P-90 | Owner's Manual - Page 3
below to avoid the possibility of serious injury or even death from electrical shock, short-circuiting, damages, fire or other hazards. These precautions include, but are not limited to, the following: Power supply/AC power adaptor • Only use the voltage specified as correct for the instrument. The - Yamaha P-90 | Owner's Manual - Page 4
, turn off the power immediately and unplug the power cord from the AC outlet. Then have the instrument inspected by qualified Yamaha service personnel. • Do not place vinyl, plastic or rubber objects on the instrument, since this might discolor the panel or keyboard. • Do not rest your weight on, or - Yamaha P-90 | Owner's Manual - Page 5
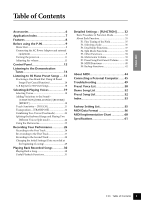
7 Features 8 Before using the P-90 9 Music Rest 9 Connecting the AC Power Adaptor and external equipment 9 Turning the power on 11 Adjusting the volume 11 Control Panel 12 Listening to the Demonstration Tunes 14 Listening to 50 Piano Preset Songs .....15 Practicing a One-Hand Part Using 50 - Yamaha P-90 | Owner's Manual - Page 6
ENGLISH Thank you for purchasing the Yamaha P-90 Electronic Piano! We recommend that you read this manual carefully so that you can fully take advantage of the advanced and convenient functions of the P-90. We also recommend that you keep this manual in a safe and handy place for future reference. - Yamaha P-90 | Owner's Manual - Page 7
Practicing using your recorded song Recording Your Performance" on page 26 Recording Recording your performance Recording Your Performance" on page 26 Settings Adjusting the P-90 settings Detailed Settings - [FUNCTION]" on page 32 Connecting the P-90 to other devices What is MIDI? ..."About MIDI - Yamaha P-90 | Owner's Manual - Page 8
Features The Yamaha P-90 Electronic Piano offers unmatched sonic realism and natural grand-piano type playability as well as Yamaha's original "AWM Dynamic Stereo Sampling" tone-generation technology for rich, musical voices, and a special "Graded Hammer" keyboard that provides graded key weight - Yamaha P-90 | Owner's Manual - Page 9
Before using the P-90 Music Rest Attach the music rest to the instrument by inserting it into the slot at the rear of the control panal. ENGLISH Connecting the AC Power Adaptor and external equipment SUSTAIN IN MIDI OUT HOST SELECT TO HOST MIDI Mac PC-2 PC-1 5 6 7 DC IN 12V STANDBY / ON - Yamaha P-90 | Owner's Manual - Page 10
the P-90 to other electronic components, turn off the power for all components. Before turning the power on or off for all components, set all-volume levels to minimum. CAUTION When turning the power on, first turn the P-90's power on and then turn the power on of the external amplifier/speaker system - Yamaha P-90 | Owner's Manual - Page 11
make sure you unplug the AC power adaptor from the wall AC outlet. Adjusting the volume If an external audio device is connected, use the P-90's [MASTER VOLUME] control and the volume control of your external audio device to adjust the volume while you play the keyboard to produce sound. If you are - Yamaha P-90 | Owner's Manual - Page 12
MAX MELLOW BRILLIANCE BRIGHT DEMO START/ STOP TEMPO/ FUNCTION# FUNCTION METRONOME - / NO + / YES TEMPO/ OTHER VALUE PRES A-1 B-1 C0 D0 E0 F0 G0 A0 B0 C1 D1 E1 F1 G1 A1 B1 C2 D2 E2 F2 G2 A2 B2 C3 1 [MASTER VOLUME] Control The [MASTER VOLUME] control adjusts the P-90's output volume (level - Yamaha P-90 | Owner's Manual - Page 13
for the Piano" Function number Parameter value - / NO + / YES ER VALUE PRESET TRACK START/ STOP REC SONG ROOM CHORUS HALL 1 PHASER HARD HALL 2 TREMOLO MEDIUM STAGE DELAY SOFT ON GRAND GRAND E. PIANO E. PIANO CLAVI./ VIBES/ PIANO 1 PIANO 2 1 2 HARPSI. GUITAR CHURCH ORGAN - Yamaha P-90 | Owner's Manual - Page 14
MEDIUM STAGE DELAY SOFT ON GRAND GRAND E. PIANO E. PIANO CLAVI./ VIBES/ PIANO 1 PIANO 2 1 2 HARPSI. GUITAR CHURCH ORGAN JAZZ ORGAN STRINGS CHOIR WOOD BASS E.BASS VARIATION SPLIT REVERB EFFECT TOUCH TRANSPOSE VOICE ELECTRONIC PIANO Procedure 1. Turn the power on. (In case the power - Yamaha P-90 | Owner's Manual - Page 15
DEMO START/ STOP TEMPO/ FUNCTION# FUNCTION METRONOME - / NO + / YES TEMPO/ OTHER VALUE PRESET TRACK START/ STOP REC SONG ROOM CHORUS HALL 1 PHASER HARD HALL 2 TREMOLO MEDIUM STAGE DELAY SOFT ON GRAND GRAND E. PIANO E. PIANO CLAVI./ VIBES/ PIANO 1 PIANO 2 1 2 HARPSI. GUITAR - Yamaha P-90 | Owner's Manual - Page 16
DEMO START/ STOP TEMPO/ FUNCTION# FUNCTION METRONOME - / NO + / YES TEMPO/ OTHER VALUE PRESET TRACK START/ STOP REC SONG ROOM CHORUS HALL 1 PHASER HARD HALL 2 TREMOLO MEDIUM STAGE DELAY SOFT ON GRAND GRAND E. PIANO E. PIANO CLAVI./ VIBES/ PIANO 1 PIANO 2 1 2 HARPSI. GUITAR - Yamaha P-90 | Owner's Manual - Page 17
start playing on the keyboard. To engage the Synchro Start function press the SONG [START/STOP] button while holding the part button for the ON part. A dot will appear mode. Both parts are automatically turned ON whenever a new song is selected. ENGLISH P-90 Listening to 50 Piano Preset Songs 17 - Yamaha P-90 | Owner's Manual - Page 18
DEMO START/ STOP TEMPO/ FUNCTION# FUNCTION METRONOME - / NO + / YES TEMPO/ OTHER VALUE PRESET TRACK START/ STOP REC SONG ROOM CHORUS HALL 1 PHASER HARD HALL 2 TREMOLO MEDIUM STAGE DELAY SOFT ON GRAND GRAND E. PIANO E. PIANO CLAVI./ VIBES/ PIANO 1 PIANO 2 1 2 HARPSI. GUITAR - Yamaha P-90 | Owner's Manual - Page 19
DEMO START/ STOP TEMPO/ FUNCTION# FUNCTION METRONOME - / NO + / YES TEMPO/OTHER VALUE PRESET TRACK START/ STOP REC SONG ROOM CHORUS HALL 1 PHASER HARD HALL 2 TREMOLO MEDIUM STAGE DELAY SOFT ON GRAND GRAND E. PIANO E. PIANO CLAVI./ VIBES/ PIANO 1 PIANO 2 1 2 HARPSI. GUITAR - Yamaha P-90 | Owner's Manual - Page 20
control can be used to change the tonality or "timbre" of the sound output. The control range is from MELLOW to BRIGHT. [REVERB] This control enables you to select various digital [GRAND PIANO 1] voices are selected. Adjusting Reverb Depth Adjust the reverb depth for the selected voice by using the - Yamaha P-90 | Owner's Manual - Page 21
DEMO START/ STOP TEMPO/ FUNCTION# FUNCTION METRONOME - / NO + / YES TEMPO/ OTHER VALUE PRESET TRACK START/ STOP REC SONG ROOM CHORUS HALL 1 PHASER HARD HALL 2 TREMOLO MEDIUM STAGE DELAY SOFT ON GRAND GRAND E. PIANO E. PIANO CLAVI./ VIBES/ PIANO 1 PIANO 2 1 2 HARPSI. GUITAR - Yamaha P-90 | Owner's Manual - Page 22
DEMO START/ STOP TEMPO/ FUNCTION# FUNCTION METRONOME - / NO + / YES TEMPO/ OTHER VALUE PRESET TRACK START/ STOP REC SONG ROOM CHORUS HALL 1 PHASER HARD HALL 2 TREMOLO MEDIUM STAGE DELAY SOFT ON GRAND GRAND E. PIANO E. PIANO CLAVI./ VIBES/ PIANO 1 PIANO 2 1 2 HARPSI. GUITAR - Yamaha P-90 | Owner's Manual - Page 23
DEMO START/ STOP TEMPO/ FUNCTION# FUNCTION METRONOME - / NO + / YES TEMPO/ OTHER VALUE PRESET TRACK START/ STOP REC SONG ROOM CHORUS HALL 1 PHASER HARD HALL 2 TREMOLO MEDIUM STAGE DELAY SOFT ON GRAND GRAND E. PIANO E. PIANO CLAVI./ VIBES/ PIANO 1 PIANO 2 1 2 HARPSI. GUITAR - Yamaha P-90 | Owner's Manual - Page 24
DEMO START/ STOP TEMPO/ FUNCTION# FUNCTION METRONOME - / NO + / YES TEMPO/ OTHER VALUE PRESET TRACK START/ STOP REC SONG ROOM CHORUS HALL 1 PHASER HARD HALL 2 TREMOLO MEDIUM STAGE DELAY SOFT ON GRAND GRAND E. PIANO E. PIANO CLAVI./ VIBES/ PIANO 1 PIANO 2 1 2 HARPSI. GUITAR - Yamaha P-90 | Owner's Manual - Page 25
DEMO START/ STOP TEMPO/ FUNCTION# FUNCTION METRONOME - / NO + / YES TEMPO/ OTHER VALUE PRESET TRACK START/ STOP REC SONG ROOM CHORUS HALL 1 PHASER HARD HALL 2 TREMOLO MEDIUM STAGE DELAY SOFT ON GRAND GRAND E. PIANO E. PIANO CLAVI./ VIBES/ PIANO 1 PIANO 2 1 2 HARPSI. GUITAR - Yamaha P-90 | Owner's Manual - Page 26
DEMO START/ STOP TEMPO/ FUNCTION# FUNCTION METRONOME - / NO + / YES TEMPO/ OTHER VALUE PRESET TRACK START/ STOP REC SONG ROOM CHORUS HALL 1 PHASER HARD HALL 2 TREMOLO MEDIUM STAGE DELAY SOFT ON GRAND GRAND E. PIANO E. PIANO CLAVI./ VIBES/ PIANO 1 PIANO 2 1 2 HARPSI. GUITAR - Yamaha P-90 | Owner's Manual - Page 27
as you play a note on the keyboard or press the SONG [START/STOP] button value in kilobytes (a unit used of measurement for data) indicates how much space remains available for recording on the P-90 This section explains how to record again in case your performance was not satisfactory. 1. Select - Yamaha P-90 | Owner's Manual - Page 28
Track This section explains how to record another part on the second track. 1. Select a voice Select a recording track. Select a track that you have not already used for recording. The selected track's indicator lights up red. (The ) • [EFFECT] type (including OFF) 28 P-90 Recording Your Performance - Yamaha P-90 | Owner's Manual - Page 29
controls. For example, if you wish to change the recorded voice from [E. PIANO 1] to [E. PIANO 2], press the [E. PIANO 2] button. Be careful not to press the SONG [START/STOP] button or a key on the keyboard made to the data shared by two tracks are also canceled.) P-90 Recording Your Performance 29 - Yamaha P-90 | Owner's Manual - Page 30
DEMO START/ STOP TEMPO/ FUNCTION# FUNCTION METRONOME - / NO + / YES TEMPO/ OTHER VALUE PRESET TRACK START/ STOP REC SONG ROOM CHORUS HALL 1 PHASER HARD HALL 2 TREMOLO MEDIUM STAGE DELAY SOFT ON GRAND GRAND E. PIANO E. PIANO CLAVI./ VIBES/ PIANO 1 PIANO 2 1 2 HARPSI. GUITAR - Yamaha P-90 | Owner's Manual - Page 31
begin playing on the keyboard. This function is useful when you wish to match the timing of the beginning of the playback sound and the start of your own performance. Tracks can be turned on or off before or during playback. If both tracks are turned off on the P-90, playback will not start - Yamaha P-90 | Owner's Manual - Page 32
P-90 has nine main functions. Some of these main functions consist of a set of sub-modes. Parameter List Function Fine Tuning of the Pitch Selecting a Scale Dual Mode Functions Split Mode Functions Other Functions Metronome Volume Preset Song Part Cancel Volume MIDI Functions Backup Functions Sub - Yamaha P-90 | Owner's Manual - Page 33
DEMO START/ STOP TEMPO/ FUNCTION# FUNCTION METRONOME - / NO + / YES TEMPO/ OTHER VALUE PRESET TRACK START/ STOP REC SONG ROOM CHORUS HALL 1 PHASER HARD HALL 2 TREMOLO MEDIUM STAGE DELAY SOFT ON GRAND GRAND E. PIANO E. PIANO CLAVI./ VIBES/ PIANO 1 PIANO 2 1 2 HARPSI. GUITAR - Yamaha P-90 | Owner's Manual - Page 34
# FUNCTION LCD indication Engage the respective sub-mode. - / NO + / YES Select a desired sub-mode. LCD indication Change the value. 5. Do the following when you finish using the func- tion. Press the [FUNCTION] button to exit function mode. The [FUNCTION] button indicator will go dark. 34 P-90 - Yamaha P-90 | Owner's Manual - Page 35
function is useful when you play the P-90 along with other instruments or CD music. 1. Engage Function mode and select . 2. Use display indi- cates a value in Hz < ... also use the keyboard to set the pitch (in any mode other than Function mode). • Refer to "Part Names" on page 12 for - Yamaha P-90 | Owner's Manual - Page 36
into twelve equal intervals. Currently the most popular piano tuning scale. PureMajor/PureMinor: Based on natural overtones, three major chords using these scales produce a beautiful, pure sound. They are sometimes used for chorus parts. Pythagorean: This scale, designed by Pythagoras, a Greek - Yamaha P-90 | Owner's Manual - Page 37
button to engage the Dual mode function's sub-mode, then use the [TEMPO/FUNCTION# ▼, ▲] buttons to select the desired sub-mode. Press the [-/NO] [+/ YES] button to assign values. If Dual mode is not engaged and Voice 2 for Dual mode to create a thicker sound. P-90 Detailed Settings - [FUNCTION] 37 - Yamaha P-90 | Owner's Manual - Page 38
function's sub-mode, then use the [TEMPO/FUNCTION# ▼, ▲] buttons to select the desired sub-mode. Press the [-/NO] [+/ YES] button to assign values. you can engage the split point by pressing the appropriate key on the keyboard. • If Function mode is not engaged, you can change the split point to any - Yamaha P-90 | Owner's Manual - Page 39
-mode, then use the [TEMPO/ FUNCTION# ▼, ▲] buttons to select the desired sub-mode. Press the [-/NO] or [+/YES] button to select the desired pedal function or assign the values. Sub-mode F5.3 Sustain Sample Depth Setting range: 0 - 20 Normal setting: 12 The [GRAND PIANO 1] voices feature special - Yamaha P-90 | Owner's Manual - Page 40
settings or the notes you play on the keyboard. No MIDI reception occurs when Demo/Preset Song mode is engaged. F8.3: Local Control ON/OFF "Local Control" refers to the fact that, normally, the P-90 keyboard controls its internal tone generator, allowing the internal voices to be played directly - Yamaha P-90 | Owner's Manual - Page 41
pedal and other "control" settings received from the controlling device (the keyboard voice is not affected). The P-90 also transmits MIDI control change information when the pedal or other appropriate controls are operated. This function makes it possible to cancel control change data reception and - Yamaha P-90 | Owner's Manual - Page 42
the P-90. If the backup function is turned on, the settings at power off are effective. If the backup function is turned off, the settings in memory are erased when you turn off the power. In this case, when you turn on the power to the unit, the default settings (the initial settings) will be used - Yamaha P-90 | Owner's Manual - Page 43
preset values by holding the C7 key (right-most key on the keyboard) while turning the [STANDBY/ON] switch ON. This also erases all user song recorder data, and sets all backup on/off settings (F9) to "OFF". (The factory setting list is found on page 55.) P-90 Detailed Settings - [FUNCTION] 43 - Yamaha P-90 | Owner's Manual - Page 44
. Using MIDI, you can control a connected MIDI device from the P-90, or control the P-90 from a connected MIDI device or computer. MIDI connectors IN MIDI OUT HOST SELECT MIDI Mac PC-2 PC-1 MIDI performance data and commands are transferred in the form of numeric values. Since MIDI data - Yamaha P-90 | Owner's Manual - Page 45
is verified, turn the power of the computer on first, then the P-90, and check whether the MIDI driver and MIDI application function properly. When the [HOST SELECT] switch is set to "PC-1," PC-2," or "Mac," you can use the [TO HOST] connector, but the MIDI connectors are disabled since no data - Yamaha P-90 | Owner's Manual - Page 46
90 functions as a MIDI interface. Therefore, you do not need a special MIDI interface. Connection Use a special serial cable (page 46) to connect the computer's serial port (RS-232C or RS-422) to the P-90's [TO HOST] connector. P-90 HOST SELECT TO HOST MIDI Mac PC-2 PC pin plug (Yamaha CCJ-PC1NF - Yamaha P-90 | Owner's Manual - Page 47
manual and set the [HOST SELECT] switch to the proper data transfer rate. (Data transfer rate of "PC-1" is 31,250bps.) 2. Using a MIDI interface and the P-90's MIDI connectors Connection Use a MIDI interface device to connect a computer to the P-90 using special MIDI cables. P-90 IN MIDI - Yamaha P-90 | Owner's Manual - Page 48
ELECTRONIC PIANO P-90 An example of connecting the USB interface to the P-90 using MIDI cables IN MIDI OUT HOST SELECT computer USB cable MIDI Mac PC-2 PC-1 MIDI cables USB interface MASTER VOLUME MIN MAX MELLOW BRILLIANCE BRIGHT DEMO START/ STOP TEMPO/ FUNCTION# FUNCTION - Yamaha P-90 | Owner's Manual - Page 49
is heard when the power is turned on or off. This is normal when electrical current is being applied to the instrument. Noise from the speakers or headphones is audible. The noise may be due to interference caused by the use of a mobile phone in close proximity to the P-90. Turn off the mobile - Yamaha P-90 | Owner's Manual - Page 50
varying timbre according to keyboard dynamics. Good for standard popular music. A synth-generated type electronic piano sound often heard in popular ✓ music. Used in the DUAL mode it blends well with an acoustic piano voice. ✓ ✓ The sound of an electric piano using hammer-struck metallic - Yamaha P-90 | Owner's Manual - Page 51
a "tonewheel" type electric organ. Often heard in jazz and rock idioms. Uses a rotary speaker effect with a different speed with a slow attack. Try ✓ combining this voice with a piano or electric piano in the DUAL mode. ✓ An upright bass played fingerstyle. 90 Demo Song List/Preset Song List 51 - Yamaha P-90 | Owner's Manual - Page 52
ENGLISH Demo Song List Piano Voice Demo Description Printed on the panel GRAND PIANO1 GRAND PIANO2 E.PIANO1 E.PIANO2 CLAVI./HARPSI. VIBES/GUITAR CHURCH ORGAN JAZZ ORGAN STRINGS Piano Voice Demo Stereo sampling Monaural sampling Dynamic sampling; mezzo piano Dynamic sampling; mezzo forte Dynamic - Yamaha P-90 | Owner's Manual - Page 53
44, 47 MIDI cables 44, 47, 48 MIDI Data Format 56 MIDI driver 46 MIDI Functions 40 Music Rest 9 N Normal setting 19 O OUTPUT [L][R] jacks, [L/L+R][R] jacks 10 P [PHONES] jacks 10 Piano Voice Demo Description 52 Pitch ➝ Fine Tuning of the Pitch 35 Practicing a One-Hand Part Using 50 Preset - Yamaha P-90 | Owner's Manual - Page 54
49 Serial cable 46, 48 Specifications 61 SPLIT 38 [SPLIT] button 24 [STANDBY/ON] switch 10 [START/STOP] button (Demo 14 [START/STOP] button (METRONOME 25 Start/Stop playback 50 Piano Preset Songs 15 Demonstration Tunes 14 Recorded Songs 30 Useful Playback Functions 31 Start/Stop recording - Yamaha P-90 | Owner's Manual - Page 55
Mode Metronome Metronome Time Signature Tempo Transpose Function Mode Function F1 F2.1 F2.2 F3.1 F3.2 Part Cancel Volume MIDI Transmit Channel MIDI Receive Channel Local Control Program Change Send & Receive Control Change Send & Receive MIDI Transmit Transpose Backup Default [GRAND PIANO 90 55 - Yamaha P-90 | Owner's Manual - Page 56
Format des données MIDI / Formato de datos MIDI If you're already very familiar with MIDI, or are using a computer to control your music hardware with computer generated MIDI messages, the data provided in this section can help you to control the P-90. Falls Sie bereits mit MIDI vertraut sind oder - Yamaha P-90 | Owner's Manual - Page 57
GUITAR in the Function mode, MIDI clock is set to External Recorder start Not received when the MIDI clock is set to Internal. Recorder stop Not received when the MIDI Controllers as when those signals are received. • Caution: If an error occurs during MIDI Yamaha MIDI Control Message 01H = Sub-ID #2= - Yamaha P-90 | Owner's Manual - Page 58
ID 73H = Clavinova ID 7FH = Extended Product ID xxH = Product ID (P-90: 32H) 11H = Special control 0nH = Control MIDI change (n=channel number) cc = Control number vv = Value F7H = End of Exclusive Control 0n ccH vvH Split Point Always 00H 14H 14H : Split Key Number Metronome Always 00H 1BH - Yamaha P-90 | Owner's Manual - Page 59
. F0H = Exclusive Status 43H = Yamaha ID 1nH = When received, n=0~F. Part Number Parameter DRY LEVEL Refer to Effect MIDI Map 00 : basic type 00(=Effect off) 00 Description 0 - 127 Default value (H) 7F • Effect MIDI Map REVERB MSB LSB ROOM 02H 10H HALL 1 01H 10H HALL 2 01H 11H STAGE - Yamaha P-90 | Owner's Manual - Page 60
YAMMAIHDA I I[mElpecletrmoneicntPaiatnioon] Chart Model P-90 MIDI Implementation Chart Date : 08,Jan 2003 Version : 1.0 Function... Transmitted Basic Channel Default 1 Changed 1 - 16 Mode Default 3 Messages ˛ Altered Note 9 - 120 Number : True voice Velocity Note ON Ø 9nH,v=1-127 - Yamaha P-90 | Owner's Manual - Page 61
and R Phone Jacks, MIDI IN/OUT, TO HOST, PHONES x 2, SUSTAIN, DC IN 12V POWER SUPPLY Yamaha PA-3C power adaptor DIMENTIONS (W x D x H) 1347 x 285 x 128 mm (53" x 11-1/4" x 5") WEIGHT 16.9 kg (37 lbs., 4oz) * Specifications and descriptions in this owner's manual are for information purposes - Yamaha P-90 | Owner's Manual - Page 62
in a residential environment will not result in harmful interference with other electronic devices. This equipment generates/ uses radio frequencies and, if not installed and used according to the instructions found in the users manual, may cause interference harmful to the operation of other - Yamaha P-90 | Owner's Manual - Page 63
+971-4-881-5868 ASIA THE PEOPLE'S REPUBLIC OF CHINA Yamaha Music & Electronics (China) Co.,Ltd. 25/F., United Plaza, 1468 Yamaha Corporation, Asia-Pacific Music Marketing Group Nakazawa-cho 10-1, Hamamatsu, Japan 430-8650 Tel: +81-53-460-2312 HEAD OFFICE Yamaha Corporation, Pro Audio & Digital - Yamaha P-90 | Owner's Manual - Page 64
Site (English only) http://www.yamahasynth.com Yamaha Manual Library http://www.yamaha.co.jp/manual/english/ This document is printed on recycled de soja. U.R.G., Pro Audio & Digital Musical Instrument Division, Yamaha Corporation ˜ 2003 Yamaha Corporation WB00060 501APAP2.3-05C0ɹPrinted in Japan
-
 1
1 -
 2
2 -
 3
3 -
 4
4 -
 5
5 -
 6
6 -
 7
7 -
8
-
9
-
10
-
11
-
12
-
13
-
14
-
15
-
16
-
17
-
18
-
19
-
20
-
21
-
22
-
23
-
24
-
25
-
26
-
27
-
28
-
29
-
30
-
31
-
32
-
33
-
34
-
35
-
36
-
37
-
38
-
39
-
40
-
41
-
42
-
43
-
44
-
45
-
46
-
47
-
48
-
49
-
50
-
51
-
52
-
53
-
54
-
55
-
56
-
57
-
58
-
59
-
60
-
61
-
62
-
63
-
64
 |
 |

Owner's Manual
Bedienungsanleitung
Mode d'emploi
Manual de instrucciones