Yamaha PF-1000 Owner's Manual
Yamaha PF-1000 Manual
 |
View all Yamaha PF-1000 manuals
Add to My Manuals
Save this manual to your list of manuals |
Yamaha PF-1000 manual content summary:
- Yamaha PF-1000 | Owner's Manual - Page 1
Owner's Manual Before using the PF-1000, be sure to read "Precautions„ on pages 3-4. IMPORTANT Check your power supply Make sure that your local AC mains voltage matches the voltage specified on - Yamaha PF-1000 | Owner's Manual - Page 2
has been modified. Implied warranties may also be affected. Model Serial No. PF-1000 SPECIFICATIONS SUBJECT TO CHANGE: The information contained in this manual is believed to be correct at the time of printing. However, Yamaha reserves the right to change or modify any of the specifications without - Yamaha PF-1000 | Owner's Manual - Page 3
the instrument inspected by qualified Yamaha service personnel. CAUTION Always follow the basic precautions listed below to avoid the possibility of keyboard stand • Read carefully this manual or the attached documentation explaining the assembly process. Failure to assemble the stand 1/2 PF-1000 3 - Yamaha PF-1000 | Owner's Manual - Page 4
, we recom- mend that you save your important data onto two floppy disks. Yamaha cannot be held responsible for damage caused by improper use or modifications to the instrument, or data that is lost or destroyed. Always turn the power off when the instrument is not in use. 4 PF-1000 (1)B-7 2/2 - Yamaha PF-1000 | Owner's Manual - Page 5
PF-1000 electronic piano! We recommend that you read this manual carefully so that you can fully take advantage of the advanced and convenient functions of the PF-1000. We also recommend that you keep this manual in a safe and handy place for future reference. About this Owner's Manual and Data List - Yamaha PF-1000 | Owner's Manual - Page 6
Piano" Disk (and Music Book) I Recording disk I Owner's Manual I Data List I Pedal Unit I Bench (included or optional depending on locale) I Dust Cover I Music Rest I Keyboard Stand Handling the Floppy Disk Drive (FDD) and Floppy Floppy Disks To insert a floppy disk into the disk drive deleting data ( - Yamaha PF-1000 | Owner's Manual - Page 7
disk drive or floppy disks. Data backup • For maximum data security Yamaha recommends that you keep two copies of important data on separate floppy disks. This gives you a backup if one disk is lost or damaged. To make a backup disk use the Disk to Disk function on page 139. About the Floppy Disks - Yamaha PF-1000 | Owner's Manual - Page 8
to facilitate operation. When such messages appear, simply follow the instructions as shown by pressing the corresponding button. You can select the desired language from the Help display (page 49). F G For this example, press the [G] (YES) button to H execute formatting. I J 8 PF-1000 - Yamaha PF-1000 | Owner's Manual - Page 9
Owner's Manual and Data List 5 Accessories 6 Handling the Floppy Disk Drive (FDD) and Floppy Disk 6 About the Display Messages 8 Application Index 12 What can you do with the PF-1000 14 Setting Up the PF-1000 54 One-touch Piano Play 55 Layer/Left Sections of the Keyboard 57 Applying Voice - Yamaha PF-1000 | Owner's Manual - Page 10
Lyrics 105 Customizing the Event List - Filter 105 Creating Accompaniment Styles - Groove and Dynamics 111 Editing the Channel Data 113 Making Style File Format Settings Keyboard - Controller 128 Making Settings for the Pedals 128 Changing the Touch Sensitivity and Transpose - Keyboard PF-1000 - Yamaha PF-1000 | Owner's Manual - Page 11
and Language Preference - Owner 140 Restoring the Factory-programmed Settings of the PF-1000 - System Reset 140 Using Your PF-1000 with Other Devices the Keyboard Stand 150 Troubleshooting 152 Specifications 154 Index 156 Introduction Quick Guide Basic Operations - Organizing Your Data - Yamaha PF-1000 | Owner's Manual - Page 12
to songs with the special voices of the PF-1000 page 117 Playing Calling up the piano setting ...page 55 Using the three performance control Left - Setting Separate Voices for the Left and Right Sections of the Keyboard" on page 57 Changing the sound Enhancing the sound with reverb and other - Yamaha PF-1000 | Owner's Manual - Page 13
/TO HOST terminals)" on page 143 Assembling the keyboard stand Using the stand Assembling the Keyboard Stand" on page 150 Quick solution Basic functions of the PF-1000 and how you can best use it pages 12, 14 Resetting the PF-1000 to the default setting Restoring the Factory-programmed Settings - Yamaha PF-1000 | Owner's Manual - Page 14
PF-1000 be your backing band! DIGITAL RECORDING Record your performances (page 90, 106) With the powerful and easy-to-use song recording features, you can record your own keyboard performances, and create your own complete, fully orchestrated compositions - which you can then save to the USER drive - Yamaha PF-1000 | Owner's Manual - Page 15
) You can call up all the optimum piano settings for the PF-1000 with just a single button press - then play the extraordinarily realistic grand piano voice. BACK NEXT VOICE PART F ON/OFF LAYER G LEFT H I MUSIC FINDER J ENTER DATA ENTRY 5 6 7 8 EXIT REVERB DSP HARMONY/ VARIATION - Yamaha PF-1000 | Owner's Manual - Page 16
Up the PF-1000 You do not need to install the stand to play the PF-1000. However, if you wish to assemble the stand, refer cord supplied with the PF-1000. If the supplied cord is lost or damaged and needs to be replaced, contact your Yamaha dealer. The use of an inappropriate replacement can pose a - Yamaha PF-1000 | Owner's Manual - Page 17
. Setting the volume Use the [MASTER VOLUME] dial to adjust the volume to an appropriate level. MIN MAX MASTER VOLUME CAUTION Do not use the PF-1000 at a high volume level for a long period of time, or your hearing may be damaged - Yamaha PF-1000 | Owner's Manual - Page 18
DIGITAL STUDIO SOUND CREATOR 2 4 30 DIGITAL P. 46 42 [DATA ENTRY] dial P. Floppy disk drive (3.5 P. 6 VOICE EFFECT 48 [REVERB] button P. 57 49 [DSP] button P. 57 50 [VARIATION] button P. 57 51 [HARMONY / ECHO] button P. 58 52 [MONO] button P. 58 53 [LEFT HOLD] button P. 58 18 PF-1000 - Yamaha PF-1000 | Owner's Manual - Page 19
67 PIANO Setting 56 [PIANO] PF-1000 panel indicate standards/ formats it supports PF-1000 is compatible with SMF Formats 0 and 1, and records "song" data using SMF Format 0.) Disk Orchestra Collection The DOC voice allocation format provides data playback compatibility with a wide range of Yamaha - Yamaha PF-1000 | Owner's Manual - Page 20
Quick Guide Playing the Demos Reference on page 52 The PF-1000 features an extensive variety of Demo songs the different functions on the PF1000. Voice Demos showcase the voices of the PF-1000. Style Demos introduce you to the rhythms and accompaniment styles of the PF-1000 (page 52). 3 Press - Yamaha PF-1000 | Owner's Manual - Page 21
Floppy disk drive The following songs are compatible for playback on the PF-1000. Refer to pages 73, 148 for more details on the logos. Disks bearing this logo contain song data logo contain song data for voices defined in Yamaha's DOC format. Songs containing a large amount of data may not be - Yamaha PF-1000 | Owner's Manual - Page 22
the A display shown when the power is turned on), you can B select songs, voices, accom- paniment styles, etc. C D E PRESET FLOPPY DISK Press the [BACK]/[NEXT] button to select the drive. 3 PRESET only Press the [A] button to select the preset songs (Song Book) folder. A B C D E 22 Quick - Yamaha PF-1000 | Owner's Manual - Page 23
to the playback point of the song, press the [REW] or [FF] button. • With song data software (Standard MIDI format 0) that includes lyrics, you can view the lyr- ics on the display during ON/OFF PART 1 2 3 4 5 6 7 8 If the STYLE tab is selected, press this button again. Quick Guide 23 - Yamaha PF-1000 | Owner's Manual - Page 24
(page 65) can be used to produce smooth fadeins and fade-outs when starting and stopping the song, as well as the accompaniment. 24 Quick Guide - Yamaha PF-1000 | Owner's Manual - Page 25
Playing Voices Playing Voices Reference The PF-1000 features a stunning variety of over 800 that the LAYER and LEFT parts are turned off. 2 Select a voice group. PIANO & ORGAN & HARPSI. E.PIANO ACCORDION PERCUSSION GUITAR BASS BRASS WOODWIND STRINGS CHOIR & PAD SYNTH. XG VOICE USER - Yamaha PF-1000 | Owner's Manual - Page 26
Naturally, you can play the voice yourself from the keyboard, but you can also have the PF-1000 demonstrate the voice for you. Simply press the [8L Check out these other voice-related features: • Instant setup of the PF-1000 for piano play - with the press of a single button (page 55). • Quick Guide - Yamaha PF-1000 | Owner's Manual - Page 27
play rich, orchestral chords with your left hand. PIANO & ORGAN & HARPSI. E.PIANO ACCORDION PERCUSSION GUITAR BASS BRASS WOODWIND STRINGS CHOIR & POINT display. From here, you can set the particular key on the keyboard that separates the two voices - called the Split Point. To do this Guide 27 - Yamaha PF-1000 | Owner's Manual - Page 28
Playing Styles Playing Styles The PF-1000 has a huge variety of musical "styles" that you can call upon to back up your own performance. They give you anything from a simple, yet effective piano backing or percussion accompaniment to a full band or orchestra. Reference on page 59 Style related - Yamaha PF-1000 | Owner's Manual - Page 29
3 Play a chord with your left hand and play some notes in the right-hand range of the keyboard. The PF-1000 has various Harmony/Echo types (page 132). The Harmony/Echo type may change according to the selected MAIN details about Harmony/ Echo types, refer to the separate Data List. Quick Guide 29 - Yamaha PF-1000 | Owner's Manual - Page 30
] button. BREAK INTRO This switches to the ending section. When the ending A is finished, the style automatically stops. MAIN B C ENDING/rit. D STYLE CONTROL 30 Quick Guide - Yamaha PF-1000 | Owner's Manual - Page 31
on, you can stop and start the style anytime you want by simply releasing or playing the keys (in the Auto Accompaniment section of the keyboard). This is a great way to add dramatic breaks and accents to your performance. For details, see page 65. Quick - Yamaha PF-1000 | Owner's Manual - Page 32
style, with the touch of a single button. This is a wonderful way to instantly reconfigure all the settings on the PF-1000 to match the style you want to play. 1 Select a style (page 28). 2 Press one of the [ONE TOUCH Touch Settings when you select a different Main section (page 68). 32 Quick Guide - Yamaha PF-1000 | Owner's Manual - Page 33
the convenient Music Finder can help you out. Simply select the song name from the Music Finder and the PF-1000 automatically makes all appropriate panel settings to let you play in that music style! Using the Music Finder 1 68) and set the OTS LINK TIMING (page 127) to "REAL TIME." Quick Guide 33 - Yamaha PF-1000 | Owner's Manual - Page 34
example, ANY is selected. 5 Enter the song title, then press the [8L] (OK) button. 1 2 3 4 5 6 7 8 Refer to page 45 for instructions on entering characters. F G H I J 3 Press the [F], [G] and [H] to clear the previous conditions, if necessary. For this example, ALL is selected. 6 Press - Yamaha PF-1000 | Owner's Manual - Page 35
files, the Music Finder data that uses the relevant style file(s) is stored or added automatically. When you copy or move a style file on a floppy disk to the USER drive (page 42, 43), the record which was recorded when storing the relevant style is automatically added to the PF-1000. • In the example - Yamaha PF-1000 | Owner's Manual - Page 36
Along with the PF-1000 In this section, try using the PF-1000's song playback the [EXIT] button. If the selected song does not contain lyric data, lyrics are A not displayed. B C D E 7 Press PF-1000 playing the melody part as well, check the channel setting for the melody part in the song data - Yamaha PF-1000 | Owner's Manual - Page 37
PF-1000 lets you record, too - quickly and easily. Try out the Quick Recording feature now and capture your keyboard starts as soon as you start playing the keyboard. 7 When you've finished recording, press Save the recorded data as required (pages 38, 44). CAUTION The recorded data will be lost - Yamaha PF-1000 | Owner's Manual - Page 38
is done on a computer. Here, we'll show you how to use the basic operations of the display controls in handling and organizing the data of the PF-1000 in files and folders. Files can be opened, saved, named, moved, or deleted in their respective Open/Save displays. You can select these displays - Yamaha PF-1000 | Owner's Manual - Page 39
in the USER or FLOPPY DISK drive). USER drive Files kept here are those containing your own original data, created or edited using the various functions of the PF-1000. They are stored internally to the PF-1000. FLOPPY DISK drive You can also store your original data to floppy disk. Commercially - Yamaha PF-1000 | Owner's Manual - Page 40
up and store files (voice files). The PF-1000 already contains a variety of voices in the PRESET section. You can store your own original voices created with the Sound Creator function to the USER or FLOPPY DISK section. BACK NEXT 1 Select "PRESET," "USER," or "FLOPPY DISK" by using the [BACK][NEXT - Yamaha PF-1000 | Owner's Manual - Page 41
and folders. Any file/folder in the USER and FLOPPY DISK sections can be named or renamed. Execute the following steps when there is data in the User drive. If there are Preset files/folders you wish to name (page 45). Press the [8L] (OK) button. To cancel, press the [8M] (CANCEL) button. PF-1000 41 - Yamaha PF-1000 | Owner's Manual - Page 42
Moving Files/Folders You can move files and folders as desired, for organizing your data. Any file/folder in the USER and FLOPPY DISK sections can be moved, using the cut-and-paste operation described below. 1 Press the [ can be handled in the current Open/ Save display will be pasted. 42 PF-1000 - Yamaha PF-1000 | Owner's Manual - Page 43
data. Any file/folder in the PRESET, USER and FLOPPY page (PRESET/USER/ FLOPPY DISK). When the Floppy Disk page. 4 Call up the destination display. Only the USER and FLOPPY data. Any file/folder in the USER and FLOPPY the displayed page (USER/FLOPPY DISK). When the [6M (or data/folder)? or data/folder - Yamaha PF-1000 | Owner's Manual - Page 44
les can be saved only to the USER and FLOPPY DISK drives. If the Open/Save display for the type of data you wish to save is not shown, first . The files of commercially available DOC software and Yamaha Disklavier software, and their edited files on the PF-1000, can be stored in the USER page, but - Yamaha PF-1000 | Owner's Manual - Page 45
of characters which are not accompanied by special character marks (with the exception of kanakan and half-size katakana), you can call up the mark list by pressing the [6M] button after selecting a character (before actual entry of a character). PF-1000 45 - Yamaha PF-1000 | Owner's Manual - Page 46
[DATA ENTRY] dial. The selected item can then be called up or executed by using the [ENTER] button. In the example VOICE display, you can select the desired voice file with the [DATA ENTRY] dial, and call up the selected item by pressing the [ENTER] button on the panel. ENTER DATA ENTRY 46 PF-1000 - Yamaha PF-1000 | Owner's Manual - Page 47
DIGITAL RECORDING MIXING CONSOLE BALANCE PART DIRECT ACCESS CHANNEL ON/OFF 1 2 3 4 5 6 7 8 EXIT PART BACK NEXT VOICE PART F ON/OFF LAYER G LEFT H I MUSIC FINDER J ENTER DATA ENTRY REVERB DSP HARMONY/ VARIATION ECHO MONO LEFT HOLD PIANO 48) for a list of the displays - Yamaha PF-1000 | Owner's Manual - Page 48
CREATOR] [DIGITAL RECORDING] [MIXING CONSOLE] [BALANCE] [CHANNEL ON/OFF] [DIRECT ACCESS] [NEXT] [BACK] [ENTER] [MUSIC FINDER] [EXIT] VOICE PART [LAYER] [LEFT] VOICE EFFECT [REVERB] [DSP] [VARIATION] [HARMONY/ECHO] [MONO] [LEFT HOLD] VOICE [PIANO & HARPSI] [E.PIANO] [ORGAN - Yamaha PF-1000 | Owner's Manual - Page 49
Basic Operations - Organizing Your Data Help Messages The Help messages give you explanations and descriptions of all the main functions and features of the PF-1000. HELP MIN MAX MASTER VOLUME FADE IN/OUT POP & ROCK POP BALLADS DANCE SWING & JAZZ R & B COUNTRY LATIN MARCH & WORLD WALTZ - Yamaha PF-1000 | Owner's Manual - Page 50
DIGITAL RECORDING MIXING CONSOLE BALANCE PART DIRECT ACCESS CHANNEL ON/OFF 1 2 3 4 5 6 7 8 EXIT PART BACK NEXT VOICE PART F ON/OFF LAYER G LEFT H I MUSIC FINDER J ENTER DATA ENTRY REVERB DSP HARMONY/ VARIATION ECHO MONO LEFT HOLD PIANO suit the song/style. 50 PF-1000 - Yamaha PF-1000 | Owner's Manual - Page 51
Data (unless the tempo has been changed manually). Indicates the current tempo for the accompaniment style (unless the tempo has been changed manually). Hitting the [TAP TEMPO] button produces a you tapped. While a song is set to Sync. Start stand-by (page 60, 74), tapping the [TAP TEMPO] button - Yamaha PF-1000 | Owner's Manual - Page 52
of the PF-1000. MENU DEMO DIGITAL RECORDING MIXING CONSOLE BALANCE PART DIRECT ACCESS CHANNEL ON/OFF 1 2 3 4 5 6 7 8 EXIT PART BACK NEXT VOICE PART F ON/OFF LAYER G LEFT H I MUSIC FINDER J ENTER DATA ENTRY REVERB DSP HARMONY/ VARIATION ECHO MONO LEFT HOLD PIANO - Yamaha PF-1000 | Owner's Manual - Page 53
the Voices in the FUNCTION demo. BACK NEXT F G H I J ENTER DATA ENTRY Use the [BACK][NEXT] buttons in the introduction screen to call up the 1 2 3 4 5 6 7 8 Select the desired word or item by using the [DATA ENTRY] dial, then press the [ENTER] button or number buttons ([1M], [2M], etc.) - Yamaha PF-1000 | Owner's Manual - Page 54
Voices The PF-1000 gives you an enormous selection of authentic voices, including various keyboard instruments, strings and brass - and many, many more. PIANO & ORGAN & HARPSI. E.PIANO ACCORDION PERCUSSION GUITAR BASS MIN MAX MASTER VOLUME FADE IN/OUT POP & ROCK POP BALLADS DANCE SWING & - Yamaha PF-1000 | Owner's Manual - Page 55
are identical. Refer to the separate Data List (Drum/key Assignment List) for a listing of the sounds in each drum/SFX kit. One-touch Piano Play This convenient, easy-to-use feature completely and automatically reconfigures the entire PF-1000 for optimum piano performance. No matter what settings - Yamaha PF-1000 | Owner's Manual - Page 56
DIGITAL RECORDING MIXING CONSOLE BALANCE PART DIRECT ACCESS CHANNEL ON/OFF 1 2 3 4 5 6 7 8 EXIT PART BACK NEXT VOICE PART F ON/OFF LAYER G LEFT H I MUSIC FINDER J ENTER DATA ENTRY VOICE PART ON/OFF LAYER LEFT REVERB DSP HARMONY/ VARIATION ECHO MONO LEFT HOLD PIANO - Yamaha PF-1000 | Owner's Manual - Page 57
freely set to any key on the keyboard. To set it, call up the DATA ENTRY REVERB DSP HARMONY/ VARIATION ECHO MONO LEFT HOLD VOICE EFFECT REVERB DSP HARMONY/ VARIATION ECHO MONO LEFT HOLD PIANO & HARPSI. VOICE EFFECT ORGAN & E.PIANO PF-1000 features a variety of dynamic built-in digital - Yamaha PF-1000 | Owner's Manual - Page 58
Pedals Included with the PF-1000 is a special pedal you play a note or chord on the keyboard and press the sostenuto pedal while the pedal. I Left Pedal When the Piano voice is selected, pressing this pedal Foot Controller/Footswitch An optional Yamaha foot controller (FC7) or footswitch - Yamaha PF-1000 | Owner's Manual - Page 59
DIGITAL DATA ENTRY Playing a style REVERB DSP HARMONY/ VARIATION ECHO MONO LEFT HOLD PIANO & HARPSI. VOICE EFFECT ORGAN & E.PIANO a location (Preset, User, Floppy G Disk) for saving the list of the available accompaniment styles, refer to the separate Data List (Style List). PF-1000 59 - Yamaha PF-1000 | Owner's Manual - Page 60
keyboard. piano-only accompaniment - effectively recreating the left-hand performance of an accomplished pianist. Just by playing the proper chords with your left hand, you can automatically add complicated arpeggios and bass/chord patterns - such as difficult-to-play stride piano parts. 60 PF-1000 - Yamaha PF-1000 | Owner's Manual - Page 61
SONG part Adjust the output level of the Part. MIC part Parts played from the keyboard (MAIN/LAYER/ LEFT) CHANNEL ON/OFF display Call up the STYLE display by pressing channel in the song data (page 147). The channels are assigned as shown below. Song 1 - 16 Accompaniment Style 9 - 16 PF-1000 61 - Yamaha PF-1000 | Owner's Manual - Page 62
chords on the auto accompaniment section of the keyboard. The Fingered mode recognizes the various chord types listed on the next page. FINGERED ON BASS This AI AI FULL KEYBOARD Artificial Intelligence When this advanced auto accompaniment mode is engaged, the PF-1000 will automatically create - Yamaha PF-1000 | Owner's Manual - Page 63
are played in sequence (e.g. some minor chords followed by the minor seventh). • You can also have the PF1000 "teach" you how to play Fingered chords. From the CHORD FINGERING display (page 128), specify the chord Other chords not marked with an asterisk can be played in any inversion. PF-1000 63 - Yamaha PF-1000 | Owner's Manual - Page 64
LED is red - The section is currently selected. LED is off - No section data; the section cannot be played. • You can dynamically control the level of the keyboard (page 127). • If you press the [SYNC. START] button while an accompaniment is playing, the accompaniment will stop and the PF-1000 - Yamaha PF-1000 | Owner's Manual - Page 65
is not playing, you can play both chords and bass in the Auto Accompaniment section in the keyboard (page 127). 3 As soon as you play a chord with your left hand, the auto on when the fingering mode is set to Full Keyboard/AI Keyboard or the auto accompaniment on the panel is set to off. PF-1000 65 - Yamaha PF-1000 | Owner's Manual - Page 66
pressing the selected MAIN button again. You can temporarily disable Auto Fill In during a performance by pressing the next Main section's button twice quickly. 66 PF-1000 - Yamaha PF-1000 | Owner's Manual - Page 67
DIGITAL RECORDING MIXING CONSOLE BALANCE PART DIRECT ACCESS CHANNEL ON/OFF 1 2 3 4 5 6 7 8 EXIT PART BACK NEXT VOICE PART F ON/OFF LAYER G LEFT H I MUSIC FINDER J ENTER DATA ENTRY 1 2 3 4 ONE TOUCH SETTING REVERB DSP HARMONY/ VARIATION ECHO MONO LEFT HOLD PIANO - Yamaha PF-1000 | Owner's Manual - Page 68
create your own One Touch Setting setups (four setups per style). For a list of One Touch Setting setup parameters, refer to the separate Data List (Parameter Chart). 1 Select a style. 2 Set up the panel controls settings will be deleted when you select a different accompaniment style. 68 PF-1000 - Yamaha PF-1000 | Owner's Manual - Page 69
. Simultaneously press the [LM] buttons to move the cursor to the first record. 3 Play the style (page 60). Records can be selected by using the [DATA ENTRY] dial and pressing the [ENTER] button. PF-1000 69 - Yamaha PF-1000 | Owner's Manual - Page 70
the search function calls up all records that contain the entered word or words. I [B] KEYWORD Searches by keyboard. Press this button to call up the display for inputting the keyword. When you enter the keyword (page this to cancel the operation and return to the previous display. 70 PF-1000 - Yamaha PF-1000 | Owner's Manual - Page 71
EDIT) button in the MUSIC FINDER display. 2 Change/clear the record data. You can also register new records. For details about all settings and operations selected by pressing the [C] button, the current beat setting is replaced with the beat setting of the selected file. I [E] FAVORITE PF-1000 71 - Yamaha PF-1000 | Owner's Manual - Page 72
and return to the MUSIC FINDER display. To maintain the edited and registered data, make sure to save all Music Finder records as a file (page 140). If no saved, the data will be lost when another Music Finder file is called up or the factory-programmed settings are restored (page 140). 72 PF-1000 - Yamaha PF-1000 | Owner's Manual - Page 73
, and is intended only for your own personal use. For more information on the song file types compatible with the PF-1000, see page 148. Disks having this logo mark feature song data compatible with Yamaha's DOC (Disk Orchestra Collection) format. Disks having this logo mark feature song - Yamaha PF-1000 | Owner's Manual - Page 74
pressing the [TOP] button and the SONG [START/STOP] button. The song starts as soon as you play the keyboard. You can also use this function along with the Style's Synchro Start function (page 60). n You can have the as that of the file name of the song that you are playing back. 74 PF-1000 - Yamaha PF-1000 | Owner's Manual - Page 75
back a song and an accompaniment style at the same time, channels 9 16 of the song data are replaced with accompaniment style channels - allowing you to use the auto accompaniment styles and features in place the accompaniment styles are automatically started when starting song playback. PF-1000 75 - Yamaha PF-1000 | Owner's Manual - Page 76
, make sure to read the section "Handling the Floppy Disk Drive (FDD) and Floppy Disk" (page 6). n You can set whether or not the PF-1000 automatically calls up the first disk song when a disk is inserted (page 139). n Some song data for the PF1000 has been recorded with special "free tempo" settings - Yamaha PF-1000 | Owner's Manual - Page 77
location, then set Point B by pressing the [REPEAT] button again. 3 After an automatic lead-in (to help guide you into the phrase), the range from point A to point B is played back repeatedly. Regardless of whether the - such as Phrase Repeat or repeat in Song Chain Play (page 126). PF-1000 77 - Yamaha PF-1000 | Owner's Manual - Page 78
by the [EXIT] button. The displayed notation is generated by the PF-1000 based on the song data. As a result, it may not be exactly the same as many short notes. n Some song data for the PF1000 has been recorded with special "free tempo" settings. For such song data, the tempo, beat, measure and - Yamaha PF-1000 | Owner's Manual - Page 79
channel, the notation of the right-hand notes and left-hand notes are displayed in piano format (two connected staves). 1 2 3 4 5 6 7 8 I [1LM you to transpose key at any point within a song. For a list of the key signatures, with their relative minor keys and accidentals, see PF-1000 79 - Yamaha PF-1000 | Owner's Manual - Page 80
the panel. You can select the display pages (one before and after) by the using the [BACK]/ [NEXT] buttons or the pedal (page 128). 80 PF-1000 - Yamaha PF-1000 | Owner's Manual - Page 81
(page 74, 76). 2 A B C D E The language used for lyrics display depends on the particular lyric data. If the lyrics are garbled or unreadable, you can remedy this by changing the "LYRICS LANGUAGE" setting from the previous page, press the button. The lyrics can be changed (page 105). PF-1000 81 - Yamaha PF-1000 | Owner's Manual - Page 82
DIGITAL STUDIO SOUND CREATOR DIGITAL 4 PIANO ONE list of the settings that can be registered, refer to the separate Data List data that was previously registered to the selected REGISTRATION MEMORY button (indicator is green or red) will be erased and replaced by the new settings. 82 PF-1000 - Yamaha PF-1000 | Owner's Manual - Page 83
can be saved to "USER" or "FLOPPY DISK" as Registration bank files. .) are listed in the Data." The result of the Name/Delete operation will be lost when the power is turned off unless you return to the REGISTRATION BANK display by pressing the [8M] (UP) button and save the data (page 44). PF-1000 - Yamaha PF-1000 | Owner's Manual - Page 84
. FREEZE 1 2 3 4 5 6 7 8 MEMORY REGISTRATION MEMORY 4 Press the appropriate REGISTRATION MEMORY button (any whose indicators are green) to recall the desired settings. FREEZE 1 2 3 4 5 6 7 8 MEMORY REGISTRATION MEMORY 84 PF-1000 - Yamaha PF-1000 | Owner's Manual - Page 85
of the display. Opens the Save (Voice) display for saving the edited voice as a User voice (page 44). 4 Save the edited voice to the USER drive (Flash ROM) as a USER voice (page 44). 5 Press the [USER] button to select the edited voice, and play the keyboard. PF-1000 85 - Yamaha PF-1000 | Owner's Manual - Page 86
only when the Natural piano voice is selected. TYPE LEFT PEDAL SETTING FILTER BRIGHTNESS FILTER HARMONIC CONTENT REVERB keyboard - allowing you to play the Natural voices with full polyphony, even if the song and style data exceeds the polyphonic limit. Natural! Cool! Sweet! Live! XG PF-1000 - Yamaha PF-1000 | Owner's Manual - Page 87
voices. STRETCH .. Tuning curve particularly for pianos FLAT .......... Tuning curve in which the frequency is octave doubled over the entire keyboard range Editing the voice - Sound Creator is available. 1 2 3 4 5 6 7 8 Determines the filter, EG, and vibrato settings (see below). PF-1000 87 - Yamaha PF-1000 | Owner's Manual - Page 88
making the sound either brighter or more mellow, Filter can be used to produce electronic, synthesizer-like effects. • BRIGHTNESS Determines the and decay of percussion sounds, or the long release of a sustained piano tone. • ATTACK ...... Determines how quickly the sound reaches its 88 PF-1000 - Yamaha PF-1000 | Owner's Manual - Page 89
Data List. The same as the "Mixing Console" on page 119. Determines the brilliance of the tone, when a Natural voice is selected. This can also be set from the PIANO page (page 87), when a piano while you press the keys on the keyboard ("PIANO LIKE"), or the sound is sustained only PF-1000 89 - Yamaha PF-1000 | Owner's Manual - Page 90
not only the voice settings for the keyboard performance (Main, Layer, Left), but DATA ENTRY DIGITAL RECORDING REVERB DSP HARMONY/ VARIATION ECHO MONO LEFT HOLD PIANO & HARPSI. VOICE EFFECT ORGAN & E.PIANO When you store data to these locations, all file types of the PF-1000 (Voice, Style, - Yamaha PF-1000 | Owner's Manual - Page 91
piano To record your keyboard performance: Press as a guide while recording. data (page 38, 44). CAUTION Turning off the power automatically deletes your recorded performance. If you wish to save the recording, make sure to store it to internal memory (USER drive) or floppy disk (page 38, 44). PF-1000 - Yamaha PF-1000 | Owner's Manual - Page 92
bass, synth bass, and others. Chord........This is the rhythmic chord backing, commonly used with piano or guitar voices. Pad This part features sustained chords and commonly uses lush sounds such as strings setting the several channels to "REC" at the same time. 1 2 3 4 5 6 7 8 92 PF-1000 - Yamaha PF-1000 | Owner's Manual - Page 93
the metronome click as a guide while recording. The sound of the metronome is not recorded. CAUTION Turning off the power automatically deletes your recorded performance. If you wish to save the recording, make sure to store it to internal memory (USER drive) or floppy disk (page 38, 44). PF-1000 93 - Yamaha PF-1000 | Owner's Manual - Page 94
the [DIGITAL RECORDING] button. C DIGITAL STUDIO D SOUND CREATOR E DIGITAL RECORDING MIXING PF-1000 Any voice, effect and other settings you make in the F Mixing Console are automat- ically cancelled when you G call up the CHD (Chord) page. H I J The voices in the USER and FLOPPY - Yamaha PF-1000 | Owner's Manual - Page 95
in this display, then enter the pitch by actually playing the note on the keyboard. Moves the cursor position up and down. A Determines the velocity (loudness) % Staccatissimo 20% Manual The gate time (note length) can be specified as a percentage by using the [DATA ENTRY] dial. PF-1000 95 - Yamaha PF-1000 | Owner's Manual - Page 96
(Note) In this section, we'll show you how to use Step Recording by guiding you through this actual music example, shown at right. The operations here apply to the recorded data, press the [EXIT] button. The entered data can be edited from the SONG CREATOR (1 - 16) display (page 103). 96 PF-1000 - Yamaha PF-1000 | Owner's Manual - Page 97
G7 C Enter the chords by using the currently selected chord fingering method in the Auto Accompaniment section of the keyboard. 1 Press the MAIN [A] button to specify the section, and enter the chords as shown at right. Select this note value and play the chords indicated at right. PF-1000 97 - Yamaha PF-1000 | Owner's Manual - Page 98
the recorded data, press the [EXIT] button. The entered data can be (CHD) display in order to convert the input data into song data. To enter a fill-in, press the indicating the end of the song data. The actual position of the End mark automatically follows the Ending data. When a section other - Yamaha PF-1000 | Owner's Manual - Page 99
data Start overwrite recording Stop recording *2 1 2 3 4 5 6 7 8 PUNCH IN AT=003 PUNCH OUT AT=006 Start/ play back original data Start overwrite recording Stop overwrite recording/ play original data 1 2 3 4 5 7 Previously recorded data Newly recorded data Deleted data PF-1000 - Yamaha PF-1000 | Owner's Manual - Page 100
Quantize size to correspond to the smallest notes in the channel you are working with. For example, if the data was recorded with both quarter notes and eighth notes, use 1/8 note for the Quantize size. If you setting, both the straight and triplet notes will be quantized correctly. 100 PF-1000 - Yamaha PF-1000 | Owner's Manual - Page 101
SONG display, from which you J can save the edited data. These let you specify the two source channels to be mixed. Determines the channel into which the mix or copy results will be placed. If "COPY" is selected here, the data from Source 1 is copied to the Destination channel. PF-1000 101 - Yamaha PF-1000 | Owner's Manual - Page 102
this button. Calls up the SONG display, from which you can save the edited data. Determines the amount of transpose for each channel. Set Up You can change with the selected song. All events, with the exception of "KEYBOARD VOICE," can be recorded only at the beginning of the song. 102 PF-1000 - Yamaha PF-1000 | Owner's Manual - Page 103
new event to the Event List. Deletes the event at the Filter display I (page 105), letting you select only the events you J wish to shown in the Event List. Calls up the SONG display, from which you can save the edited data separate Data List booklet (MIDI Data Format Data List booklet (Voice List - Yamaha PF-1000 | Owner's Manual - Page 104
you change the actual contents of the data; however, it lets you delete, cut, copy, and paste the data. Meta (Meta event) Displays the SMF meta events in the song. This does not let you change the actual contents of the data; however, it lets you delete, cut, copy, and paste the data. 104 PF-1000 - Yamaha PF-1000 | Owner's Manual - Page 105
more information on each E event type, refer to the separate Data List booklet (MIDI Data Format). Calls up the Accompaniment Filter display. For more information on each event type, refer to the separate Data List booklet (MIDI Data Format). END EXIT Execute the settings by pressing the [EXIT - Yamaha PF-1000 | Owner's Manual - Page 106
DATA ENTRY EXIT DIGITAL 8 RECORDING REVERB DSP HARMONY/ VARIATION ECHO MONO LEFT HOLD PIANO & HARPSI. VOICE EFFECT ORGAN & E.PIANO CHORD 1, CHORD 2, PAD, PHRASE 1, PHRASE 2 keyboard in real time. However, you don't have to want, then add or replace parts in that style 2 106 PF-1000 - Yamaha PF-1000 | Owner's Manual - Page 107
all of Yamaha's auto accompaniment Auto Accompaniment section of the keyboard (page 114). 1 Select the . C D DIGITAL 2 STUDIO SOUND CREATOR E DIGITAL RECORDING MIXING CONSOLE data to the USER or FLOPPY DISK page. END Press the [EXIT] button to close the STYLE CREATOR display. PF-1000 - Yamaha PF-1000 | Owner's Manual - Page 108
non-rhythm channels (BASS - PHR 2), make sure to delete the existing data of the appropriate channel. You can make other settings (see the box " button), you can start recording by simply pressing a key on the keyboard. 3 Stop recording by pressing the STYLE CONTROL [START/STOP] button 108 PF-1000 - Yamaha PF-1000 | Owner's Manual - Page 109
to edit (event data or control data). Press the [F] (TRACK EVT) button to switch between the Event display (Note, Control Change, etc.) and the Control display (System Exclusive, etc.). Make sure to set the record channel from another display (e.g., BASIC display; page 108) beforehand. PF-1000 109 - Yamaha PF-1000 | Owner's Manual - Page 110
The PLAY TYPE parameter affects only the playback, and does not change the actual accompaniment style data. Determines the playback settings for each channel. You can assemble the accompaniment style while the style CHANNEL display (page 108), OFF does not appear and is not available. 110 PF-1000 - Yamaha PF-1000 | Owner's Manual - Page 111
the Style display and G lets you store the edited accompaniment style data. H I J Determines the settings for each of the Groove parameters (see the list below). 1 2 3 4 5 6 7 8 Groove parameters effect, "B" types produce medium effect, and "C" types produce maximum effect. PF-1000 111 - Yamaha PF-1000 | Owner's Manual - Page 112
to [UNDO], letting you restore the original data if you're not satisfied with the of the Dynamics parameters (see the list below). Dynamics parameters Accent Type keyboard. The more strongly you play the keyboard, the higher the velocity value and, hence, the louder the sound. 112 PF-1000 - Yamaha PF-1000 | Owner's Manual - Page 113
the specified percentage (selected with the [4LM]/[5LM] (BOOST/CUT) buttons). I Bar Copy This function allows data to be copied from one measure or group of measures to another location within the specified channel. Use the [ ] (EVENT) buttons to select the desired event type to be removed. PF-1000 113 - Yamaha PF-1000 | Owner's Manual - Page 114
style change when playing the chords in the left-hand range of the keyboard. For details about the relationship between the parameters, refer to "Style File Type of"M7"), is automatically selected whenever the preset data is deleted prior to recording a new style, regardless of the Source 114 PF-1000 - Yamaha PF-1000 | Owner's Manual - Page 115
Suitable for chord transposition. Use for the Chord 1 and Chord 2 channels, especially when they contain piano or guitar-like chordal parts. Bass Suitable for bass line transposition. This table is basically similar to next chord. However, the octave of the new note remains the same. PF-1000 115 - Yamaha PF-1000 | Owner's Manual - Page 116
plays XG-compatible songs (page 149) with the rich and dynamic voices that are exclusive to the PF-1000. This gives you much more authentic and realistic instrument sounds for your song playback. • FILTER (page 118) These controls affect the tone quality of the voice, letting you add power, punch - Yamaha PF-1000 | Owner's Manual - Page 117
among the various parts/channels. A B C D E DIGITAL STUDIO SOUND CREATOR DIGITAL RECORDING MIXING CONSOLE BALANCE PART CHANNEL ON/OFF 1 2 3 4 Set this to ON to enable automatic replacement of the XG voices (in XG song data) with the special voices of the PF-1000. To use the normal XG - Yamaha PF-1000 | Owner's Manual - Page 118
E DIGITAL STUDIO SOUND CREATOR DIGITAL RECORDING Switches between the HARMONIC and BRIGHTNESS parameters. F G H I J For details about the Filter, see pitch in semitone units. MASTER... Transposes both the pitch of the keyboard and that of the song playback. SONG ....... Transposes the pitch PF-1000 - Yamaha PF-1000 | Owner's Manual - Page 119
button switches among the various parts/ channels. A B C D E DIGITAL STUDIO SOUND CREATOR Indicates the type name for each effect block. Press this Natural voices and Regular voices. For details, refer to the Effect Block list (page 120). 2 When the BLOCK parameter is set to REVERB1, PF-1000 119 - Yamaha PF-1000 | Owner's Manual - Page 120
a variety of special effects, All parts except microphone (MIC) including distortion. - All parts except microphone (MIC) Changes the brightness and clarity of the sound. - 120 PF-1000 - Yamaha PF-1000 | Owner's Manual - Page 121
Voices - Mixing Console Effect Structure The PF-1000 features the following digital effect systems, which can be applied independently up and traces the signal flow for the send/return controls set on the PF-1000. For Regular Voices (REVERB1, CHORUS1, DSP1) For Natural Voices (REVERB2, CHORUS2, - Yamaha PF-1000 | Owner's Manual - Page 122
customize the PF-1000 to your DIGITAL RECORDING MIXING CONSOLE BALANCE PART DIRECT ACCESS CHANNEL ON/OFF 1 2 3 4 5 6 7 8 EXIT PART BACK NEXT VOICE PART F ON/OFF LAYER G LEFT H I MUSIC FINDER J ENTER DATA ENTRY REVERB DSP HARMONY/ VARIATION ECHO MONO LEFT HOLD PIANO - Yamaha PF-1000 | Owner's Manual - Page 123
of Harmony or Echo effect applied to the keyboard-played voices, as well as the amount of effect. Showing the PF-1000 Display on a TV - Video Out (page type of data to be transmitted over each channel. I Receive (page 136) This determines how the parts of the PF-1000 respond to data from connected - Yamaha PF-1000 | Owner's Manual - Page 124
not affect the Drum Kit or SFX Kit voices. Determines the overall pitch of the PF-1000, from 414.8 - 466.8 Hz. Press the 4 or 5 [LM] buttons 1 scale. When the base note is changed, the pitch of the keyboard is transposed, yet maintains the original pitch relationship between the notes. Selects - Yamaha PF-1000 | Owner's Manual - Page 125
devised by the famous Greek philosopher and is created from a series of perfect fifths, which are collapsed into a single octave. -2.3 -10.2 -3.1 -7.8 -10.2 -3.9 -11.7 Arabic1 0.0 0 -50.0 0.0 0.0 0.0 0.0 0.0 0.0 -50.0 0.0 0.0 Arabic2 0.0 0 0.0 0.0 -50.0 0.0 0.0 0.0 0.0 0.0 0.0 -50.0 PF-1000 125 - Yamaha PF-1000 | Owner's Manual - Page 126
the song (such as voice selection, volume, etc.) are recorded to the first measure, before the actual note data. When Quick Start is set to "ON," the PF-1000 reads all initial non-note data of the song at the highest possible speed, then automatically slows down to the appropriate tempo at the first - Yamaha PF-1000 | Owner's Manual - Page 127
section of the keyboard. About Section Set When any of the Main A-D sections is not included in the accompaniment style data, the nearest section your playing strength (in the Auto Accompaniment section of the keyboard). The PF-1000 lets you automatically enable Sync Stop (page 65) simply - Yamaha PF-1000 | Owner's Manual - Page 128
selected. Chord Tutor The Chord Tutor feature is essentially an electronic "chord book" that shows you appropriate fingerings for chords; method are indicated in the display. Making Settings for the Pedals and Keyboard - Controller The explanations here apply to step #3 of the procedure on PF-1000 - Yamaha PF-1000 | Owner's Manual - Page 129
of notes played. It only applies to certain voices - PIANO, for example. GLIDE When the pedal is pressed the pitch pressed. MODULATION* Applies a vibrato effect to notes played on the keyboard. The depth of the effect increases while pedal is pressed. This Yamaha FC7 Foot Controller. PF-1000 129 - Yamaha PF-1000 | Owner's Manual - Page 130
and you are accustomed to playing the keyboard part in C. To match up the keys, keep the Master Transpose setting at "0," set the Keyboard Transpose to "2," and set Song Transpose to "-3." This brings the keyboard part up in pitch and the song data down to your comfortable singing key. 130 PF-1000 - Yamaha PF-1000 | Owner's Manual - Page 131
position. These move the cursor position in the sequence. Replaces the number at the cursor position with the currently selected Registration Memory bank file (page 38, 44). Any Registration Sequence data is lost when changing Registration Memory banks, unless you've stored it page 84. PF-1000 131 - Yamaha PF-1000 | Owner's Manual - Page 132
is set to "ON," the Harmony effect is applied only to the note that belongs to a chord played in the Auto Accompaniment section of the keyboard. This parameter is not available when Multi Assign, Echo, Tremolo, or Trill is selected in Type above. This lets you assign the Harmony effect to - Yamaha PF-1000 | Owner's Manual - Page 133
and the "Standard Duet" type is selected, the note you play on the keyboard will be played by the Main voice, and the added harmony note will be part. When the Layer part is turned off, Harmony is not applied. Showing the PF-1000 Display on a TV - Video Out The explanations here apply to step #3 of - Yamaha PF-1000 | Owner's Manual - Page 134
external tone generators or other devices. Transmit Upper and Lower keyboard play instead of the individual parts (Main/Layer/Left). All Transmit channels are set to correspond to the Song channels 1-16. Use this to play the PF-1000 song data with an external tone generator, or to record your entire - Yamaha PF-1000 | Owner's Manual - Page 135
. I Receive Transpose When this parameter is set to "OFF," note data received by the PF-1000 is not transposed, and when it is set to "ON," the received note data is transposed according to the current PF-1000 keyboard transpose (page 130) setting. I Start/Stop Determines whether incoming FA - Yamaha PF-1000 | Owner's Manual - Page 136
on the corresponding channel. The LEFT part is controlled by the MIDI data received on the corresponding channel. MIDI note data received by the PF-1000 plays the corresponding notes in the same way as if they are played on the keyboard. The received notes are used as the accompaniment RHYTHM 1 and - Yamaha PF-1000 | Owner's Manual - Page 137
, Cuatro) Determines the time signature of the metronome sound. When you start the song or accompaniment style, the values matching to them are automatically set. PF-1000 137 - Yamaha PF-1000 | Owner's Manual - Page 138
Registration Memory, One Touch Setting, Music Finder, or song and sequence data. Selects the desired parameter for locking/ unlocking. 1 2 3 4 Number Indication - CONFIG 2 Determines the brightness of the backlit display. 138 PF-1000 1 2 3 4 5 6 7 8 HEADPHONE SW (SWITCH) Speaker sounds - Yamaha PF-1000 | Owner's Manual - Page 139
eject the source disk and replace it with a blank, formatted disk, then press "OK." To abort the operation, press "CANCEL." 2 Insert the disk containing the original data into the drive and press "OK." A "Now copying" message appears, and the PF-1000 begins copying data to internal memory. To abort - Yamaha PF-1000 | Owner's Manual - Page 140
similar problems may occur when trying to access files originating or edited by a computer having a different language operating system. In general, be careful when switching languages - you risk not being able to access the data properly. Restoring the Factory-programmed Settings of the PF-1000 - Yamaha PF-1000 | Owner's Manual - Page 141
connecting the PF-1000 to other electronic components, 1/4" phone jacks) located on the left side of the keyboard. You can also determine whether or not the internal stereo (page 138). Two people can enjoy listening to the PF1000 together by connecting two pairs of headphones to the two jacks - Yamaha PF-1000 | Owner's Manual - Page 142
R L LEVEL FIXED R Cassette tape recorder stereo system 5 Showing the display of the PF-1000 on a connected TV monitor (VIDEO OUT) You can connect the PF-1000 to a television or video monitor to display the lyrics in your song data or LCD on a larger screen. The size and color of the displayed - Yamaha PF-1000 | Owner's Manual - Page 143
PF-1000 can be connected in three ways. I Using the TO HOST terminal I Using the MIDI terminals I Connecting to a USB terminal by using an optional USB interface (UX series data via the computer's serial port and the PF-1000's TO HOST terminal, you need to install a specified MIDI driver (Yamaha CBX - Yamaha PF-1000 | Owner's Manual - Page 144
to 1 MHz. For details, refer to the owner's manual for the particular software you are using. PF-1000 HOST SELECT MIDI PC-2 PC-1 Mac • When the HOST SELECT switch is set to "MIDI," the TO HOST terminal is disabled. • When using a Macintosh series computer, set the MIDI interface clock setting in - Yamaha PF-1000 | Owner's Manual - Page 145
/UX96/UX16 and the computer with a USB cable. Install the included UX256/UX96/UX16 driver to the computer, and connect the UX256/UX96/UX16 to the PF-1000 with a MIDI cable. Set the HOST SELECT switch on the PF-1000 to "MIDI." For details, refer to the owner's manual of the UX256/UX96/UX16. Now let - Yamaha PF-1000 | Owner's Manual - Page 146
operations on the PF-1000, such as playing the keyboard and selecting voices, are processed and stored as MIDI data. The auto accompaniment styles and songs also consist of MIDI data. MIDI is an acronym that stands for Musical Instrument Digital Interface, which allows electronic musical instruments - Yamaha PF-1000 | Owner's Manual - Page 147
/stop operation The messages transmitted/received by the PF-1000 are shown in the MIDI Data Format and MIDI Implementation Chart in the separate Data List. What You Can Do With MIDI The following MIDI settings can be made on the PF1000: • MIDI templates (preset MIDI setups for various applications - Yamaha PF-1000 | Owner's Manual - Page 148
automatically recorded as SMF Format 0. • Song data loaded to the PF-1000 is automatically saved as SMF Format 0 regardless of the original format. I ESEQ This sequence format is compatible with many of Yamaha's MIDI devices, including the PF-1000 series instruments.This is a common format used with - Yamaha PF-1000 | Owner's Manual - Page 149
Song data recorded on the PF-1000 using voices in the [XG] category is XG-compatible. I DOC This voice allocation format is compatible with many of Yamaha's MIDI devices, including the PF-1000 series instruments.This is also a common format used with various Yamaha software. Using Your PF-1000 with - Yamaha PF-1000 | Owner's Manual - Page 150
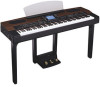
Assembling the Keyboard Stand You can use the PF-1000 without installing the stand. However, if you wish to attach the stand to the PF-1000, follow the steps below. CAUTION • Be careful not to confuse parts. Make sure that you install all parts in the correct orientation. Assemble the stand in - Yamaha PF-1000 | Owner's Manual - Page 151
other movable fixtures? • Move the PF-1000 to an appropriate location. • Does the PF-1000 make a rattling noise when you shake it? • Tighten all screws. • Are the pedal and power cords inserted securely into the sockets? • Check the connections. • If the keyboard stand creaks or is otherwise unsteady - Yamaha PF-1000 | Owner's Manual - Page 152
Troubleshooting Problem • The PF-1000 does not turn on; there is no power. • A click or pop is heard when the power is turned on or off. • Noise is heard from the PF-1000's speakers. • The display is too bright or too dark to read. • The keyboard the end of the song data. Return to the beginning of - Yamaha PF-1000 | Owner's Manual - Page 153
Troubleshooting Problem • Auto accompaniment chords are recognized regardless of the split point or where chords are played on the keyboard. • Certain notes sound at the wrong pitch. • Some channels do not properly play back when playing back song data. • The Harmony function does not operate. • - Yamaha PF-1000 | Owner's Manual - Page 154
Pianist Styles Piano Combo Styles Fingering Style Creator OTS (One Touch Setting) OTS link Music Finder Edit Format Preset Songs Lyrics Score Recording Record Channels Floppy Disk (2HD,2DD) Flash Memory (internal) Flash Availability Tempo Range Tap Tempo Metronome Sound PF-1000 AWM Dynamic - Yamaha PF-1000 | Owner's Manual - Page 155
rest, pedal unit) main unit main unit with keyboard stand main unit main unit with keyboard stand PF-1000 8 Function, Voice, Style 6 languages (English, Japanese, German, French, Spanish, Italian) Keyboard/Song/Master Flat/Stretch (Natural Piano Voice only) Equal Temperament, Pure Major/Pure Minor - Yamaha PF-1000 | Owner's Manual - Page 156
Style Pattern 64 Assembling an Accompaniment Style 110 Assembling the keyboard stand 150 ATTACK 88 AUTO 20 Auto Revoice 117 [AUTO Customizing the Event List - Filter 105 CUT 42 D Damper pedal 19, 58 Data Compatibility 148 [DATA ENTRY] dial 18, 46 Data Types in the 58, 132 156 PF-1000 - Yamaha PF-1000 | Owner's Manual - Page 157
41 Files/folders in a floppy disk 42 Fill 66 Filter 88, 105, 118 FINGERED 62 FINGERED ON BASS 62 First Key On 99 FLOPPY DISK drive 39 Floppy disk drive 18, 6 Foot Controller 58, 143 Footswitch 58, 143 Formatting a Disk 139 [FREEZE] button 19, 84, 131 FULL KEYBOARD 62 [FUNCTION] button - Yamaha PF-1000 | Owner's Manual - Page 158
[1] - [4] buttons 19, 67, 68 One-touch Piano Play 55 [ON / OFF] button (POWER 19, the built-in speakers of the PF-1000 142 Overdub recording 106 Owner 140 P Pad 92 Parameter 114 25 PORTAMENTO TIME 118 PRESET drive 39 Preset MIDI Templates 134 135 Receiving MIDI Data 136 record 69 - Yamaha PF-1000 | Owner's Manual - Page 159
Data 135 TRANSPOSE [-] [+] buttons 18, 130 Transpose Assign 130 Tune 118 TUNING 118 Tuning the Overall Pitch 124 U UP 44 USER drive 39 USER EFFECT 120, 140 Using the USB terminal on your computer with a USB/MIDI interface 145 Using Your PF-1000 with Other Devices 141 Utility 137 PF-1000 - Yamaha PF-1000 | Owner's Manual - Page 160
Voice Set 132 Volume/Voice 117 W Werckmeister 125 What You Can Do With MIDI 147 What's MIDI 145 X XF 19, 148 XG 19, 149 160 PF-1000 - Yamaha PF-1000 | Owner's Manual - Page 161
replaced. Do NOT defeat the safety purpose of the plug. 4. Some electronic products utilize external power supplies or adapters. Do NOT connect this type of product to any power supply or adapter other than one described in the owners manual, on the name plate, or specifically recommended by Yamaha - Yamaha PF-1000 | Owner's Manual - Page 162
according to the instructions found in the users manual, may cause interference harmful to the operation of other electronic devices. Compliance with only to products distributed by Yamaha Canada Music Ltd. • Ceci ne s'applique qu'aux produits distribués par Yamaha Canada Musique Ltée. 162 PF-1000 - Yamaha PF-1000 | Owner's Manual - Page 163
IN PACIFIC OCEAN Yamaha Corporation, Asia-Pacific Music Marketing Group Nakazawa-cho 10-1, Hamamatsu, Japan 430-8650 Tel: 053-460-2312 SY23 HEAD OFFICE Yamaha Corporation, Pro Audio & Digital Musical Instrument Division Nakazawa-cho 10-1, Hamamatsu, Japan 430-8650 Tel: 053-460-2445 PF-1000 163 - Yamaha PF-1000 | Owner's Manual - Page 164
only) www.yamahasynth.com Yamaha Manual Library http://www2.yamaha.co.jp/manual/english/ This document is printed on recycled chlorine free (ECF) paper with soy ink. M.D.G., Pro Audio & Digital Musical Instrument Division, Yamaha Corporation C 2002 Yamaha Corporation V939640 205APAP1.3-01A0 Printed
-
 1
1 -
 2
2 -
 3
3 -
 4
4 -
 5
5 -
 6
6 -
 7
7 -
8
-
9
-
10
-
11
-
12
-
13
-
14
-
15
-
16
-
17
-
18
-
19
-
20
-
21
-
22
-
23
-
24
-
25
-
26
-
27
-
28
-
29
-
30
-
31
-
32
-
33
-
34
-
35
-
36
-
37
-
38
-
39
-
40
-
41
-
42
-
43
-
44
-
45
-
46
-
47
-
48
-
49
-
50
-
51
-
52
-
53
-
54
-
55
-
56
-
57
-
58
-
59
-
60
-
61
-
62
-
63
-
64
-
65
-
66
-
67
-
68
-
69
-
70
-
71
-
72
-
73
-
74
-
75
-
76
-
77
-
78
-
79
-
80
-
81
-
82
-
83
-
84
-
85
-
86
-
87
-
88
-
89
-
90
-
91
-
92
-
93
-
94
-
95
-
96
-
97
-
98
-
99
-
100
-
101
-
102
-
103
-
104
-
105
-
106
-
107
-
108
-
109
-
110
-
111
-
112
-
113
-
114
-
115
-
116
-
117
-
118
-
119
-
120
-
121
-
122
-
123
-
124
-
125
-
126
-
127
-
128
-
129
-
130
-
131
-
132
-
133
-
134
-
135
-
136
-
137
-
138
-
139
-
140
-
141
-
142
-
143
-
144
-
145
-
146
-
147
-
148
-
149
-
150
-
151
-
152
-
153
-
154
-
155
-
156
-
157
-
158
-
159
-
160
-
161
-
162
-
163
-
164
 |
 |

IMPORTANT
Check your power supply
Make sure that your local AC mains voltage matches the voltage specified on the name plate
on the bottom panel. In some areas a voltage selector may be provided on the bottom panel of
the main keyboard unit. Make sure that the voltage selector is set for the voltage in your area. The
voltage selector is set at 240V when the unit is initially shipped. To change the setting use a
"minus" screwdriver to rotate the selector dial so that the correct voltage appears next to the
pointer on the panel.
Before using the PF-1000, be sure to read
“
Precautions
„
on pages 3-4.
O
wner's Manual