Yamaha PSR-225GM Owner's Manual
Yamaha PSR-225GM Manual
 |
View all Yamaha PSR-225GM manuals
Add to My Manuals
Save this manual to your list of manuals |
Yamaha PSR-225GM manual content summary:
- Yamaha PSR-225GM | Owner's Manual - Page 1
- Yamaha PSR-225GM | Owner's Manual - Page 2
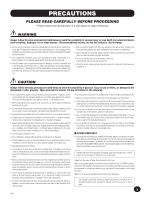
DO NOT connect this product to any power supply or adapter other than one described in the manual, on the name plate, or specifically recommended by Yamaha. WARNING: Do not place this product in a position where anyone could walk on, trip over ,or roll anything over power or connecting cords of any - Yamaha PSR-225GM | Owner's Manual - Page 3
for a long time, make sure you unplug the AC power adaptor from the wall AC outlet. Make sure to discard used batteries according to local regulations. * The illustrations and LCD screens as shown in this owner's manual are for instructional purposes only, and may be different from the ones - Yamaha PSR-225GM | Owner's Manual - Page 4
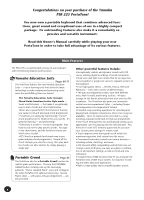
of the Yamaha PSR-225 PortaTone! You now own a portable keyboard that combines advanced functions, great sound and exceptional ease-of-use in a highly compact package. Its outstanding features also make it a remarkably expressive and versatile instrument. Read this Owner's Manual carefully while - Yamaha PSR-225GM | Owner's Manual - Page 5
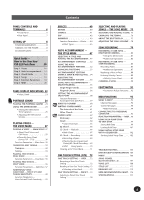
THE POWER 8 ACCESSORY JACKS 9 Quick Guide - How to Use Your New PSR-225 PortaTone 10 Step 1 Voices 10 Step 2 Auto Accompaniment .... 12 Step 3 Chord Guide 14 Step 4 Songs 16 Step 5 Function Parameters ...... 18 Step 6 MIDI 20 PANEL DISPLAY INDICATIONS 22 • Music Stand 23 PORTABLE - Yamaha PSR-225GM | Owner's Manual - Page 6
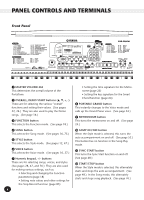
VOLUME dial This determines the overall volume of the PortaTone. · OVERALL, DEMO START buttons (L, M, +, note values and other settings for the Step Record function (page 85) 6 • Setting the 64) º PORTABLE GRAND button This instantly changes to the Voice mode and calls up the Grand Piano voice. (See - Yamaha PSR-225GM | Owner's Manual - Page 7
control the Chord Guide functions. (See page 62.) ƻ RECORD button This is used for selecting and enabling the recording functions: Song ( FOOT SWITCH ¿ IN MIDI OUT ³ DC IN 10-12V jack This is for connection to a PA-3B AC power adaptor. (See page 8.) · PHONES/AUX OUT jack This is for connection - Yamaha PSR-225GM | Owner's Manual - Page 8
interrupt the power supply (e.g. remove the batteries or unplug the AC adaptor) during any PSR-225 record operation! Doing so can result in a loss of data. Using an AC Power Adaptor To connect your PortaTone to a wall socket, you will need the optionally available Yamaha PA-3B Power Adaptor. Use - Yamaha PSR-225GM | Owner's Manual - Page 9
functions the same way as a damper pedal on an acoustic piano - press and hold down the footswitch as you play the keyboard to sustain the sound. PHONES/ AUX OUT FOOT SWITCH I Connecting a Keyboard Amplifier or Stereo System Though the PortaTone is equipped with a builtin speaker system - Yamaha PSR-225GM | Owner's Manual - Page 10
Quick Guide - How to Use Your New PSR-225 Step 1 Voices PortaTone This brief, easy-to-follow section shows you how to use the basic features and functions of your new PSR-225 PortaTone. If you've never touched an electronic keyboard before, reading and going through the steps in this section - Yamaha PSR-225GM | Owner's Manual - Page 11
Piano 003 Honky-tonk Piano 004 Funky Electric Piano 005 DX Electric Piano 006 MIDI Grand Piano 007 CP 80 008 Hyper Electric Piano 009 Bell Electric Piano 010 Harpsichord 011 Clavi 012 Celesta MALLET 013 Vibraphone 014 Marimba 015 Xylophone 016 Tubular Bells 017 Timpani 018 Steel Drums 019 Music - Yamaha PSR-225GM | Owner's Manual - Page 12
PSR-225 has powerful and easy-to-use auto accompaniment features. All you have to do is play chords with your left hand - and the PortaTone in learning how to play chords, Accompaniment section refer to "Using the Chord Guide function" on page 14. n Select a section. Try playing with the Intro - Yamaha PSR-225GM | Owner's Manual - Page 13
PortaTone features 100 different styles in various music styles, see below. STYLE 0028BtPop2 v Play the keyboard. Want to find out more? See page 74 8Beat Medium 8 8Beat Ballad 9 Epic Ballad 10 Piano Ballad 16BEAT 11 16Beat Shuffle 1 12 16Beat Shuffle Name COUNTRY & WESTERN 61 Bluegrass 62 Country 2/4 - Yamaha PSR-225GM | Owner's Manual - Page 14
Root note Chord type z Enter the Style mode, then press the CHORD GUIDE button until "Dict." is shown in the display. STYLE ACMP ON Dict. keyboard diagram flash when the chord is played properly. Want to find out more? See page 62. Playing appropriate chords with just one finger The PortaTone - Yamaha PSR-225GM | Owner's Manual - Page 15
in succession, and the PortaTone automatically plays the proper chords for you! q Enter the Style mode, then press the CHORD GUIDE button until "EZ. board to play a chord. Want to find out more? See page 66. Recording your own EZ Chord banks You can also create your own custom chord progressions, - Yamaha PSR-225GM | Owner's Manual - Page 16
Playing a song Playing back all three songs The PSR-225 has three Demo songs that showcase the authentic voices back a single song Naturally, you can also individually select and play back any of the PortaTone's songs. z Enter the song mode. ALLTakeOff! SONG 001 111 MEASURE TEMPO 123456 x Select - Yamaha PSR-225GM | Owner's Manual - Page 17
desired settings on the PortaTone. w Select the User One Touch Setting record mode. STYLE 1OTS User RECORD e Select the desired User bank (1 - 4). STYLE 2UserBank r Select the desired User button (USER 1 - 4). t Turn off the User One Touch Setting record mode. Calling up a User One Touch Setting - Yamaha PSR-225GM | Owner's Manual - Page 18
a variety of settings in the Function parameters. These give you detailed control over many of the PSR-225's features. z Press the FUNCTION button. x Select a Function number. For a list of functions, see page 19. STYLE F02M.Octave FUNCTION The Function number can be selected - Yamaha PSR-225GM | Owner's Manual - Page 19
Split Point 35 F61 USng1Clr User Song 1 Clear 35 F62 USng2Clr User Song 2 Clear 35 F63 USng3Clr User Song 3 Clear 37 F71 FootSw Footswitch 37 F72 VoiceSet Voice Set 37 F73 TouchSns Touch Sensitivity 37 F81 RemoteCh Remote Channel 37 F82 KbdOut Keyboard Out 37 F83 AcmpOut Accompaniment - Yamaha PSR-225GM | Owner's Manual - Page 20
functions, that let you use the instrument in a variety of recording and performance applications. G Sending original song and One Touch Setting data to another PSR-225. PSR-225 MIDI OUT MIDI transmit MIDI IN PSR-225 MIDI IN MIDI receive MIDI OUT ➔ See "Using Bulk Dump Send to Save Data - Yamaha PSR-225GM | Owner's Manual - Page 21
accompaniment can also be used in this setup.) PSR-225 MIDI receive MIDI IN MIDI OUT MIDI keyboard with no tone generator ➔ See page 97. G In this setup you can record your PSR-225 performance, including the auto accompani- ment, to a connected computer or sequencer. (Up to 16 channels can - Yamaha PSR-225GM | Owner's Manual - Page 22
the currently selected style.) · Overall functions bar indicator The PortaTone has five Overall functions or controls. The currently selected function is on the panel). » Notation ¿ Keyboard These two portions of the display conveniently indicate notes. When a user song (with chords) is being - Yamaha PSR-225GM | Owner's Manual - Page 23
77.) ¶ Chord When a user song (with chords) is ACMP section of the keyboard when the Style mode recording and playback, these indicate the status of the tracks. (See pages 75, 83.) Music Stand Insert the bottom edge of the included music stand into the slot located at the top rear of the PortaTone - Yamaha PSR-225GM | Owner's Manual - Page 24
also resets the footswitch to Sustain operation. The Portable Grand setting is designed also for playing with the special Pianist styles (#91 - #100). When auto accompaniment is turned on, these provide piano-only accompaniment in a variety of music styles. (See page 52.) USING THE METRONOME 1 Set - Yamaha PSR-225GM | Owner's Manual - Page 25
PORTABLE GRAND 2 Change the value. Use the OVERALL +/- buttons to increase or decrease the Tempo value. Holding down either button continuously increases or decreases the value. - Yamaha PSR-225GM | Owner's Manual - Page 26
PORTABLE GRAND Adjusting the Metronome Volume You can adjust the volume of the Metronome sound independently of the other PortaTone sounds. The volume range is 000 - 127. 1 Select the Metronome Volume function in the Overall menu. Press one of the OVERALL L/M buttons, repeatedly if necessary, - Yamaha PSR-225GM | Owner's Manual - Page 27
mode features 228 authentic voices (including 128 General MIDI voices), plus 10 special drum kits - all of which have been created with Yamaha's sophisticated AWM (Advanced Wave Memory) tone generation system. The Voice mode gives you many powerful and versatile tools for playing and enhancing these - Yamaha PSR-225GM | Owner's Manual - Page 28
STYLE ACMP ON All two-digit voice numbers can be selected without entering an initial "0." However, when selecting voice numbers 1 - 23, the PortaTone pauses briefly before actually calling up the voice. (This pause allows for entering threedigit voice numbers, such as "235." Entering the numbers - Yamaha PSR-225GM | Owner's Manual - Page 29
be played. About Panel Voices and GM Voices Keep in mind that the PortaTone has two separate sets of voices: 100 Panel voices and 128 GM (General MIDI) Voices. The GM Voices can also be used for optimum playback of GM-compatible song data. This means that any GM song data (played from a sequencer or - Yamaha PSR-225GM | Owner's Manual - Page 30
Kit voices are selected you can play different drums and percussion instruments on the keyboard. The drums and percussion instruments played by the various keys are marked by Kit 1 102 Standard Kit 2 103 Room Kit 104 Rock Kit 105 Electronic Kit 106 Analog Kit 107 Dance Kit 108 Jazz Kit 109 Brush Kit - Yamaha PSR-225GM | Owner's Manual - Page 31
hold down the - button and press the desired number button. These settings are not saved when you turn off the power. If you wish to save them, save them to a User bank in the One Touch Setting feature (page 72). Function Parameters No. Parameter Name F01 Main Voice Volume Display Name - Yamaha PSR-225GM | Owner's Manual - Page 32
/chord accompaniment of the selected style. It also determines the pitch of the songs. This allows you to easily match the pitch of the PortaTone to other instruments or singers, or play in a different key without changing your fingering. The Transpose settings can be adjusted over a range of ± 12 - Yamaha PSR-225GM | Owner's Manual - Page 33
PLAYING VOICES - THE VOICE MODE Tuning Tuning determines the fine pitch setting of both the main voice and the bass/chord accompaniment of the selected style. It also determines the pitch of the songs. This allows you to accurately match the tuning with that of other instruments. The Tuning - Yamaha PSR-225GM | Owner's Manual - Page 34
Dual Voice mode. Press the DUAL button. The Dual Voice mode can also be turned on and off with a connected footswitch. (See page 91.) 001 116 MEASURE TEMPO When you play the keyboard, both the currently selected Main and Dual voices will be heard. To turn the Dual mode off, press the - Yamaha PSR-225GM | Owner's Manual - Page 35
, STYLE, or VOICE). These settings are not saved when you turn off the power. If you wish to save them, save them to a User bank in the One Touch Setting feature (page 72). Function Parameters - Dual Voice of the DUAL button. It can also be controlled by a connected footswitch; see page 91.) 35 - Yamaha PSR-225GM | Owner's Manual - Page 36
to opposite sections of the keyboard, and play one Voice with the left hand and play piano with the right. The right Volume). * Set the octave to a musically appropriate setting (#22 Split Octave). For power. If you wish to save them, save them to a User bank in the One Touch Setting feature ( - Yamaha PSR-225GM | Owner's Manual - Page 37
This turns the Split Voice mode on/off. This can also be controlled by a connected footswitch. (See page 91.) This determines the highest key for the Split voice and parameter is selected. While this is being set, the keyboard does not produce any sound. After setting this, make sure to select - Yamaha PSR-225GM | Owner's Manual - Page 38
dynamic, expressive control over the voices by letting you set how the volume of the PortaTone responds to your playing strength. Once the Touch Sensitivity parameter is set below, Touch response of the keyboard can be turned on or off by pressing the TOUCH button. Indicates Touch Sensitivity is - Yamaha PSR-225GM | Owner's Manual - Page 39
PLAYING VOICES - THE VOICE MODE Function Parameters - Voice Set and Touch Sensitivity Function Parameters No. Parameter Name F72 Voice Set Display Name VoiceSet Range/Settings oFF, on F73 Touch Sensitivity TouchSns 1 - 3 Description When this is set to on, selecting a voice also - Yamaha PSR-225GM | Owner's Manual - Page 40
connected keyboard played voices. If you want to turn off the Reverb effect for the overall PortaTone power. If you wish to save them, save them to a User bank in the One Touch Setting feature (page 72). • Three additional Reverb Types are available when controlling the PortaTone from a MIDI - Yamaha PSR-225GM | Owner's Manual - Page 41
only to the keyboard-played voices. • These settings are not saved when you turn off the power. If you wish to save them, save them to a User bank in the One Touch Setting feature (page 72). • Three additional Chorus Types are available when controlling the PortaTone from a MIDI device. (For details - Yamaha PSR-225GM | Owner's Manual - Page 42
with a connected footswitch. ( keyboard-played voices. • These settings are not saved when you turn off the power. If you wish to save them, save them to a User bank in the One Touch Setting feature (page 72). • Eighteen additional DSP Types are available when controlling the PortaTone from a MIDI - Yamaha PSR-225GM | Owner's Manual - Page 43
the accompaniment styles of the PortaTone. A total of twenty in the upper section of the keyboard) to match the accompaniment chords. be turned on and off with a connected footswitch (page 91), or from Function power. If you wish to save them, save them to a User bank in the One Touch Setting feature - Yamaha PSR-225GM | Owner's Manual - Page 44
(See "Reverb Type" list below.) (See "Reverb Type" list below.) on, off This turns the Chorus effect on/off. This can also be controlled by a connected footswitch. (See page 91.) (See "Chorus Type" list below.) (See "Chorus Type" list below.) on, off This turns the DSP effect on/off. This can - Yamaha PSR-225GM | Owner's Manual - Page 45
Tremolo effect with both volume and pitch modulation. Simulated electric guitar tremolo. Several panning effects that automatically shift the sound boosts both high and low frequencies, as is typical in most disco music. Equalizer effect that cuts both high and low frequencies, to simulate the sound - Yamaha PSR-225GM | Owner's Manual - Page 46
the single-note melody played in the right hand. These types only sound when chords are played in the auto accompaniment section of the keyboard. Types 6 - 26 are rhythm-based effects and add embellishments 3 or delayed repeats in time with the auto accompaniment. These types sound whether the - Yamaha PSR-225GM | Owner's Manual - Page 47
music the powerful Chord Guide powerful, easy-to-use tools for learning chords and chord relationships. EZ Chord (page 66) lets you record chord progressions for an entire song, and then step through the chords by simply pressing a single key in the auto accompaniment section of the keyboard - Yamaha PSR-225GM | Owner's Manual - Page 48
B section will play. This function can also be controlled by using a connected footswitch. (See page 91.) You can select the Main A or B Sync-Start The PortaTone also has a Sync-Start function that allows you to start the rhythm/accompaniment by simply pressing a key on the keyboard. To use - Yamaha PSR-225GM | Owner's Manual - Page 49
001 116 MEASURE TEMPO 2) Press the INTRO button. Indicates selected section (Main A or B). This function can also be controlled by using a connected footswitch. (See page 91.) 001 116 MEASURE TEMPO Indicates Intro standby. To actually start the Intro section and accompaniment, press the START - Yamaha PSR-225GM | Owner's Manual - Page 50
enable Sync-Start, and start the Intro section and accompaniment by playing any key on the keyboard. (When auto accompaniment is on, play a key or chord in the auto accompaniment section of the keyboard.) Auto accompaniment section Once the Intro section is finished, the icon section of the display - Yamaha PSR-225GM | Owner's Manual - Page 51
Start, letting you re-start the accompaniment by simply playing a chord or key in the auto accompaniment section of the keyboard. • This function can also be controlled by using a connected footswitch. (See page 91.) • To have the Ending section gradually slow down as it is playing, press the INTRO - Yamaha PSR-225GM | Owner's Manual - Page 52
accompaniment playback. Pressing this button selects the Main A section, or adds a Fill-in A section. (See page 54.) This controls the Chord Guide functions. (See page 62.) Pressing this button alternately enables and cancels the SyncStart function. (See page 48.) This controls the Intro and - Yamaha PSR-225GM | Owner's Manual - Page 53
Change chords using the auto ac- companiment feature. Try playing at the end of a musical phrase. Chords played in the auto accompaniment section of the keyboard are also detected and played been given a default or standard tempo. (For instructions on restoring the default tempo, see page 77.) - Yamaha PSR-225GM | Owner's Manual - Page 54
• Main A → Main B (Fill-in "AB") • Main B → Main A (Fill-in "BA") • Main B → Main B (Fill-in "BB") • This function can also be controlled by using a connected footswitch. (See page 91.) • If you press the MAIN A or B button, the Fill-in will begin immediately, and the newly selected section (A or - Yamaha PSR-225GM | Owner's Manual - Page 55
AUTO ACCOMPANIMENT - THE STYLE MODE ADJUSTING THE ACCOMPANIMENT VOLUME The playback volume of the accompaniment can be adjusted. This volume control affects only the accompaniment volume. The volume range is 000 - 127. 1 Select the Accompaniment Volume function in the Overall menu. Press one of - Yamaha PSR-225GM | Owner's Manual - Page 56
chords of the accompaniment by playing keys in the auto accompaniment section of the keyboard using either the "Single Finger" or "Fingered" method. With Single Finger notes of the chord. Whichever method you use, the PortaTone "understands" what chord you indicate and then automatically generates - Yamaha PSR-225GM | Owner's Manual - Page 57
AUTO ACCOMPANIMENT - THE STYLE MODE Chord Name/[Abbreviation] Major [M] Add ninth [(9)] Sixth [6] Sixth ninth [6(9)] Major seventh [M7] Major seventh ninth [M7(9)] Major seventh add sharp eleventh [M7(#11)] Flatted fifth [(b5)] Major seventh flatted fifth [M7b5] Suspended fourth [sus4] Augmented [ - Yamaha PSR-225GM | Owner's Manual - Page 58
AUTO ACCOMPANIMENT - THE STYLE MODE SETTING THE ACCOMPANIMENT SPLIT POINT The Accompaniment Split Point determines the highest key for the accompaniment section. The accompaniment can be played with the keys up to and including the Accompaniment Split Point key. This parameter can be set lower (but - Yamaha PSR-225GM | Owner's Manual - Page 59
different parameter or exit the Function mode before playing the keyboard. Function Parameter - Accompaniment Split Point Function Parameters No. the Split mode (page 37). While this is being set, the keyboard does not produce any sound. After setting this, make sure to select a different parameter - Yamaha PSR-225GM | Owner's Manual - Page 60
made up of three notes and are the most basic and common chords in most music. In this triad, the lowest note is the "root." The root (also The use of intervals and chords is one of the most important elements in music. A wide variety of emotions and feelings can be created depending on the types - Yamaha PSR-225GM | Owner's Manual - Page 61
chord type as a number - the number being the distance of the note from the root. (See the keyboard diagram below.) For example, the minor 6th chord includes the 6th note of the scale, the major 7th chord 7th Major chord Cdim7 * Bbb = A Diminished 7th (double flatted 7th) Diminished chord 61 - Yamaha PSR-225GM | Owner's Manual - Page 62
- THE STYLE MODE CHORD GUIDE The Chord Guide functions of the PortaTone provide powerful, easy-to-use tools for learning chords and chord relationships. Chord Guide features three different types of operation: Dictionary, Smart, and EZ Chord. • Pressing the CHORD GUIDE button automatically turns on - Yamaha PSR-225GM | Owner's Manual - Page 63
the chord (major, minor, seventh, etc.). Press the key on the keyboard that corresponds to the desired chord type (as printed on the panel). CHORD chord, and the individual notes - both in notation and on the keyboard diagram. STYLE Dict. ACMP ON 001 116 MEASURE TEMPO M7 Chord name (root and - Yamaha PSR-225GM | Owner's Manual - Page 64
of the styles, as described in steps 1 - 2 on page 47. 2 Select the Smart Chord Guide. Press the CHORD GUIDE button so that "Smart" appears briefly in the display. STYLE ACMP ON Smart 3 Set the desired ) b=5 (Db, or Bbm) b=4 (Ab, or Fm) b=3 (Eb, or Cm) b=2 (Bb, or Gm) b=1 (F, or Dm) 64 - Yamaha PSR-225GM | Owner's Manual - Page 65
music score, select number 15 so that the key is set to b=1 (F, or Dm). Key of F 15b=1 STYLE 4 Play the accompaniment, and play single note chords (root notes) in the auto accompaniment section. Start accompaniment playback in the desired way. (For specific instructions Gdim Gdim Gm Gm Gm Gm Ab - Yamaha PSR-225GM | Owner's Manual - Page 66
in the auto accompaniment section of the keyboard. Besides being a convenient performance tool, which you can record chords. A special bank chain function allows you to connect all banks, letting Select the EZ Chord function. Press the CHORD GUIDE button, repeatedly if necessary, until "EZ" appears - Yamaha PSR-225GM | Owner's Manual - Page 67
press a single key in the accompaniment section of the keyboard, EZ Chord plays the recorded chord and automatically advances to the next one. ( the full keyboard while still being able to use EZ Chord. (See page 91.) Bank Chain A special bank chain function allows you to connect all banks, - Yamaha PSR-225GM | Owner's Manual - Page 68
chord root and name manually from the ROOT and CHORD TYPE section of the keyboard. RECORD ACMP ON 3-025 Indicates the M7 recorded chord. - Clearing the Bank Before recording, you may want to erase (clear) all recorded chords for the selected EZ Chord bank. For instructions on doing this, see - Yamaha PSR-225GM | Owner's Manual - Page 69
the chord. Play the desired chord in the auto accompaniment section of the keyboard. Remember that the chord is not actually recorded until you press the + button to move to the next block. If you manually enter the chord root and type (as described on page 68), the chord and bass accompaniment - Yamaha PSR-225GM | Owner's Manual - Page 70
or two spaces between recorded chord blocks - for example, between the different sections (verse, chorus, bridge, etc.) of your song. This gives you a clear visual indication of where you are in a song, and makes it easier to perform the chord changes. • Regardless of the musical genre - rock, pop - Yamaha PSR-225GM | Owner's Manual - Page 71
the EZ Chord Record mode. Press the RECORD button, repeatedly if necessary, until EZ Chord recording is selected. 2) Select the desired point at which the chord will be cleared. Use the +/- buttons. 3) Execute the Clear function. Press the C6 key (highest key on the keyboard) to actually clear - Yamaha PSR-225GM | Owner's Manual - Page 72
, Transpose, Tuning, and Accompaniment Volume • Footswitch assignment • Touch Sensitivity setting Recording a User One Touch Setting 1 Make all desired settings for the PortaTone. Virtually all PortaTone settings can be saved to a User button. Refer to the list above for details. 2 Select the OTS - Yamaha PSR-225GM | Owner's Manual - Page 73
button. 001 116 MEASURE TEMPO 5 Exit from the Record mode. Press the RECORD button. Briefly appears to indicate that settings have been saved to OTS User button 1. Recalling a User One Touch Setting Once you've recorded your settings to a User button, you can instantly recall those settings any - Yamaha PSR-225GM | Owner's Manual - Page 74
OTS) ONE TOUCH SETTING - PRESET Preset One Touch Settings are used in a slightly different way than the User settings. First, select a style, then select a Preset OTS. The Preset A and B settings have been a key or chord in the auto accompaniment section of the keyboard starts the accompaniment. 74 - Yamaha PSR-225GM | Owner's Manual - Page 75
created using the rich and dynamic sounds of the PortaTone, and three User songs to which you can record your own performance. The demo songs are generally the keyboard. The User songs are "empty" and cannot be played until something has been recorded to them. (For instructions on recording your - Yamaha PSR-225GM | Owner's Manual - Page 76
. Simply call up the Voice mode while the song is playing back and select the desired voice. • This function can also be controlled by using a connected footswitch. (See page 91.) CHANGING THE TEMPO The tempo of song (and style) playback can be adjusted over a range of 32 - 280 bpm (beats per - Yamaha PSR-225GM | Owner's Manual - Page 77
when selecting a different song or style. (The set tempo remains, however, when switching styles during playback.) When you turn on the power of the PortaTone, the tempo is automatically set to 116 bpm. ABOUT THE BEAT DISPLAY This section of the display provides a convenient, easy-to-understand - Yamaha PSR-225GM | Owner's Manual - Page 78
SELECTING AND PLAYING SONGS - THE SONG MODE ADJUSTING THE SONG VOLUME The playback volume of the song can be adjusted. This volume control affects only the song volume. The volume range is 000 - 127. 1 Select the Song Volume function in the Overall menu. Press one of the OVERALL L/M buttons, - Yamaha PSR-225GM | Owner's Manual - Page 79
RECORDING The PortaTone features powerful and easy-to-use song recording features that let you record your keyboard performances - using up to six separate tracks - and create your own complete, fully orchestrated compositions. Up to three User songs can be recorded and saved. There are two record - Yamaha PSR-225GM | Owner's Manual - Page 80
SONG RECORDING RECORDING A USER SONG - REALTIME RECORDING In brief, the basic operation for recording is: 1) Make all desired PortaTone settings. 2) Select the Realtime Record mode. 3) Select a User song for recording. 4) Select a track number. 5) Start recording. 6) Stop recording. 7) Listen to - Yamaha PSR-225GM | Owner's Manual - Page 81
TEMPO 3 Select a User song for recording. Use the numeric keypad to select the desired song: User 1 (004), User 2 (005), or User 3 (006). User song numbers can be desired track. (This step is optional; the PortaTone automatically selects the first available track. When there is no - Yamaha PSR-225GM | Owner's Manual - Page 82
of the keyboard. The accompaniment starts automatically and you can continue recording, playing other chords in time with the accompaniment. If you wish to cancel recording at this point, press the RECORD button again. This function can also be controlled by using a connected footswitch. (See - Yamaha PSR-225GM | Owner's Manual - Page 83
simply press the START/STOP button again. Playback stops automatically at the end of the song, or when the START/STOP button is pressed again. 8 Record to other tracks as desired. To do this, simply repeat steps #4 - #7 above. Make sure that when you press the SONG MEMORY button corresponding to the - Yamaha PSR-225GM | Owner's Manual - Page 84
SONG RECORDING RECORDING A USER SONG - STEP RECORDING The basic steps for Step recording are similar to those for Realtime recording. In brief, the basic operation is: 1) Make all desired PortaTone settings. 2) Select the Step Record mode. 3) Select a User song for recording. 4) Select a track - Yamaha PSR-225GM | Owner's Manual - Page 85
. (The note name is shown at the top of display.) When recording chords to the Chord track, make sure the accompaniment is on, then play the desired chord in the accompaniment section of the keyboard. More than one note can be recorded at a time; however, only the last pressed note appears in the - Yamaha PSR-225GM | Owner's Manual - Page 86
value is shown as an icon in the display.) For example, play middle C (C3), then press the "4" button (1/8 note). Note name 004C3 SONG RECORD Beat bars 001-201 MEASURE 1 Measure number Clicks Beat number Note value q(96 Clicks) Beat q(96 Clicks) q(96 Clicks) Beat Beat Measure (384 Clicks - Yamaha PSR-225GM | Owner's Manual - Page 87
the accompaniment section of the keyboard. ("Chord" and the chord name appears in the display.) RECORD ACMP ON M7 Chords can be entered manually (with the Dictionary function), ). This saves you the trouble of repeatedly entering rests when there are several beats or measures of silence between - Yamaha PSR-225GM | Owner's Manual - Page 88
the keyboard (or the appropriate rest value button on the numeric keypad). 3) Enter the new note value on the numeric keypad. (Enter dotted note or triplet first, if desired.) 4) At the "Delete?" prompt press the + button. To cancel, press the button. This operation deletes all previously recorded - Yamaha PSR-225GM | Owner's Manual - Page 89
. Mezzopiano This sets all subsequent notes to a velocity value of 60. Piano This sets all subsequent notes to a velocity value of 40. Pianissimo This 10. You can specify a Velocity Curve in the middle of a track BEFORE recording the notes that the curve will affect. To do this, select the last note - Yamaha PSR-225GM | Owner's Manual - Page 90
tracks of a selected User song. Use this operation only when you're sure you want to erase a song and record a new one. 1 Select the Function mode. Press the FUNCTION button. STYLE F61USng1Clr FUNCTION Flashes to indicate Function parameter can be selected. 2 Select the Function parameter (61 - 63 - Yamaha PSR-225GM | Owner's Manual - Page 91
a variety of functions and operations. By using your foot to conveniently control these functions, you free your hands to concentrate on your performance. Normally, this is used as a damper pedal, producing pedal-controlled sustain for piano and other instrument sounds that have a natural decay - Yamaha PSR-225GM | Owner's Manual - Page 92
Footswitch Assign Functions Function Name Display Name Sustain Sustain EZ Chord Increment EZChdInc Description Damper pedal or sustain operation. Pressing the footswitch applies a natural sustain to the keyboard-played voice. When using EZ Chord (page 66), this provides the same function as - Yamaha PSR-225GM | Owner's Manual - Page 93
? For example, let's say you play a "C" quarter note using the grand piano sound on the PSR-225 keyboard. Unlike an acoustic instrument that puts out a resonated note, the electronic instrument puts out information from the keyboard such as "with what voice," "with which key," "about how strong - Yamaha PSR-225GM | Owner's Manual - Page 94
. IN MIDI OUT MIDI IN Receives MIDI data from another MIDI device. MIDI OUT ....... Transmits the PSR-225's keyboard information as MIDI data to another MIDI device. 94 • Special MIDI cables (sold separately) must be used for connecting to MIDI devices. They can be bought at music stores, etc - Yamaha PSR-225GM | Owner's Manual - Page 95
wide variety of music software. When using a MIDI interface device installed in the personal computer, connect the MIDI terminals of the personal computer and the PSR-225. Use only special MIDI cables when connecting MIDI devices. G Connect the MIDI terminals of the PSR-225 to the MIDI terminals of - Yamaha PSR-225GM | Owner's Manual - Page 96
provide additional, more detailed MIDI settings for the PortaTone. These settings include: • Remote Channel • Keyboard Out • Accompaniment Out 96 The MIDI settings below are saved even when the power is turned off. However, MIDI settings are NOT included in the data saved to the User banks in the - Yamaha PSR-225GM | Owner's Manual - Page 97
is transmitted or not. When this is set to "off," notes played on the PortaTone will not affect (not be transmitted to) the connected MIDI device. When this is set to "on," the following keyboard data is transmitted: Main voice part over channel 1, Split voice part over channel 2, and Dual voice - Yamaha PSR-225GM | Owner's Manual - Page 98
User Songs 1 - 3, and EZ Chord banks 1 8), which you can then reload any time you need. For example, you can save data to floppy disk on a computer or a MIDI data filer (such as the Yamaha MDF3), and have unlimited storage capability for your valuable PortaTone data. (For detailed instructions, see - Yamaha PSR-225GM | Owner's Manual - Page 99
and software. For example, if you are using the Yamaha MDF3 MIDI Data Filer: 1) Make the appropriate MIDI connections. PSR-225 MIDI OUT MIDI IN MDF3 2) Set up the MDF3 for recording MIDI data. (Refer to the MDF3 Owner's Manual.) 2 On the PortaTone, select the Bulk Dump Send function. Do this in - Yamaha PSR-225GM | Owner's Manual - Page 100
MIDI FUNCTIONS 4 At the "Sure?" prompt, start sending the data. Press the + button complete: STYLE FUNCTION STYLE FUNCTION STYLE FUNCTION Send:OTS Send:Sng Indicates One Touch Setting User data is being sent. Indicates User Song data is being sent. Send:Chd Indicates EZ Chord data is being sent. - Yamaha PSR-225GM | Owner's Manual - Page 101
or playback, accompaniment playback, EZ Chord recording, Bulk Dump Send, etc. 3 Start sending the data from the connected MIDI device. Send the data from the connected device. (Refer to the owner's manual of the device for details.) The PortaTone automatically receives the data. As the data - Yamaha PSR-225GM | Owner's Manual - Page 102
two or more measures of silence (no performance data) before the song begins. The Initial Setup data should then be recorded to this space in the song. 2 On the PortaTone, select the Initial Setup Send function. Do this in the normal way: 1) Press the FUNCTION button. 2) Select parameter #87 (with - Yamaha PSR-225GM | Owner's Manual - Page 103
the normal way. Make sure that any subsequently recorded performance data is recorded at least one measure following the Initial Setup data. 6 Exit from the Initial Setup Send operation. To exit from Initial Setup Send, press one of the other mode buttons: SONG, STYLE, or VOICE. MIDI FUNCTIONS 103 - Yamaha PSR-225GM | Owner's Manual - Page 104
TROUBLESHOOTING Problem When the PortaTone is turned on or off, a popping sound is temporarily produced. There is no sound even when the keyboard Solution This is normal and indicates that the PortaTone is receiving electrical power. Check that nothing is connected to the PHONES/AUX OUT jack on the - Yamaha PSR-225GM | Owner's Manual - Page 105
to the owner's manual of your particular device and/or software for details.) The polarity of the footswitch is reversed. Make sure that the footswitch plug is properly connected to the FOOT SWITCH jack before turning on the power. The AWM tone generation method uses multiple recordings (samples) of - Yamaha PSR-225GM | Owner's Manual - Page 106
56 music stand 23 N numeric keypad 6, 28 O One Touch Setting 72 One Touch Setting, Preset 74 One Touch Setting, User 72 OTS (One Touch Setting 72 OVERALL buttons 6 Overall indicator 22 P PHONES / AUX OUT jack 9 Portable Grand 24 Preset One Touch Setting 74 Q Quick Guide 10 R RECORD - Yamaha PSR-225GM | Owner's Manual - Page 107
SONG SCORES (EZ Chord banks 1, 2) EZ Chord Bank 1 Menuet EZ Chord Bank 2 The Entertainer 107 - Yamaha PSR-225GM | Owner's Manual - Page 108
notes for playing on the keyboard is correspondingly reduced. The same applies to the Dual Voice, Split Voice, and Song functions. • The Voice List includes MIDI program change numbers for each voice. Use these program change numbers when playing the PSR-225 via MIDI from an external device. • Some - Yamaha PSR-225GM | Owner's Manual - Page 109
PIANO 0 Grand Piano 1 Bright Piano 3 Honky-tonk Piano 4 Funky Electric Piano 5 DX Electric Piano 2 MIDI Grand Piano 2 CP 80 5 Hyper Electric Piano 5 Bell Electric Piano 6 Harpsichord 7 Clavi 8 Celesta MALLET 11 Vibraphone 12 Marimba 13 Xylophone 14 Tubular Bells 47 Timpani 114 Steel Drums 10 Music - Yamaha PSR-225GM | Owner's Manual - Page 110
MIDI Program Change# Voice Name PIANO 0 0 0 Acoustic Grand Piano 0 0 1 Bright Acoustic Piano 0 0 2 Electric Grand Piano 0 0 3 Honky-tonk Piano 0 0 4 Electric Piano 1 0 0 5 Electric Piano 0 72 Piccolo 0 0 73 Flute 0 0 74 Recorder 0 0 75 Pan Flute 0 0 76 Blown Bottle - Yamaha PSR-225GM | Owner's Manual - Page 111
222 223 224 225 226 227 228 229 230 Bank Select MSB LSB 0 0 0 0 0 0 0 0 0 0 0 0 0 0 0 0 0 0 0 0 MIDI Program Change# Voice Musette Waltz 009 Epic Ballad 035 6/8 Heavy Rock 058 Mariachi LATIN 010 Piano Ballad 036 US Rock 059 Tejano 081 Bossa Nova 1 16BEAT ROCK & ROLL - Yamaha PSR-225GM | Owner's Manual - Page 112
Bank LSB# Program Change# Keyboard MIDI Note# Note Note# Note 25 G# 1 57 A 2 45 A 1 58 A# 2 46 A# 1 59 B 2 47 B 1 60 C 3 48 C 2 61 C# 3 49 C# 2 62 D 3 50 D 2 63 D# 3 51 D# 2 64 E 3 52 E 2 65 F 3 Pedal 5 - Yamaha PSR-225GM | Owner's Manual - Page 113
DRUM KIT LIST Voice# Bank MSB# Bank LSB# Program Change# Keyboard MIDI Note# Note Note# Note 25 C# 0 13 C# -1 26 D 0 14 D -1 56 G# 2 44 G# 1 57 A 2 45 A 1 58 A# 2 46 A# 1 59 B 2 47 B 1 60 C 3 48 C 2 61 C# 3 49 C# 2 62 D 3 50 D 2 63 D# 3 51 D# 2 64 E 3 52 E 2 65 F 3 53 F 2 66 F# - Yamaha PSR-225GM | Owner's Manual - Page 114
MIDI IMPLEMENTATION CHART [Portable Keyboard] Model: PSR-225GM MIDI Implementation Chart Function Transmitted Recognized Basic Default Channel Changed 1 - 16 1 - 16 Mode Default Messages Altered Note Number : True voice Velocity Note ON Note OFF 3 X 0 - 127 O - Yamaha PSR-225GM | Owner's Manual - Page 115
• The values of "mm" and "ll" are used for MIDI Master Tuning. • The default value of "mm" and "ll" are 08H and 00H, respectively. Any values can be used for "n" and "cc." • This is used for saving (recording) User data (User songs, User One Touch Setting, and EZ Chord). - Yamaha PSR-225GM | Owner's Manual - Page 116
MIDI IMPLEMENTATION CHART I Effect map * If the received value does not contain an effect parameter changes, you can select the Reverb, Chorus and DSP effect types which are not accessible from the PSR-225 panel itself. When one of the effects is selected by the external sequencer, " - " will be - Yamaha PSR-225GM | Owner's Manual - Page 117
PA-3B power adaptor) Power Supply • Adaptor : Yamaha PA-3B AC power adaptor • Batteries : Six "D" size, R20P (LR20) or equivalent batteries Dimensions (W x D x H) • 933 x 370 x 129 mm (36-3/4" x 14-5/8" x 5-1/6") Weight • 5.5 kg (12 lbs. 2 oz.) Supplied Accessories • Music Stand • Owner's Manual - Yamaha PSR-225GM | Owner's Manual - Page 118
products: YPP SERIES OF PORTABLE PIANO If during the first 90 days that immediately follows the purchase date, your new Yamaha product covered by this the servicing of your unit and provide a tracking system if needed. 4. Your owners manual contains important safety and operating instructions. It - Yamaha PSR-225GM | Owner's Manual - Page 119
when installed as indicated in the instructions contained in this manual, meets FCC requirements. Modifications not expressly approved by Yamaha may void your authority, granted by the FCC, to use the product. 2. IMPORTANT: When connecting this product to accessories and/ or another product use only - Yamaha PSR-225GM | Owner's Manual - Page 120
BP 70-77312 Marne-la-Vallée Cedex 2, France Tel: 01-64-61-4000 ITALY Yamaha Musica Italia S.P.A., Home Keyboard Division Viale Italia 88, 20020 Lainate (Milano), Italy Tel: 02-935-771 SPAIN/PORTUGAL Yamaha-Hazen Electronica Musical, S.A. Ctra. de la Coruna km. 17, 200, 28230 Las Rozas (Madrid - Yamaha PSR-225GM | Owner's Manual - Page 121
Yamaha PK CLUB (Portable Keyboard Home Page, English only) http://www.yamahaPKclub.com/ Yamaha Manual Library (English versions only) http://www2.yamaha.co.jp/manual/english/ M.D.G., Pro Audio & Digital Musical Instrument Division, Yamaha Corporation © 2001 Yamaha Corporation V799500 10?PO???.?-01A0
-
 1
1 -
 2
2 -
 3
3 -
 4
4 -
 5
5 -
 6
6 -
 7
7 -
8
-
9
-
10
-
11
-
12
-
13
-
14
-
15
-
16
-
17
-
18
-
19
-
20
-
21
-
22
-
23
-
24
-
25
-
26
-
27
-
28
-
29
-
30
-
31
-
32
-
33
-
34
-
35
-
36
-
37
-
38
-
39
-
40
-
41
-
42
-
43
-
44
-
45
-
46
-
47
-
48
-
49
-
50
-
51
-
52
-
53
-
54
-
55
-
56
-
57
-
58
-
59
-
60
-
61
-
62
-
63
-
64
-
65
-
66
-
67
-
68
-
69
-
70
-
71
-
72
-
73
-
74
-
75
-
76
-
77
-
78
-
79
-
80
-
81
-
82
-
83
-
84
-
85
-
86
-
87
-
88
-
89
-
90
-
91
-
92
-
93
-
94
-
95
-
96
-
97
-
98
-
99
-
100
-
101
-
102
-
103
-
104
-
105
-
106
-
107
-
108
-
109
-
110
-
111
-
112
-
113
-
114
-
115
-
116
-
117
-
118
-
119
-
120
-
121
 |
 |
