Yamaha PSR-225GM Owner's Manual - Page 68
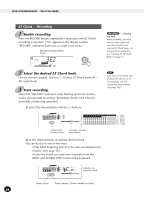
EZ Chord — Recording - keyboard manual
 |
View all Yamaha PSR-225GM manuals
Add to My Manuals
Save this manual to your list of manuals |
Page 68 highlights
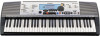
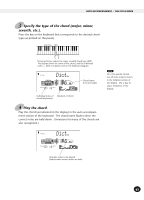
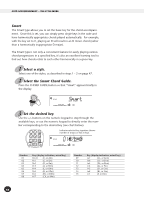
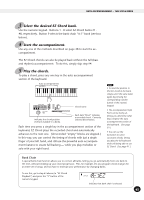
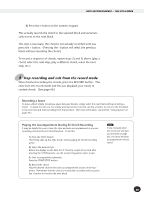
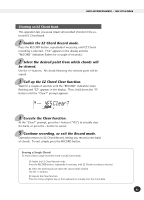
AUTO ACCOMPANIMENT - THE STYLE MODE EZ Chord - Recording 1 Enable recording. Press the RECORD button, repeatedly if necessary, until EZ Chord recording is selected. ("EZ" appears in the display and the "RECORD" indication flashes for a couple of seconds.) RECORD indication flashes briefly. STYLE 3EZ RECORD ACMP ON 2 Select the desired EZ Chord bank. Use the numeric keypad. Buttons 1 - 8 select EZ Chord banks #1 #8, respectively. 3 Start recording. When the "RECORD" indication stops flashing (and is lit continuously), you can start recording. Recording chords in EZ Chord is essentially a three-step operation: 1) Select the desired block with the +/- buttons. RECORD ACMP ON 3-025 Indicates the chord position. Currently selected block flashes. 2) At the selected block, record the desired chord. You can do this in one of two ways: • Play Multi Fingering chords in the auto accompaniment section. (See page 56.) • Enter the chord root and name manually from the ROOT and CHORD TYPE section of the keyboard. RECORD ACMP ON 3-025 Indicates the M7 recorded chord. - Clearing the Bank Before recording, you may want to erase (clear) all recorded chords for the selected EZ Chord bank. For instructions on doing this, see "Clearing an EZ Chord Bank" on page 71. Even if you've recorded over (erased) the factory set EZ Chord banks, you can restore the original banks. (See page 105.) 1 - 16 Block 17 - 32 Block 33 - 48 Block 49 - 64 Block 65 - 80 Block 81 - 96 Block 97 - 112 Block 113 - 128 Block Bank number Block number (128 are available in a bank) 68
-
 1
1 -
2
-
3
-
4
-
5
-
6
-
7
-
8
-
9
-
10
-
11
-
12
-
13
-
14
-
15
-
16
-
17
-
18
-
19
-
20
-
21
-
22
-
23
-
24
-
25
-
26
-
27
-
28
-
29
-
30
-
31
-
32
-
33
-
34
-
35
-
36
-
37
-
38
-
39
-
40
-
41
-
42
-
43
-
44
-
45
-
46
-
47
-
48
-
49
-
50
-
51
-
52
-
53
-
54
-
55
-
56
-
57
-
58
-
59
-
60
-
61
-
62
-
 63
63 -
 64
64 -
 65
65 -
 66
66 -
 67
67 -
 68
68 -
 69
69 -
 70
70 -
 71
71 -
 72
72 -
 73
73 -
74
-
75
-
76
-
77
-
78
-
79
-
80
-
81
-
82
-
83
-
84
-
85
-
86
-
87
-
88
-
89
-
90
-
91
-
92
-
93
-
94
-
95
-
96
-
97
-
98
-
99
-
100
-
101
-
102
-
103
-
104
-
105
-
106
-
107
-
108
-
109
-
110
-
111
-
112
-
113
-
114
-
115
-
116
-
117
-
118
-
119
-
120
-
121
 |
 |