Yamaha PSR-225GM Owner's Manual - Page 80
RECORDING A USER SONG — REALTIME RECORDING, Make all desired PortaTone settings.
 |
View all Yamaha PSR-225GM manuals
Add to My Manuals
Save this manual to your list of manuals |
Page 80 highlights
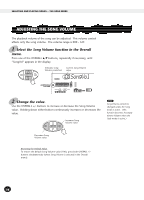
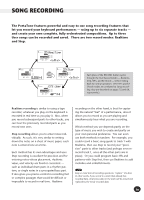
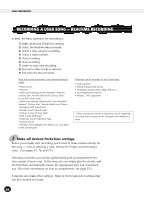
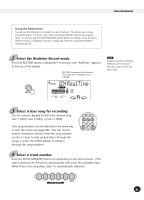
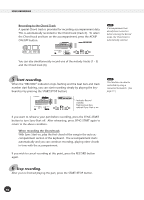
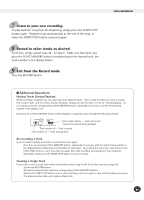
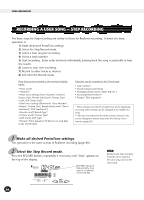
SONG RECORDING RECORDING A USER SONG - REALTIME RECORDING In brief, the basic operation for recording is: 1) Make all desired PortaTone settings. 2) Select the Realtime Record mode. 3) Select a User song for recording. 4) Select a track number. 5) Start recording. 6) Stop recording. 7) Listen to your new recording. 8) Record to other tracks as desired. 9) Exit from the Record mode. Data that can be recorded to the normal (melody) tracks: • Note on/off • Velocity • Main voice settings (Voice Number*, Volume*, Octave, Pan*, Reverb Send Level, Chorus Send Level, DSP Send Level) • Dual voice settings (Dual on/off, Voice Number*, Volume*, Octave, Pan*, Reverb Send Level, Chorus Send Level, DSP Send Level) • Reverb on/off, Reverb Type* • Chorus on/off, Chorus Type* • DSP on/off, DSP Type* • Harmony on/off, Harmony Type • Sustain on/off • Tempo*, Time Signature* (if there is no such data in the Chord track) Data that can be recorded to the Chord track: • Style number* • Chord changes and timing • Changing sections (Intro, Main A/B, etc.) • Accompaniment Volume* • Tempo*, Time Signature* * These settings can only be recorded once at the beginning of a song; other settings can be changed in the middle of a song. 1 Make all desired PortaTone settings. Before you actually start recording, you'll need to make various settings for the song - such as selecting a style, setting the Tempo, and selecting a voice. (See pages 47, 76, and 27.) Selecting a style lets you use the sophisticated auto accompaniment features as part of your song. In this way, you can simply play the chords, and the PortaTone automatically creates the appropriate bass and chord backing. (For more information on auto accompaniment, see page 52.) If desired, also make other settings. Refer to the list above for settings that can be recorded to a song. 80
-
 1
1 -
2
-
3
-
4
-
5
-
6
-
7
-
8
-
9
-
10
-
11
-
12
-
13
-
14
-
15
-
16
-
17
-
18
-
19
-
20
-
21
-
22
-
23
-
24
-
25
-
26
-
27
-
28
-
29
-
30
-
31
-
32
-
33
-
34
-
35
-
36
-
37
-
38
-
39
-
40
-
41
-
42
-
43
-
44
-
45
-
46
-
47
-
48
-
49
-
50
-
51
-
52
-
53
-
54
-
55
-
56
-
57
-
58
-
59
-
60
-
61
-
62
-
63
-
64
-
65
-
66
-
67
-
68
-
69
-
70
-
71
-
72
-
73
-
74
-
 75
75 -
 76
76 -
 77
77 -
 78
78 -
 79
79 -
 80
80 -
 81
81 -
 82
82 -
 83
83 -
 84
84 -
 85
85 -
86
-
87
-
88
-
89
-
90
-
91
-
92
-
93
-
94
-
95
-
96
-
97
-
98
-
99
-
100
-
101
-
102
-
103
-
104
-
105
-
106
-
107
-
108
-
109
-
110
-
111
-
112
-
113
-
114
-
115
-
116
-
117
-
118
-
119
-
120
-
121
 |
 |