Yamaha PSR-225GM Owner's Manual - Page 85
Recording Notes
 |
View all Yamaha PSR-225GM manuals
Add to My Manuals
Save this manual to your list of manuals |
Page 85 highlights
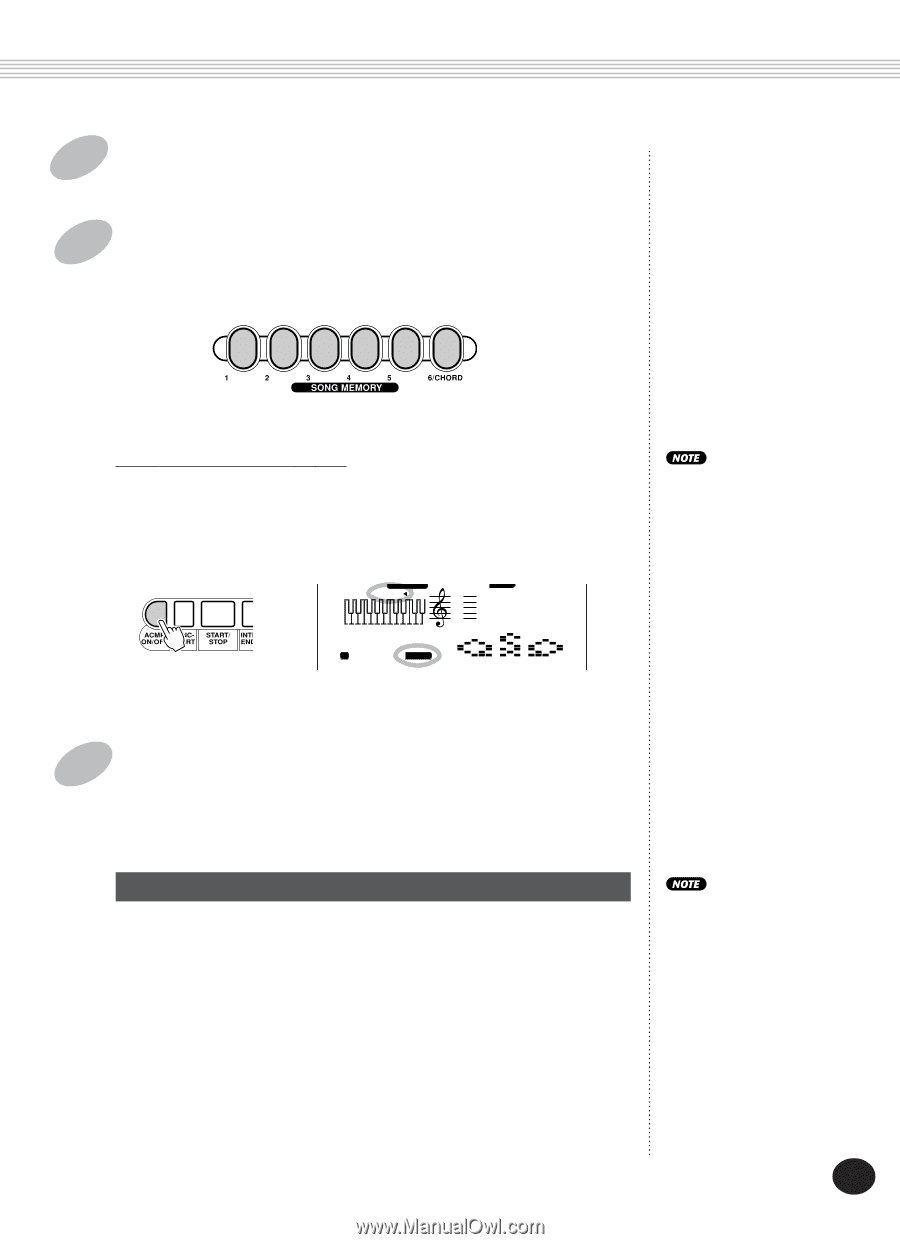
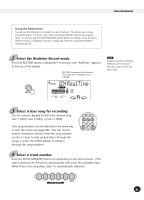
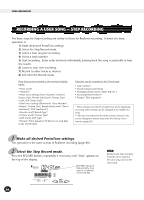
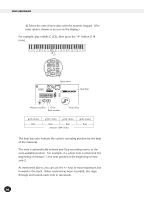
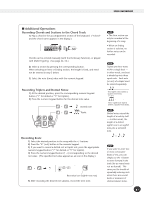
3 Select a User song for recording. This operation is the same as that of Realtime recording (page 81). 4 Select a track number. Press the SONG MEMORY button corresponding to the desired track. SONG RECORDING Recording to the Chord Track A special Chord track is provided for recording accompaniment data. This is automatically recorded to the Chord track (track 6). To select the Chord track and turn on the accompaniment, press the ACMP ON/OFF button. RECORD ACMP ON Unlike Realtime Recording, Step Recording only allows you to record one track at a time; the Chord track cannot be recorded simultaneously with another track. 001-101 MEASURE 1 CHORD 5 Start recording. When the RECORD indication stops flashing and the track number starts flashing, you can start recording. Record each note (or chord) and rest individually, as described below: Recording Notes 1) Select the desired position in the song (measure/beat) with the +/- buttons. (Each press of the button moves one beat forward or backward.) 2) Play the desired key or keys. (The note name is shown at the top of display.) When recording chords to the Chord track, make sure the accompaniment is on, then play the desired chord in the accompaniment section of the keyboard. More than one note can be recorded at a time; however, only the last pressed note appears in the display. 85
-
 1
1 -
2
-
3
-
4
-
5
-
6
-
7
-
8
-
9
-
10
-
11
-
12
-
13
-
14
-
15
-
16
-
17
-
18
-
19
-
20
-
21
-
22
-
23
-
24
-
25
-
26
-
27
-
28
-
29
-
30
-
31
-
32
-
33
-
34
-
35
-
36
-
37
-
38
-
39
-
40
-
41
-
42
-
43
-
44
-
45
-
46
-
47
-
48
-
49
-
50
-
51
-
52
-
53
-
54
-
55
-
56
-
57
-
58
-
59
-
60
-
61
-
62
-
63
-
64
-
65
-
66
-
67
-
68
-
69
-
70
-
71
-
72
-
73
-
74
-
75
-
76
-
77
-
78
-
79
-
 80
80 -
 81
81 -
 82
82 -
 83
83 -
 84
84 -
 85
85 -
 86
86 -
 87
87 -
 88
88 -
 89
89 -
 90
90 -
91
-
92
-
93
-
94
-
95
-
96
-
97
-
98
-
99
-
100
-
101
-
102
-
103
-
104
-
105
-
106
-
107
-
108
-
109
-
110
-
111
-
112
-
113
-
114
-
115
-
116
-
117
-
118
-
119
-
120
-
121
 |
 |