Yamaha PSR-225GM Owner's Manual - Page 88
Replacing a Note or Rest - how to delete recordings
 |
View all Yamaha PSR-225GM manuals
Add to My Manuals
Save this manual to your list of manuals |
Page 88 highlights
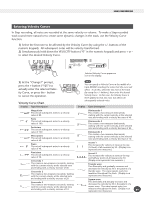
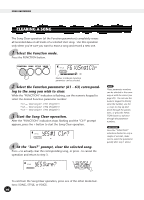
SONG RECORDING 6 Listen to your new recording. You can listen to the entire step recorded track at any time by pressing the START/STOP button. The track you are working on plays back (until stopped), and returns to Step recording at the next position. Keep in mind that this only plays the selected track. To hear all tracks of the song, exit from Step Rec (press the RECORD button), then press the START/STOP button to start song playback. 7 Record to other tracks as desired. To do this, simply repeat steps #4 - #6 above. Make sure that when you press the SONG MEMORY button corresponding to the desired track, the track number in the display flashes. 8 Exit from the Record mode. This operation is the same as step #9 of Realtime recording (page 83). Replacing a Note or Rest If you want to change a note or rest you've just recorded, you can easily replace it with a new one. To do this: 1) Select the desired position in the song with the +/- buttons. 2) Press the new note on the keyboard (or the appropriate rest value button on the numeric keypad). 3) Enter the new note value on the numeric keypad. (Enter dotted note or triplet first, if desired.) 4) At the "Delete?" prompt press the + button. To cancel, press the button. This operation deletes all previously recorded notes that follow the note to be replaced. Make sure you wish to delete any subsequent notes before actually replacing the selected note or rest. 88
-
 1
1 -
2
-
3
-
4
-
5
-
6
-
7
-
8
-
9
-
10
-
11
-
12
-
13
-
14
-
15
-
16
-
17
-
18
-
19
-
20
-
21
-
22
-
23
-
24
-
25
-
26
-
27
-
28
-
29
-
30
-
31
-
32
-
33
-
34
-
35
-
36
-
37
-
38
-
39
-
40
-
41
-
42
-
43
-
44
-
45
-
46
-
47
-
48
-
49
-
50
-
51
-
52
-
53
-
54
-
55
-
56
-
57
-
58
-
59
-
60
-
61
-
62
-
63
-
64
-
65
-
66
-
67
-
68
-
69
-
70
-
71
-
72
-
73
-
74
-
75
-
76
-
77
-
78
-
79
-
80
-
81
-
82
-
 83
83 -
 84
84 -
 85
85 -
 86
86 -
 87
87 -
 88
88 -
 89
89 -
 90
90 -
 91
91 -
 92
92 -
 93
93 -
94
-
95
-
96
-
97
-
98
-
99
-
100
-
101
-
102
-
103
-
104
-
105
-
106
-
107
-
108
-
109
-
110
-
111
-
112
-
113
-
114
-
115
-
116
-
117
-
118
-
119
-
120
-
121
 |
 |