Yamaha PSR-510 Owner's Manual - Page 51
Specify the Required Gate Time, Play a Note or Chord, The MULTI DISPLAY During Step Record, Stepping
 |
View all Yamaha PSR-510 manuals
Add to My Manuals
Save this manual to your list of manuals |
Page 51 highlights
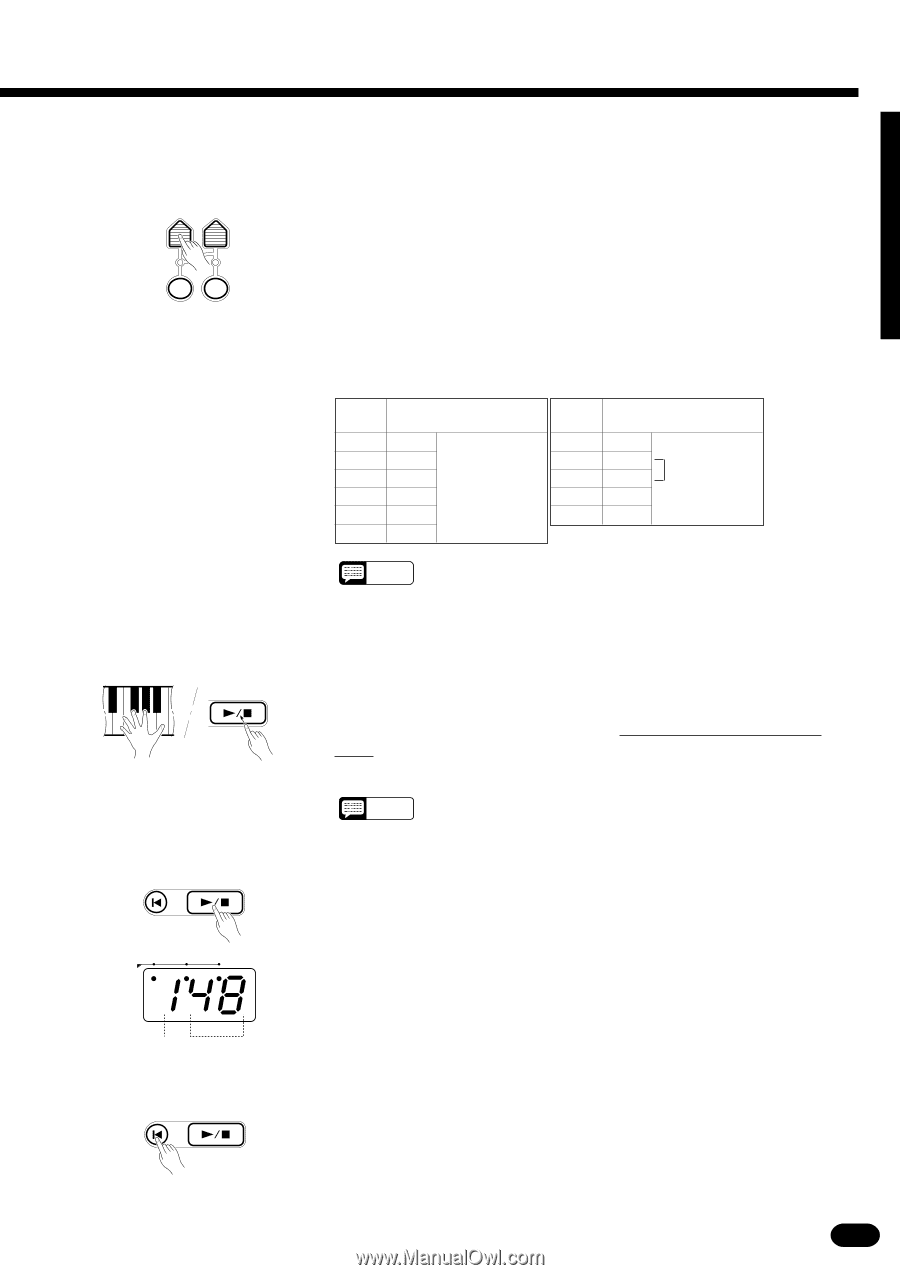
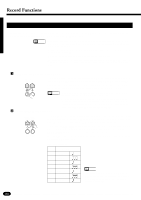
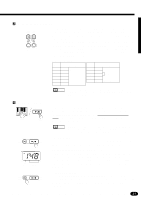
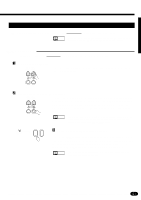
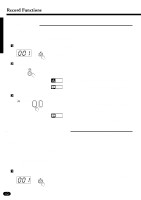
CSpecify the Required Gate Time ... GATE STEP TIME SIZE STEP QUANTIZE REC "Gate Time" refers to the actual length of the note to be entered in relation to the note's step size - i.e. whether the note is staccato, legato, etc. Gate times are specified as percentages of the total note length, as shown in the list below. Press the [GATE TIME] button and the current gate time will appear on the MULTI DISPLAY. Then use the [+] and [-] buttons, the number buttons, the data dial, or the [GATE TIME] button itself to select the required gate time (00 ... 10). The "08" gate time can be instantly selected by pressing the [+] and [-] buttons simultaneously. Gate Time Settings MULTI DISPLAY 00 01 02 03 04 05 GATE TIME MIN. 10% 20% 30% 40% 50% (Most staccato) MULTI DISPLAY 06 07 08 09 10 GATE TIME 60% 70% 80% 90% MAX. Normal (Most legato) NOTES • The current gate time setting is retained in memory even when the power switch is turned off, as long as batteries are installed or an AC adaptor is connected. VPlay a Note or Chord ... PLAY /STOP STEP FWD Play the note on the keyboard corresponding to the pitch of the note you want to enter, or a chord if you want to enter a chord. You can then press the [STEP FWD (PLAY/STOP)] button while still holding the note or chord as many times as necessary to extend the length of the note or chord by the specified step size. NOTES • When several notes are played simultaneously, all the notes will be recorded at one time as a chord after the last key pressed is released. This is a handy technique for the chord progression recording. RESET STEP BWD PLAY /STOP STEP FWD To Enter a Rest ... Rests can be entered by pressing only the [STEP FWD (PLAY/STOP)] button immediately after specifying the required step size for the rest. BEAT Beat Clock The MULTI DISPLAY During Step Record During step recording the leftmost digit on the MULTI DISPLAY repre- sents the current beat, and the rightmost two digits represent the current clock within the current beat (each beat consists of 96 clocks). The BEAT indicator dots function in the same way as they do in the Auto Accompaniment mode. RESET STEP BWD PLAY / STOP STEP FWD Stepping Backward In the STEP RECORD mode the [RESET] button functions as the [STEP BWD] (step backward) button. You can use this button to step backward through the recording by the currently specified step size while erasing the data. 49
-
 1
1 -
2
-
3
-
4
-
5
-
6
-
7
-
8
-
9
-
10
-
11
-
12
-
13
-
14
-
15
-
16
-
17
-
18
-
19
-
20
-
21
-
22
-
23
-
24
-
25
-
26
-
27
-
28
-
29
-
30
-
31
-
32
-
33
-
34
-
35
-
36
-
37
-
38
-
39
-
40
-
41
-
42
-
43
-
44
-
45
-
 46
46 -
 47
47 -
 48
48 -
 49
49 -
 50
50 -
 51
51 -
 52
52 -
 53
53 -
 54
54 -
 55
55 -
 56
56 -
57
-
58
-
59
-
60
-
61
-
62
-
63
-
64
-
65
-
66
-
67
-
68
-
69
-
70
-
71
-
72
-
73
-
74
-
75
-
76
-
77
 |
 |