Yamaha PSR-620 Owner's Manual - Page 49
UserSong
 |
View all Yamaha PSR-620 manuals
Add to My Manuals
Save this manual to your list of manuals |
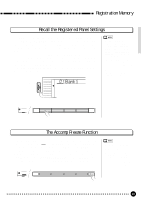
Page 49 highlights
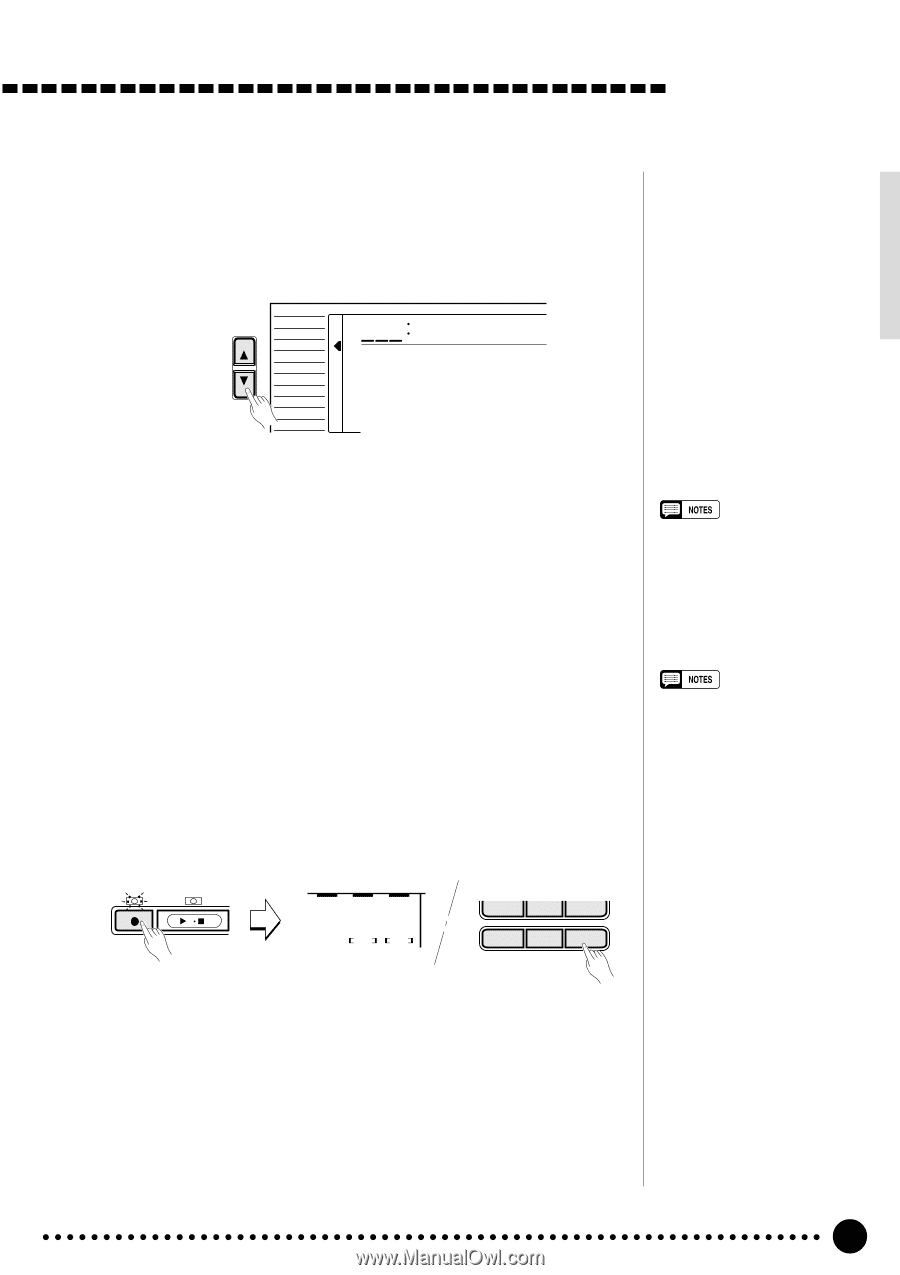
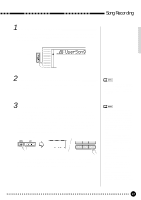
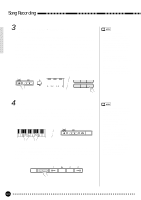
Song Recording 1 Select the User Song Number If necessary, use the [FUNCTION] buttons to select the SONG function, and then the [-/NO] and [+/YES] buttons, the number buttons or the data dial to select SONG number "26" (the user song number). FUNCTION VOICE STYLE SONG REGIST MEMORY MULTI PAD DUAL VOICE SPLIT VOICE HARM/ ECHO OVERALL DIGITAL EFFECT 826 UserSong 2 Select a Voice and Set the Voice Parameters Select the voice you want to record with, and set the digital effects and other parameters as required. • You cannot record in the SPLIT mode - the NORMAL mode will automatically be selected when the SONG record ready mode is engaged. 3 Engage the MELODY Track Record Ready Mode Press the SONG [REC] button. The [REC] indicator will flash, and "REC" will appear in the MELODY 1 track position on the display indicating that the PSR-620 is ready to record. Flashing square brackets in both the MELODY 1 and MELODY 2 track positions indicate that either track can be selected for recording at this point - use the [-/NO] and [+/YES] buttons or the data dial to select the MELODY track to be recorded ("REC" appears in the selected track position). REC SONG PLAY/STOP / ACCOMP MELODY MELODY 1 2 REC 7 8 9 0 -/NO +/YES The BEAT indicator dots flash at the current tempo. If the "Metronom" function in the OVERALL function group is turned ON, the metronome will also begin to sound at the currently selected tempo (page 80). • If a previously-recorded SONG ACCOMP track is ON (the SONG ACCOMP track icon is showing), it can be monitored while recording a MELODY track. If you don't want to hear the ACCOMP track while recording, move the cursor to the ACCOMP track icon and press the [-/NO] button to turn it OFF. • If a non-user song number is selected when the record ready mode is engaged, user song number 26 will automatically be selected. • The melody track volume is the current Keyboard Volume setting - see page 77. • Only one melody track can be recorded at a time. • The record-ready mode of the MELODY track can be disengaged by pressing the [REC] button. • When the record-ready mode is engaged, the measure number resets to 01. (Recording cannot start from the specified measure.) 47
-
 1
1 -
2
-
3
-
4
-
5
-
6
-
7
-
8
-
9
-
10
-
11
-
12
-
13
-
14
-
15
-
16
-
17
-
18
-
19
-
20
-
21
-
22
-
23
-
24
-
25
-
26
-
27
-
28
-
29
-
30
-
31
-
32
-
33
-
34
-
35
-
36
-
37
-
38
-
39
-
40
-
41
-
42
-
43
-
 44
44 -
 45
45 -
 46
46 -
 47
47 -
 48
48 -
 49
49 -
 50
50 -
 51
51 -
 52
52 -
 53
53 -
 54
54 -
55
-
56
-
57
-
58
-
59
-
60
-
61
-
62
-
63
-
64
-
65
-
66
-
67
-
68
-
69
-
70
-
71
-
72
-
73
-
74
-
75
-
76
-
77
-
78
-
79
-
80
-
81
-
82
-
83
-
84
-
85
-
86
-
87
-
88
-
89
-
90
-
91
-
92
-
93
-
94
-
95
-
96
-
97
-
98
-
99
-
100
-
101
-
102
-
103
-
104
-
105
-
106
-
107
-
108
-
109
-
110
-
111
 |
 |