Yamaha PSR-620 Owner's Manual - Page 67
Using Floppy Disks, Formatting a New Floppy Disk
 |
View all Yamaha PSR-620 manuals
Add to My Manuals
Save this manual to your list of manuals |
Page 67 highlights
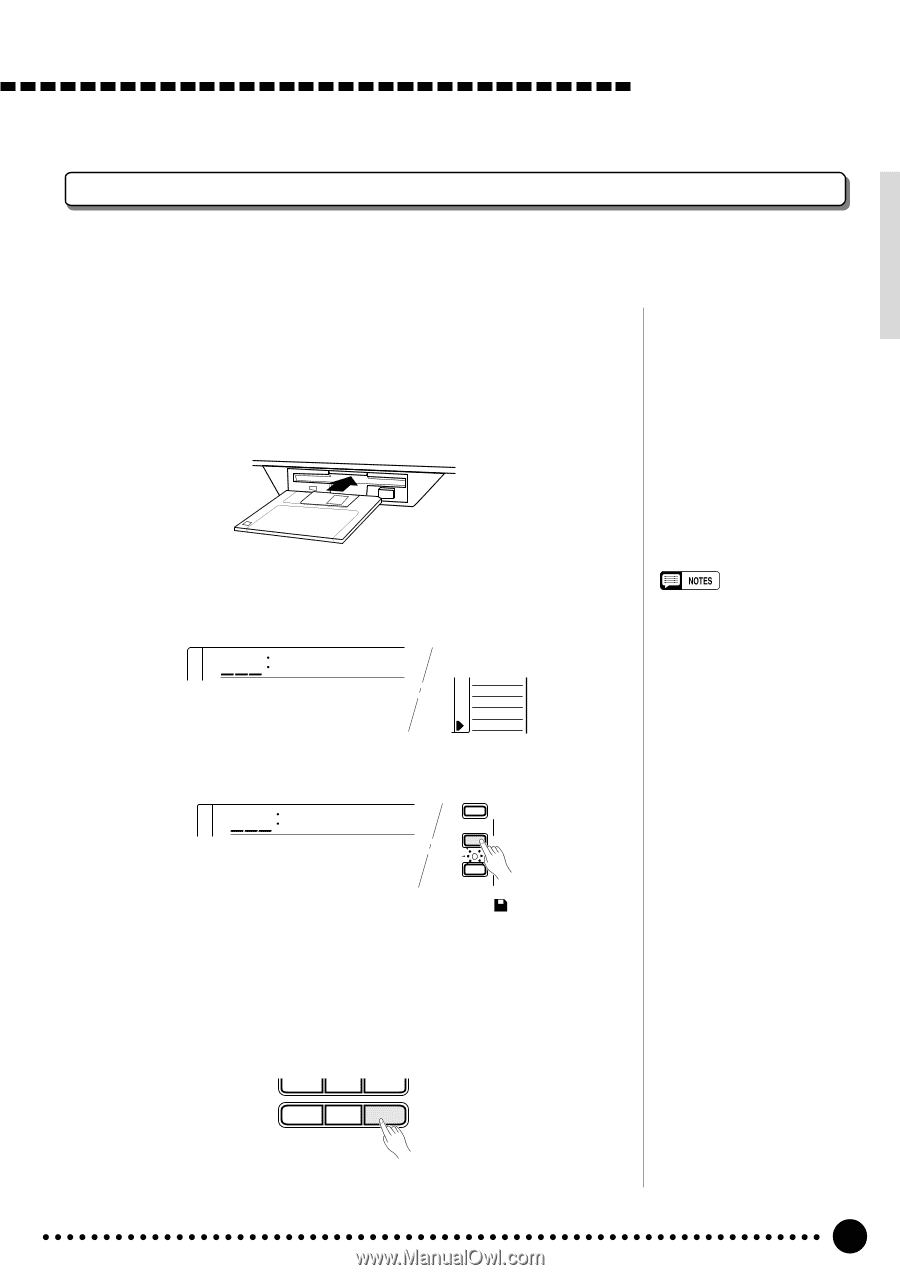
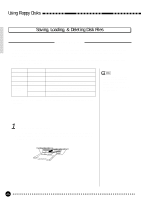
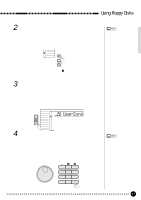
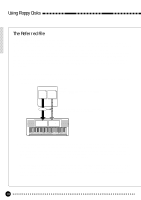
Using Floppy Disks Formatting a New Floppy Disk The PSR-620 uses only 3.5" 2DD floppy disks. Before you can use a new disk for saving data, the disk must be "formatted" as described below. 1 Insert the Disk to Be Formatted Make sure that the disk's write protect tab is set to the "write" position (tab closed), and insert the new disk into the disk drive unit with the sliding shutter facing the drive slot and the label side of the disk facing upward. The disk should click securely into place. When an unformatted disk is properly loaded, the FORMAT job is automatically selected. "Unformat" will appear on the display and the [EXECUTE] indicator will flash. 170 Unformat LOAD SAVE DELETE FORMAT Press the [EXECUTE] button. "Sure?" will appear on the display 170 Sure ? JOB SELECT EXECUTE QUIT DISK 2 Format ...Press the [+/YES] button to execute the format operation (or eject the disk to cancel). "Formatng" will appear on the display during formatting. When the disk has been formatted, the [EXECUTE] indicator will go out. 7 8 9 0 -/NO +/YES • Be careful not to format a disk that already contains data you want to keep. The format operation erases all data on the floppy disk! • Never remove the disk or turn the power OFF while the "Formatng" display is showing. • The "Unformat" display will also appear if you insert a disk the PSR-620 cannot read. • When an unformatted writeprotected disk is loaded, "Unformat" will be displayed. If you press the [EXECUTE] button, "Protcted" will appear on the display. Make sure the disk's write-protect tab is set to the OFF position before formatting. • When you want to re-format a formatted disk, press the [JOB SELECT] button to the right of the display as many times as necessary until the arrowhead in the display appears next to "FORMAT" in the disk job list to the right of the display. The [EXECUTE] indicator will flash and "Format?" will appear on the display. To execute the format operation, press the [EXECUTE] button. "Sure?" will appear on the display and the format is executed by pressing the [+/YES] button. 65
-
 1
1 -
2
-
3
-
4
-
5
-
6
-
7
-
8
-
9
-
10
-
11
-
12
-
13
-
14
-
15
-
16
-
17
-
18
-
19
-
20
-
21
-
22
-
23
-
24
-
25
-
26
-
27
-
28
-
29
-
30
-
31
-
32
-
33
-
34
-
35
-
36
-
37
-
38
-
39
-
40
-
41
-
42
-
43
-
44
-
45
-
46
-
47
-
48
-
49
-
50
-
51
-
52
-
53
-
54
-
55
-
56
-
57
-
58
-
59
-
60
-
61
-
 62
62 -
 63
63 -
 64
64 -
 65
65 -
 66
66 -
 67
67 -
 68
68 -
 69
69 -
 70
70 -
 71
71 -
 72
72 -
73
-
74
-
75
-
76
-
77
-
78
-
79
-
80
-
81
-
82
-
83
-
84
-
85
-
86
-
87
-
88
-
89
-
90
-
91
-
92
-
93
-
94
-
95
-
96
-
97
-
98
-
99
-
100
-
101
-
102
-
103
-
104
-
105
-
106
-
107
-
108
-
109
-
110
-
111
 |
 |