Yamaha PSR-630 Owner's Manual - Page 102
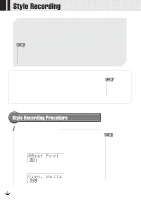
If Necessary, Select a User Style Number, Select a to Record, INTRO], ENDING], FILL], TRACK
 |
View all Yamaha PSR-630 manuals
Add to My Manuals
Save this manual to your list of manuals |
Page 102 highlights
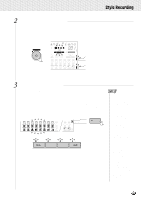
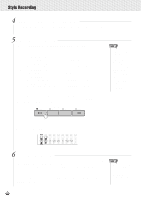
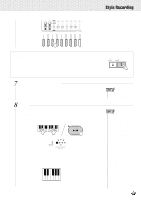
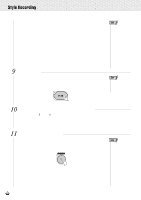
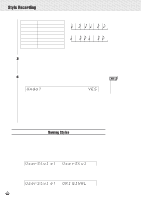
,,QQ,,QQSty,,QQleRec,,QQordin,,QQg ,,QQ,,QQ,,QQ,,QQ,,QQ,,QQ,,QQ,,QQ,,QQ,,QQ,,QQ 4 If Necessary, Select a User Style Number If the desired user style is not already selected, use the [-] and [+] buttons, [1]-[0] number buttons, or the Data Dial to select it. 5 Select a Section to Record Press the [INTRO], MAIN [A]/[B], [ENDING], or [FILL] button to select a section for recording. To select the INTRO section Press the INTRO button the INTRO lamp will light To select the MAIN A section Press the MAIN A button the MAIN A lamp will light To select the MAIN B section Press the MAIN B button the MAIN B lamp will light To select the ENDING section Press the ENDING button the ENDING lamp will light To select the FILL section Press the MAIN A/B button twice ......... the MAIN A /B lamp will light For example, press the [INTRO] button, lighting the INTRO indicator. The indicators for the other sections will go out. This shows that the INTRO section has been selected as the section for recording. INTRO MAIN / AUTO FILL A B A B ENDING • Multiple sections cannot be recorded at the same time. • If you don't specifically select a section, the MAIN A section will automatically be selected for recording. • Although the preset FILL sections have 4 variations (refer to page 27), user-style FILL sections can have only 1. When using a preset style as a basis for a user style, the AA FILL variation is used. At the bottom of the display, the RHYTHM1 track bar will appear (not flashing). This shows that RHYTHM1 has been selected as the recording track. 1 2 3 4 5 6 7 8 9 219 219 340 322 324 434 468 442 471 RHYTHM RHYTHM BASS CHORD CHORD PAD PHRASE PHRASE MELODY 1 2 1 2 1 2 1 6 Select a Track to Record When using a preset style as a basis for a user style, the BASS, CHORD 1, CHORD 2, PAD, PHRASE 1, and PHRASE 2 tracks must be cleared before they can be selected for recording (see page 105). The RHYTHM 1 and RHYTHM 2 tracks can be "overdubbed" - i.e. new notes can be added without erasing the original data. Use the TRACK buttons to select RHYTHM 1, BASS, CHORD 1/2, PAD, or PHRASE 1/2 as the style track you want to record. • Only one track can be recorded at a time. • If you don't specifically select a track, the RHYTHM 1 track will automatically be selected when you start recording. 100
-
 1
1 -
2
-
3
-
4
-
5
-
6
-
7
-
8
-
9
-
10
-
11
-
12
-
13
-
14
-
15
-
16
-
17
-
18
-
19
-
20
-
21
-
22
-
23
-
24
-
25
-
26
-
27
-
28
-
29
-
30
-
31
-
32
-
33
-
34
-
35
-
36
-
37
-
38
-
39
-
40
-
41
-
42
-
43
-
44
-
45
-
46
-
47
-
48
-
49
-
50
-
51
-
52
-
53
-
54
-
55
-
56
-
57
-
58
-
59
-
60
-
61
-
62
-
63
-
64
-
65
-
66
-
67
-
68
-
69
-
70
-
71
-
72
-
73
-
74
-
75
-
76
-
77
-
78
-
79
-
80
-
81
-
82
-
83
-
84
-
85
-
86
-
87
-
88
-
89
-
90
-
91
-
92
-
93
-
94
-
95
-
96
-
 97
97 -
 98
98 -
 99
99 -
 100
100 -
 101
101 -
 102
102 -
 103
103 -
 104
104 -
 105
105 -
 106
106 -
 107
107 -
108
-
109
-
110
-
111
-
112
-
113
-
114
-
115
-
116
-
117
-
118
-
119
-
120
-
121
-
122
-
123
-
124
-
125
-
126
-
127
-
128
-
129
-
130
-
131
-
132
-
133
-
134
-
135
-
136
-
137
-
138
-
139
-
140
-
141
-
142
-
143
-
144
-
145
-
146
-
147
-
148
-
149
-
150
-
151
-
152
-
153
-
154
-
155
-
156
-
157
-
158
-
159
-
160
-
161
-
162
-
163
-
164
-
165
-
166
-
167
-
168
-
169
-
170
-
171
-
172
-
173
-
174
-
175
-
176
-
177
-
178
 |
 |