Yamaha PSR-630 Owner's Manual - Page 104
Stop Recording, Record Additional s & Tracks as Required, Exit From the Record Mode
 |
View all Yamaha PSR-630 manuals
Add to My Manuals
Save this manual to your list of manuals |
Page 104 highlights
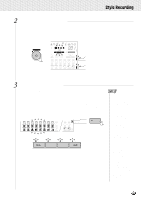
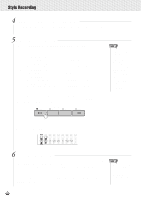
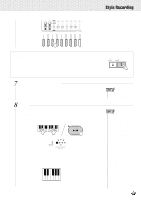
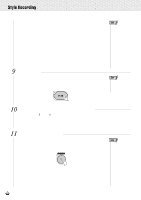
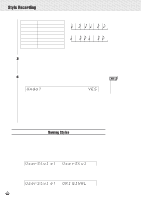
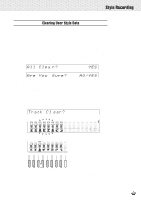
,,QQ,,QQSty,,QQleRec,,QQordin,,QQg ,,QQ,,QQ,,QQ,,QQ,,QQ,,QQ,,QQ,,QQ,,QQ,,QQ,,QQ Observe the following rules when recording the MAIN and FILL sections: • Use only the CM7 scale tones when recording the BASS and PHRASE tracks (i.e. C, D, E, G, A, and B). • Use only the chord tones when recording the CHORD and PAD tracks (i.e. C, E, G, and B). Any appropriate chord or chord progression can be used for the INTRO and ENDING sections. The basic chord for the accompaniment is called the source chord. The default source chord is set as CM7, but you can change it to whatever chord is easy for you to play. For details, see "Refining User Styles with Style File Format" (page 148). 9 Stop Recording Stop recording by pressing the [START/STOP] button. The PSR-730/630 will return to Record Ready Mode. When recording is stopped the MEASURE number on the display will return to "1". START / STOP • During recording you can use the TRACK buttons to turn playback of previously-recorded tracks on or off as required. • For recording the RHYTHM 1/2 tracks, the instrument symbols printed on the front edge of the panel show you the instrument assignments to each key. See Keyboard Percussion on page 140 for playing each drum/ percussion sound. • You can also press the [SYNC START] button to stop recording and return to the Record Ready Mode. 10 Record Additional Sections & Tracks as Required By repeating steps 5 through 9, above, you can select and record additional sections and tracks as required. 11 Exit From the Record Mode When you're finished recording a style, press the [RECORD] button so that its indicator goes out to exit from the record mode. The recorded user style can now be used in the same way as the preset styles (page 22). RECORD • The voice data in specific user style tracks can be "revoiced" in the same way as the preset styles, as described on page 112. This, however, does not actually rewrite the user style data. In order to actually change the user style data first use the revoice function, then immediately engage and disengage the style record mode without recording any data. 102
-
 1
1 -
2
-
3
-
4
-
5
-
6
-
7
-
8
-
9
-
10
-
11
-
12
-
13
-
14
-
15
-
16
-
17
-
18
-
19
-
20
-
21
-
22
-
23
-
24
-
25
-
26
-
27
-
28
-
29
-
30
-
31
-
32
-
33
-
34
-
35
-
36
-
37
-
38
-
39
-
40
-
41
-
42
-
43
-
44
-
45
-
46
-
47
-
48
-
49
-
50
-
51
-
52
-
53
-
54
-
55
-
56
-
57
-
58
-
59
-
60
-
61
-
62
-
63
-
64
-
65
-
66
-
67
-
68
-
69
-
70
-
71
-
72
-
73
-
74
-
75
-
76
-
77
-
78
-
79
-
80
-
81
-
82
-
83
-
84
-
85
-
86
-
87
-
88
-
89
-
90
-
91
-
92
-
93
-
94
-
95
-
96
-
97
-
98
-
 99
99 -
 100
100 -
 101
101 -
 102
102 -
 103
103 -
 104
104 -
 105
105 -
 106
106 -
 107
107 -
 108
108 -
 109
109 -
110
-
111
-
112
-
113
-
114
-
115
-
116
-
117
-
118
-
119
-
120
-
121
-
122
-
123
-
124
-
125
-
126
-
127
-
128
-
129
-
130
-
131
-
132
-
133
-
134
-
135
-
136
-
137
-
138
-
139
-
140
-
141
-
142
-
143
-
144
-
145
-
146
-
147
-
148
-
149
-
150
-
151
-
152
-
153
-
154
-
155
-
156
-
157
-
158
-
159
-
160
-
161
-
162
-
163
-
164
-
165
-
166
-
167
-
168
-
169
-
170
-
171
-
172
-
173
-
174
-
175
-
176
-
177
-
178
 |
 |