Yamaha PSR-630 Owner's Manual - Page 32
Changing the Accompaniment Split Point
 |
View all Yamaha PSR-630 manuals
Add to My Manuals
Save this manual to your list of manuals |
Page 32 highlights
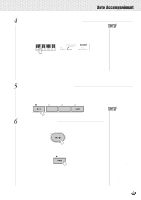
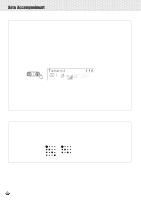
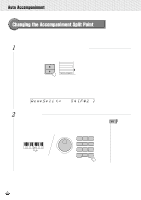
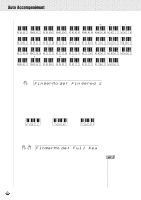
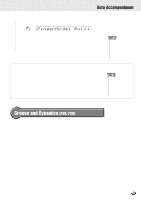
,,QQ,,QQAut,,QQoAcc,,QQompa,,QQnimen,,QQt ,,QQ,,QQ,,QQ,,QQ,,QQ,,QQ,,QQ,,QQ,,QQ,,QQ Changing the Accompaniment Split Point The AUTO ACCOMPANIMENT split point (the boundary point between the melody section and accompaniment section) can be set to any key on the PSR-730/630 keyboard to match your individual playing requirements. 1 Select the Accompaniment Split Point Function Use the MENU [v] and [w] buttons to the left of the display to move the triangular indicator next to "OVERALL" on the left side of the display. MENU MIDI DIGITAL EFFECT OVERALL GROOVE&DYNAMICS Then use the SUB MENU [v] and [w] buttons to select the "AcmpSplit" function from within the OVERALL menu . The MIDI note number corresponding to the current split point will appear to the right of "AcmpSplit" on the top line of the display. AcmpSpli t: 54 [F#2 ] 2 Set As Required Simply press the key you want to assign as the split point. The key number of the key you press will appear to the right of "AcmpSplit" on the top line of the display.You can also use the [-] and [+] buttons, number buttons, or Data Dial to enter the split point key number. The split point can be set at any key number from 0 through 127. 1 2 3 4 5 6 7 8 9 - / NO 0 + / YES • The split point key becomes the highest key in the Auto Accompaniment section of the keyboard. • When setting the split point, that is, the sub menu "AcmpSplit" is shown on the display, pressing the key on the keyboard doesn't either produce notes or detect chords in the accompaniment section, but only designates the split point. 30
-
 1
1 -
2
-
3
-
4
-
5
-
6
-
7
-
8
-
9
-
10
-
11
-
12
-
13
-
14
-
15
-
16
-
17
-
18
-
19
-
20
-
21
-
22
-
23
-
24
-
25
-
26
-
 27
27 -
 28
28 -
 29
29 -
 30
30 -
 31
31 -
 32
32 -
 33
33 -
 34
34 -
 35
35 -
 36
36 -
 37
37 -
38
-
39
-
40
-
41
-
42
-
43
-
44
-
45
-
46
-
47
-
48
-
49
-
50
-
51
-
52
-
53
-
54
-
55
-
56
-
57
-
58
-
59
-
60
-
61
-
62
-
63
-
64
-
65
-
66
-
67
-
68
-
69
-
70
-
71
-
72
-
73
-
74
-
75
-
76
-
77
-
78
-
79
-
80
-
81
-
82
-
83
-
84
-
85
-
86
-
87
-
88
-
89
-
90
-
91
-
92
-
93
-
94
-
95
-
96
-
97
-
98
-
99
-
100
-
101
-
102
-
103
-
104
-
105
-
106
-
107
-
108
-
109
-
110
-
111
-
112
-
113
-
114
-
115
-
116
-
117
-
118
-
119
-
120
-
121
-
122
-
123
-
124
-
125
-
126
-
127
-
128
-
129
-
130
-
131
-
132
-
133
-
134
-
135
-
136
-
137
-
138
-
139
-
140
-
141
-
142
-
143
-
144
-
145
-
146
-
147
-
148
-
149
-
150
-
151
-
152
-
153
-
154
-
155
-
156
-
157
-
158
-
159
-
160
-
161
-
162
-
163
-
164
-
165
-
166
-
167
-
168
-
169
-
170
-
171
-
172
-
173
-
174
-
175
-
176
-
177
-
178
 |
 |
