Yamaha PSR-630 Owner's Manual - Page 90
Multi Recording Procedure
 |
View all Yamaha PSR-630 manuals
Add to My Manuals
Save this manual to your list of manuals |
Page 90 highlights
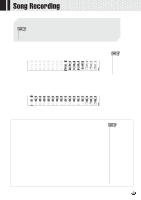
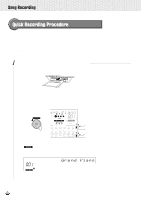
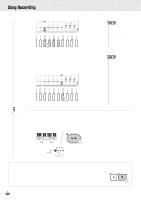
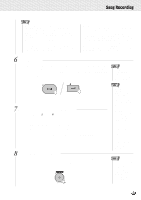
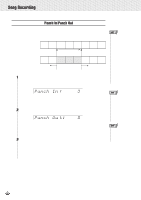
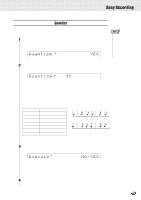
,,QQ,,QQSon,,QQgRec,,QQordin,,QQg ,,QQ,,QQ,,QQ,,QQ,,QQ,,QQ,,QQ,,QQ,,QQ,,QQ,,QQ Multi Recording Procedure With Multi Recording, you can record up to 16 tracks for a single song. The default settings for the tracks are as follows: Track 1 For recording keyboard playing (R1 part). Track 2 For recording keyboard playing (R2 part). Track 3 For recording keyboard playing (L part). Tracks 4,5 ......... For recording keyboard playing (R1 part). Tracks 6-8 ........ For recording harmony notes (Harmony type 7-16). Tracks 9-16 ...... For recording Auto Accompaniment notes (RHYTHM 1- PHRASE 2) 1 Engage the Song Record Mode and Select the User Song In the same way as steps 1-3 for Quick Recording, engage the Song Recording Mode and select the user song number. 2 Select the Record Method Use the SUB MENU [v] and [w] buttons so that "Quick Record" or "Multi Record" (record method selection screen) appears on the display. Multi Re cord Use the [-] and [+] buttons or the Data Dial to select Multi Record as the record method. 3 Select the Track and Part to Record Select the track and the part to be recorded on that track.. Default parts are already set for recording, but you can change them as needed. Use the SUB MENU [v] and [w] buttons so that "Part Select" (record part selection screen) appears on the display. Part Sel ect:Voi ce R1 • Even though three tracks, track 1, 4 and 5, are prepared for R1 part as the default, the R1 part performance cannot be recorded to the multiple tracks at the same time. In such cases, the last track you select is designated for the R1 part recording. • When you insert an commercially available song disk and try to record and overwrite one of the song files which is not writeprotected, "Convert NO/ YES" will appear and the recording will not be initiated. If you select "YES" to execute recording, "Don't remove the disk" appears and the PSR730/630 starts converting the selected song's format to the PortaTone's. After completing the conversion, Record-ready mode is engaged to indicate recording becomes possible. • If you begin recording without selecting the record method, Quick Record Mode will automatically be selected. 88
-
 1
1 -
2
-
3
-
4
-
5
-
6
-
7
-
8
-
9
-
10
-
11
-
12
-
13
-
14
-
15
-
16
-
17
-
18
-
19
-
20
-
21
-
22
-
23
-
24
-
25
-
26
-
27
-
28
-
29
-
30
-
31
-
32
-
33
-
34
-
35
-
36
-
37
-
38
-
39
-
40
-
41
-
42
-
43
-
44
-
45
-
46
-
47
-
48
-
49
-
50
-
51
-
52
-
53
-
54
-
55
-
56
-
57
-
58
-
59
-
60
-
61
-
62
-
63
-
64
-
65
-
66
-
67
-
68
-
69
-
70
-
71
-
72
-
73
-
74
-
75
-
76
-
77
-
78
-
79
-
80
-
81
-
82
-
83
-
84
-
 85
85 -
 86
86 -
 87
87 -
 88
88 -
 89
89 -
 90
90 -
 91
91 -
 92
92 -
 93
93 -
 94
94 -
 95
95 -
96
-
97
-
98
-
99
-
100
-
101
-
102
-
103
-
104
-
105
-
106
-
107
-
108
-
109
-
110
-
111
-
112
-
113
-
114
-
115
-
116
-
117
-
118
-
119
-
120
-
121
-
122
-
123
-
124
-
125
-
126
-
127
-
128
-
129
-
130
-
131
-
132
-
133
-
134
-
135
-
136
-
137
-
138
-
139
-
140
-
141
-
142
-
143
-
144
-
145
-
146
-
147
-
148
-
149
-
150
-
151
-
152
-
153
-
154
-
155
-
156
-
157
-
158
-
159
-
160
-
161
-
162
-
163
-
164
-
165
-
166
-
167
-
168
-
169
-
170
-
171
-
172
-
173
-
174
-
175
-
176
-
177
-
178
 |
 |