Yamaha PSR-9000 Owner's Manual - Page 110
Style Recording (Full Edit
 |
View all Yamaha PSR-9000 manuals
Add to My Manuals
Save this manual to your list of manuals |
Page 110 highlights
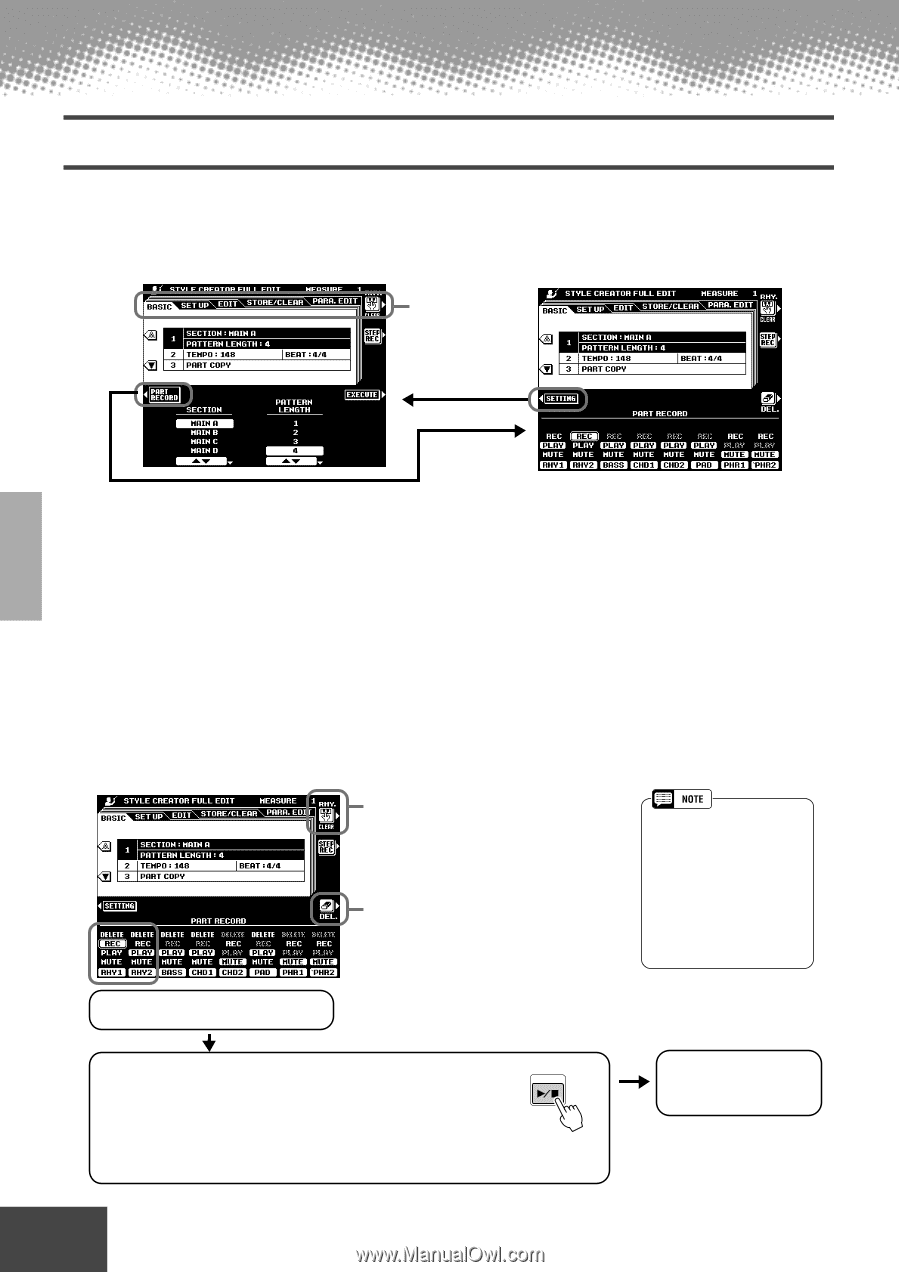
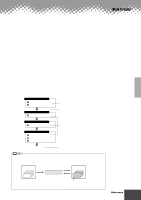
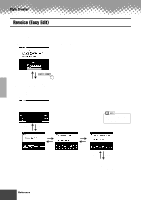
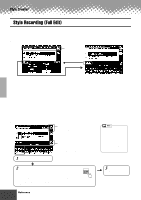
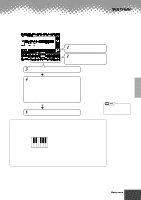
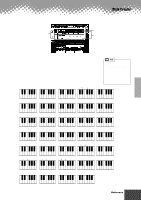
Style Creator Style Recording (Full Edit) This section explains how to record all parts by playing the keyboard. The explanations here apply to step #5 of the Basic Procedure on page 106. s Basic Setting for Recording Select the desired menu. • Section Select the section you want to program. • Pattern Length ....... Select the desired number of measures (1-32) for the selected section (except for FILL IN sections, which are fixed at 1 measure). • Beat Select a different time signature: 2/4, 3/4, 4/4, or 5/4. Please note that the time signature can only be changed if all sections of the current style have been cleared. If any data remains in any section, the alert message will appear. A new time signature can be selected after clearing all sections of the current selected style. • Tempo Set the default tempo for the new style. • Part Copy Instead of starting with all the sections and/or parts from the selected original style, you can copy specific parts from other sections/parts of the same style, or from other styles as required. Also, in some cases it may not be possible to copy from other parts. In such a case the EXECUTE LCD button will appear in gray and will not be available. s Style Recording - Rhythm Tracks You can also delete certain percussion sounds while recording. While holding this button, press the key on the keyboard corresponding to the instrument you want to cancel 1 Set one of Rhythm parts to "REC." When this button is pressed, DELETE will appear for parts which contain data. Set the desired part to "DELETE" while holding this button to delete all data in the corresponding parts. The data is actually deleted when this button is released. • Only DRUM KIT/SFX KIT and DRUM KIT custom voices can be selected for the RHY2 part. • All voices except the ORGAN FLUTE voice can be selected for the RHY1 part. • You can also start recording by pressing [SYNC START] button and playing a key on the keyboard. 2 Press the [START/STOP] button to start recording. The selected section of the current style will begin playing (only the metronome will sound if the rhythm parts have been cleared). The style will loop (play) continuously to allow convenient recording and overdubbing. Since the rhythm pattern plays back repeatedly, you can record by overdubbing - listening to the pattern and playing the desired keys. Look at the icons printed under the keys indicating the percussion sounds that are assigned to each key. START/STOP 3 Press the [START/ STOP] button again to stop recording. 110 Reference q q q q q q q q q q q q q q q q q q q q q q q q q q q q q q q q q q q q q q q q q q q 108
-
 1
1 -
2
-
3
-
4
-
5
-
6
-
7
-
8
-
9
-
10
-
11
-
12
-
13
-
14
-
15
-
16
-
17
-
18
-
19
-
20
-
21
-
22
-
23
-
24
-
25
-
26
-
27
-
28
-
29
-
30
-
31
-
32
-
33
-
34
-
35
-
36
-
37
-
38
-
39
-
40
-
41
-
42
-
43
-
44
-
45
-
46
-
47
-
48
-
49
-
50
-
51
-
52
-
53
-
54
-
55
-
56
-
57
-
58
-
59
-
60
-
61
-
62
-
63
-
64
-
65
-
66
-
67
-
68
-
69
-
70
-
71
-
72
-
73
-
74
-
75
-
76
-
77
-
78
-
79
-
80
-
81
-
82
-
83
-
84
-
85
-
86
-
87
-
88
-
89
-
90
-
91
-
92
-
93
-
94
-
95
-
96
-
97
-
98
-
99
-
100
-
101
-
102
-
103
-
104
-
 105
105 -
 106
106 -
 107
107 -
 108
108 -
 109
109 -
 110
110 -
 111
111 -
 112
112 -
 113
113 -
 114
114 -
 115
115 -
116
-
117
-
118
-
119
-
120
-
121
-
122
-
123
-
124
-
125
-
126
-
127
-
128
-
129
-
130
-
131
-
132
-
133
-
134
-
135
-
136
-
137
-
138
-
139
-
140
-
141
-
142
-
143
-
144
-
145
-
146
-
147
-
148
-
149
-
150
-
151
-
152
-
153
-
154
-
155
-
156
-
157
-
158
-
159
-
160
-
161
-
162
-
163
-
164
-
165
-
166
-
167
-
168
-
169
-
170
-
171
-
172
-
173
-
174
-
175
-
176
-
177
-
178
-
179
-
180
-
181
-
182
-
183
-
184
-
185
-
186
-
187
-
188
-
189
-
190
-
191
-
192
-
193
-
194
-
195
-
196
-
197
-
198
-
199
-
200
-
201
-
202
-
203
-
204
-
205
-
206
-
207
-
208
-
209
-
210
-
211
-
212
-
213
-
214
 |
 |