Yamaha PSR-9000 Owner's Manual - Page 132
Editing Directories, Formatting a Disk - hard drive format
 |
View all Yamaha PSR-9000 manuals
Add to My Manuals
Save this manual to your list of manuals |
Page 132 highlights
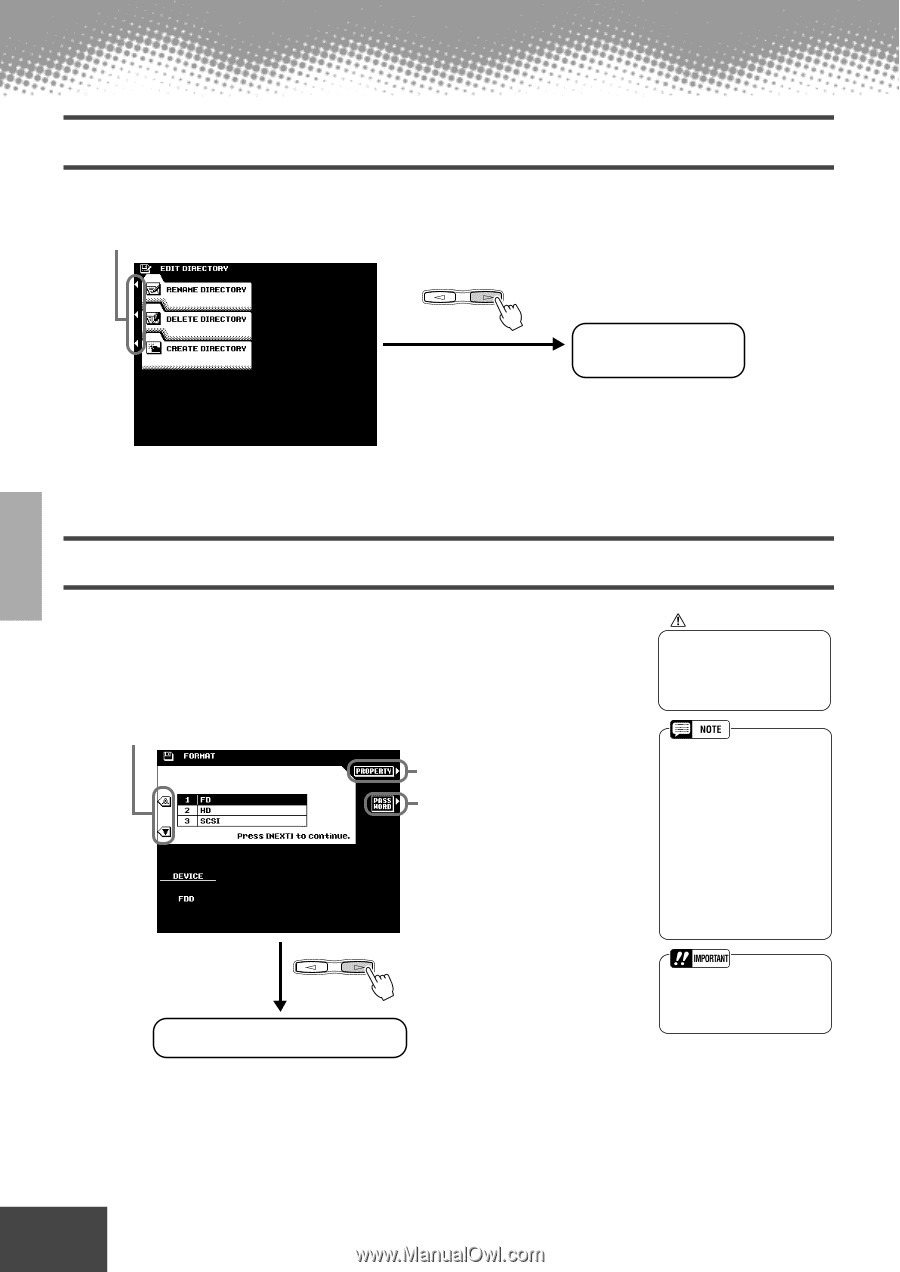
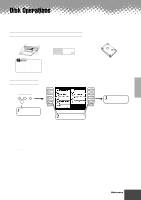
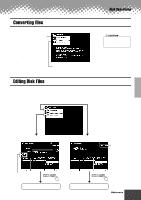
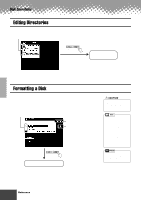
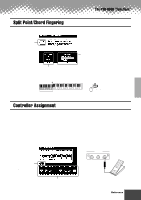
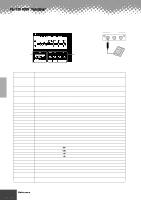
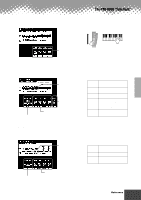
Disk Operations Editing Directories The explanations here apply to step #3 of the Basic Procedure on page 127. q Select the desired menu. PAGE CONTROL BACK NEXT Execute each operation by following the on-screen instructions. Formatting a Disk Setting up commercially available blank floppy disks for use with PSR-9000 is called formatting. This function is also useful for quickly deleting unnecessary files from an already formatted disk. Be careful when using this operation, since it automatically deletes all data on the disk. The explanations here apply to step #3 of the Basic Procedure on page 127. q Select the device to be formatted. PAGE CONTROL BACK NEXT Select this to display the properties of the selected disk. This allows you to assign a password for future formatting operations on the PSR9000. Once a password is assigned, no device can be formatted without first specifying the password. This ensures that no one else, intentionally or inadvertently, will be able to format the device. Pressing this button calls up the Name Entry display (page 44), from which you can enter the password. A maximum of 8 characters can be entered for the name, and both capital and lowercase letters can be used. Execute the Format operation by following the on-screen instructions. CAUTION • Formatting a disk completely erases all data on the disk, so be sure that the disk you're formatting does not contain important data! • Hard disk drives of a maximum 8 GB capacity can be formatted; however, the maximum partition size is 2 GB. For example, an 8 GB hard disk drive would have to be formatted into four separate 2 GB partitions. • Hard disk drives of a capacity greater than 8 GB can be installed; however, the PSR9000 is capable of formatting only up to a maximum 8 GB on the drive. • Make sure to write down your password and keep in a separate, secure location, in case you forget it. 132 Reference q q q q q q q q q q q q q q q q q q q q q q q q q q q q q q q q q q q q q q q q q q q 130
-
 1
1 -
2
-
3
-
4
-
5
-
6
-
7
-
8
-
9
-
10
-
11
-
12
-
13
-
14
-
15
-
16
-
17
-
18
-
19
-
20
-
21
-
22
-
23
-
24
-
25
-
26
-
27
-
28
-
29
-
30
-
31
-
32
-
33
-
34
-
35
-
36
-
37
-
38
-
39
-
40
-
41
-
42
-
43
-
44
-
45
-
46
-
47
-
48
-
49
-
50
-
51
-
52
-
53
-
54
-
55
-
56
-
57
-
58
-
59
-
60
-
61
-
62
-
63
-
64
-
65
-
66
-
67
-
68
-
69
-
70
-
71
-
72
-
73
-
74
-
75
-
76
-
77
-
78
-
79
-
80
-
81
-
82
-
83
-
84
-
85
-
86
-
87
-
88
-
89
-
90
-
91
-
92
-
93
-
94
-
95
-
96
-
97
-
98
-
99
-
100
-
101
-
102
-
103
-
104
-
105
-
106
-
107
-
108
-
109
-
110
-
111
-
112
-
113
-
114
-
115
-
116
-
117
-
118
-
119
-
120
-
121
-
122
-
123
-
124
-
125
-
126
-
 127
127 -
 128
128 -
 129
129 -
 130
130 -
 131
131 -
 132
132 -
 133
133 -
 134
134 -
 135
135 -
 136
136 -
 137
137 -
138
-
139
-
140
-
141
-
142
-
143
-
144
-
145
-
146
-
147
-
148
-
149
-
150
-
151
-
152
-
153
-
154
-
155
-
156
-
157
-
158
-
159
-
160
-
161
-
162
-
163
-
164
-
165
-
166
-
167
-
168
-
169
-
170
-
171
-
172
-
173
-
174
-
175
-
176
-
177
-
178
-
179
-
180
-
181
-
182
-
183
-
184
-
185
-
186
-
187
-
188
-
189
-
190
-
191
-
192
-
193
-
194
-
195
-
196
-
197
-
198
-
199
-
200
-
201
-
202
-
203
-
204
-
205
-
206
-
207
-
208
-
209
-
210
-
211
-
212
-
213
-
214
 |
 |