Yamaha PSR-9000 Owner's Manual - Page 14
Starting Up
 |
View all Yamaha PSR-9000 manuals
Add to My Manuals
Save this manual to your list of manuals |
Page 14 highlights
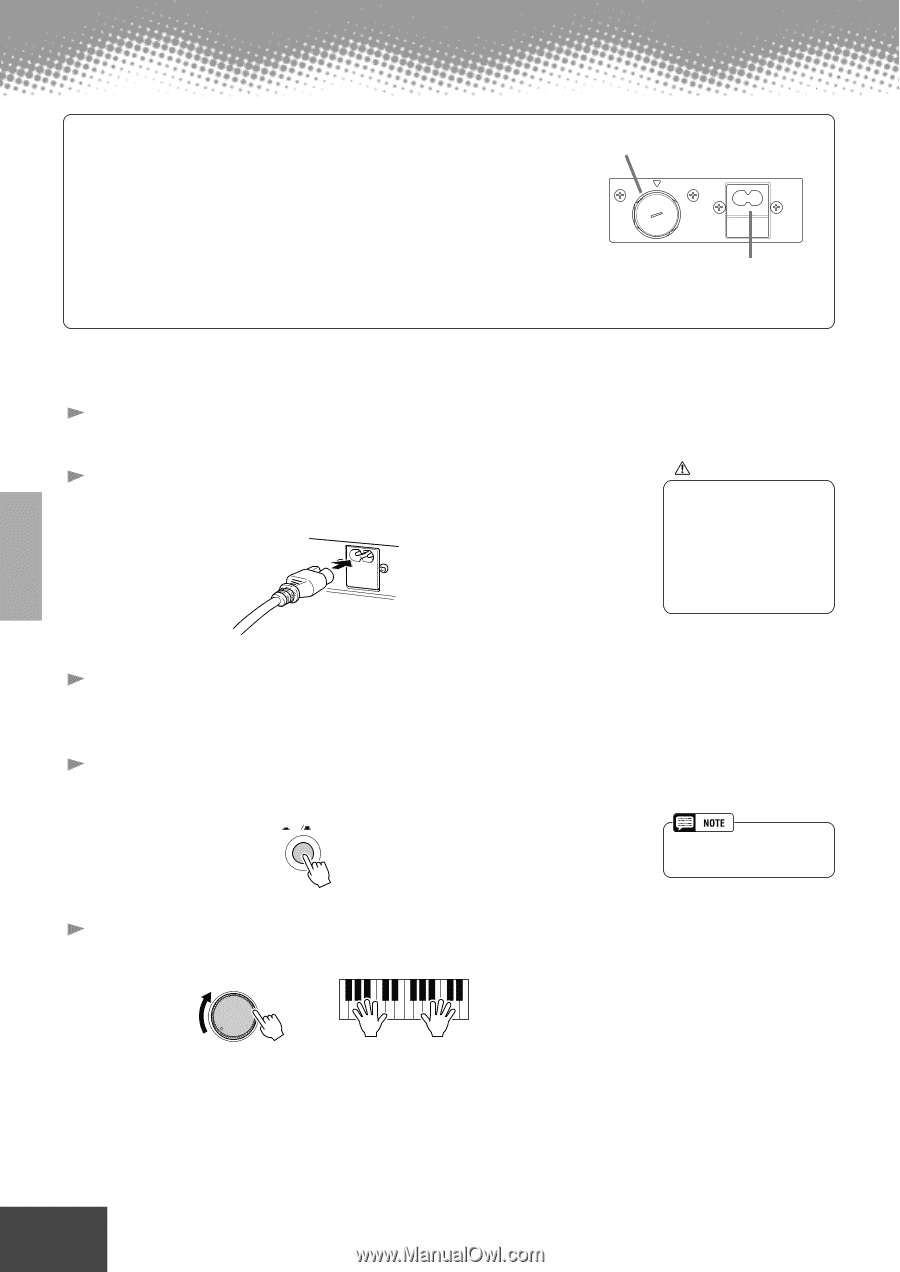
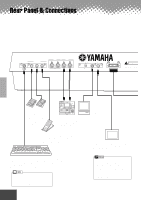
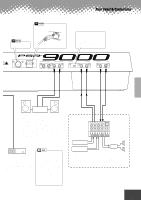
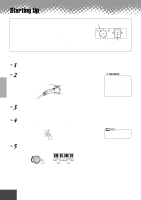
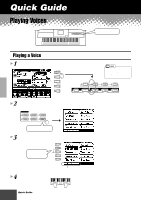
Starting Up Check Your Power Supply Make sure that your local AC mains voltage matches the voltage specified on the name plate on the bottom panel. In some areas a voltage selector may be provided on the rear panel of the PSR-9000 near the power cord. Make sure that the voltage selector is set for the voltage in your area. The voltage selector is set at 240V when the unit is initially shipped. To change the setting use a slotted ("minus") screwdriver to rotate the selector dial so that the correct voltage appears next to the pointer on the panel. Make sure that the power is turned off before changing the Voltage Selector setting. Voltage Selector 240V AC INLET 220V 110V 130V The configuration of the AC INLET may be different depending on your particular locale. Use the following procedure to start up the PSR-9000. 1 Make sure that the POWER switch is in the OFF (extended) position. 2 Securely plug the "female" end of the AC power cord supplied with the PSR-9000 into the rear-panel AC cord socket. AC INLET WARNING • Use only the AC power cord supplied with the PSR-9000. If the supplied cord is lost or damaged and needs to be replaced, contact your Yamaha dealer. The use of an inappropriate replacement can pose a fire and shock hazard! 3 Plug the power cord into a convenient AC outlet. In some areas, an AC plug adaptor may be provided to match the pin configuration of the AC wall outlets in your area. 4 Turn the power ON by pressing the [POWER] switch. Press the [POWER] switch again to turn the power OFF. POWER ON OFF • When turning the power OFF, simply reverse the procedure. 5 Play & adjust the volume. MASTER VOLUME MIN MAX 14 q q q q q q q q q q q q q q q q q q q q q q q q q q q q q q q q q q q q q q q q q q q q q q q q 12
-
 1
1 -
2
-
3
-
4
-
5
-
6
-
7
-
8
-
 9
9 -
 10
10 -
 11
11 -
 12
12 -
 13
13 -
 14
14 -
 15
15 -
 16
16 -
 17
17 -
 18
18 -
 19
19 -
20
-
21
-
22
-
23
-
24
-
25
-
26
-
27
-
28
-
29
-
30
-
31
-
32
-
33
-
34
-
35
-
36
-
37
-
38
-
39
-
40
-
41
-
42
-
43
-
44
-
45
-
46
-
47
-
48
-
49
-
50
-
51
-
52
-
53
-
54
-
55
-
56
-
57
-
58
-
59
-
60
-
61
-
62
-
63
-
64
-
65
-
66
-
67
-
68
-
69
-
70
-
71
-
72
-
73
-
74
-
75
-
76
-
77
-
78
-
79
-
80
-
81
-
82
-
83
-
84
-
85
-
86
-
87
-
88
-
89
-
90
-
91
-
92
-
93
-
94
-
95
-
96
-
97
-
98
-
99
-
100
-
101
-
102
-
103
-
104
-
105
-
106
-
107
-
108
-
109
-
110
-
111
-
112
-
113
-
114
-
115
-
116
-
117
-
118
-
119
-
120
-
121
-
122
-
123
-
124
-
125
-
126
-
127
-
128
-
129
-
130
-
131
-
132
-
133
-
134
-
135
-
136
-
137
-
138
-
139
-
140
-
141
-
142
-
143
-
144
-
145
-
146
-
147
-
148
-
149
-
150
-
151
-
152
-
153
-
154
-
155
-
156
-
157
-
158
-
159
-
160
-
161
-
162
-
163
-
164
-
165
-
166
-
167
-
168
-
169
-
170
-
171
-
172
-
173
-
174
-
175
-
176
-
177
-
178
-
179
-
180
-
181
-
182
-
183
-
184
-
185
-
186
-
187
-
188
-
189
-
190
-
191
-
192
-
193
-
194
-
195
-
196
-
197
-
198
-
199
-
200
-
201
-
202
-
203
-
204
-
205
-
206
-
207
-
208
-
209
-
210
-
211
-
212
-
213
-
214
 |
 |