Yamaha PSR-9000 Owner's Manual - Page 32
Vocal Harmony, Setting Up, Vocal Harmony with Accompaniment Playback
 |
View all Yamaha PSR-9000 manuals
Add to My Manuals
Save this manual to your list of manuals |
Page 32 highlights
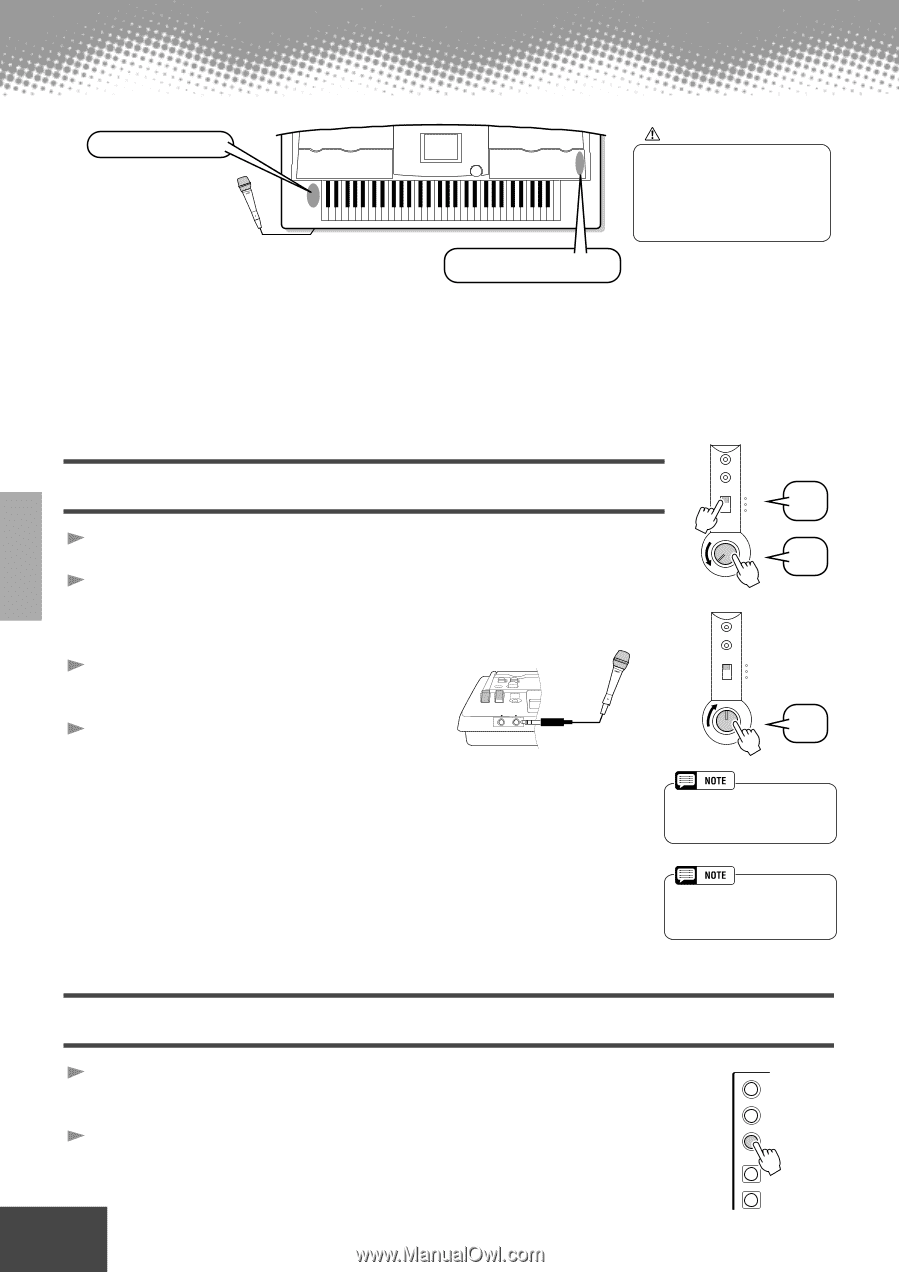
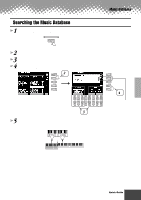
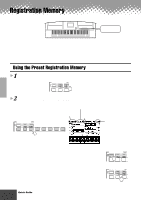
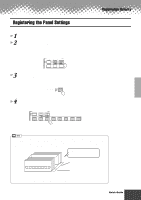
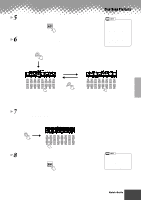
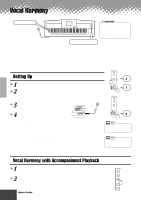
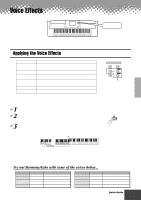
Vocal Harmony MIC/LINE IN buttons VOCAL HARMONY buttons CAUTION Pickup of extraneous sounds from the microphone can cause distorted Vocal Harmony sound. • Separate the microphone from the instrument's speakers as much as possible. This extraordinarily powerful feature uses advanced voice-processing technology to automatically produce vocal harmony based on a single lead vocal. In addition to straightforward harmony, the PSR-9000 also lets you change the apparent gender of the harmony and/or lead vocal sound. For example, if you are a male singer, you can have the PSR-9000 automatically generate a two-part female backup. A comprehensive set of parameters gives you exceptionally precise and flexible control over the vocal harmony sound. MIC/LINE IN Setting Up 1 Set the INPUT VOLUME control to "MIN." 2 Set the MIC/LINE panel switch to "MIC 1" or "MIC 2." This is a gain control for the microphone input signal. The "MIC 1" setting boosts the signal, while the "MIC 2" setting reduces it. 3 Connect a microphone to the MIC/ LINE IN jack of the PSR-9000. PHONES MIC/LINE IN 4 Adjust the INPUT VOLUME control while singing into the microphone. OVER SIGNAL MIC1 MIC2 2 LINE 1 MIN MAX INPUT VOLUME MIC/LINE IN OVER SIGNAL MIC1 MIC2 LINE 4 MIN MAX INPUT VOLUME Use the SIGNAL and OVER indicators to determine the appropriate setting. With the INPUT VOLUME control at the minimum, sing or talk into the microphone at the highest expected volume. Gradually bring the control up toward "MAX" so that the SIGNAL indicator is lit and the OVER indicator flashes occasionally. Then reduce the INPUT VOLUME just enough to keep the OVER indicator from flashing. This should be the optimum level setting. To hear the microphone input, make sure to set the "MIC" fader in the MAIN VOLUME display to an appropriate level. • Refer to the important notes and caution message on page 68. • Turn the INPUT VOLUME control all the way down when disconnecting a microphone. Vocal Harmony with Accompaniment Playback 1 Turn AUTO ACCOMPANIMENT on and start the accompaniment (page 20). 2 Press the VOCAL HARMONY [V.H.(9)] button to turn the Vocal Harmony effect on. VOCAL HARMONY TALK DSP(8) V.H. (9) SELECT MIC SETUP 32 Quick Guide q q q q q q q q q q q q q q q q q q q q q q q q q q q q q q q q q q q q q q q q q q 30
-
 1
1 -
2
-
3
-
4
-
5
-
6
-
7
-
8
-
9
-
10
-
11
-
12
-
13
-
14
-
15
-
16
-
17
-
18
-
19
-
20
-
21
-
22
-
23
-
24
-
25
-
26
-
 27
27 -
 28
28 -
 29
29 -
 30
30 -
 31
31 -
 32
32 -
 33
33 -
 34
34 -
 35
35 -
 36
36 -
 37
37 -
38
-
39
-
40
-
41
-
42
-
43
-
44
-
45
-
46
-
47
-
48
-
49
-
50
-
51
-
52
-
53
-
54
-
55
-
56
-
57
-
58
-
59
-
60
-
61
-
62
-
63
-
64
-
65
-
66
-
67
-
68
-
69
-
70
-
71
-
72
-
73
-
74
-
75
-
76
-
77
-
78
-
79
-
80
-
81
-
82
-
83
-
84
-
85
-
86
-
87
-
88
-
89
-
90
-
91
-
92
-
93
-
94
-
95
-
96
-
97
-
98
-
99
-
100
-
101
-
102
-
103
-
104
-
105
-
106
-
107
-
108
-
109
-
110
-
111
-
112
-
113
-
114
-
115
-
116
-
117
-
118
-
119
-
120
-
121
-
122
-
123
-
124
-
125
-
126
-
127
-
128
-
129
-
130
-
131
-
132
-
133
-
134
-
135
-
136
-
137
-
138
-
139
-
140
-
141
-
142
-
143
-
144
-
145
-
146
-
147
-
148
-
149
-
150
-
151
-
152
-
153
-
154
-
155
-
156
-
157
-
158
-
159
-
160
-
161
-
162
-
163
-
164
-
165
-
166
-
167
-
168
-
169
-
170
-
171
-
172
-
173
-
174
-
175
-
176
-
177
-
178
-
179
-
180
-
181
-
182
-
183
-
184
-
185
-
186
-
187
-
188
-
189
-
190
-
191
-
192
-
193
-
194
-
195
-
196
-
197
-
198
-
199
-
200
-
201
-
202
-
203
-
204
-
205
-
206
-
207
-
208
-
209
-
210
-
211
-
212
-
213
-
214
 |
 |