Yamaha PSR-E433 Owner's Manual - Page 11
Setting Up, Rear Panel - voice list
 |
View all Yamaha PSR-E433 manuals
Add to My Manuals
Save this manual to your list of manuals |
Page 11 highlights
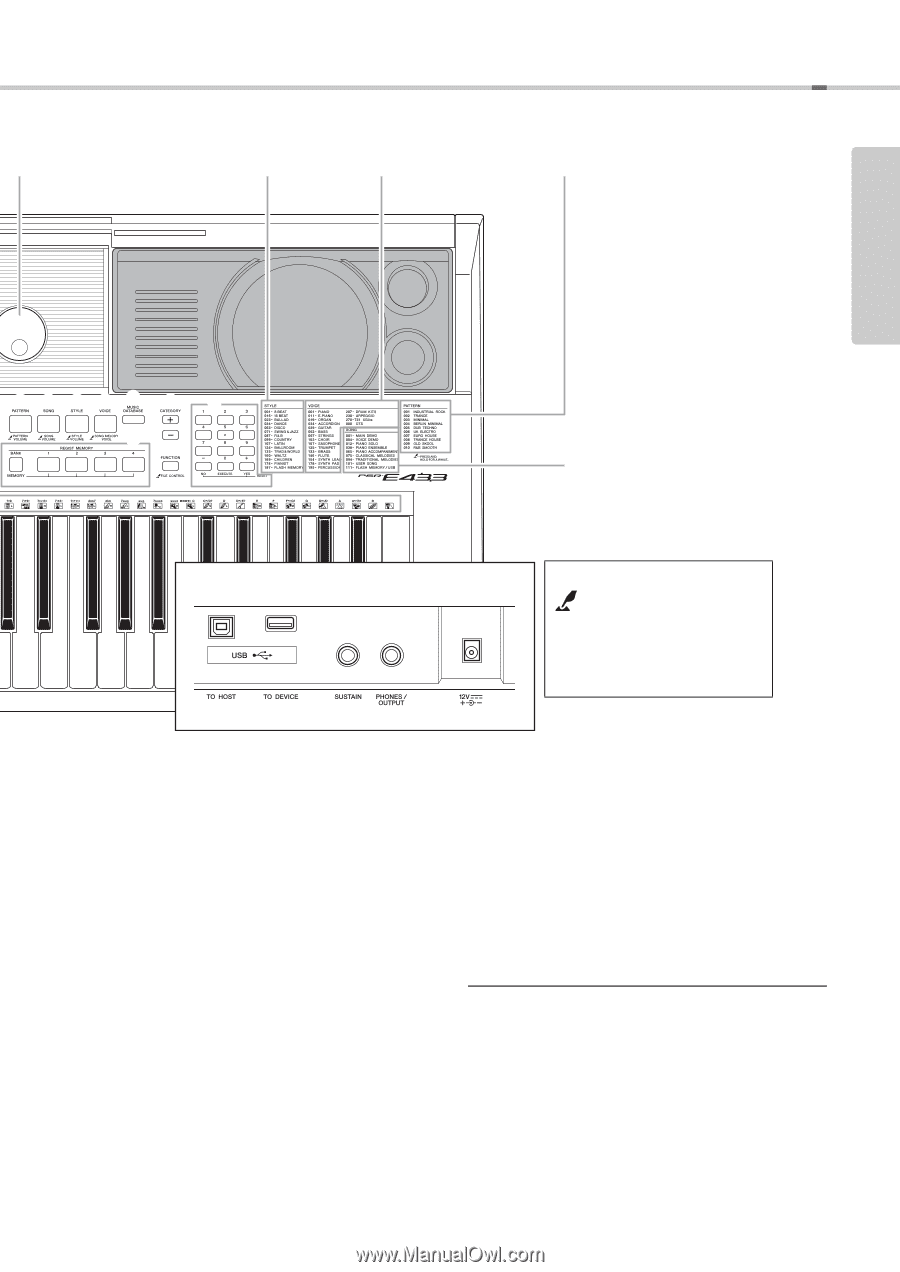
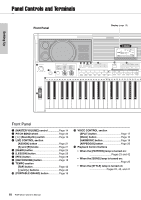
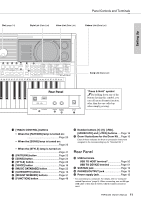
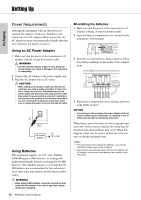
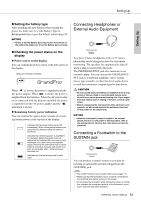
Dial (page 14) Panel Controls and Terminals Style List (Data List) Voice List (Data List) Pattern List (Data List) Setting Up !4 !5 !6 !7 !8 !9 @2 @0 @1 Song List (Data List) Rear Panel @4 @5 @6 @7 "Press & Hold" symbol By holding down one of the buttons having this symbol, you can call up an alternate function, other than the one called up when simply pressing. !3 [TRACK CONTROL] buttons • When the [PATTERN] lamp is turned on Page 23 • When the [SONG] lamp is turned on Page 25 • When the [STYLE] lamp is turned on Page 41 !4 [PATTERN] button Page 23 !5 [SONG] button Page 24 !6 [STYLE] button Page 22 !7 [VOICE] button Page 16 !8 [MUSIC DATABASE] button Page 22 !9 [CATEGORY] buttons Page 14 @0 [REGIST MEMORY] buttons Page 31 @1 [FUNCTION] button Page 48 @2 Number buttons [1]-[9], [-/NO], [0/EXECUTE] and [+/YES] buttons ..... Page 14 @3 Drum illustrations for the Drum Kit.... Page 16 Each of these indicates the drum or percussion instrument assigned to the corresponding key for "Standard Kit 1." Rear Panel @4 USB terminals USB TO HOST terminal Page 50 USB TO DEVICE terminal Page 51 @5 SUSTAIN jack Page 13 @6 PHONES/OUTPUT jack Page 13 @7 Power supply jack Page 12 * For connecting to a computer. For details, refer to "Computerrelated Operations" (page 9). When connecting, use an AB type USB cable of less than 3 meters. USB 3.0 cables cannot be used. PSR-E433 Owner's Manual 11
-
 1
1 -
2
-
3
-
4
-
5
-
 6
6 -
 7
7 -
 8
8 -
 9
9 -
 10
10 -
 11
11 -
 12
12 -
 13
13 -
 14
14 -
 15
15 -
 16
16 -
17
-
18
-
19
-
20
-
21
-
22
-
23
-
24
-
25
-
26
-
27
-
28
-
29
-
30
-
31
-
32
-
33
-
34
-
35
-
36
-
37
-
38
-
39
-
40
-
41
-
42
-
43
-
44
-
45
-
46
-
47
-
48
-
49
-
50
-
51
-
52
-
53
-
54
-
55
-
56
-
57
-
58
-
59
-
60
-
61
-
62
-
63
-
64
-
65
-
66
-
67
-
68
 |
 |