Yamaha PSR-S700 Owners Manual
Yamaha PSR-S700 Manual
 |
View all Yamaha PSR-S700 manuals
Add to My Manuals
Save this manual to your list of manuals |
Yamaha PSR-S700 manual content summary:
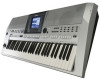
- Yamaha PSR-S700 | Owners Manual - Page 1
OWNER'S MANUAL EN - Yamaha PSR-S700 | Owners Manual - Page 2
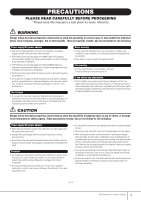
product to any power supply or adapter other than one described in the manual, on the name plate, or specifically recommended by Yamaha. WARNING: Do not place this product in a position where anyone could walk on, trip over, or roll anything over power or connecting cords of any kind. The use of an - Yamaha PSR-S700 | Owners Manual - Page 3
the following: Power supply/AC power adaptor • Only use the voltage specified as correct for the instrument. The required voltage is printed on the name plate of the instrument. • (PSR-S900) Use the specified , and possibly result in the instrument overheating. (3)-10 PSR-S900/S700 Owner's Manual 3 - Yamaha PSR-S700 | Owners Manual - Page 4
not in use. Even when the power switch is in the "STANDBY" position, electricity is still flowing to the instrument at the minimum level. When you are not using the instrument for a long time, make sure you unplug the AC power adaptor from the wall AC outlet. 4 PSR-S900/S700 Owner's Manual (3)-10 - Yamaha PSR-S700 | Owners Manual - Page 5
manual are for instructional purposes only, and may appear somewhat different from those on your instrument. • The example Operation Guide displays shown in this Manual are taken from the PSR-S900, and in English. • Copying of the commercially available musical data including but not limited to MIDI - Yamaha PSR-S700 | Owners Manual - Page 6
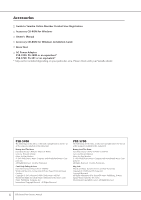
Manual Accessory CD-ROM for Windows Installation Guide Music Rest AC Power Adaptor PSR-S900: PA-300B or an equivalent* PSR-S700: PA-301 or an equivalent* * May not be included depending on your particular area. Please check with your Yamaha dealer. PSR-S900 All Rights Reserved Used by Permission Can - Yamaha PSR-S700 | Owners Manual - Page 7
16 Power Supply 16 Powering Up 17 Setting Up 18 Music Rest 18 Using Headphones 18 Changing the Display Language 19 Display Settings 19 Handling the Floppy Disk Drive (FDD) and Floppy Disks 22 Handling the USB Storage Device (USB Flash Memory/Floppy Disk, etc 23 Quick Guide Playing the Demos - Yamaha PSR-S700 | Owners Manual - Page 8
204 Basic Operation 204 Pre-Programmed MIDI Templates 206 MIDI System Settings 207 MIDI Transmit Settings 207 MIDI Receive Settings 208 Setting the Bass Note for Style Playback via MIDI Receive 209 Setting the Chord Type for Style Playback via MIDI Receive 209 8 PSR-S900/S700 Owner's Manual - Yamaha PSR-S700 | Owners Manual - Page 9
Editing the Auto Accompaniment Styles The Multi Pads Registering and Recalling Custom Panel Setups Using, Creating and Editing Songs Connecting the PSR-S900/S700 Directly to the Internet Using a Microphone (PSR-S900) Using Your Instrument with Other Devices Appendix PSR-S900/S700 Owner's Manual 9 - Yamaha PSR-S700 | Owners Manual - Page 10
the power on/off ...page 17 Listening to the PSR-S900/S700 • Playing the Demos ...page 24 • Playing songs...page 36 - Playing a Preset Song ...page 36 - Turning parts (channels) of the Song on/off...page 146 - Adjusting the balance between the Song and keyboard page 144 • Playing Styles ...page - Yamaha PSR-S700 | Owners Manual - Page 11
Using the Fade In/Out ...pages 48, 49 Group performance tips and techniques • Independently transposing the Song and keyboard pitch to match your singing range page 59 • Tuning the overall sound of the PSR-S900/S700 to match other instruments page 87 • Synchronizing the PSR-S900/S700 to other MIDI - Yamaha PSR-S700 | Owners Manual - Page 12
can you do with the PORTATONE? DEMO Explore the Demos (page 24) These not only showcase the stunning voices and styles of the instrument, they introduce you to the various functions and features - and give you hands-on experience using the PSR-S900/S700! SONG Playback previously recorded songs - Yamaha PSR-S700 | Owners Manual - Page 13
wide world of computer music software. Connections and setup are exceptionally easy, and you can play back your computer recorded parts with different instrument sounds - all from a single instrument! USB TO DEVICE TO HOST MIDI IN OUT FOOT PEDAL 1 2 VIDEO OUT PSR-S900/S700 Owner's Manual 13 - Yamaha PSR-S700 | Owners Manual - Page 14
DEMO 6 [DEMO] button P. 24 MIC. 7 [MIC SETTING/VOCAL HARMONY] button (PSR-S900) P. 59 SONG 8 [SELECT] button P. 36 9 [SCORE] button P. 39 0 [LYRICS/TEXT] button (PSR-S900 P. 58 [LYRICS] button (PSR-S700 P. 58 A [REPEAT] button P. 42 B [GUIDE P. 48 STYLE CONTROL P PSR-S900/S700 Owner's Manual - Yamaha PSR-S700 | Owners Manual - Page 15
MIDI OUT FOOT PEDAL 1 2 VIDEO OUT Introduction G3 A3 B3 C4 D4 E4 F4 G4 A4 B4 C5 D5 E5 F5 G5 A5 B5 C6 Z [LCD CONTRAST] knob P. 19 [ sorted "Panel Button Chart" on page 220. • For information on the jacks and connectors located on the rear panel, see page 193. PSR-S900/S700 Owner's Manual 15 - Yamaha PSR-S700 | Owners Manual - Page 16
the Keyboard Power Supply 1 WARNING • (PSR-S900) Use the specified adaptor (PA-300B/PA- 2 300 or an equivalent recom- mended by Yamaha) only. • (PSR-S700) Use the speci- fied adaptor (PA-301/PA- 300B/PA-300 or an equiva- lent recommended by Yamaha) only. • (PSR-S900/S700) The use of - Yamaha PSR-S700 | Owners Manual - Page 17
power of the PSR-S900/ S700 after switching off the power of the amplified speakers or mixer and amplifier. When you're ready to turn off the power, press the [STANDBY/ON] switch again. 2 Setting the volume Use possibly result in the instrument overheating. Air Vents PSR-S900/S700 Owner's Manual 17 - Yamaha PSR-S700 | Owners Manual - Page 18
Rest The PSR-S900/S700 is supplied with a music rest that can be attached to the instrument by inserting it into the slot at the rear of the control panel. CAUTION Do not listen with the headphones at high volume for long periods of time. Doing so may cause hearing loss. Using Headphones Connect - Yamaha PSR-S700 | Owners Manual - Page 19
Introduction Changing the Display Language This determines the language used in the display for messages, file names, and character input. 1 Call up the operation display. [FUNCTION] → [J] UTILITY → by turning the [LCD CONTRAST] knob located to the left of the display. PSR-S900/S700 Owner's Manual 19 - Yamaha PSR-S700 | Owners Manual - Page 20
Introduction Adjusting the Brightness of the Display Adjust the brightness of the display. 1 Call up the operation display. [FUNCTION] → [J] UTILITY → TAB[√][®] CONFIG 2 2 Press the [2π†] button to adjust the brightness of the display. 20 PSR-S900/S700 Owner's Manual - Yamaha PSR-S700 | Owners Manual - Page 21
have your name appear in the opening display (the display that appears when the power is turned on). (Example display from PSR-S900) 1 Call up the operation display. [FUNCTION] → [J] UTILITY → TAB[√][®] the [EXIT] or [8π†] button to return to the original display. PSR-S900/S700 Owner's Manual 21 - Yamaha PSR-S700 | Owners Manual - Page 22
deletion of data. If a floppy disk is inserted while the power is on, the disk is automatically accessed, since the instrument checks Yamaha recommends that you use a commercially-available dry-type head cleaning disk to clean the head about once a month. Ask your Yamaha PSR-S900/S700 Owner's Manual - Yamaha PSR-S700 | Owners Manual - Page 23
keyboard or mouse cannot be used. • The instrument does not necessarily support all commercially available USB storage devices. Yamaha do NOT remove the media from the device, and do NOT turn the power off to either device. Doing so may corrupt the data on either or PSR-S900/S700 Owner's Manual 23 - Yamaha PSR-S700 | Owners Manual - Page 24
Quick Guide Quick Guide Playing the Demos The Demos are more than just songs - they also provide helpful, easy-to-understand introductions to the features, functions and operations of the instrument. In a way, the Demos are an interactive "mini-manual"- complete with sound demonstrations and text - Yamaha PSR-S700 | Owners Manual - Page 25
display, press the [J] (Play Overview Demo) button. 2 Press one of the [A]-[H] buttons to show a specific Demo. When the Demo has more than one screen. Press [1π†]-[8π†] buttons corresponding to the screen number. 3 Press the [EXIT] button to exit from the Demos. PSR-S900/S700 Owner's Manual 25 - Yamaha PSR-S700 | Owners Manual - Page 26
To start with, you should know a little about the basic displays that appear in the Quick Guide. There are three basic displays: Main display ➤ File selection display ➤ Function display ➤ See below : Simply press the [DIRECT ACCESS] button, then the [EXIT] button. 26 PSR-S900/S700 Owner's Manual - Yamaha PSR-S700 | Owners Manual - Page 27
30)/Song (page 36)/Style (page 46), etc. In the example here, we'll call up and use the Song Selection display. 2 Quick Guide 1 3, 5 3, using the DATA ENTRY dial, then press the [ENTER] button to execute. 6 Press the [EXIT] button to return to the previous display. PSR-S900/S700 Owner's Manual - Yamaha PSR-S700 | Owners Manual - Page 28
the display. n On the PSR-S700, "2 S.ART" shown in the illustration at right is displayed as "2 VOLUME." 3 Press the TAB [√][®] buttons to select the KEYBOARD/PANEL tab. When the setting is further divided into additional settings, a list will be shown in the display. 28 PSR-S900/S700 Owner's Manual - Yamaha PSR-S700 | Owners Manual - Page 29
this manual, arrows are used in the instructions, indicating in shorthand the process of calling up certain displays and functions. For example, the instructions above can be indicated in shorthand as: [FUNCTION] → [D] CONTROLLER → TAB [√][®] KEYBOARD/PANEL → [A] 1 INITIAL TOUCH. PSR-S900/S700 Owner - Yamaha PSR-S700 | Owners Manual - Page 30
Guide Playing Voices The instrument features to the Voice List in the Data List available at the Yamaha website. (See page 5.) 1 Press the PART SELECT [ the [B] (2 VOICE CATEGORY BUTTON OPTIONS) button, and use the [1π†]/[2π†] buttons to change how the Voice selection PSR-S900/S700 Owner's Manual - Yamaha PSR-S700 | Owners Manual - Page 31
Guide PSR-S900 only) • You can instantly jump back to the Main display by "double-clicking" on one of the [A]-[J] buttons. 4 Play the keyboard USER display in the Voice Selection display and recall it by using the VOICE [USER] button 1 Copy your favorite Voices from the PSR-S900/S700 Owner's Manual 31 - Yamaha PSR-S700 | Owners Manual - Page 32
sounds. • Setting separate Voices for the left and right sections of the keyboard You can play different Voices with the left and right hands. For example, you can set up the keyboard to play the bass Voice with your left hand and the piano Voice with your right hand. 32 PSR-S900/S700 Owner's Manual - Yamaha PSR-S700 | Owners Manual - Page 33
a vibrato effect to notes played on the keyboard. This is applied to all the keyboard parts (RIGHT 1, 2 and LEFT). Moving the MODULATION wheel down (towards MIN) decreases the depth of the effect, while moving it up (towards MAX) increases it. PITCH BEND MODULATION PSR-S900/S700 Owner's Manual 33 - Yamaha PSR-S700 | Owners Manual - Page 34
minute. The range is between 5 and 500. The higher the value, the faster the tempo. 3 Press the [EXIT] button to close the Tempo display. 34 PSR-S900/S700 Owner's Manual - Yamaha PSR-S700 | Owners Manual - Page 35
the level of the metronome sound. SOUND Determines which sound is used for the metronome. Bell Off Conventional metronome sound, with no bell. Bell On Conventional metronome sound, with bell. TIME SIGNATURE Determines the time signature of the metronome sound. PSR-S900/S700 Owner's Manual 35 - Yamaha PSR-S700 | Owners Manual - Page 36
Quick Guide Practicing with the Preset Songs n Song In this manual, the word "Song" refers to 3 Press one of the [A]-[E] buttons to select the desired Song. You can also select the file by using the DATA ENTRY dial, then press the [ENTER] button to execute. n You can instantly jump back to - Yamaha PSR-S700 | Owners Manual - Page 37
Quick Guide 5 Press the SONG [J] (STOP) button 1. The indication "USB1"/"USB2" will be displayed depending on the number of the connected devices. 4 Use the [A]-[J] buttons to select a Song. n You can also select a specified file in "OFF" in the display in step 2. PSR-S900/S700 Owner's Manual 37 - Yamaha PSR-S700 | Owners Manual - Page 38
Quick Guide Boost the volume of the part to be practiced On the instrument, a single Song can contain separate data for up to sixteen MIDI channels. Specify the channel for practicing and increase the playback volume for the show you which channel you wish to boost. 38 PSR-S900/S700 Owner's Manual - Yamaha PSR-S700 | Owners Manual - Page 39
Quick Guide Displaying to display the music nota- tion. n The music notation at right is for instructional purposes only, and the song depicted is not one of the preset Songs on , etc.). Use the [1π†]-[4π†] buttons to turn off the items you want not to be displayed. PSR-S900/S700 Owner's Manual 39 - Yamaha PSR-S700 | Owners Manual - Page 40
CH Determines which MIDI channel in the Song data is used for the left-hand/right-hand part. This setting returns to AUTO when a different Song is selected. AUTO The MIDI channels in the SCORE] button to call up the Score display. 2 Turn the [GUIDE] button on. 2 3 4 40 PSR-S900/S700 Owner's Manual - Yamaha PSR-S700 | Owners Manual - Page 41
singing-a convenient feature for singing along with your keyboard performance. • Vocal CueTIME (PSR-S900) This automatically controls the timing of the accompaniment to match the melody (pitch) of your singing-allowing you to practice singing with the correct pitch. PSR-S900/S700 Owner's Manual 41 - Yamaha PSR-S700 | Owners Manual - Page 42
(STOP) button to stop playback. 6 Turn the [GUIDE] button off. Practicing with the Repeat Playback Function The Song Repeat functions can be used to repeatedly play back a Song or a specific range stop playback. 5 Press the [REPEAT] button to turn off Repeat playback. 42 PSR-S900/S700 Owner's Manual - Yamaha PSR-S700 | Owners Manual - Page 43
on the keyboard. 5 Press the SONG [J] (STOP) button to stop recording. A message prompting you to save the recorded performance appears. To close the message, press the [EXIT] button. 6 Press the SONG [F/K] (PLAY/PAUSE) button to play back the recorded performance. PSR-S900/S700 Owner's Manual 43 - Yamaha PSR-S700 | Owners Manual - Page 44
Guide feature makes it exceptionally easy to play the backing parts along with Song playback. n Before using performance assistant technology To use instructions, use the Songs in the "SampleSongs" folder. 2 Call up the operation display. [FUNCTION] → [B] SONG SETTING 44 PSR-S900/S700 Owner's Manual - Yamaha PSR-S700 | Owners Manual - Page 45
) on. Quick Guide 4 Press the SONG [F/K] (PLAY/PAUSE) button to start playback. 5 Play the keyboard. The instrument automatically matches your performance on the keyboard to the Song . 7 Press the [8π†] button to turn the [P.A.T.] (Performance Assistant) off. PSR-S900/S700 Owner's Manual 45 - Yamaha PSR-S700 | Owners Manual - Page 46
Quick Guide Playing "Mary Had a Little Lamb" with the Auto Accompaniment Feature MARY HAD A LITTLE LAMB Traditional Style: Country Pop C C G C 3 21 2 3 2 35 1 1 4 C C 3 21 2 3 G C 2 3 21 1 Ending 1 1 4 1 1 Press the STYLE CONTROL "COUNTRY" button. 46 PSR-S900/S700 Owner - Yamaha PSR-S700 | Owners Manual - Page 47
Style name. 2 Press one of the [A]-[J] buttons to select a Style "CountryPop." Quick Guide n • The Style type and its defining characteristics are indicated above the Preset Style Use the left-hand section (lower part) of the keyboard use to specify chords (page 106). PSR-S900/S700 Owner's Manual 47 - Yamaha PSR-S700 | Owners Manual - Page 48
and the Style playback starts automatically at the tempo you tapped. n The particular drum sound and the velocity (loudness) of the sound when the Tap function is used can be selected in the following display. [FUNCTION] → [J] UTILITY →TAB [√][®] CONFIG 1 → [B] 4 TAP 48 PSR-S900/S700 Owner's Manual - Yamaha PSR-S700 | Owners Manual - Page 49
either Intro or Main (Section Set) For example, you can set this function to Intro to conveniently have an Intro play automatically whenever you select a Style (page 110). PSR-S900/S700 Owner's Manual 49 - Yamaha PSR-S700 | Owners Manual - Page 50
Quick Guide About the section button (INTRO/MAIN/ENDING, button to turn the Left Hold function on. 21 Learning How to Play (Indicate) Chords for Style Playback Learning the Notes to Play for Certain Chords If know the name of a chord but type is selected (page 107). 50 PSR-S900/S700 Owner's Manual - Yamaha PSR-S700 | Owners Manual - Page 51
the [F] (YES) button to call up the Style selection display and save the panel settings as a Style file (page 73). CAUTION The panel settings memorized to each OTS button will be lost if you change the Style or turn the power off without executing the Save operation. PSR-S900/S700 Owner's Manual 51 - Yamaha PSR-S700 | Owners Manual - Page 52
Guide The Multi Pads The Multi Pads can be used to play a number of short pre-recorded rhythmic and melodic sequences that can be used to add impact and variety to your keyboard performances. Multi Pads are grouped in Banks or four each. The PSR-S900/S700 features . 52 PSR-S900/S700 Owner's Manual - Yamaha PSR-S700 | Owners Manual - Page 53
Effects The PSR-S900/S700 features a sophisticated multi-processor effect system which can add extraordinary depth and expression to your sound. This effect system can be turned on or off by using the following buttons. These three effect systems are applied to the currently selected keyboard part - Yamaha PSR-S700 | Owners Manual - Page 54
Quick Guide Applying Harmony to Your notes played in the Chord section right-hand range of the keyboard. You can also use the Harmony effect with the style stopped (with the Stop Accompaniment function; page 109). Simply Drum Kit Vibraphone Trill Timpani Tremolo 54 PSR-S900/S700 Owner's Manual - Yamaha PSR-S700 | Owners Manual - Page 55
the desired record by using the DATA ENTRY dial, Styles alphabetically. Simultaneously press the [π†] buttons to move the cursor to the first record. • BEAT This is the time signature registered to each record. • TEMPO This is the assigned tempo setting for the record. PSR-S900/S700 Owner's Manual - Yamaha PSR-S700 | Owners Manual - Page 56
by song title. • STYLE The record is sorted by Style name. • BEAT The record is sorted by beat. • TEMPO The record is sorted by tempo. Changing the order of the records Press the [G] (SORT ORDER) button to change the order of the records (ascending or descending). 56 PSR-S900/S700 Owner's Manual - Yamaha PSR-S700 | Owners Manual - Page 57
lyrics on the display. Since the PSR-S900 is equipped with the MIC/LINE IN jack, you can sing a song using a microphone. Quick Guide Connecting a Microphone (PSR-S900 only) 1 Make sure you have INPUT VOLUME] knob to the minimum position before turning off the power. PSR-S900/S700 Owner's Manual 57 - Yamaha PSR-S700 | Owners Manual - Page 58
Quick Guide Singing with the Lyrics Display Try singing while playing back a Song containing lyric data 1 Select a Song (page 36). 2 Press the [LYRICS/TEXT] button (PSR-S900) / [LYRICS] button (PSR-S700) to display the lyrics. When the Text display appears, press the [1†] (LYRICS) button to display - Yamaha PSR-S700 | Owners Manual - Page 59
Guide Displaying the lyrics/text on an external TV monitor (PSR-S900) The lyrics indicated on the display can also be output via the VIDEO OUT terminal. 1 Use an appropriate video cable to connect the [VIDEO OUT] connec- tor of the PSR-S900 to the VIDEO (page 95). PSR-S900/S700 Owner's Manual 59 - Yamaha PSR-S700 | Owners Manual - Page 60
, refer to the Data List available at the Yamaha website. (See page 5.) 6 Press the [ACMP] button to turn on Auto Accompaniment. 7 Press the SONG [F/K] (PLAY/PAUSE) button and sing into the microphone. The harmony is applied to your voice according to the chord data. 60 PSR-S900/S700 Owner's Manual - Yamaha PSR-S700 | Owners Manual - Page 61
146 PSR-S900/S700 PSR-S900 PSR-S900/S700 Changing the Key (Transpose) You can match both the Song and your keyboard performance KEYBOARD Transpose pitch of the keyboard played Voices and Style playback (controlled by what you play in the chord section of the keyboard PSR-S900/S700 Owner's Manual 61 - Yamaha PSR-S700 | Owners Manual - Page 62
Quick Guide Displaying the Music Score on the Instrument and the Lyrics on TV (PSR-S900) This convenient sing-along function lets you have the music score shown on the display of the to add any desired effects to your voice as you speak to your audience (page 191). 62 PSR-S900/S700 Owner's Manual - Yamaha PSR-S700 | Owners Manual - Page 63
use the compatible USB flash memory. When the USB flash memory is not compatible, it is not likely to be able to record/playback normally. • Before using a USB storage device, be sure to read "Handling the USB Storage Device (USB Flash Memory/Floppy Disk, etc)" on page 23. PSR-S900/S700 Owner's Manual - Yamaha PSR-S700 | Owners Manual - Page 64
check the information of the USB storage device. Quick Guide 5 6,7 The following information is indicated on the PSR-S900), and the elapsed recording time is displayed. CAUTION Avoid frequently connecting/disconnecting the USB storage device, or turning the power PSR-S900/S700 Owner's Manual - Yamaha PSR-S700 | Owners Manual - Page 65
Quick Guide Playing Back the Recorded Performance Play back the recorded . CAUTION Avoid frequently connecting/disconnecting the USB storage device, or turning the power on/off too often. Doing so may corrupt the USB storage device data as Audio" on the previous page. PSR-S900/S700 Owner's Manual 65 - Yamaha PSR-S700 | Owners Manual - Page 66
the operation display. [FUNCTION] → [J] UTILITY → TAB [√][®] OWNER 2 Use [4π†]/[5π†] (LANGUAGE) buttons to select the language. 3 Press the [EXIT] . When the message appears, simply press the appropriate button. 66 PSR-S900/S700 Owner's Manual In this example, press the [F] (YES) button to start - Yamaha PSR-S700 | Owners Manual - Page 67
the Guide function display Press the [DIRECT ACCESS] button, then press the [GUIDE] button. 1 2 Returning to the Main display Here's a convenient way to return to the Main display from any other display: Simply press the [DIRECT ACCESS] button, then the [EXIT] button. PSR-S900/S700 Owner's Manual 67 - Yamaha PSR-S700 | Owners Manual - Page 68
rest of the keyboard, and "L", which divides the left-hand and right-hand sections. 9 Recording status of USB Audio recorder (PSR-S900) While recording, a "REC" indication appears. ) Registration Sequence Appears when the Registration Sequence is active (page 138). 68 PSR-S900/S700 Owner's Manual - Yamaha PSR-S700 | Owners Manual - Page 69
. Adjust the volume balance among the parts by using the [1π†]-[8π†] buttons. File Selection Display Configuration Styles, and other data. VOICE category selection buttons SONG SELECT button STYLE category selection buttons REGIST. BANK buttons MULTI PAD SELECT button PSR-S900/S700 Owner's Manual - Yamaha PSR-S700 | Owners Manual - Page 70
Location where data on USB storage device (USB flash memory, floppy disk, etc.) is saved. Hereafter in this manual, any USB storage device such as USB flash memory, floppy disk drive, etc. will be referred to as les into a folder. Folder File Folder Icon Basic Operation 70 PSR-S900/S700 Owner's Manual - Yamaha PSR-S700 | Owners Manual - Page 71
SONG/[B] STYLE/ [F] VOICE/[G] MULTI PAD → [A]-[J] 1 Select the tab containing the desired file by using the TAB [√][®] buttons. 2 Select the page containing the desired file by using the Each folder shown in this display contains appropriately categorized Voices. PSR-S900/S700 Owner's Manual 71 - Yamaha PSR-S700 | Owners Manual - Page 72
[√][®] MEDIA 3 Press the [A]/[B] buttons to select the USB device to be formatted from the device list. 4 Press the [H] button to format the device/media. 3 4 72 PSR-S900/S700 Owner's Manual - Yamaha PSR-S700 | Owners Manual - Page 73
S900)/560KB (PSR-S700). This capacity applies to all file types, including Voice, Style, Song, and Registration data files. Basic Operation 2 Select the appropriate tab (USER, USB, etc.) to which you want to save the data by using among the files in alphabetical order. PSR-S900/S700 Owner's Manual 73 - Yamaha PSR-S700 | Owners Manual - Page 74
Prot. 2 Orig Indicates Yamaha-protection-formatted Songs. using the TAB [√][®] buttons. 6 Press the [4†] (PASTE) button to paste the file/folder. The folder/file copied and pasted appears on the display at the appropriate position among the files in alphabetical order. 74 PSR-S900/S700 Owner's Manual - Yamaha PSR-S700 | Owners Manual - Page 75
tab (USER, USB) to which the file is to be pasted, by using the TAB [√][®] buttons. 6 Press the [4†] (PASTE) button to paste the operation, press the [8†] (CANCEL) button. 5 Follow the on-display instructions. YES Delete the file/folder YES ALL Delete all selected files PSR-S900/S700 Owner's Manual 75 - Yamaha PSR-S700 | Owners Manual - Page 76
5 Press the [1†] (ICON) button to call up the ICON display. 6 Select the icon by using the [A]-[J] buttons or [3π†]-[5π†] but- tons. The ICON display includes several pages. Press the TAB [√][®] icon. 8 Press the [8π] (OK) button to actually enter the new name. 76 PSR-S900/S700 Owner's Manual - Yamaha PSR-S700 | Owners Manual - Page 77
The instructions that made in the PRESET tab. Folder directories for the USER tab display In the USER tab display, folder directories can contain up to four levels. The maximum total number of files and folders which can be stored is 730 (360 for the PSR-S700 2 Use the PSR-S900/S700 Owner's Manual 77 - Yamaha PSR-S700 | Owners Manual - Page 78
entering a character by moving the cursor, press the [6†] button to call up the mark list. 2 Use the DATA ENTRY dial to move the cursor to the desired mark, then press the [8π] (OK) button. • Canceling the character-entering operation Press the [8†] (CANCEL) button. 78 PSR-S900/S700 Owner's Manual - Yamaha PSR-S700 | Owners Manual - Page 79
while holding the B5 key (right-most B key on the keyboard). 4 23 3 Checkmark the box of the item to be reset to the factory pro- grammed settings by pressing the [4π] button. 4 Press the [D] button to execute the Factory Reset operation for all checkmarked items. PSR-S900/S700 Owner's Manual 79 - Yamaha PSR-S700 | Owners Manual - Page 80
to the System Setup. The Data List is available at the Yamaha website. (See page 5.) MIDI SETUP The MIDI settings including the MIDI templates on the User tab display are handled as a single file specified in step 4), and press the corresponding [A]-[J] button. 80 PSR-S900/S700 Owner's Manual - Yamaha PSR-S700 | Owners Manual - Page 81
[F]-[I] buttons to call up the relevant display for saving your data. 4 Select the appropriate USB tab to which you want to save the data by using the TAB [√][®] buttons. 5 Save your data (page 73). PSR-S900/S700 Owner's Manual 81 - Yamaha PSR-S700 | Owners Manual - Page 82
) button in step 3 above. n • It takes a few minutes to complete the backup/restore operation. • Backup data which has not been created on the PSRS900/S700 cannot be restored. CAUTION Move the Protected Songs which are saved to the USER display before restoring. If the songs are not moved, the - Yamaha PSR-S700 | Owners Manual - Page 83
be played from the keyboard. They are primarily designed for use with recorded MIDI sequence data (such as songs and styles). Some of the style data you've created on the PSR-S900/S700 using the Mega Voices will not sound properly when played back on other instruments. PSR-S900/S700 Owner's Manual - Yamaha PSR-S700 | Owners Manual - Page 84
Different Voices Simultaneously The PSR-S900/S700 keyboard features various functions and duet or combine two similar Voices to create a thicker sound. Using, Creating and Editing Voices Right 2 part Right 1 part Specifying the 84 PSR-S900/S700 Owner's Manual Left part Right 2 part Right 1 part - Yamaha PSR-S700 | Owners Manual - Page 85
2] button again to turn it off. Switching the Right 2 part on/off with a pedal You can use a pedal to switch the Right 2 part on/off (when the Right 2 part is appropriately assigned; page 195). This is useful for turning the Right 2 part on and off while you play. PSR-S900/S700 Owner's Manual 85 - Yamaha PSR-S700 | Owners Manual - Page 86
to select the PRESET display. 4 Using, Creating and Editing Voices 5 5 5 6 7 Switching the Left part on/off with a pedal You can use a pedal to switch the Left part select a Voice. Play the keyboard. Press the PART ON/OFF [LEFT] button again to turn it off. 86 PSR-S900/S700 Owner's Manual - Yamaha PSR-S700 | Owners Manual - Page 87
by using the [6π†]/[7π†] buttons. Checkmark the box by pressing the [8π] button. 3 Use the [A]/[B] buttons to select the desired scale. The tuning of each note for the currently selected scale is indicated in the keyboard illustration at the upper right of the display. PSR-S900/S700 Owner's Manual - Yamaha PSR-S700 | Owners Manual - Page 88
keyboard (TUNE) 1 Press the [3π†] button to select the note for tuning. 2 Use feature of this scale is that each key has its own unique character. The scale was used 0 ARABIC 2 0 0 0 0 -50.0 0 0 0 0 0 0 -50.0 * In the display, the rounded off value is shown. 88 PSR-S900/S700 Owner's Manual - Yamaha PSR-S700 | Owners Manual - Page 89
section for Style playback and Harmony effect Split Point (for Style) Split Point (for keyboard Voice) Left Voice and chord section for Harmony effect Right 1 Right 2 Voices Chord section Left Voice for Style playback and Harmony effect Right 1 Right 2 Voices PSR-S900/S700 Owner's Manual 89 - Yamaha PSR-S700 | Owners Manual - Page 90
is available for all types with the exception of "Multi Assign." This lets you determine the keyboard part via which the harmony/echo notes will be sounded. This parameter is available when one key strongly (above the set value). Using, Creating and Editing Voices 90 PSR-S900/S700 Owner's Manual - Yamaha PSR-S700 | Owners Manual - Page 91
a parameter in step 4, you can instantly set the same value to all other parts. To do this, simultaneously hold down one of the [A]-[J] buttons, and use the [1]-[8] buttons or the DATA ENTRY dial. PSR-S900/S700 Owner's Manual 91 - Yamaha PSR-S700 | Owners Manual - Page 92
the level balance among the Keyboard parts (RIGHT 1, RIGHT 2 and LEFT), SONG, STYLE, MULTI PAD, and MIC parts (PSR-S900). The part components are data, channel 10 (in the SONG CH 9-16) can only be used for a Drum Kit Voice. Adjustable Items (parameters) in the MIXING PSR-S900/S700 Owner's Manual - Yamaha PSR-S700 | Owners Manual - Page 93
Using, Creating and Editing Voices Editing the Volume that creates a smooth transition in pitch from the first note played on the keyboard to the next. The Portamento Time determines the pitch transition time. Higher values result is attenuated/boosted for each part. PSR-S900/S700 Owner's Manual 93 - Yamaha PSR-S700 | Owners Manual - Page 94
. When you play back any commercially available XG song data or that created on other instruments, you can use Auto Revoice to automatically assign the specially created Voices of the PSR-S900/S700 (Live!, Cool!, etc.) instead of the conventional XG Voices of the same type. 1-3 Same operation as in - Yamaha PSR-S700 | Owners Manual - Page 95
played simultaneously. STYLE PART SONG CHANNNEL PSR-S900) Any unused DSP blocks are automatically assigned to the appropriate parts (channels) as needed. * Handled only by DSP4. 6 Use the [3π†]/[4π†] buttons to select the part to which you want to apply the effect. PSR-S900/S700 Owner's Manual - Yamaha PSR-S700 | Owners Manual - Page 96
parameter by using the [6π†]/ [7π†] buttons. If you have selected the REVERB, CHORUS or DSP1 effect block in step 5: Adjust the Effect Return Level by pressing [8π†] button. 13 Press the [I] (SAVE) button to call up the display for saving your origi- nal effect. 96 PSR-S900/S700 Owner's Manual - Yamaha PSR-S700 | Owners Manual - Page 97
required to tailor the overall frequency response. Usually an equalizer is used to correct the sound from speakers to match the special character of EQ tab. 4 Use the [A]/[B] buttons to select a preset EQ type to suit your perfor- mance (music style or environment). PSR-S900/S700 Owner's Manual 97 - Yamaha PSR-S700 | Owners Manual - Page 98
to save the edited EQ type (page 73). Up to two types of EQ can be created and saved. When recalling the saved EQ type, use the same procedure as in step 6. 98 PSR-S900/S700 Owner's Manual - Yamaha PSR-S700 | Owners Manual - Page 99
PSR-S900/S700 has a Voice Set feature for the ORGAN FLUTES Voices compared to other Voices. For instructions on editing the ORGAN FLUTES 4 As necessary, use the [A]/[B] buttons to select the item (parameter) to be edited. 5 Use the [1π†]-[8π†] buttons to power off. PSR-S900/S700 Owner's Manual 99 - Yamaha PSR-S700 | Owners Manual - Page 100
used as the LEFT part, the LEFT parameter is available. Determines whether the edited Voice is played monophonically or polyphonically. This setting can also be made in pitch from the first note played on the keyboard to the next. TOUCH SENSE OFFSET Changes to velocity PSR-S900/S700 Owner's Manual - Yamaha PSR-S700 | Owners Manual - Page 101
range. In addition to making the sound either brighter or mellower, Filter can be used to produce electronic, synthesizer-like effects. BRIGHTNESS Determines the cutoff frequency or effective frequency Sustain level ATTACK DECAY RELEASE Time Key on Key off PSR-S900/S700 Owner's Manual 101 - Yamaha PSR-S700 | Owners Manual - Page 102
[SUSTAIN] button on the panel is turned on (page 53). Using, Creating and Editing Voices 2. DSP DSP TYPE VARIATION Selects the adjusted in the VALUE menu explained below. This setting can also be made from the VOICE CONTROL "DSP VARI." button on the panel (page 53 102 PSR-S900/S700 Owner's Manual - Yamaha PSR-S700 | Owners Manual - Page 103
PSR-S900/S700 features a variety of lush, dynamic organ Voices that you can call up with the [ORGAN FLUTES] button. It also gives you the tools to create your own original organ sounds by using tab display, use the [A]/[B] buttons to select the parameter to be edited. PSR-S900/S700 Owner's Manual 103 - Yamaha PSR-S700 | Owners Manual - Page 104
sure to save the settings as a User Voice before selecting another Voice or turning the power off. 5 Use the [A]-[D], [F]-[H] and [1π†]-[8π†] buttons to edit the Voice. 6 Press the [I] ( create your own distinctive organ sounds. Using, Creating and Editing Voices 104 PSR-S900/S700 Owner's Manual - Yamaha PSR-S700 | Owners Manual - Page 105
is selected. However, you can also disable this feature by the operation in the relevant display as explained TAB [√][®] VOICE SET 2 Use the [A]/[B] buttons to select a keyboard part. 3 Use the [4π†]-[7π†] buttons to enable/disable Yamaha website. (See page 5.) PSR-S900/S700 Owner's Manual 105 - Yamaha PSR-S700 | Owners Manual - Page 106
keyboard. There are seven types of fingerings. 1 Call up the operation display. [FUNCTION] → [C] STYLE SETTING/SPLIT POINT/CHORD FINGERING → TAB [√][®] CHORD FINGERING 2 Press the [1π†]-[3π†] buttons to select a fingering. Using, Creating and Editing the Auto Accompaniment Styles 106 PSR-S900/S700 - Yamaha PSR-S700 | Owners Manual - Page 107
Auto Accompaniment off. 3 Press the STYLE CONTROL [START/STOP] button to play back the rhythm channels. Starting the rhythm with Sync Start You can also start the rhythm simply by playing the keyboard, if Sync Start is enabled (turn on the [SYNC START] button). PSR-S900/S700 Owner's Manual 107 - Yamaha PSR-S700 | Owners Manual - Page 108
to fade out, or go from maximum to minimum. FADE OUT HOLD TIME Determines the time the volume is held at 0 following the fade out. Using, Creating and Editing the Auto Accompaniment Styles 108 PSR-S900/S700 Owner's Manual - Yamaha PSR-S700 | Owners Manual - Page 109
the keys sooner than the time set here, the Synchro Stop function works. • Style Touch Turns touch response for the Style playback on/off. When this is set to "ON," the Style volume changes in response to your playing strength in the chord section of the keyboard. PSR-S900/S700 Owner's Manual 109 - Yamaha PSR-S700 | Owners Manual - Page 110
Style playback from the section(s) for playing Voices (RIGHT 1, 2 and LEFT) • Split Point (L)- separates the two sections for playing Voices, LEFT and RIGHT 1- 2. These two settings can be set to the same note (as in the default) or two different notes as desired. 110 PSR-S900/S700 Owner's Manual - Yamaha PSR-S700 | Owners Manual - Page 111
and chord section of the keyboard by using STYLE in the display, and you can specify the Split Point of the instructions. Convenient Music Finder feature Music Finder (page 55) is a convenient feature that calls up pre-programmed panel settings (for Voices, Styles, . PSR-S900/S700 Owner's Manual 111 - Yamaha PSR-S700 | Owners Manual - Page 112
. (These correspond to the tabs at the top of the Music Finder display.) TEMPO Set the range of the tempo you want to use in your performance by using the [1π†]/[2π†] (TEMPO) buttons. GENRE Select the desired music genre by using the [5π†]/ [6π†] (GENRE) buttons. 112 PSR-S900/S700 Owner's Manual - Yamaha PSR-S700 | Owners Manual - Page 113
3 Call up the FAVORITE display by using the TAB [√][®] buttons, and check to see if the record has been added. Deleting Records from the FAVORITE Display 1 Select the record you want to delete from the FAVORITE display. 2 Press the [H] (DELETE FROM FAVORITE) button. PSR-S900/S700 Owner's Manual 113 - Yamaha PSR-S700 | Owners Manual - Page 114
Finder feature Using, Creating and Editing the Auto Accompaniment Styles Keep in mind that the Beat setting made here is only for the Music Finder search function; this does not affect the actual Beat setting of the Style itself. The maximum number of records is 2500 (PSR-S900)/ 1200 (PSR-S700 - Yamaha PSR-S700 | Owners Manual - Page 115
Using, Creating and Editing the Auto Accompaniment Styles Convenient Music Finder feature Saving the Record The Music Finder feature handles all the Records including the presets and additionally created file (page 73). All records are saved together as a single file. PSR-S900/S700 Owner's Manual 115 - Yamaha PSR-S700 | Owners Manual - Page 116
Using, Creating and Editing the Auto Accompaniment Styles Convenient Music Finder feature CAUTION Selecting "REPLACE" automatically deletes all your original records from internal memory and replaces them with the factory Music Finder data. When you download instructions PSR-S900/S700 Owner's Manual - Yamaha PSR-S700 | Owners Manual - Page 117
to open the Web page. The available contents of the Music Finder Plus service are subject to change. 3 2 4 4 Press the [EXIT] button to exit the browser screen and return to the MUSIC FINDER display. Using, Creating and Editing the Auto Accompaniment Styles PSR-S900/S700 Owner's Manual 117 - Yamaha PSR-S700 | Owners Manual - Page 118
Style data. The created Styles can be edited. Style Structure Styles are made up of fifteen different sections and each section has eight separate channels. With the Style Creator feature, you can create a Style 1 Rhythm 2 Bass Chord 1 Chord 2 Pad Phrase 1 Phrase 2 118 PSR-S900/S700 Owner's Manual - Yamaha PSR-S700 | Owners Manual - Page 119
[F] DIGITAL REC MENU 3 Press the [B] button to call up the Style Creator display. 4 Use the TAB [√][®] buttons, then select the BASIC tab to call up the [EXIT] the STYLE CREATOR display disappears, you can press the [F] (REC CH) button to re-display it. button. PSR-S900/S700 Owner's Manual 119 - Yamaha PSR-S700 | Owners Manual - Page 120
ed with the panel controls. 6 Use the [3π†]/[4π†] buttons to select the section (page 118) to be recorded. 7-2 Using, Creating and Editing the Auto Accompaniment Styles 6 7-1 7 Muting specific channels again, before releasing your finger from the [J] button. 120 PSR-S900/S700 Owner's Manual - Yamaha PSR-S700 | Owners Manual - Page 121
the appropriate [1†]-[8†] button to specify the channel, then play the keyboard. 13 Stop recording by pressing the Style Control [START/STOP] button. 14 Call up the display for (page 128) before recording. Using, Creating and Editing the Auto Accompaniment Styles PSR-S900/S700 Owner's Manual 121 - Yamaha PSR-S700 | Owners Manual - Page 122
BASIC tab display. • In the Style Creator, the channel data can be entered and System Exclusive data can be edited (delete, copy, or move). You can switch between the two by pressing the [F] button. However, Chord, Lyrics, and System Exclusive data cannot be entered. 122 PSR-S900/S700 Owner's Manual - Yamaha PSR-S700 | Owners Manual - Page 123
section as desired by using the [6π†]/[7π†] buttons Style Selection display, and save your data from the display (page 73). CAUTION The recorded Style will be lost if you change to another Style or you turn the power off without executing the Save operation (page 73). PSR-S900/S700 Owner's Manual - Yamaha PSR-S700 | Owners Manual - Page 124
. • Making Style File Format Settings (PARAMETER) ➤ See page 128 For playback of your created Style, you can decide how notes will be converted and sounded for the accompaniment when changing chords in the chord section of the keyboard. 5 Edit the selected Style. 124 PSR-S900/S700 Owner's Manual - Yamaha PSR-S700 | Owners Manual - Page 125
data. Save the data in the Style Selection display (page 73). CAUTION The edited Style will be lost if you change to another Style or you turn the power off without executing the Save operation (page 73). Using, Creating and Editing the Auto Accompaniment Styles PSR-S900/S700 Owner's Manual 125 - Yamaha PSR-S700 | Owners Manual - Page 126
/CUT Boosts or cuts all velocity values in the selected section/channel. Values above 100% boost the overall velocity, while values below 100% reduce it. Using, Creating and Editing the Auto Accompaniment Styles 126 PSR-S900/S700 Owner's Manual - Yamaha PSR-S700 | Owners Manual - Page 127
menu (see below). 1 4 5 Style Creator Using, Creating and Editing the Auto Accompaniment Styles 2 3 2 Use the [1π†]/[2π†] (CHANNEL) buttons to select Style will be lost if you change to another Style or you turn the power off without executing the save operation. PSR-S900/S700 Owner's Manual - Yamaha PSR-S700 | Owners Manual - Page 128
Output The explanation here applies when you select the PARAMETER tab in step 4 of "Basic Operation for Editing Styles" (page 124). 1 Press the [A]/[B] button to select the edit menu (page 129). 1 4 Using, Creating and Editing the Auto Accompaniment Styles 2 3 128 PSR-S900/S700 Owner's Manual - Yamaha PSR-S700 | Owners Manual - Page 129
C3, E3 and G3 in the key of C become C3, F3 and A3 when they are transposed to F. Use this setting for channels that contain chord parts. When playing a C major chord. When playing an F major chord. When playing a C major chord. When playing an F major chord. PSR-S900/S700 Owner's Manual 129 - Yamaha PSR-S700 | Owners Manual - Page 130
Accompaniment Styles Style Creator ■ NTT (Note Transposition Table) This sets the note transposition table for the source pattern. BYPASS When NTR is set to ROOT FIXED, the transposition table used Notes played C3-E3-G3 C#3-F3-G#3 FM F3-A3-C4 F#M F#2-A#2-C#3 130 PSR-S900/S700 Owner's Manual - Yamaha PSR-S700 | Owners Manual - Page 131
the note range (highest and lowest notes) for voices recorded to the style channels. By judicious setting of this range, you can ensure that the the octave of the new note remains the same. Style Creator Using, Creating and Editing the Auto Accompaniment Styles PSR-S900/S700 Owner's Manual 131 - Yamaha PSR-S700 | Owners Manual - Page 132
the STYLE CONTROL [START/STOP] button to stop recording when you've finished playing the phrase. beat of the phrase, just before the "one" of the next measure. If it is difficult to get a good loop, you may want to use the Step Record functions on the EDIT page. 132 PSR-S900/S700 Owner's Manual - Yamaha PSR-S700 | Owners Manual - Page 133
10 Turn Repeat of each pad On or Off by using the [1π†] - [4π†] but- tons. If the Repeat on during Song or Style playback, playback will start and repeat in of the keyboard generated by turning [ACMP] on, or specified in the LEFT voice section of the keyboard generated by PSR-S900/S700 Owner's Manual 133 - Yamaha PSR-S700 | Owners Manual - Page 134
location, then execute the Copy operation by pressing the [4†] button (page 74). • Deleting Press the [5†] button then delete the unnecessary Multi Pad (page 75). 134 PSR-S900/S700 Owner's Manual - Yamaha PSR-S700 | Owners Manual - Page 135
Panel Setups 1 Set up the panel controls (such as Voice, Style, effects, and so on) as desired. Refer to the Data POWER] 6 Register various panel setups to other buttons by repeating steps 1-5. button ON while holding the B5 key (right-most B key on the key- board). PSR-S900/S700 Owner's Manual - Yamaha PSR-S700 | Owners Manual - Page 136
storage device, make sure that the appropriate USB storage device including the registered Song/Style is connected into the [USB TO DEVICE] terminal. Recalling the Registered Panel Setups green-lit numbered buttons ([1]-[8]) in the Registra- tion Memory section. 136 PSR-S900/S700 Owner's Manual - Yamaha PSR-S700 | Owners Manual - Page 137
, One Touch Setting, Music Finder, Song or incoming MIDI data, etc. 1 Call up the Parameter Lock display [B] 3 PARAMETER LOCK 2 Select the desired parameter by using the [1π†]-[7π†]buttons, then lock it with the [8π] (OK) PSR-S900/S700 Owner's Manual 137 Registering and Recalling Custom Panel Setups - Yamaha PSR-S700 | Owners Manual - Page 138
the power off setups you made with a same accompaniment Style. This used-to advance or to reverse through the sequence. Use the [C] button to select the pedal for advancing through the sequence. Use the [D] button to select the pedal for reversing through the sequence. 138 PSR-S900/S700 Owner's Manual - Yamaha PSR-S700 | Owners Manual - Page 139
you exit from this display. However, if you turn the power off without exiting reverse order. The TAB [√][®] buttons can only be used for Registration Sequence when the Main display is called up. Memory Bank file. Registering and Recalling Custom Panel Setups PSR-S900/S700 Owner's Manual 139 - Yamaha PSR-S700 | Owners Manual - Page 140
Available Song Data A variety of song data for the instrument can be downloaded from the Yamaha website, and even more titles are available commercially as Disk Songs. Disk Songs oppy disks) that bear the following marks: Using, Creating and Editing Songs 140 PSR-S900/S700 Owner's Manual - Yamaha PSR-S700 | Owners Manual - Page 141
are not covered in the "Quick Guide." ■ Starting/Stopping a Song Press on the particular Song data, the Style will also play back at the same time. as you start playing the keyboard. While playback is stopped, simultaneously Using, Creating and Editing Songs PSR-S900/S700 Owner's Manual 141 - Yamaha PSR-S700 | Owners Manual - Page 142
showing the current measure number in the Main display. For Songs containing Phrase Marks, you can use the [G/H] (REW/FF) buttons to navigate through the Phrase Marks in the Song. If you (rewind and fast forward)" (see above). Using, Creating and Editing Songs 142 PSR-S900/S700 Owner's Manual - Yamaha PSR-S700 | Owners Manual - Page 143
first note, turn Quick Start "OFF." 1 Call up the operation display. [FUNCTION] → [B] SONG SETTING 2 Press the [7†] (QUICK START) buttons to turn the Quick Start "OFF." Using, Creating and Editing Songs PSR-S900/S700 Owner's Manual 143 - Yamaha PSR-S700 | Owners Manual - Page 144
settings can be made for each using the [1π†]- [8π†] buttons. 7 You can save the volume settings to the Song in the Setup operation of the SETUP (page 166). Make sure to checkmark the "VOICE" item in step 2 of the Setup procedure. Using, Creating and Editing Songs 144 PSR-S900/S700 Owner's Manual - Yamaha PSR-S700 | Owners Manual - Page 145
→ [B] SONG SETTING 2 Use the [A]/[B] buttons to select the desired Guide function type. The following types are available. 2 1 3 Select a song, call up the Score display (by pressing the [SCORE] but- ton), then play the keyboard. Using, Creating and Editing Songs PSR-S900/S700 Owner's Manual 145 - Yamaha PSR-S700 | Owners Manual - Page 146
Yamaha Clavinova series. This function is used for practicing purposes, with built-in lamps on the Clavinova keyboard indicating the notes to be played. Even though the PSR-S900/S700 does not have these lamps, you can use again. 146 PSR-S900/S700 Owner's Manual Using, Creating and Editing Songs - Yamaha PSR-S700 | Owners Manual - Page 147
here, but can be recorded using the Audio Recording function (page 63). Internal memory (User tab displays) capacity The internal memory capacity of the instrument is about 1.4MB (PSR-S900)/560KB (PSR-S700). This capacity applies to all file types, including Voice, Style, Song, and Registration data - Yamaha PSR-S700 | Owners Manual - Page 148
a Song with a short one-or two-beat pick-up or lead-in. • Starting by pressing the STYLE CONTROL [START/STOP] button. In this case the rhythm parts (channels) of the Style begin playing back and recording starts simultaneously. Using, Creating and Editing Songs 148 PSR-S900/S700 Owner's Manual - Yamaha PSR-S700 | Owners Manual - Page 149
Your Performance to MIDI 5 Press the SONG STYLE CONTROL [SYNC START] button, then play in the chord section of the keyboard. CAUTION The recorded Song data will be lost if you select another Song or turn the power page 151. Using, Creating and Editing Songs PSR-S900/S700 Owner's Manual 149 - Yamaha PSR-S700 | Owners Manual - Page 150
To close the message, press the [EXIT] button. For instructions on saving Song data, see step 8. 6 Listen to your newly recorded performance. Press the SONG [F/ K] (PLAY/PAUSE) button to playback the performance you just recorded. Using, Creating and Editing Songs 150 PSR-S900/S700 Owner's Manual - Yamaha PSR-S700 | Owners Manual - Page 151
used for punchy brass stabs, arpeggiated chords, and other extras that make the accompaniment more interesting. About Multi Pad parts As the default, each of the Multi Pads is assigned to the channels 5-8, respectively as shown above. Using, Creating and Editing Songs PSR-S900/S700 Owner's Manual - Yamaha PSR-S700 | Owners Manual - Page 152
Recording Your Performance to MIDI Step Recording This method lets you record regular music data such as melodies and chords. Basic . 7 Start Step Recording. For recording melodies See page 153. For recording chords See page 160. 152 PSR-S900/S700 Owner's Manual Using, Creating and Editing Songs - Yamaha PSR-S700 | Owners Manual - Page 153
button to select " ." Since the music score displayed on the instrument is generated from the recorded MIDI data, it may not appear exactly the same as shown here. 1 2 3 4 2 Press the via the [G] [H] [I] buttons See page 155. Using, Creating and Editing Songs PSR-S900/S700 Owner's Manual 153 - Yamaha PSR-S700 | Owners Manual - Page 154
another Song or turn the power to the instrument off without Use the [A]/[B] buttons in the STEP RECORD display (page 152) to select the data you want to delete. 2 Press the [J] (DELETE) button to delete the selected data. Using, Creating and Editing Songs 154 PSR-S900/S700 Owner's Manual - Yamaha PSR-S700 | Owners Manual - Page 155
by using the DATA ENTRY dial. [I] button Determines the note type to be entered. Pressing the button alternately switches the note selectors (at the bottom of the display) among three basic note values: normal, dotted and triplet. Using, Creating and Editing Songs PSR-S900/S700 Owner's Manual - Yamaha PSR-S700 | Owners Manual - Page 156
music score displayed on the instrument is generated from the recorded MIDI data, it may not appear exactly the same as shown here keyboard, press the [7π†] button. Before you go on to step 6, release the F3 key and the [7π†] button. Using, Creating and Editing Songs 156 PSR-S900/S700 Owner's Manual - Yamaha PSR-S700 | Owners Manual - Page 157
Performance to MIDI 6 After select the dotted half-note length. 13 Play the A3 key on the keyboard, as specified in the example. 14 Press the [I] button to power to the instrument off without executing the Save operation (page 73). Using, Creating and Editing Songs PSR-S900/S700 Owner's Manual 157 - Yamaha PSR-S700 | Owners Manual - Page 158
displayed on the instrument is generated from the recorded MIDI data, it may not appear exactly the same as shown keyboard, press the [7π†] button. Do not release the C3 key yet. Keep holding it while executing the following steps. Using, Creating and Editing Songs 158 PSR-S900/S700 Owner's Manual - Yamaha PSR-S700 | Owners Manual - Page 159
the data in the Song Selection display (page 73). CAUTION The recorded Song data will be lost if you select another Song or turn the power to the instrument off without executing the Save operation (page 73). PSR-S900/S700 Owner's Manual 159 - Yamaha PSR-S700 | Owners Manual - Page 160
STYLE CONTROL [MAIN VARIATION A] button. 3C 1 F Using, Creating and Editing Songs G 2 2 Press the [5π†] button to select the half-note length. 3 Play the chords C, F and G in the chord section of the keyboard. 4 Press the STYLE CONTROL [BREAK] button. 6F G7 4 5 160 PSR-S900/S700 Owner's Manual - Yamaha PSR-S700 | Owners Manual - Page 161
IN] button to ON, and simply press one of the STYLE CONTROL [MAIN VARIATION (A, B, C, D)] buttons. (The appropriate fill-in section plays and then automatically goes to the selected [MAIN VARIATION (A, B, C, D)] pattern playback.) Using, Creating and Editing Songs PSR-S900/S700 Owner's Manual 161 - Yamaha PSR-S700 | Owners Manual - Page 162
Recording Your Performance to MIDI Editing a Recorded Song You can edit the Songs you've recorded with any recording method - Quick Recording, . • Editing Lyrics (LYRICS page 170 This lets you change the Song name or lyrics events. 162 PSR-S900/S700 Owner's Manual Using, Creating and Editing Songs - Yamaha PSR-S700 | Owners Manual - Page 163
continues. This setting maintains all data after the point at which recording is stopped. You can set the Punch Out measure by pressing the [6π†] buttons. Using, Creating and Editing Songs PSR-S900/S700 Owner's Manual 163 - Yamaha PSR-S700 | Owners Manual - Page 164
MIDI Examples of re-recording with various Punch In/Out settings This instrument features several different ways you use be lost if you select another Song or turn the power to the instrument off without executing the Save operation Using, Creating and Editing Songs 164 PSR-S900/S700 Owner's Manual - Yamaha PSR-S700 | Owners Manual - Page 165
Recording Your Performance to MIDI 4 Press the [I] (SAVE) button to call up the Song Selection display for in the Song. Select the channel whose data to be deleted by using the [1π†]-[8π†] buttons, then press the [D] (EXECUTE) button to execute the operation. PSR-S900/S700 Owner's Manual 165 - Yamaha PSR-S700 | Owners Manual - Page 166
1 Selects the channel (1-16) to be mixed. All MIDI events in the selected channel are copied to the destination made from the Mixing Console. KEYBOARD VOICE Records the panel settings including the Voice selection of the keyboard Using, Creating and Editing Songs 166 PSR-S900/S700 Owner's Manual - Yamaha PSR-S700 | Owners Manual - Page 167
Recording Your Performance to MIDI 5 Press the [I] ( power to the instrument off without executing the Save operation (page 73). Chord and Section data recorded with Realtime Recording cannot be indicated and edited on this display. Using, Creating and Editing Songs PSR-S900/S700 Owner's Manual - Yamaha PSR-S700 | Owners Manual - Page 168
Recording Your Performance to MIDI About Clock A unit of note resolution. The Quantize size is the number of clocks per quarter note. On the PSR-S900/S700, one clock is equal to 1/1920th of a quarter note. About the events shown in the display 1 2 3 Using, Creating and Editing Songs Example - Yamaha PSR-S700 | Owners Manual - Page 169
display. STYLE Call up the Accompaniment Style Filter Display MIDI Data Format" in the Data List for details. The Data List is available at the Yamaha power to the instrument off without executing the Save operation (page 73). Using, Creating and Editing Songs PSR-S900/S700 Owner's Manual 169 - Yamaha PSR-S700 | Owners Manual - Page 170
lyrics text. LF Unavailable on the instrument. On some MIDI devices, this event may delete the currently displayed lyrics power to the instrument off without executing the Save operation (page 73). Inputting and Editing Lyrics 1 Use Using, Creating and Editing Songs 170 PSR-S900/S700 Owner's Manual - Yamaha PSR-S700 | Owners Manual - Page 171
://music.yamaha.com/homekeyboard). Use a computer to connect to the Internet and get online before connecting the instrument, since no modem or router settings can be made from the instrument itself. To use the Internet connection, you will first need to subscribe to an Internet service or provider - Yamaha PSR-S700 | Owners Manual - Page 172
the browser display of the instrument, a scroll bar appears at the right side of the display. Use the DATA ENTRY dial to scroll through the display and view those parts of the page that are not shown. Scroll bar 172 PSR-S900/S700 Owner's Manual Connecting the PSR-S900/S700 Directly to the Internet - Yamaha PSR-S700 | Owners Manual - Page 173
up links by using the DATA ENTRY dial and pressing the [ENTER] button. Entering Characters See page 77, "Entering Characters," for instructions on entering (BACK) button, press the [2π†] (FORWARD) button. PSR-S900/S700 Owner's Manual 173 Connecting the PSR-S900/S700 Directly to the Internet - Yamaha PSR-S700 | Owners Manual - Page 174
, from which you can select the downloaded data. To return to the Internet display, select "NO." When the File Selection display is open, press the [8π] (UP) button to call up the next highest level folder. Connecting the PSR-S900/S700 Directly to the Internet 174 PSR-S900/S700 Owner's Manual - Yamaha PSR-S700 | Owners Manual - Page 175
Download Destination The download destination depends on the use of storage media, as described below. • When a USB storage device is connected to the instrument during pur- chase: The downloaded (ADD) button. PSR-S900/S700 Owner's Manual 175 Connecting the PSR-S900/S700 Directly to the Internet - Yamaha PSR-S700 | Owners Manual - Page 176
) button. Opening a Bookmarked Page 1 Press the [4π†] (BOOKMARK) button to call up the Bookmark dis- play. 2 Press the [1 button to select the desired bookmark. Connecting the PSR-S900/S700 Directly to the Internet 23 3 Press the [2π†] (VIEW) button to open the page of the selected bookmark. 176 - Yamaha PSR-S700 | Owners Manual - Page 177
in the Bookmark list. 2 View Opens the web page of the selected bookmark. 3 Add Used when saving a bookmark (page 175). 4 Move Changes the order of the bookmarks. 1 Select and returns to the browser display. PSR-S900/S700 Owner's Manual 177 Connecting the PSR-S900/S700 Directly to the Internet - Yamaha PSR-S700 | Owners Manual - Page 178
display. 3 Select the desired item by pressing the [1 button. Connecting the PSR-S900/S700 Directly to the Internet Entering Characters When the character input display is opened, you change the value. This can also be done by using the DATA ENTRY dial. 178 PSR-S900/S700 Owner's Manual 56 - Yamaha PSR-S700 | Owners Manual - Page 179
/Gateway These settings are available only when DHCP is not used. The settings here are: IP address, subnet mask, and gateway server address. These settings must be made when "Use DHCP" above is set to "OFF." PSR-S900/S700 Owner's Manual 179 Connecting the PSR-S900/S700 Directly to the Internet - Yamaha PSR-S700 | Owners Manual - Page 180
the host name for the nonproxy server. The settings here are only necessary when using a proxy server. 2 Delete cookies Deletes the information of all saved cookies. 3 information on the current connection. Connecting the PSR-S900/S700 Directly to the Internet 180 PSR-S900/S700 Owner's Manual - Yamaha PSR-S700 | Owners Manual - Page 181
page as Home." 5 Use the [2π†]/[3π†] (EDIT) buttons to actually set the selected page as your new Home page. 6 To return to the browser, press the [7π†] (SAVE) button. To cancel, press the [8π†] (CANCEL) button. Connecting the PSR-S900/S700 Directly to the Internet PSR-S900/S700 Owner's Manual 181 - Yamaha PSR-S700 | Owners Manual - Page 182
only the settings of the browser, but also all settings you have made in the Internet Settings displays (except for the cookies and bookmarks), use the appropriate operations in the OTHERS tab display (page 180). Connecting the PSR-S900/S700 Directly to the Internet 182 PSR-S900/S700 Owner's Manual - Yamaha PSR-S700 | Owners Manual - Page 183
system or computer used as a central point for a network, providing access to files and services. Site Short easy wireless connection with digital consumer electronic devices, printers, and game machines, etc. equipped with LAN ports. PSR-S900/S700 Owner's Manual 183 Connecting the PSR-S900/S700 - Yamaha PSR-S700 | Owners Manual - Page 184
Using a Microphone (PSR-S900) Reference to Quick Guide pages Singing Along with Song Playback (Karaoke) or Your Own Performance page 2 2 Press the [H] (VOCAL HARMONY TYPE) button to call up the VOCAL HARMONY TYPE selection display. Using a Microphone (PSR-S900) 184 PSR-S900/S700 Owner's Manual - Yamaha PSR-S700 | Owners Manual - Page 185
up the VOCAL HARMONY EDIT display. 5 If you want to re-select the Vocal Harmony type, use the [1π†]/ [2π†] buttons. Or you can re-select the Vocal Harmony type by pressing the [8π†] the power off without executing the Save operation. PSR-S900/S700 Owner's Manual 185 Using a Microphone (PSR-S900) - Yamaha PSR-S700 | Owners Manual - Page 186
Off. VIBRATO DELAY Specifies the length of the delay before the vibrato effect begins when a note is produced. Higher values result in a longer delay. Using a Microphone (PSR-S900) 186 PSR-S900/S700 Owner's Manual - Yamaha PSR-S700 | Owners Manual - Page 187
third (highest) harmony notes. Random The stereo position of the sound will change randomly whenever the keyboard is played. This is effective when the Harmony mode (page 190) is set to "VOCODER call up the MICROPHONE SET- TING display. Using a Microphone (PSR-S900) PSR-S900/S700 Owner's Manual 187 - Yamaha PSR-S700 | Owners Manual - Page 188
power off without exiting from this display, the settings will be lost. 4 Use the [A]-[J] buttons to select the item (parameter) (see below) to be adjusted. 5 Use overall frequency response. The instrument features a high-grade three-band ( PSR-S900/S700 Owner's Manual Using a Microphone (PSR-S900) - Yamaha PSR-S700 | Owners Manual - Page 189
S900 or an external MIDI sequencer) contained on the corresponding channel is used to control the harmony. This setting is linked to the HARMONY CH setting in the SONG SETTING display (page 145). KEYBOARD OFF Keyboard vocal is output. Using a Microphone (PSR-S900) PSR-S900/S700 Owner's Manual 189 - Yamaha PSR-S700 | Owners Manual - Page 190
chord: chords played in the chord section of the keyboard (with the [ACMP] turned on), chords played in the LEFT Voice section of the keyboard (with the [ACMP] turned off and the [ Adjusts the output volume of the microphone sound. Using a Microphone (PSR-S900) 190 PSR-S900/S700 Owner's Manual - Yamaha PSR-S700 | Owners Manual - Page 191
SETTING tab display. 3 4 Using a Microphone (PSR-S900) 6 5 4 Use the [A]/[B] buttons to select the item (parameter) (page 192) to be set. 5 Use the [1π†]-[7π†] buttons to set the turn the power off without exiting from this display, the settings will be lost. PSR-S900/S700 Owner's Manual 191 - Yamaha PSR-S700 | Owners Manual - Page 192
DSP effect to be applied to the microphone sound. DSP MIC DEPTH This sets the depth of the DSP effect applied to the microphone sound. Using a Microphone (PSR-S900) 192 PSR-S900/S700 Owner's Manual - Yamaha PSR-S700 | Owners Manual - Page 193
the instrument. Reverse this order when you turn the power off. n • Use only the [L/L+R] jack for connection with a monaural device. • The instrument's [MASTER VOLUME] setting affects the input signal from the [AUX IN] jacks. PSR-S900/S700 Owner's Manual 193 Using Your Instrument with Other Devices - Yamaha PSR-S700 | Owners Manual - Page 194
PSR-S900) Plug an optional Yamaha Footswitch FC4 or FC5 into this jack and use it to control the Super Articulation Voices (page 83). (PSR-S700) Plug an optional Yamaha FC7 foot controller into this jack and use power is off. Using Your Instrument with Other Devices 194 PSR-S900/S700 Owner's Manual - Yamaha PSR-S700 | Owners Manual - Page 195
changed-for example, letting you use the footswitch to start/stop Style playback, or use the foot controller to produce pitch use this setting to reverse the control. Press the [I] (PEDAL POLARITY) button to switch the polarity. Using Your Instrument with Other Devices PSR-S900/S700 Owner's Manual - Yamaha PSR-S700 | Owners Manual - Page 196
VARIATION A-D] buttons. Plays a fill-in, which is automatically followed by the Main section of the button on the immediate left. Plays a fill-in. Plays a break. Using Your Instrument with Other Devices 196 PSR-S900/S700 Owner's Manual - Yamaha PSR-S700 | Owners Manual - Page 197
the particular drum kit used for the pedal. When PERCUSSION is assigned to the pedal, all sounds of the selected drum kit (in KIT above) are shown here. This determines the particular instrument sound assigned to the pedal. Using Your Instrument with Other Devices PSR-S900/S700 Owner's Manual 197 - Yamaha PSR-S700 | Owners Manual - Page 198
using a USB cable to connect the instrument to your computer, make the connection directly without passing through a USB hub. • For information on setting up your sequence software, refer to the owner's manual of the relevant software. Using Your Instrument with Other Devices 198 PSR-S900/S700 - Yamaha PSR-S700 | Owners Manual - Page 199
computer via the instrument. Formatting USB storage media For details, see page 72. CAUTION The format operation overwrites any previously existing data. Proceed with caution. Using Your Instrument with Other Devices PSR-S900/S700 Owner's Manual 199 - Yamaha PSR-S700 | Owners Manual - Page 200
itself but also Standard MIDI files and Style File-formatted Style files created on other use the [LAN] port to access special Internet websites, and download song data, etc. See page 171 for instructions on connecting. Using Your Instrument with Other Devices 200 PSR-S900/S700 Owner's Manual - Yamaha PSR-S700 | Owners Manual - Page 201
example. Here, the player's performance on the keyboard is captured as MIDI song data (see illustration below). In order to record the audio performance on an acoustic piano, special recording equipment is needed. However, since the PSR-S900/S700 features a built-in sequencer that lets you record - Yamaha PSR-S700 | Owners Manual - Page 202
's keyboard and internal tone generator are also connected by MIDI. → LOCAL CONTROL (page 207) For example, several parts or channels can be transmitted simultaneously, including the Style data (as shown on the next page). Using Your Instrument with Other Devices 202 PSR-S900/S700 Owner's Manual - Yamaha PSR-S700 | Owners Manual - Page 203
data is played. (SMF is the most common format used for MIDI sequence files. The PSR-S900/S700 is compatible with SMF Formats 0 and 1, and records "song" data using SMF Format 0.) ● Style File The Style File Format (SFF) combines all of Yamaha's auto accompaniment know-how into a single unified format - Yamaha PSR-S700 | Owners Manual - Page 204
into the future. Song data recorded on the PSR-S900/S700 using Voices in the XG category is XG-compatible. ● DOC (Disk Orchestra Collection) This voice allocation format is compatible with many of Yamaha's MIDI devices, including the PSR-S900/S700 series instruments. ● GS GS was developed by the - Yamaha PSR-S700 | Owners Manual - Page 205
When you've finished editing, press the [EXIT] button to return to the MIDI template selection display (PRESET or USER). 6 Select the USER tab display to save the data by using the TAB [√][®] buttons (page 73). MIDI Settings Using Your Instrument with Other Devices PSR-S900/S700 Owner's Manual 205 - Yamaha PSR-S700 | Owners Manual - Page 206
as a "master" keyboard, playing and controlling one Style playback with a MIDI pedal unit. This template lets you play the bass part for Style playback by using a MIDI pedal unit. No MIDI signals are sent or received. Using Your Instrument with Other Devices 206 PSR-S900/S700 Owner's Manual - Yamaha PSR-S700 | Owners Manual - Page 207
from the Split Point for the Voices (RIGHT1 and/ or 2). • LOWER The keyboard part played on the left side of the keyboard from the Split Point for the Voices. This is not affected by the on/off status of the [ACMP] button. Using Your Instrument with Other Devices PSR-S900/S700 Owner's Manual 207 - Yamaha PSR-S700 | Owners Manual - Page 208
The received note messages control the instrument's keyboard performance. • EXTRA PART 1-5 There are five parts specially reserved for receiving and playing MIDI data. Normally, these parts are not used by the instrument itself. The PSR-S900/S700 can be used as a 32-channel multi-timbral tone - Yamaha PSR-S700 | Owners Manual - Page 209
here start from "1." Accordingly the actual MIDI program change numbers are one lower, since that number system starts from "0." • For the GS Voices, this feature is not available (the program change numbers are not shown). Using Your Instrument with Other Devices PSR-S900/S700 Owner's Manual 209 - Yamaha PSR-S700 | Owners Manual - Page 210
, letting the latest played notes sound. The keyboard volume is lower than the Song/Style playback volume. • The volume of the keyboard parts may be set too low. Raise the characters to 50 or less. Demo How can I stop the demo? • Press the [EXIT] button. Appendix 210 PSR-S900/S700 Owner's Manual - Yamaha PSR-S700 | Owners Manual - Page 211
fingering mode is set to "Full Key- board" or "AI Full Keyboard." If either of these is selected, chords are recognized over the entire range of the keyboard, irrespective of the split point setting. If desired, select a different fingering mode (page 107). Appendix PSR-S900/S700 Owner's Manual 211 - Yamaha PSR-S700 | Owners Manual - Page 212
the Assembly (Style Creator) feature. • original has been changed. • MIDI Clock may be set to "EXTERNAL." Guide function is turned on. (In this case, playback is "waiting" for the correct key to be played.) Press the [GUIDE] button to turn off the guide function. Appendix 212 PSR-S900/S700 Owner's Manual - Yamaha PSR-S700 | Owners Manual - Page 213
turning off the power is contained in . Use the [USB TO DEVICE] terminal to move the song to a USB flash memory device connected to this instrument. Guide The the Step Record display (page 153) may solve the problem. The tempo, beat, measure and music notation is PSR-S900/S700 Owner's Manual 213 - Yamaha PSR-S700 | Owners Manual - Page 214
Video out (PSR-S900) The instrument display contents cannot be sent via video Style using a USB memory device to which data has already been recorded, check first that no important data remains on the device, then format it (page 72) and try recording again. Appendix 214 PSR-S900/S700 Owner's Manual - Yamaha PSR-S700 | Owners Manual - Page 215
Style Fingering Style Creator OTS (One Touch Setting) OTS Link Music Finder Preset Edit RAM Capacity Preset Songs Guide Song Performance assistant technology Recording Record Channels RAM Capacity USB Audio Recorder Multi Pad Preset Internet Direct Connection PSR-S900 PSR-S700 - Yamaha PSR-S700 | Owners Manual - Page 216
Pedal Functions Amplifiers/ Speakers Amplifiers Speakers Power Consumption Dimensions [W ✕ D ✕ H] Weight Headphones Footswitch Foot Controller Optional accessories Floppy Disk Drive AC Power Adaptor Keyboard stand PSR-S900 PSR-S700 YES External Adaptor (via USB TO DEVICE) External - Yamaha PSR-S700 | Owners Manual - Page 217
183 GM System Level 1 204 GM System Level 2 204 GROOVE 125 GS 204 Guide 40, 145 H HARMONY 102 HARMONY/ECHO 89 Headphones 18 Home Page 181 Hz 87 I ICON 76 Initializing Internet Settings 182 Internet Direct Connection 171 Internet Settings 178 Appendix PSR-S900/S700 Owner's Manual 217 - Yamaha PSR-S700 | Owners Manual - Page 218
Keyboard Parts 84 KEYBOARD 57, 187 MIDI 201 MIDI recording 43, 147 MIDI Settings 204 MIDI Templates 206 MIXING Record 43 Record (Song 147 Record (Style 118 REGISTRATION MEMORY 135 REGISTRATION SEQUENCE 138 195 SFX 83 SINGLE FINGER 107 SMF (Standard MIDI file 203 Song 12, 36 SONG CH 1-8/9- - Yamaha PSR-S700 | Owners Manual - Page 219
Style Assembly 118 Style Change Behavior 110 Style Creator 118 Style File Format (SFF 203 STYLE PART 92, 151 STYLE SETTING/SPLIT POINT 109 Style Structure 118 Style Touch 109 Super Articulation 83 Sweet 83 Synchro Start (Song 141 Synchro Start (Style VIDEO PSR-S900/S700 Owner's Manual 219 - Yamaha PSR-S700 | Owners Manual - Page 220
h [DEMO 6 [DIRECT ACCESS a Drum Kit Icons DSP y E ENDING/rit. [I]/[II]/[III V [ENTER i [EXIT g [EXTRA TR C F [FADE IN/OUT O [FREEZE n [FUNCTION d G [GUIDE B H [HARMONY/ECHO u I [INTERNET f INTRO [I]/[II]/[III S L [LCD CONTRAST Z [LYRICS/TEXT] (PSR-S900 0 [LYRICS] (PSR-S700 0 MAIN - Yamaha PSR-S700 | Owners Manual - Page 221
warranty to: the retailer selling the product, an authorized service center, or to Yamaha with an explanation of the problem. Please be prepared to provide proof purchase date (sales receipt, credit card copy, etc.) when requesting service and/or parts under warranty. 3. Shipping and/or insurance - Yamaha PSR-S700 | Owners Manual - Page 222
/ uses radio frequencies and, if not installed and used according to the instructions found in the users manual, Yamaha Corporation of America Address : 6600 Orangethorpe Ave., Buena Park, Calif. 90620 Telephone : 714-522-9011 Type of Equipment : Electronic Keyboard Model Name : PSR-S900/S700 - Yamaha PSR-S700 | Owners Manual - Page 223
, Japan 430-8650 Tel: +81-53-460-2312 MIDDLE EAST TURKEY/CYPRUS Yamaha Music Central Europe GmbH Siemensstraße 22-34, 25462 Rellingen, Germany Tel: 04101-3030 OTHER COUNTRIES Yamaha Music Gulf FZE LOB 16-513, P.O.Box 17328, Jubel Ali, Dubai, United Arab Emirates Tel: +971-4-881-5868 ASIA THE PEOPLE - Yamaha PSR-S700 | Owners Manual - Page 224
Yamaha Home Keyboards Home Page (English only) http://music.yamaha.com/homekeyboard Yamaha Manual Library http://www.yamaha.co.jp/manual/ U.R.G., Pro Audio & Digital Musical Instrument Division, Yamaha Corporation © 2007 Yamaha Corporation WH65940 703APAP4.3-02B1 Printed in China
-
 1
1 -
 2
2 -
 3
3 -
 4
4 -
 5
5 -
 6
6 -
 7
7 -
8
-
9
-
10
-
11
-
12
-
13
-
14
-
15
-
16
-
17
-
18
-
19
-
20
-
21
-
22
-
23
-
24
-
25
-
26
-
27
-
28
-
29
-
30
-
31
-
32
-
33
-
34
-
35
-
36
-
37
-
38
-
39
-
40
-
41
-
42
-
43
-
44
-
45
-
46
-
47
-
48
-
49
-
50
-
51
-
52
-
53
-
54
-
55
-
56
-
57
-
58
-
59
-
60
-
61
-
62
-
63
-
64
-
65
-
66
-
67
-
68
-
69
-
70
-
71
-
72
-
73
-
74
-
75
-
76
-
77
-
78
-
79
-
80
-
81
-
82
-
83
-
84
-
85
-
86
-
87
-
88
-
89
-
90
-
91
-
92
-
93
-
94
-
95
-
96
-
97
-
98
-
99
-
100
-
101
-
102
-
103
-
104
-
105
-
106
-
107
-
108
-
109
-
110
-
111
-
112
-
113
-
114
-
115
-
116
-
117
-
118
-
119
-
120
-
121
-
122
-
123
-
124
-
125
-
126
-
127
-
128
-
129
-
130
-
131
-
132
-
133
-
134
-
135
-
136
-
137
-
138
-
139
-
140
-
141
-
142
-
143
-
144
-
145
-
146
-
147
-
148
-
149
-
150
-
151
-
152
-
153
-
154
-
155
-
156
-
157
-
158
-
159
-
160
-
161
-
162
-
163
-
164
-
165
-
166
-
167
-
168
-
169
-
170
-
171
-
172
-
173
-
174
-
175
-
176
-
177
-
178
-
179
-
180
-
181
-
182
-
183
-
184
-
185
-
186
-
187
-
188
-
189
-
190
-
191
-
192
-
193
-
194
-
195
-
196
-
197
-
198
-
199
-
200
-
201
-
202
-
203
-
204
-
205
-
206
-
207
-
208
-
209
-
210
-
211
-
212
-
213
-
214
-
215
-
216
-
217
-
218
-
219
-
220
-
221
-
222
-
223
-
224
 |
 |

E
N
OWNER'S MANUAL