Yamaha PSR-S910 Reference Manual - Page 73
Editing FILTER Parameters
 |
View all Yamaha PSR-S910 manuals
Add to My Manuals
Save this manual to your list of manuals |
Page 73 highlights
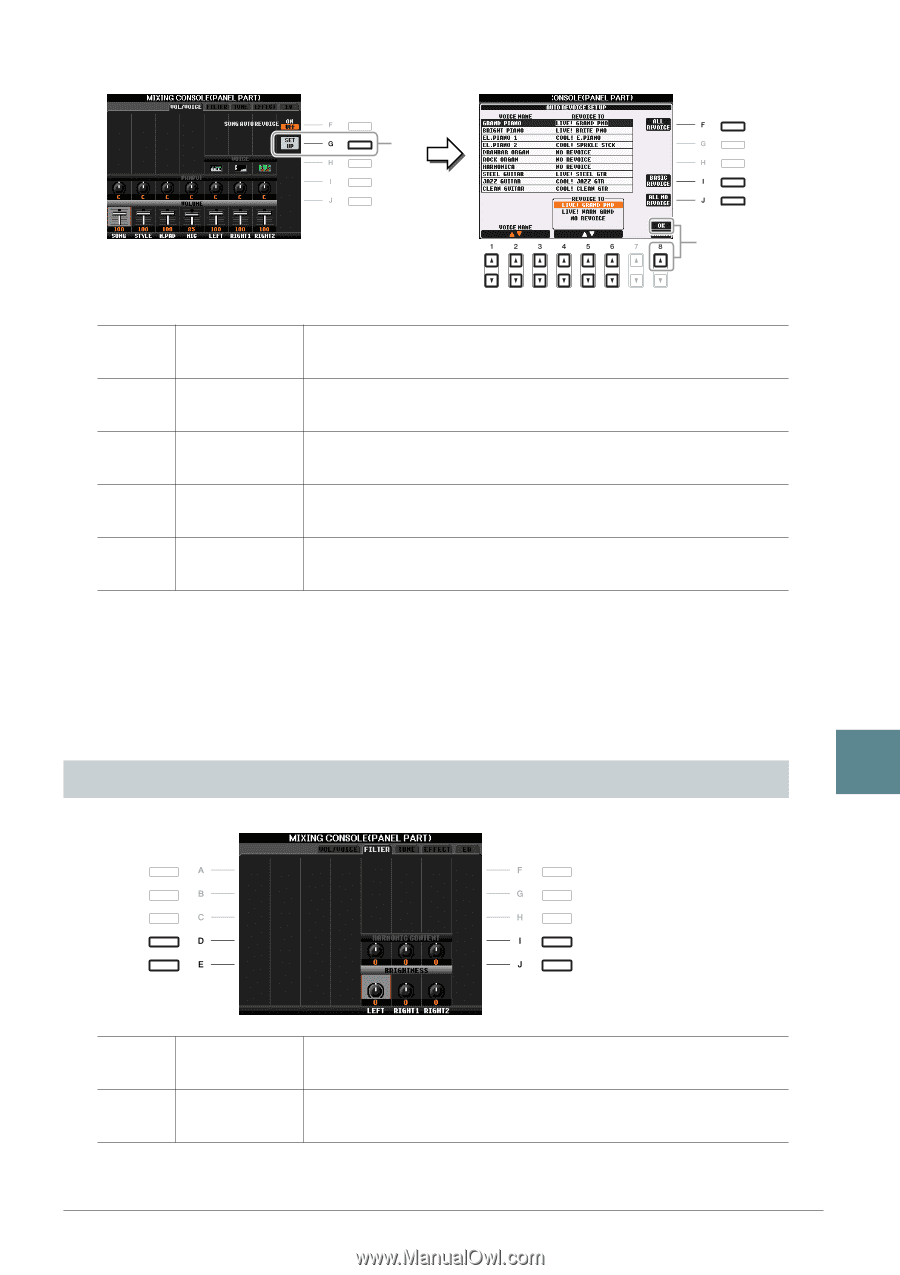
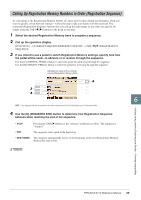
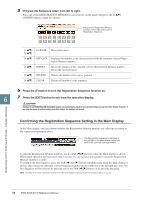
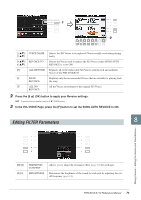
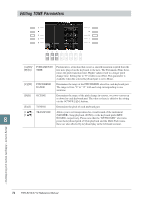
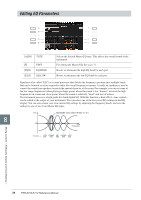
1 2 [1 ▲▼]- VOICE NAME [3 ▲▼] [4 ▲▼]- REVOICE TO [6 ▲▼] Selects the XG Voices to be replaced (Voices usually used when playing back). Selects the Voices used to replace the XG Voices (when SONG AUTO REVOICE is set to ON). [F] ALL REVOICE Replaces all of the replaceable XG Voices with the rich and authentic Voices of the PSR-S910/S710. [I] BASIC Replaces only the recommended Voices that are suitable for playing back REVOICE the song. [J] ALL NO All the Voices are returned to the original XG Voices. REVOICE 2 Press the [8 ▲] (OK) button to apply your Revoice settings. NOTE To cancel the Revoice operation, press the [8 ▼] (CANCEL) button. 3 In the VOL/VOICE Page, press the [F] button to set the SONG AUTO REVOICE to ON. Editing FILTER Parameters 8 Mixing Console - Editing the Volume and Tonal Balance - [D]/[I] [E]/[J] HARMONIC CONTENT BRIGHTNESS Allows you to adjust the resonance effect (page 12) for each part. Determines the brightness of the sound for each part by adjusting the cutoff frequency (page 12). PSR-S910/S710 Reference Manual 73
-
 1
1 -
2
-
3
-
4
-
5
-
6
-
7
-
8
-
9
-
10
-
11
-
12
-
13
-
14
-
15
-
16
-
17
-
18
-
19
-
20
-
21
-
22
-
23
-
24
-
25
-
26
-
27
-
28
-
29
-
30
-
31
-
32
-
33
-
34
-
35
-
36
-
37
-
38
-
39
-
40
-
41
-
42
-
43
-
44
-
45
-
46
-
47
-
48
-
49
-
50
-
51
-
52
-
53
-
54
-
55
-
56
-
57
-
58
-
59
-
60
-
61
-
62
-
63
-
64
-
65
-
66
-
67
-
 68
68 -
 69
69 -
 70
70 -
 71
71 -
 72
72 -
 73
73 -
 74
74 -
 75
75 -
 76
76 -
 77
77 -
 78
78 -
79
-
80
-
81
-
82
-
83
-
84
-
85
-
86
-
87
-
88
-
89
-
90
-
91
-
92
-
93
-
94
-
95
-
96
-
97
-
98
-
99
-
100
-
101
-
102
-
103
-
104
-
105
-
106
-
107
-
108
 |
 |