Yamaha PSR-S910 Reference Manual - Page 86
Talk Settings, Talk Setting Parameters, DSP Parameters
 |
View all Yamaha PSR-S910 manuals
Add to My Manuals
Save this manual to your list of manuals |
Page 86 highlights
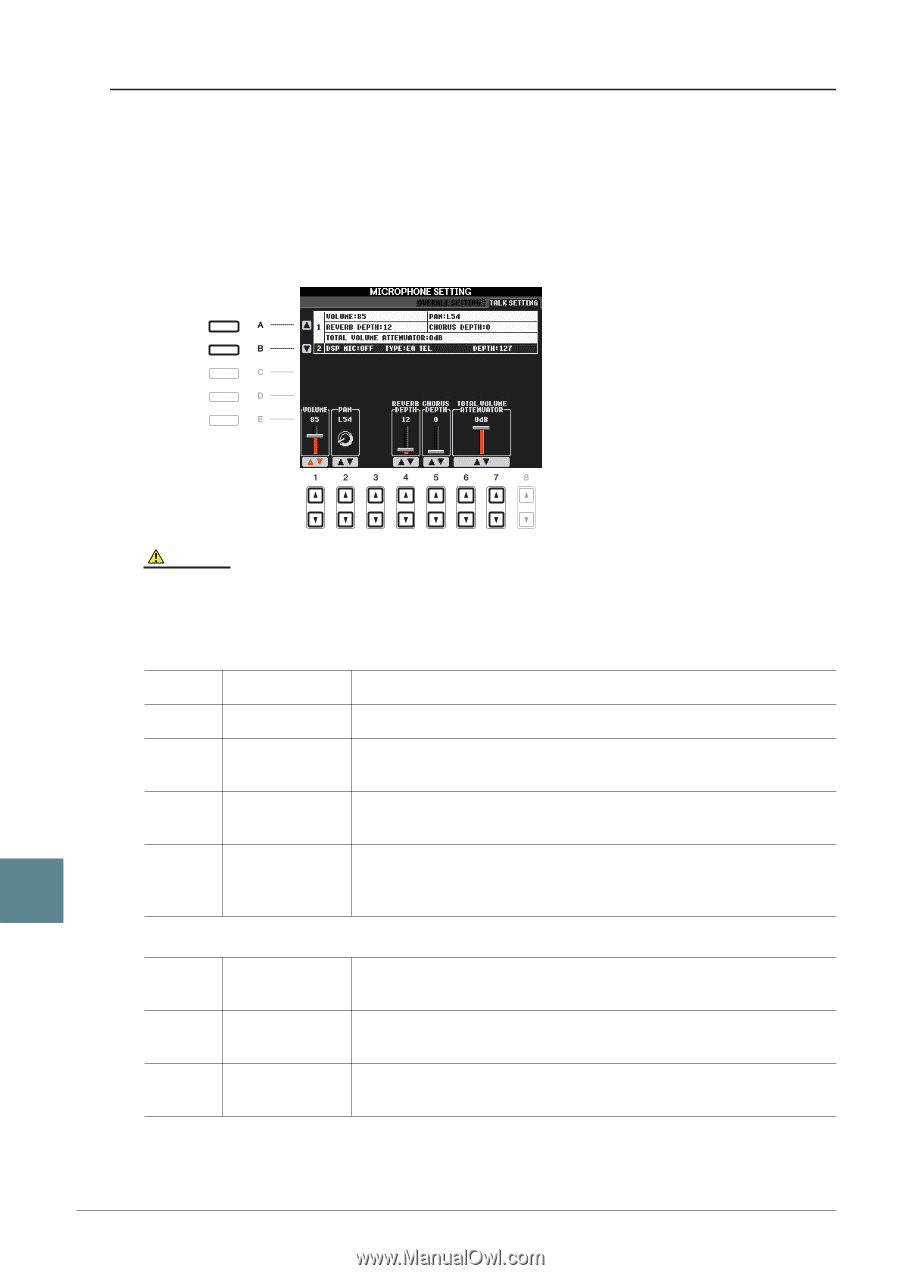
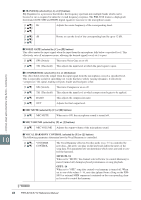
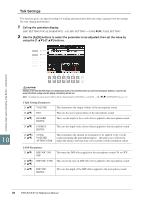
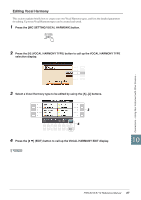
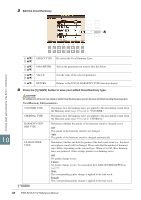
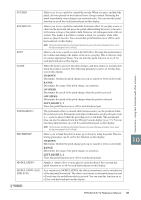
Talk Settings This function gives you special settings for making announcements between songs, separate from the settings for your singing performance. 1 Call up the operation display. [MIC SETTING/VOCAL HARMONY] → [I] MIC SETTING → TAB [E][F] TALK SETTING 2 Use the [A]/[B] buttons to select the parameter to be adjusted, then set the value by using the [1 ▲▼]-[7 ▲▼] buttons. Connections - Using Your Instrument with Other Devices - 10 CAUTION Settings in the TALK SETTING Page are automatically saved to the instrument when you exit from the display. However, if you turn the power off without exiting from this display, the settings will be lost. NOTE The settings here can be saved to USER or USB as a System Setup file: [FUNCTION] → [J] UTILITY → TAB [E][F] SYSTEM RESET. See page 105. 1 Talk Setting Parameters [1 ▲▼] VOLUME [2 ▲▼] PAN [4 ▲▼] REVERB DEPTH [5 ▲▼] CHORUS DEPTH [6 ▲▼]/ TOTAL [7 ▲▼] VOLUME ATTENUATOR This determines the output volume of the microphone sound. This sets the stereo pan position of the microphone sound. These set the depth of the reverb effects applied to the microphone sound. This sets the depth of the chorus effects applied to the microphone sound. This determines the amount of attenuation to be applied to the overall sound (excepting the microphone input)-allowing you to effectively adjust the balance between your voice and the overall instrument sound. 2 DSP Parameters [3 ▲▼] DSP MIC ON/ OFF This turns the DSP effect applied to the microphone sound ON or OFF. [4 ▲▼]/ DSP MIC TYPE This selects the type of DSP effect to be applied to the microphone sound. [5 ▲▼] [6 ▲▼] DSP MIC DEPTH This sets the depth of the DSP effect applied to the microphone sound. 86 PSR-S910/S710 Reference Manual
-
 1
1 -
2
-
3
-
4
-
5
-
6
-
7
-
8
-
9
-
10
-
11
-
12
-
13
-
14
-
15
-
16
-
17
-
18
-
19
-
20
-
21
-
22
-
23
-
24
-
25
-
26
-
27
-
28
-
29
-
30
-
31
-
32
-
33
-
34
-
35
-
36
-
37
-
38
-
39
-
40
-
41
-
42
-
43
-
44
-
45
-
46
-
47
-
48
-
49
-
50
-
51
-
52
-
53
-
54
-
55
-
56
-
57
-
58
-
59
-
60
-
61
-
62
-
63
-
64
-
65
-
66
-
67
-
68
-
69
-
70
-
71
-
72
-
73
-
74
-
75
-
76
-
77
-
78
-
79
-
80
-
 81
81 -
 82
82 -
 83
83 -
 84
84 -
 85
85 -
 86
86 -
 87
87 -
 88
88 -
 89
89 -
 90
90 -
 91
91 -
92
-
93
-
94
-
95
-
96
-
97
-
98
-
99
-
100
-
101
-
102
-
103
-
104
-
105
-
106
-
107
-
108
 |
 |