Yamaha R-N500 Owners Manual
Yamaha R-N500 Manual
 |
View all Yamaha R-N500 manuals
Add to My Manuals
Save this manual to your list of manuals |
Yamaha R-N500 manual content summary:
- Yamaha R-N500 | Owners Manual - Page 1
UC Network Receiver Réseau Ampli-Tuner OWNER'S MANUAL MODE D'EMPLOI - Yamaha R-N500 | Owners Manual - Page 2
important operating and maintenance (servicing) instructions in the literature accompanying the Manual in a safe place for future reference. 1 Read these instructions. 2 Keep these instructions. 3 Heed all warnings. 4 Follow all instructions sounds is often undetectable until it is too late, Yamaha - Yamaha R-N500 | Owners Manual - Page 3
instructions found in the users manual ON", please try to eliminate the problem by using one of the following Yamaha Corporation of America A/V Division Address: 6600 Orangethorpe Avenue, Buena Park, CA 90620, USA Telephone: 1-714-522-9011 Type of Equipment: Network Receiver Model Name: R-N500 - Yamaha R-N500 | Owners Manual - Page 4
service is needed. The cabinet should never be opened for any reasons. 15 When not planning to use this unit for long periods of time (i.e. vacation), disconnect the AC power plug from the wall outlet. 16 Be sure to read the "Troubleshooting" section in the owner's manual on common operating errors - Yamaha R-N500 | Owners Manual - Page 5
/iPod music via a network (AirPlay 27 Playback of iTunes/iPod music contents 27 Listening to Pandora service 28 Account setup for Pandora 40 Resetting remote control codes 41 Updating the unit's firmware via the network .......42 ADDITIONAL INFORMATION Troubleshooting 43 Error indications - Yamaha R-N500 | Owners Manual - Page 6
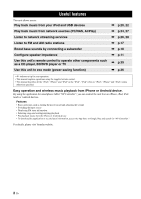
network sources (PC/NAS, AirPlay) Listen to network streaming services Listen to FM and AM radio stations Boost bass sounds by connecting a subwoofer Configure speaker music from the iPhone or Android device • To download the application or see the latest information, access the App Store or Google - Yamaha R-N500 | Owners Manual - Page 7
accessories Check that the following accessories are supplied with the product. Remote control AM antenna FM antenna SOURCE SLEEP CODE SET RECEIVER SPEAKERS ID DIMMER A B COAX1 COAX2 OPT1 OPT2 LINE1 LINE2 LINE3 PHONO TUNER CD USB NET FM AM PRESET TUNING MEMORY SHUFFLE - Yamaha R-N500 | Owners Manual - Page 8
ID1 and ID2 when using multiple Yamaha receivers or amplifiers (p.37). 4 DIMMER Changes you to listen to a source in the purest possible sound (p.14). The indicator above it lights up and the D SPEAKERS A/B Turns on or off the speaker set connected to the SPEAKERS A and/or SPEAKERS B terminals - Yamaha R-N500 | Owners Manual - Page 9
response. The center position produces a flat response (p.15). I BALANCE control Adjusts the sound output balance of the left and right speakers to compensate for sound imbalances caused by speaker locations or listening room conditions (p.15). J LOUDNESS control Retains a full tonal range at - Yamaha R-N500 | Owners Manual - Page 10
as input name sound mode name). You can switch the information that is displayed when you press DISPLAY (p.32). 2 STEREO Lights up when the unit is receiving a stereo FM radio signal. 3 TUNED Lights up when the unit is receiving an FM/AM radio station signal. 4 Speaker indicators "SP A" lights - Yamaha R-N500 | Owners Manual - Page 11
with a coaxial digital output (p.10). 5 SPEAKERS terminals Used to connect speakers (p.11). 6 NETWORK jack For connecting to a network (p.13). 7 DC OUT jack For supplying power to a Yamaha AV accessory. For details on connections, refer to the instruction manual of the AV accessory. 8 Power - Yamaha R-N500 | Owners Manual - Page 12
unit or other components made by Yamaha or other manufacturers. 1 2 3 SOURCE SLEEP CODE SET RECEIVER E 4 5 6 SPEAKERS ID DIMMER A B F AM tuner CD CD jacks USB USB jack NET NETWORK jack (press repeatedly to select a desired network source) 8 Radio keys Operate the FM/AM radio - Yamaha R-N500 | Owners Manual - Page 13
INTRODUCTION Using the remote controls ■ Installing batteries AAA, R03, UM-4 batteries ■ Operation range The remote controls transmit a directional infrared beam. Be sure to aim the remote controls directly at the remote control sensor on the front panel of this unit. Approximately 6 m (20 ft) - Yamaha R-N500 | Owners Manual - Page 14
to L, R (right) to R, "+" to "+" and "-" to "-". If the connections are faulty, no sound will be heard from the speakers, and if the polarity of the speaker connections is incorrect, the sound will be unnatural and lack bass. Refer to the owner's manual for each of your components. • Do not let bare - Yamaha R-N500 | Owners Manual - Page 15
have two wires. One is for connecting the negative (-) terminal of the unit and the speaker, and the other is for the positive (+) terminal. If the wires are colored to prevent confusion, connect the black wire to the negative and the other wire to the positive terminal. a Remove approximately 10 - Yamaha R-N500 | Owners Manual - Page 16
strength. Connect each antenna correctly to the designated terminals. Note If you experience poor reception quality, install an outdoor antenna. Consult the nearest authorized Yamaha dealer or service center about outdoor antennas. Outdoor AM antenna Use 5 to 10 m of vinyl-covered wire extended - Yamaha R-N500 | Owners Manual - Page 17
) will be assigned automatically to it. You only need to configure the network settings if your router does not support DHCP or if you want to configure the network parameters manually (p.35). • You can check whether the network parameters (such as IP address) are properly assigned to the unit in - Yamaha R-N500 | Owners Manual - Page 18
whether your CD player supports CDs encoded in DTS. Also, check the sound output level of your CD player before you play back a CD encoded in DTS. Playing a source A (power) SPEAKERS A/B INPUT selector VOLUME SOURCE SLEEP CODE SET RECEIVER RECEIVER A SPEAKERS ID DIMMER A B COAX1 COAX2 - Yamaha R-N500 | Owners Manual - Page 19
set. 1 Set the LOUDNESS control to the FLAT position. BALANCE The BALANCE control adjusts the sound output balance of the left and right speakers to compensate for sound imbalance caused by speaker locations or listening room conditions. 2 Rotate the VOLUME control on the front panel (or press - Yamaha R-N500 | Owners Manual - Page 20
are going to sleep while this unit is playing or recording a source. SOURCE SLEEP CODE SET RECEIVER SPEAKERS ID DIMMER A B COAX1 COAX2 OPT1 OPT2 LINE1 LINE2 LINE3 PHONO TUNER CD USB NET RECEIVER A SLEEP Note The sleep timer can only be set with the remote control. 1 Press SLEEP - Yamaha R-N500 | Owners Manual - Page 21
a frequency that is out of receivable range. Make sure that the entered frequency is correct. y When the signal reception for an FM radio station is unstable, switching to monaural may improve it. ■ Improving FM reception If the signal from the station is weak and the sound quality is not good, set - Yamaha R-N500 | Owners Manual - Page 22
. • If the station you want to store is weak in signal strength, try using the manual preset tuning method. y FM stations registered as presets using the automatic preset registration feature will be heard in stereo. TUNER FM AM Cursor keys B / C ENTER TUNER CD USB NET FM AM PRESET TUNING - Yamaha R-N500 | Owners Manual - Page 23
preset stations that were registered using automatic station preset or manual station preset. TUNER LINE1 LINE2 LINE3 PHONO TUNER CD keys (B / C) to select a preset station to be cleared and press ENTER. 01:FM STEREO TUNED 98.5 SP A VOL. MHz SW L CR SL SR Preset station to be cleared - Yamaha R-N500 | Owners Manual - Page 24
4, iPhone 3GS, iPhone 3G, iPhone • iPad (4th generation), iPad mini, iPad (3rd generation), iPad 2, iPad (as of August 2013) Playback of iPod content Follow the procedure below to operate the iPod contents and start playback. Note "_" (underscore) will be displayed for characters not supported by - Yamaha R-N500 | Owners Manual - Page 25
BASIC OPERATION Use the following remote control keys to control playback. External device operation keys Function p Resumes playback from pause. s Stops playback. e Stops playback temporarily. b a Skips forward/backward. w f Searches forward/backward (by holding down). HOME Displays - Yamaha R-N500 | Owners Manual - Page 26
files stored on a USB storage device on the unit. Refer to the instruction manuals for the USB storage device for more information. The unit supports USB mass storage class devices (FAT16 or FAT32 format). Notes • The unit supports WAV (PCM format only), MP3, WMA, MPEG-4 AAC and FLAC files (1- or - Yamaha R-N500 | Owners Manual - Page 27
Use the following remote control keys to control playback. External device operation keys Function p Resumes playback from pause. s Stops playback. e Stops playback temporarily. b a Skips forward/backward. HOME Displays the top menu of the USB device. NOW PLAYING Displays information - Yamaha R-N500 | Owners Manual - Page 28
network parameters (such as the IP address) are properly assigned to the unit in "Information" (p.35) in the "SETUP" menu. • The unit supports supports sharing of FLAC files via DLNA on your PC or use a NAS that supports next to "R-N500". 1 Start Windows , select the "R-N500" icon, and click "Allow". - Yamaha R-N500 | Owners Manual - Page 29
contents Follow the procedure below to operate the PC music contents and start playback. Note "_" (underscore) will be displayed for characters not supported by the unit. Cursor keys ENTER RETURN DISPLAY LINE1 LINE2 LINE3 PHONO TUNER CD USB NET FM AM PRESET TUNING MEMORY SHUFFLE REPEAT - Yamaha R-N500 | Owners Manual - Page 30
to the Internet (p.13). You can check whether the network parameters (such as the IP address) are properly assigned receive some Internet radio stations. • The unit uses the vTuner Internet radio station database service. • This service display (p.32). • By accessing the following website from your - Yamaha R-N500 | Owners Manual - Page 31
the network parameters (such as the IP address) are properly assigned to the unit in "Information" (p.35) in the "SETUP" menu. AirPlay works with iPhone, iPad speakers in advance. iTunes (example of English version) 2 On the iTunes/iPod, click (tap) the AirPlay icon and select the unit (network - Yamaha R-N500 | Owners Manual - Page 32
access your own personalized Pandora stations from any computer or device in the United States, Australia and New Zealand that support Internet. For detail on connections and network settings (p.13). • If any error message appears on the front display, see "Error indications on the front display" (p. - Yamaha R-N500 | Owners Manual - Page 33
L R b Use a web browser on your PC to access the URL and follow the on-screen instruction to register for a Pandora account. c After activation, press not displayed, perform the following operations after press HOME. Listening to Pandora service 2 Press OPTION. 3 Use the cursor keys (B / C) to - Yamaha R-N500 | Owners Manual - Page 34
Listening to Pandora service Playback of Pandora stations If you have created Pandora stations, follow the procedure below to select a Pandora station to be played. LINE1 LINE2 LINE3 PHONO - Yamaha R-N500 | Owners Manual - Page 35
BASIC OPERATION Listening to Pandora service Deleting Pandora stations The created Pandora station can be deleting in the following procedures. HOME Cursor keys ENTER SHUFFLE REPEAT MODE HOME SETUP NOW PLAYING - Yamaha R-N500 | Owners Manual - Page 36
information on the front display When you select USB or a network source as the input source, you can switch playback information on item appears. SP A VOL. Track #1 Information Input source USB (iPod) SERVER AirPlay NET RADIO Pandora Item Song (song title), Artist (artist name), Album (album - Yamaha R-N500 | Owners Manual - Page 37
the iPod, 21, 23, USB storage device, or media server. 25 Vol.Interlock Enables/disables volume controls from iTunes/iPod via AirPlay. 33 PandoraAccount (While the Pandora station list is displayed) Create Station Configures the Pandora accounts and 31 Delete Station create/delete Pandora - Yamaha R-N500 | Owners Manual - Page 38
the network name (the Network Name unit's name on the network) displayed on other network 36 devices. Update Updates the firmware via the network. 36 Max Volume Sets the maximum volume to prevent excessive loudness. 36 Initial Volume Sets the initial volume for when this receiver is - Yamaha R-N500 | Owners Manual - Page 39
Appears if an update for this unit's firmware is available (p.42). STATUS The connection status of the NETWORK jack MAC MAC address menu, press SETUP. y When using "AirPlay" (p.27) and "DMC Control" (p.35), you cannot limit access from network devices regardless of the MAC address filter. - Yamaha R-N500 | Owners Manual - Page 40
from the menu, press SETUP. ■ Update Updates the firmware via the network. Perform Update Starts the process to update the unit's firmware. For details, see "Updating the unit's firmware via the network" (p.42). Version Displays the version of the firmware installed on the unit. ID Displays - Yamaha R-N500 | Owners Manual - Page 41
) RETURN Changing the speaker impedance setting (SP IMP Updates the firmware. Checks the version of firmware currently installed on the unit. Page 37 37 38 38 38 Change the unit's remote control ID so that it matches the remote control's ID (default: ID2). When using multiple Yamaha AV receivers - Yamaha R-N500 | Owners Manual - Page 42
read the information supplied with updates before updating the firmware. 1 Press SELECT/ENTER repeatedly to select "USB" or "NETWORK" and press DISPLAY to start firmware update. Choices USB NETWORK Update the firmware using a USB memory device. Update the firmware via the network. y If the unit - Yamaha R-N500 | Owners Manual - Page 43
this function may not be available on some TV models). SOURCE SLEEP CODE SET RECEIVER CODE SET SPEAKERS ID DIMMER A B COAX1 COAX2 OPT1 OPT2 1 2 3 4 5 6 TV. 1 Refer to "LIST OF REMOTE CONTROL CODES" (end of this manual) to find your TV's remote control code. y If there are multiple - Yamaha R-N500 | Owners Manual - Page 44
control it using the following keys after selecting the input source or scene. SOURCE A Menu operation keys DISPLAY SOURCE SLEEP CODE SET RECEIVER SPEAKERS ID DIMMER A B COAX1 HOME SETUP COAX2 OPT1 NOW PLAYING OPTION OPT2 ENTER VOLUME DISPLAY RETURN TOP MENU DISC SKIP POP-UP MENU - Yamaha R-N500 | Owners Manual - Page 45
remote control codes You can reset the remote control codes assigned to each input selection keys to the factory default. SOURCE SLEEP CODE SET RECEIVER CODE SET SETUP SPEAKERS ID DIMMER A B HOME SETUP NOW PLAYING OPTION ENTER VOLUME DISPLAY RETURN TOP MENU DISC SKIP POP-UP - Yamaha R-N500 | Owners Manual - Page 46
. If the unit is connected to the Internet, you can download the firmware via the network and update it. Notes • Do not operate the unit or disconnect the power cable or network cable during firmware update. Firmware update takes about 20 minutes or more (depending on your Internet connection speed - Yamaha R-N500 | Owners Manual - Page 47
or if the instructions below do not help, set this unit to standby mode, disconnect the power cable, and contact the nearest authorized Yamaha dealer or service center. ■ General Problem Cause Remedy This unit fails to turn on. No sound The sound suddenly goes off. Only the speaker on one side - Yamaha R-N500 | Owners Manual - Page 48
Troubleshooting Problem Cause Remedy There is a lack of bass and no ambience. A "humming" sound can be heard. The volume level is low while playing a record. The sound is degraded when listening with the headphones connected to the CD player or the tape deck connected to this unit. The sound - Yamaha R-N500 | Owners Manual - Page 49
Tuner Troubleshooting Problem Cause Remedy FM stereo reception is noisy. The particular characteristics of the FM stereo broadcasts being received may cause this problem when the transmitter is too far away or the antenna input is poor. Check the antenna connections. Try using a high-quality - Yamaha R-N500 | Owners Manual - Page 50
allow it to access to the unit. Use the file format supported by both the unit and the media server. For information about the file formats supported by the unit, see "Playing back music stored on media servers (PCs/NAS)". There may be a network problem at the radio station, or the service may have - Yamaha R-N500 | Owners Manual - Page 51
■ Remote control Troubleshooting Problem The remote control does not work nor function properly. Cause Remedy code of the same manufacturer using "LIST OF REMOTE CONTROL CODES" at the end of this manual. Even if the remote control code is correctly set, there are some models that do not - Yamaha R-N500 | Owners Manual - Page 52
the USB device. The unit cannot access the iPod. The connected iPod is not supported by the unit. There is a problem with the signal path from the network to the unit. The Pandora service was not operated for 8 hours or more. The speaker cables short circuit. Access from the outside of the region - Yamaha R-N500 | Owners Manual - Page 53
Please note that the use of this accessory with iPod, iPhone, or iPad may affect wireless performance. AirPlay, iPad, iPhone, iPod, iPod nano, and iPod touch are trademarks of Android is a trademark of Google Inc. This receiver supports network connections. ADDITIONAL INFORMATION English 49 En - Yamaha R-N500 | Owners Manual - Page 54
, etc. to SPEAKERS (20 Hz to 20 kHz, 40.0 W, 8 0.015% or less • Signal to noise ratio (IHF-A network) PHONO (MM) error (+16.5 to -80 dB 0.5 dB or less • Digital input OPTICAL COAXIAL Support ratio (IHF) Mono/Stereo 71 dB/69 dB • Harmonic distortion (1 kHz) Mono/Stereo 0.3%/0.5% Antenna input - Yamaha R-N500 | Owners Manual - Page 55
menu 35 DNS Server (IP Address, SETUP menu 35 E ECO Mode (SETUP menu 36 Error indication 48 F Filter (MAC Filter, SETUP menu 35 Firmware update 42 Firmware update (network 38, 42 Firmware update (USB 38 Firmware version check 36, 38 FM antenna connection 12 FM radio listening 17 FM/AM - Yamaha R-N500 | Owners Manual - Page 56
jack 7 OPTION key 8 OPTION menu 33 P Pandora service account 28, 31 Pandora service listening 28 Pandora service playback 30 Pandora station 29 Pandora station editing 31 PC connection 13 PC content playback 24 Perform Update (Network Setup, SETUP menu).......... 36 PHONES jack 4 Playback - Yamaha R-N500 | Owners Manual - Page 57
- Yamaha R-N500 | Owners Manual - Page 58
à cet effet, ci-dessous. MODÈLE: No. de série: Le numéro de série se trouve à l'arrière de l'appareil. Prière de conserver le mode d'emploi en lieu sûr pour toute référence future. 1 Lire ces instructions. 2 Conserver ces instructions. 3 Tenir compte de tous les avertissements. 4 Suivre toutes les - Yamaha R-N500 | Owners Manual - Page 59
aux États-Unis) 1 AVIS IMPORTANT: NE PAS APPORTER DE MOFIDICATIONS À CET APPAREIL ! Ce produit est conforme aux exigences de la FCC s'il est installé selon les instructions du mode d'emploi. Toute modification non approuvée expressément par Yamaha peut invalider l'autorisation, accordée par la FCC - Yamaha R-N500 | Owners Manual - Page 60
. 13 Pour éviter les dommages dus à la foudre, débranchez le cordon d'alimentation de la prise secteur ou de l'appareil pendant les orages électriques. 14 Ne tentez pas de modifier ni de réparer l'appareil. Consultez le service Yamaha compétent pour toute réparation qui serait requise. Le coffret - Yamaha R-N500 | Owners Manual - Page 61
du partage de support de fichiers de musique 24 Playback of PC music contents 25 Écoute de la radio Internet 26 Lecture de musique issue d'iTunes ou d'un iPod via un réseau (AirPlay 27 Lecture de contenus musicaux issus d'iTunes ou d'un iPod 27 Écoute du service Pandora 28 Réglages de compte - Yamaha R-N500 | Owners Manual - Page 62
et lancement/arrêt de lecture • Lecture de musique sur iPhone ou appareil Android • Pour télécharger l'application ou lire les dernières informations en date, surfez sur l'App Store ou Google Play et cherchez « NP Controller ». Pour plus de détails, rendez-vous sur le site internet de Yamaha. 2 Fr - Yamaha R-N500 | Owners Manual - Page 63
Télécommande Antenne AM Antenne FM SOURCE SLEEP CODE SET RECEIVER SPEAKERS ID DIMMER A B COAX1 COAX2 OPT1 OPT2 LINE1 baignoire, - lieux très chauds, par exemple près d'un appareil de chauffage ou d'un poêle, - lieux exposés à des températures très basses, - lieux poussiéreux. • Insérez - Yamaha R-N500 | Owners Manual - Page 64
Sélectionne la fréquence de syntonisation lorsque la source d'entr SPEAKERS A/B Active ou désactive le jeu d'enceintes raccordées aux bornes SPEAKERS A et/ou SPEAKERS B situées sur le panneau arrière à chaque pression sur la touche correspondante. E Prise USB Pour le raccordement d'un dispositif de - Yamaha R-N500 | Owners Manual - Page 65
) Tournez la molette pour choisir une valeur numérique ou un réglage et appuyez dessus pour confirmer votre sélection. L RETURN Retourne au contenu précédent de l'afficheur de la face avant. M Commande VOLUME Augmente ou réduit le niveau sonore. Commandes et fonctions Français 5 Fr - Yamaha R-N500 | Owners Manual - Page 66
FM/AM. 4 Témoins d'enceinte « SP A » s'allume lorsque la sortie enceinte SPEAKERS A est activée, et « SP B » s'allume lorsque celle de SPEAKERS B est activée. 5 SLEEP S'allume lorsque la minuterie de mise hors service est activée. 6 MUTE Clignote lorsque le son est mis en sourdine. 7 Témoin - Yamaha R-N500 | Owners Manual - Page 67
audio dotés d'une sortie numérique coaxiale (p.10). 5 Bornes SPEAKERS Pour le raccordement à des enceintes (p.11). 6 Prise NETWORK Pour le raccordement à un réseau (p.13). 7 Prise DC OUT Permet d'alimenter un accessoire AV Yamaha. Pour plus d'informations sur les raccordements, reportez-vous au - Yamaha R-N500 | Owners Manual - Page 68
Télécommande Cette section décrit la fonction de chaque touche de la télécommande utilisée pour commander cet appareil ou d'autres composants fabriqués par Yamaha ou d'autres fabricants. 1 2 3 SOURCE SLEEP CODE SET RECEIVER E 4 5 6 SPEAKERS ID DIMMER A B F 7 COAX1 COAX2 OPT1 OPT2 - Yamaha R-N500 | Owners Manual - Page 69
AAA, R03, UM-4 Commandes et fonctions ■ Portée de la télécommande Les télécommandes émettent un faisceau infrarouge directionnel. Veillez à diriger les télécommandes directement vers le capteur de télécommande situé sur le panneau avant de cet appareil. Environ 6 m 30° 30° Télécommande Fran - Yamaha R-N500 | Owners Manual - Page 70
Enceintes A Sortie audio GND Sortie audio O (numérique optique) Sortie audio C (numérique coaxiale) Entrée audio Sortie audio Sortie audio Enregistreur de CD, etc. Lecteur CD Subwoofer Enceintes B y • Les prises PHONO sont destinées au raccordement d'un tourne-disque doté d'une cartouche - Yamaha R-N500 | Owners Manual - Page 71
câbles des enceintes. y Pour utiliser les connexions bifilaires, appuyez sur SPEAKERS A et SPEAKERS B sur le panneau avant ou sur la télécommande afin que les témoins SP A et B s'allument tous les deux sur l'afficheur du panneau avant. SPEAKERS A/B SOURCE SLEEP CODE SET RECEIVER SPEAKERS ID - Yamaha R-N500 | Owners Manual - Page 72
à cet effet. Remarque Si la réception devait être mauvaise, installez une antenne extérieure. Pour de plus amples détails concernant cette question, veuillez consulter un revendeur ou service après-vente Yamaha. Antenne AM extérieure Déployez par une fenêtre à l'extérieur un fil isolé en vinyle - Yamaha R-N500 | Owners Manual - Page 73
STP (câble droit CAT-5 ou supérieur) disponible dans le commerce. Internet Network Attached Storage (NAS) WAN LAN Modem Router Appareil mobile (tel qu'un iPhone) PC Câble de réseau PRÉPARATIONS L'unité (arrière) y • Si vous utilisez un routeur prenant en charge DHCP, il n'est pas nécessaire - Yamaha R-N500 | Owners Manual - Page 74
CD codés en DTS. Vérifiez également le niveau sonore de votre lecteur de CD avant de lire un CD codé en DTS. Lecture d'une source A (alimentation) SPEAKERS A/B Sélecteur INPUT VOLUME SOURCE SLEEP CODE SET RECEIVER RECEIVER A SPEAKERS ID DIMMER A B COAX1 COAX2 OPT1 OPT2 LINE1 LINE2 - Yamaha R-N500 | Owners Manual - Page 75
y a trop d'aigus, tournez dans le sens antihoraire pour les atténuer. Plage de commande : -10 dB à +10 dB (20 kHz) LOUDNESS VOLUME HOME SETUP NOW avoir vérifié que la commande LOUDNESS est correctement réglée. ■ Réglage de la commande BALANCE 1 Réglez la commande LOUDNESS sur la position FLAT. - Yamaha R-N500 | Owners Manual - Page 76
automatiquement l'appareil en mode veille après un certain laps de temps. La minuterie de veille est utile lorsque vous allez vous coucher alors que l'appareil lit ou enregistre une source. SOURCE SLEEP CODE SET RECEIVER SPEAKERS ID DIMMER A B COAX1 COAX2 OPT1 OPT2 LINE1 LINE2 LINE3 - Yamaha R-N500 | Owners Manual - Page 77
station est faible et la qualité du son mauvaise, réglez le mode de réception de la bande FM sur le mode monaural afin d'améliorer la réception. 1 Appuyez à plusieurs reprises sur MODE pour sélectionner « Stereo » (mode stéréo automatique) ou « Mono » (mode monaural) quand l'appareil est réglé sur - Yamaha R-N500 | Owners Manual - Page 78
station de radio Sélectionnez une station manuellement et enregistrez-la avec un numéro de présélection. 1 Suivez les instructions sous é la station de radio souhaitée, appuyez sur PRESET F / G pour sélectionner un numéro de présélection, puis appuyez de nouveau sur MEMORY. STEREO TUNED 02:Empty - Yamaha R-N500 | Owners Manual - Page 79
curseur pour sélectionner « Clear Preset » et appuyez sur ENTER. VOL. Clear Preset 4 Utilisez les touches de curseur (B / C) pour sélectionner une présélection à effacer et appuyez sur ENTER. 01:FM STEREO TUNED 98.5 SP A VOL. MHz SW L CR SL SR Station préréglée à effacer Si la station pr - Yamaha R-N500 | Owners Manual - Page 80
compatibles selon le modèle ou la version du logiciel de l'iPod. Conçu pour • iPod touch (1re, 2e, 3e, 4e et 5e générations) • iPod nano (2e, 3e, 4e, 5e, 6e et 7e générations) • Phone 5, iPhone 4S, iPhone 4, iPhone 3GS, iPhone 3G, iPhone • iPad (4e génération), iPad mini, iPad (3e génération), iPad - Yamaha R-N500 | Owners Manual - Page 81
p s e b a w f HOME NOW PLAYING Fonction Reprend la lecture après la pause. Arrête la lecture. Arrête temporairement la lecture. Permet d'avancer ou de reculer rapidement. Effectue une recherche vers l'arrière/vers l'avant (avec la touche correspondante maintenue enfoncée). Affiche le menu principal - Yamaha R-N500 | Owners Manual - Page 82
USB lorsque vous ne l'utilisez pas. • Arrêtez la lecture à partir du dispositif de stockage USB avant de le débrancher de la prise USB. • Vous ne pouvez pas raccorder le PC à la prise USB de l'unité. Touches de curseur ENTER RETURN DISPLAY SHUFFLE REPEAT MODE HOME SETUP NOW PLAYING OPTION ENTER - Yamaha R-N500 | Owners Manual - Page 83
plusieurs fois sur DISPLAY (p.32). • Si vous choisissez un fichier non compatible avec l'appareil, s'affiche au-dessus du nom de fichier. Utilisez les touches de télécommande suivantes pour contrôler la lecture. Touches d'opération d'appareil externe p s e b a HOME NOW PLAYING Fonction Reprend la - Yamaha R-N500 | Owners Manual - Page 84
dias dans », cliquez sur l'icône « R-N500 » puis sur « Autorisé ». d Cliquez sur « OK » pour quitter. • Pour un PC ou un système de stockage doté d'un autre logiciel de serveur DLNA Reportez-vous au mode d'emploi de l'appareil ou du logiciel et configurez les paramètres de partage de support. 24 Fr - Yamaha R-N500 | Owners Manual - Page 85
atoire avec le menu « OPTION » (p.33). y • Pour revenir à l'écran précédent, appuyez sur RETURN. • Vous pouvez changer les informations de lecture affichées sur l'afficheur de la face avant en appuyant plusieurs fois sur DISPLAY (p.32). • Si vous choisissez un fichier non compatible avec l'appareil - Yamaha R-N500 | Owners Manual - Page 86
radio Internet. • L'unité utilise le service de base de données des stations radio Internet vTuner. • Ce service peut être supprimé sans avis préalable de cet appareil sous l'option « Information » du menu « Network Setup (SETUP) » (p.35). http://yradio.vtuner.com/ • Utilisez la touche d'opération de - Yamaha R-N500 | Owners Manual - Page 87
« SETUP ». AirPlay est compatible avec les iPhone, iPad et iPod de l'unité du réseau) affiché sur iTunes ou l'iPod dans l'option « Network Name » (p.36) du menu « SETUP ». • Si vous sélectionnez l'autre source d'entrée de AirPlay et sélectionnez l'unité (nom du réseau de l'unité) comme appareil de - Yamaha R-N500 | Owners Manual - Page 88
restent donc accessibles depuis tout ordinateur ou autre dispositif compatible avec Pandora aux États-Unis, en Australie et en NouvelleZélande. À l'heure actuelle, Pandora est uniquement disponible dans ces pays en raison de restrictions liées aux droits de licence. Pandora est un service enti - Yamaha R-N500 | Owners Manual - Page 89
adresse du site Internet avec un logiciel de navigation sur votre ordinateur et suivez les instructions à l'écran pour créer votre service Pandora 2 Appuyez sur OPTION. 3 Utilisez les touches de curseur (B / C) pour sélectionner « Create Station » et appuyez sur ENTER. 4 Utilisez les touches de - Yamaha R-N500 | Owners Manual - Page 90
Écoute du service Pandora Écoute de stations Pandora Si vous avez créé des stations Pandora, effectuez la procédure ci-dessous pour sélectionner la station Pandora que vous voulez écouter. LINE1 LINE2 LINE3 PHONO TUNER CD USB NET FM AM PRESET TUNING MEMORY NET Touches de curseur ENTER - Yamaha R-N500 | Owners Manual - Page 91
Add Account » et appuyez sur ENTER. b Suivez la procédure à partir de l'étape 3 sous « Réglages de compte pour le service Pandora » (p.28). y Une fois le nombre maximum de comptes Pandora créé, « Max account » apparaît sur l'afficheur de la face avant. Pour supprimer un compte Pandora a Utilisez les - Yamaha R-N500 | Owners Manual - Page 92
. Track #1 Icône Source d'entrée Élément USB (iPod) SERVER AirPlay Song (titre du morceau), Artist (nom de l'artiste), Album (nom de l'album), Time NET RADIO Song (titre du morceau), Album (nom de l'artiste), Station (nom de la station), Time Pandora Track (titre du morceau), Station (nom - Yamaha R-N500 | Owners Manual - Page 93
édia. 21, 23, 25 Configure la lecture aléatoire pour l'iPod, le dispositif de stockage USB ou le serveur multimédia. 21, 23, 25 Active/désactive les commandes de volume depuis iTunes ou l'iPod via 33 AirPlay. FORMAT CHAN SAMPL Format audio du signal d'entrée Si l'appareil reçoit un signal - Yamaha R-N500 | Owners Manual - Page 94
Standby sous tension depuis d'autres 35 périphériques réseau est activée/désactivée. Modifie le nom du réseau Network Name (nom de l'unité du réseau) affiché sur les autres 36 périphériques réseau. Update Met à jour le microprogramme via le 36 réseau. Max Volume Règle le volume maximum - Yamaha R-N500 | Owners Manual - Page 95
du microprogramme de cet appareil est disponible (p.42). STATUS État du raccordement de la prise NETWORK MAC Adresse de curseur (D / E) pour sélectionner le caractère à modifier et (B / C) pour sélectionner une valeur. 4 Pour quitter le menu, appuyez sur SETUP. y Quand vous utilisez « AirPlay - Yamaha R-N500 | Owners Manual - Page 96
Network Name ». SP A VOL. Network Name 2 Appuyez sur ENTER pour accéder à l'écran de modification du nom. SP A VOL. R-N500 XXXXXX Nom du réseau 3 Utilisez les touches de Update Met à jour le microprogramme via le réseau. Perform Update Lance le processus de mise à jour du microprogramme de - Yamaha R-N500 | Owners Manual - Page 97
37 37 38 38 38 Sélection du code de la télécommande (REMOTE ID) REMOTE ID ID2 Modifiez le code de télécommande de l'unité de sorte qu'il corresponde au code de la télécommande (par défaut : ID2). Lors de l'utilisation de plusieurs récepteurs AV Yamaha, vous pouvez régler chaque télécommande avec un - Yamaha R-N500 | Owners Manual - Page 98
Update » (p.36) du menu « SETUP ». • L'affichage de la version du microprogramme peut prendre un certain temps. UPDATE USB De nouveaux microprogrammes proposant des fonctions supplémentaires ou des menu « Network Setup ». Dans ce cas, vous pouvez également mettre à jour le microprogramme de l'unit - Yamaha R-N500 | Owners Manual - Page 99
ériques pour faire fonctionner le téléviseur (cette fonction peut ne pas être disponible sur certains modèles de téléviseur). SOURCE SLEEP CODE SET RECEIVER CODE SET SPEAKERS ID DIMMER A B COAX1 COAX2 OPT1 OPT2 1 2 3 4 5 6 7 8 9 0 +10 ENT TV TV INPUT TV VOL TV CH TV MUTE - Yamaha R-N500 | Owners Manual - Page 100
suivantes après avoir sélectionné la source d'entrée ou la scène. SOURCE A Touches d'opération de menu DISPLAY SOURCE SLEEP CODE SET RECEIVER SPEAKERS ID DIMMER A B COAX1 HOME SETUP COAX2 OPT1 NOW PLAYING OPTION OPT2 ENTER VOLUME DISPLAY RETURN TOP MENU DISC SKIP POP-UP MENU - Yamaha R-N500 | Owners Manual - Page 101
commande Vous pouvez initialiser les codes de télécommande assignés à chaque touche de sélection d'entrée et retrouver les assignations d'usine. SOURCE SLEEP CODE SET RECEIVER CODE SET SETUP SPEAKERS ID DIMMER A B HOME SETUP NOW PLAYING OPTION ENTER VOLUME DISPLAY RETURN TOP MENU - Yamaha R-N500 | Owners Manual - Page 102
MENU MUTE 1 Appuyez sur SETUP. 2 Utilisez les touches de curseur pour sélectionner « Network Setup » et appuyez sur ENTER. 6 Pour lancer la à jour le microprogramme, appuyez sur SETUP. 7 Si « UPDATE SUCCESS » apparaît sur l'afficheur de la face avant, appuyez sur A (alimentation) sur le panneau - Yamaha R-N500 | Owners Manual - Page 103
service après-vente agréé Yamaha le plus proche. ■ Généralités Anomalies Impossible de de l'une des touches du sélecteur d'entrée de la télécommande). Les commutateurs SPEAKERS A/B ne sont pas réglés correctement. Allumez les SPEAKERS A ou les SPEAKERS B correspondants. Les raccordements des - Yamaha R-N500 | Owners Manual - Page 104
Guide de dépannage Anomalies Causes possibles Seule l'enceinte de gauche ou de droite émet des sons. Basses insuffisantes et absence d'ambiance. Un ronflement se fait entendre. Le niveau sonore est trop faible pendant la lecture d'un disque. Le son est de moins bonne qualité lorsque vous écoutez - Yamaha R-N500 | Owners Manual - Page 105
■ Syntoniseur Guide de dépannage Anomalies Causes possibles Actions correctives La réception FM en stéréophonie est parasitée. Les caractéristiques particulières des émissions FM stéréophoniques reçues sont à l'origine de cette anomalie si l'émetteur est trop éloigné, ou encore si le niveau d' - Yamaha R-N500 | Owners Manual - Page 106
Le réglage du partage de support est incorrect. Certains logiciels de sécurité installés sur votre PC bloquent l'accès de l'unité à votre PC de port varie en fonction de la station de radio. Dans « MAC Filter » du menu « Network Setup », désactivez le filtre adresse MAC ou spécifiez l'adresse MAC de - Yamaha R-N500 | Owners Manual - Page 107
■ Télécommande Guide de dépannage Anomalies La télécommande ne fonctionne pas correctement. Causes possibles Actions correctives Distance ou angle incorrect. La télécommande fonctionne jusqu'à une portée de 6 m et à un angle de 30 degrés maximum par rapport au panneau avant. Les rayons - Yamaha R-N500 | Owners Manual - Page 108
erreurs sur l'afficheur de la face avant Signalement d'erreurs sur l'afficheur de la face avant Message Access denied Access error Are you still service. Le code de télécommande de l'unité et celui de la télécommande ne sont pas identiques. Modifiez le code de télécommande de l'unité ou celui de - Yamaha R-N500 | Owners Manual - Page 109
à la réglementation en vigueur. Notez que l'utilisation de cet accessoire avec un iPod, un iPhone ou un iPad peut avoir un effet néfaste sur ses fonctions de liaison sans fil. AirPlay, iPad, iPhone, iPod, iPod nano et iPod touch sont des marques commerciales de Apple Inc., déposées aux ÉtatsUnis et - Yamaha R-N500 | Owners Manual - Page 110
105 W • Puissance IEC [Modèle pour l'Europe uniquement] (1 kHz, 0,04% DHT, 8 84 W • Largeur de la bande de puissance (0,06% DHT, 40 W, 8 10 Hz à 50 kHz • Taux d'amortissement (SPEAKERS A) 1 kHz, 8 150 ou plus • Puissance de sortie maximale efficace (JEITA) [Modèle pour l'Asie et modèle standard - Yamaha R-N500 | Owners Manual - Page 111
33 IP Address (Information, menu SETUP 35 IP Address (Network Setup, menu SETUP 35 iPod, charge 20 iPod, connexion 20 iPod, lecture 20 iPod, lecture de contenu (AirPlay 27 iTunes, lecture de contenu (AirPlay 27 L Lecture aléatoire (dispositif de stockage USB 23 Lecture aléatoire (iPod 21 - Yamaha R-N500 | Owners Manual - Page 112
31 Pandora, écoute du service 28, 30 Pandora, gestion des stations 31 Panneau arrière (noms des pièces et fonctions 7 Partage de support, réglage 24 Passerelle 35 PC, lecture de contenus 24 Perform Update (Network Setup, menu SETUP).......... 36 Piles 9 Portée de la télécommande 9 Power Mode - Yamaha R-N500 | Owners Manual - Page 113
LIABLE FOR ANY DIRECT, INDIRECT, INCIDENTAL, SPECIAL, EXEMPLARY, OR CONSEQUENTIAL DAMAGES (INCLUDING, BUT NOT LIMITED TO, PROCUREMENT OF SUBSTITUTE GOODS OR SERVICES; LOSS OF USE, DATA, OR PROFITS; OR BUSINESS INTERRUPTION) HOWEVER CAUSED AND ON ANY THEORY OF LIABILITY, WHETHER IN CONTRACT, STRICT - Yamaha R-N500 | Owners Manual - Page 114
IS", and you, its user, assume the entire risk as to its quality and accuracy. Permission is hereby granted to use, copy, modify, and distribute WITH THE SOFTWARE OR THE USE OR OTHER DEALINGS IN THE SOFTWARE. ■ About Network Copyright © 1988 Stephen Deering. Copyright © 1992, 1993 The Regents of the - Yamaha R-N500 | Owners Manual - Page 115
(INCLUDING, BUT NOT LIMITED TO, PROCUREMENT OF SUBSTITUTE GOODS OR SERVICES; LOSS OF USE, DATA, OR PROFITS; OR BUSINESS INTERRUPTION) This library is provided with all faults, and the entire risk of satisfactory quality, performance, accuracy, and effort is with the user. libpng versions 0.97 - Yamaha R-N500 | Owners Manual - Page 116
(INCLUDING, BUT NOT LIMITED TO, PROCUREMENT OF SUBSTITUTE GOODS OR SERVICES; LOSS OF USE, DATA, OR PROFITS; OR BUSINESS INTERRUPTION) and encourage the use of this source code as a component to supporting the PNG file format in commercial products. If you use this source in Yamaha AV products. iv - Yamaha R-N500 | Owners Manual - Page 117
, 0381, 0465 Dainichi 0277, 0340 Dansai 0277, 0282, 0320, 0337, 0349, 0350 Dantax 0161, 0349 Dawa 0320 Daytron 0007, 0008, 0026, 0323, 0343 De Graaf 0346 Decca 0282, 0320, 0342, 0349, 0350 Dell 0145, 0245 Denver 0358, 0362 Desmet 0320, 0349, 0350 Diamant 0320 Diamond 0277 - Yamaha R-N500 | Owners Manual - Page 118
Fujitsu Siemens 0504, 0505, 0507, 0510, 0511 Funai 0051, 0058, 0059, 0112, 0113, 0115, 0118, 0119, 0179, 0337, 0488, 0489 Futuretech 0058, 0179 Galaxi 0320, 0351 Galaxis 0161, 0320 Gateway 0176, 0177, 0241 GBC 0323, 0343, 0344 GE 0008, 0021, 0023, 0026, 0027, 0031, 0034, 0049, - Yamaha R-N500 | Owners Manual - Page 119
Neufunk New Tech New World NewTech Nicamagic Nikkai Nikko Nobliko Nokia Norcent Nordic Nordmende Nordvision Novatronic Oceanic Okano Olevia ONCEAS Sierra Siesta Signature Silva Silver Singer Sinudyne Skantic Skyworth Solavox Sonitron Sonoko Sonolor Sontec Sony Sound & Vision Soundesign Soundwave - Yamaha R-N500 | Owners Manual - Page 120
0342, 0349 Wincom 0101, 0106 Xrypton 0320 Yamaha Yamishi Yokan Yoko Yorx Zanussi Zenith 0008, Howell 1065 Bestar 1009, 1025, 1030 Black Panther Line 1009, 1025 Blaupunkt 1028 Daytron 1009, 1025 DBX 1064 De Graaf 1028 Decca 1026, 1027 , 1122 Dish Network 1018 Dishpro 1018 - Yamaha R-N500 | Owners Manual - Page 121
Hughes 1111, 1113, 1122 Hughes Network Systems 1110, 1116 Humax 1012, 1071 Niveus Media 1016 Noblex 1070 Nokia 1009, 1027 Nordmende 1027 Northgate 1070 Siemens 1031 Silva 1031 Silver 1009 Singer 1068 Sinudyne 1028 1031 XR-1000 1068, 1069 Yamaha 1064, 1065 Yamishi 1008, - Yamaha R-N500 | Owners Manual - Page 122
Alba 2064, 2165, 2186, 2337, 2346 Alco 2149 Alize 2361 Allegro 2133 Amitech 2362 Amphion MediaWorks 2195 AMW 2195, 2363 Apex 2030, 2124, 2125, 2126, 2127, 2130, 2131 Apple 2241 Arrgo 2138 Asono 2364 Aspire 2152, 2222 Astar 2240 ATACOM 2364 Audiovox 2061, 2149 Avious - Yamaha R-N500 | Owners Manual - Page 123
JVC LG Marantz (US) Mitsubishi Onkyo Panasonic Philips Pioneer Samsung Sharp Sony Toshiba Yamaha 2452, 2500, 2501 2460, 2461, 2463 2472, 2473, 2475, 2478, 2496 Zapp 3101 Multichoice 3107 Multitech 3127 NEC 3064 NET Brazil 3085 Nokia 3097 Noos 3101 NSC 3077 Oak 3074 Pace 3006, 3089, - Yamaha R-N500 | Owners Manual - Page 124
PVP Stereo Visual Matrix HTS 4117 Hughes 4064, 4068, 4192, 4194, 4196, 4202 Hughes Network Systems 4071 Humax 4025, 4030, 4060, 4097 Huth 4005, 4011 4008 Insignia 4107 Intertronic 4011 Intervision 4048, 4219 ITT Nokia 4006 Jerrold 4019 Johansson 4013 JOK 4216 JSR 4048 JVC - Yamaha R-N500 | Owners Manual - Page 125
Level 4019 NextWave 4223 Nikko 4011, 4217 Nokia 4006, 4040 Nordmende 4001, 4006, Sumida Sunny Sound Sunsat Yamaha 5082, 5095, 5114 CD Recorder Yamaha 5083 MD Yamaha 5080, 5081, 5086 Tape Yamaha 5084, 5087 Tuner Yamaha 5066, 5085, 5088, 5090, 5092 LD Yamaha 2080 Amplifier Yamaha - Yamaha R-N500 | Owners Manual - Page 126
- Yamaha R-N500 | Owners Manual - Page 127
- Yamaha R-N500 | Owners Manual - Page 128
© 2013 Yamaha Corporation Printed in Malaysia ZH44700
-
 1
1 -
 2
2 -
 3
3 -
 4
4 -
 5
5 -
 6
6 -
 7
7 -
8
-
9
-
10
-
11
-
12
-
13
-
14
-
15
-
16
-
17
-
18
-
19
-
20
-
21
-
22
-
23
-
24
-
25
-
26
-
27
-
28
-
29
-
30
-
31
-
32
-
33
-
34
-
35
-
36
-
37
-
38
-
39
-
40
-
41
-
42
-
43
-
44
-
45
-
46
-
47
-
48
-
49
-
50
-
51
-
52
-
53
-
54
-
55
-
56
-
57
-
58
-
59
-
60
-
61
-
62
-
63
-
64
-
65
-
66
-
67
-
68
-
69
-
70
-
71
-
72
-
73
-
74
-
75
-
76
-
77
-
78
-
79
-
80
-
81
-
82
-
83
-
84
-
85
-
86
-
87
-
88
-
89
-
90
-
91
-
92
-
93
-
94
-
95
-
96
-
97
-
98
-
99
-
100
-
101
-
102
-
103
-
104
-
105
-
106
-
107
-
108
-
109
-
110
-
111
-
112
-
113
-
114
-
115
-
116
-
117
-
118
-
119
-
120
-
121
-
122
-
123
-
124
-
125
-
126
-
127
-
128
 |
 |

Network Receiver
Réseau Ampli-Tuner
OWNER’S MANUAL
MODE D’EMPLOI
UC