Yamaha RX V463 Owner's Manual
Yamaha RX V463 - AV Receiver Manual
 |
UPC - 027108929897
View all Yamaha RX V463 manuals
Add to My Manuals
Save this manual to your list of manuals |
Yamaha RX V463 manual content summary:
- Yamaha RX V463 | Owner's Manual - Page 1
U RX-V463 AV Receiver OWNER'S MANUAL - Yamaha RX V463 | Owner's Manual - Page 2
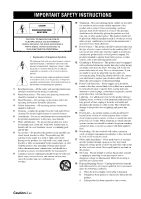
INSTRUCTIONS IMPORTANT SAFETY INSTRUCTIONS CAUTION RISK OF ELECTRIC SHOCK DO NOT OPEN CAUTION: TO REDUCE THE RISK OF ELECTRIC SHOCK, DO NOT REMOVE COVER (OR BACK). NO USER-SERVICEABLE PARTS INSIDE. REFER SERVICING TO QUALIFIED SERVICE and disconnect the antenna or cable system. This will prevent - Yamaha RX V463 | Owner's Manual - Page 3
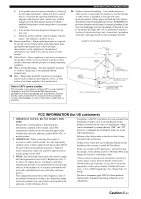
instructions contained in this manual, meets FCC requirements. Modifications not expressly approved by Yamaha may void your authority, granted by the FCC, to use the product. 2 IMPORTANT: When connecting this product to accessories and/or another product use only high quality shielded cables. Cable - Yamaha RX V463 | Owner's Manual - Page 4
cause electrical shock to the user and/or damage to this disconnecting the power cable from the wall outlet qualified Yamaha service personnel when any service read the "Troubleshooting" section on MODEL: Serial No.: The serial number is located on the rear of the unit. Retain this Owner's Manual in - Yamaha RX V463 | Owner's Manual - Page 5
speakers 11 Information on jacks and cable plugs 13 Information on HDMI 14 Audio and video signal flow 14 Connecting video components 15 Connecting other components 16 Connecting audio components 18 Connecting a Yamaha iPod™ universal dock or Bluetooth™ adapter 19 Using the VIDEO AUX jacks - Yamaha RX V463 | Owner's Manual - Page 6
Interface) ◆ HDMI interface for standard, enhanced or high-definition video (includes 1080p video signal transmission) as well as multi-channel digital audio DOCK terminal ◆ DOCK terminal to connect a Yamaha iPod universal dock (such as YDS-10, sold separately) or Bluetooth adapter (such as - Yamaha RX V463 | Owner's Manual - Page 7
Check that you received all of the following parts. ❏ Remote control ❏ Batteries (2) (AAA, R03, UM-4) ❏ Optimizer microphone ❏ AM loop antenna ❏ Indoor FM antenna ■ VOLTAGE SELECTOR (Asia and General models up the remote control code. We Want You Listening For A Lifetime Yamaha and the Electronic - Yamaha RX V463 | Owner's Manual - Page 8
playback in your home theater. Video monitor Front left speaker Front right speaker Subwoofer Surround right speaker Center speaker DVD player Surround left speaker Step 1: Set up your speakers ☞ P. 5 Step 2: Connect your DVD player and other components Preparation: Check the items Prepare - Yamaha RX V463 | Owner's Manual - Page 9
DVD IN1 DTV/CBL IN2 HDMI OUT DVD 1 DVD A DTV cables to each speaker. Quick start guide Be sure to connect the left channel (L), right channel cable to the input jack of the subwoofer and the SUBWOOFER OUTPUT jack of this unit. Subwoofer AV receiver English Input jack Subwoofer cable - Yamaha RX V463 | Owner's Manual - Page 10
guide Step 2: Connect your DVD player and other components COAXIAL OOPPTTIICCAALL DVD IN1 DTV/CBL IN2 HDMI AV receiver Digital coaxial audio output jack Digital coaxial audio cable DVD DIGITAL INPUT COAXIAL jack 2 Connect the video cable 18 • Connecting an Yamaha iPod/Bluetooth dock ☞ P. - Yamaha RX V463 | Owner's Manual - Page 11
Check the type of the connected speakers. If the speakers are 6 ohm speakers, set "SP Yamaha product that has capability of the SCENE control signals, this unit can automatically activate the component and start playback. Refer to the instruction manual You must connect a cable TV or a satellite - Yamaha RX V463 | Owner's Manual - Page 12
guide , this unit consumes a small amount of power in order to receive infrared signals from the remote control. To turn on this unit from the standby mode, press • Using your iPod with this unit. ☞ P. 57 • Using your Bluetooth components with this unit. ☞ P. 59 ■ Using various sound features • - Yamaha RX V463 | Owner's Manual - Page 13
OUTPUT CENTER SPEAKERS R SURROUND L R FRONT A L R FRONT B L 9 0A BC Name 1 HDMI jacks 2 DIGITAL INPUT jacks 3 COMPONENT VIDEO jacks 4 XM jack (U.S.A. and Canada models only) 5 SIRIUS jack (U.S.A. and Canada models only) 6 DOCK terminal 7 Speaker terminals 8 VOLTAGE SELECTOR (Asia and General - Yamaha RX V463 | Owner's Manual - Page 14
the speaker setting we recommend. You can use it to enjoy CINEMA DSP and multichannel audio sources. FL C FR 30˚ SL SR 60˚ amplifier, such as the Yamaha Active Servo Processing Subwoofer System, is effective not only for reinforcing bass frequencies from any or all channels, but also for - Yamaha RX V463 | Owner's Manual - Page 15
sure to connect the left channel (L), right channel (R), "+" (red) the speakers. If the speaker wires are short-circuited, "CHECK SP WIRES" appears in the front panel display when you turn speakers Right Left COAXIAL OPTICAL DVD IN1 DTV/CBL IN2 HDMI OUT DVD 1 DVD A DTV/CBL CD 2 3 - Yamaha RX V463 | Owner's Manual - Page 16
the knob to secure the wire. Connecting the banana plug (except Europe, Russia, Korea, and Asia models) The banana plug is a single-pole electrical connector widely used to terminate speaker cables. First, tighten the knob and then insert the banana plug connector into the end of the corresponding - Yamaha RX V463 | Owner's Manual - Page 17
on the availability of audio jacks on your other components. AUDIO jacks For conventional analog audio signals transmitted via left and right analog audio cables. Connect red plugs to the right jacks and white plugs to the left jacks. DIGITAL AUDIO COAXIAL jacks For digital audio signals transmitted - Yamaha RX V463 | Owner's Manual - Page 18
unit is not compatible with HDCP-incompatible HDMI or DVI components. • You can check the potential problem about the HDMI connection (see page 36). Audio and video signal flow ■ Audio signal flow HDMI HDMI cable plug y • We recommend using an HDMI cable shorter than 5 meters (16 feet) with the - Yamaha RX V463 | Owner's Manual - Page 19
that this unit and other components are unplugged from the AC wall outlets. y You can choose to play back HDMI audio signals on this unit or on another HDMI component connected to the HDMI OUT jack of this unit. Use the "SUPPORT AUDIO" parameter in "SOUND MENU" to select the component to play back - Yamaha RX V463 | Owner's Manual - Page 20
assigned to DIGITAL INPUT jack, select the corresponding setting for "OPTICAL IN" or "COAXIAL IN" in "INPUT ASSIGNMENT" (see page 68). ■ Connecting a DVD player HDMI out DVD player Component video out Coaxial out Audio out Video out V RL C PR PB Y COAXIAL OPTICAL DVD IN1 DTV/CBL IN2 - Yamaha RX V463 | Owner's Manual - Page 21
V RL V PR PB Y RL Video out DVD recorder, PVR or VCR Component video out Connections ■ Connecting a set-top box Satellite receiver, cable TV receiver or HDTV decoder HDMI out Component video out Optical out Audio out Video out V LR O PR PB Y COAXIAL OPTICAL DVD IN1 DTV/CBL IN2 - Yamaha RX V463 | Owner's Manual - Page 22
recorder or MD recorder L R Audio out DVD IN1 DTV/CBL IN2 HDMI COAXIAL OPTICAL DVD DTV/CBL CD OUT 1 2 3 DIGITAL INPUT DVD output jacks to the left and right input jacks for the front and surround channels. Notes • When you select the component connected to the MULTI CH INPUT jacks - Yamaha RX V463 | Owner's Manual - Page 23
iPod universal dock (such as YDS-10, sold separately) or Bluetooth adapter (such as YBA-10, sold separately). Connect a Yamaha iPod universal dock or Bluetooth adapter to the DOCK terminal on the rear panel of this unit using its dedicated cable. Using the VIDEO AUX jacks on the front panel Use the - Yamaha RX V463 | Owner's Manual - Page 24
an outdoor antenna. Consult the nearest authorized Yamaha dealer or service center about outdoor antennas. Connecting the wire of models. Connecting the power cable Once all connections are complete, plug the power cable into the AC wall outlet. (U.S.A. model) SUB WOOFER TPUT CENTER (U.S.A. model - Yamaha RX V463 | Owner's Manual - Page 25
standby mode. In the standby mode, this unit consumes a small amount of power in order to receive infrared signals from the remote control. 3 Press LPROGRAM l / h to select "SP IMP.". "SP IMP." and the current speaker impedance setting ("8Ω MIN") appear in the front panel display. 4 Press MSTRAIGHT - Yamaha RX V463 | Owner's Manual - Page 26
models DTV/CBL DOCK ENHANCER SP A B SILENT CINEMA HDMI IN jacks (see page 14). 2 DOCK indicator • Lights up when you station your iPod in a Yamaha Bluetooth adaptor is searching the Bluetooth component (see page 59). • Lights up while the connected Yamaha Bluetooth adaptor is connected to the Bluetooth - Yamaha RX V463 | Owner's Manual - Page 27
24) or the speaker level setting procedure in the "SP LEVEL" (see page 65). Connections ■ Using the remote control The remote control transmits a directional infrared ray. Be sure to aim the remote control directly at the remote control sensor on this unit during operation. Approximately 6 m (20 - Yamaha RX V463 | Owner's Manual - Page 28
your listening room This unit employs the YPAO (Yamaha Parametric Room Acoustic Optimizer) technology which lets manual uses the OSD illustrations to explain the "AUTO SETUP" procedure. 1 Make sure of the following check points. Note Before starting the automatic setup, check the following check - Yamaha RX V463 | Owner's Manual - Page 29
restore the previous settings. • Select "DEFAULT" to reset the "AUTO SETUP" parameters to the initial factory settings. Note "RELOAD" or "UNDO" is available only channel. Speaker size SIZE Checks the frequency response of each speaker and sets the appropriate low-frequency crossover for each channel - Yamaha RX V463 | Owner's Manual - Page 30
this unit detects potential problems during the "AUTO MANUAL SETUP" (see page 61). Note The distances displayed in the "DISTANCE" results may be longer than the actual distance depending on the characteristics of your speakers. 9 Press 8ENTER to return to the result display. AUTO:RESULT . RESULT SP - Yamaha RX V463 | Owner's Manual - Page 31
detects potential problems during the "AUTO SETUP" procedure, "WARNING" appears in the result display. Check the warning messages channel AAAAFLAAAAA--AAACENTER AAAASLAAAAA--- [ ]/[ ]:Select [ENTER]:Return y • For details about each warning message, see the "AUTO SETUP" section in "Troubleshooting - Yamaha RX V463 | Owner's Manual - Page 32
for various situations of using this unit. As the initial factory setting, the following SCENE templates are assigned to each SCENE button h) to select the desired template. l INPUT h Front panel or AMP ENTER Remote control SCENE template library (Image) 1 Assign the SCENE template to the - Yamaha RX V463 | Owner's Manual - Page 33
DTV/CBL V-AUX* TV Viewing 3 TV Sports Viewing Game Playing Note * When iPod is connected to the Yamaha iPod universal dock or a Bluetooth component is connected to the Bluetooth adapter, this unit plays back the audio sources input at the DOCK terminal. y You can create your original SCENE - Yamaha RX V463 | Owner's Manual - Page 34
5ch Enhancer Select this SCENE template when you play back music on your iPod stationed in a Yamaha iPod universal dock or Bluetooth component that is connected to the Bluetooth adapter. STRAIGHT Select this SCENE template when you enjoy general programs on your TV. ENTERTAINMENT TV Sports - Yamaha RX V463 | Owner's Manual - Page 35
the desired SCENE templates are assigned to the corresponding 6SCENE buttons, you may need to set the input source of the SCENE template on the remote control. See page 32 for details. • You can create a customized SCENE template for each 6SCENE button, and if you create another customized SCENE - Yamaha RX V463 | Owner's Manual - Page 36
unit and the input source component by using the remote control. You must set the appropriate remote control code for each input source in advance (see * POWER POWER STANDBY POWER TV AV A XM SIRIUS MUTE CD MD/CD-R TUNER DVD DTV/CBL DVR TV CH V-AUX/DOCK B C AMP TV INPUT TV MUTE TV VOL - Yamaha RX V463 | Owner's Manual - Page 37
. Check whether your CD player supports CDs encoded in DTS. Also, check the instructions. • See page 46 for details about XM Satellite Radio tuning instructions. • See page 51 for details about SIRIUS Satellite Radio tuning instructions 36 for details. ■ A quick guide to contents When you want to... - Yamaha RX V463 | Owner's Manual - Page 38
output. Note This feature is not available when no digital input jacks (OPTICAL, COAXIAL and HDMI) are assigned. In addition, HDMI is not available as an audio input jack select setting when the HDMI IN DVD and HDMI IN DTV/CBL jacks are not used. Use "INPUT ASSIGNMENT" in "INPUT MENU" to reassign - Yamaha RX V463 | Owner's Manual - Page 39
of headphones with a stereo analog audio cable plug to the PHONES jack on the Movie Spacious INPUT: DVD A.SEL: HDMI NIGHT:CINEMA (MID) [DISPLAY]:STATUS the OSD by using the "OSD-AMP" parameter in "OPTION MENU" (see down to the left and right headphone channels. Muting the audio output Press JMUTE - Yamaha RX V463 | Owner's Manual - Page 40
You can display the format, sampling frequency, channel, bit rate and flag data of the HDMI signals input or output at the HDMI IN/OUT jacks of this unit. Error message for HDMI sources or connected HDMI devices. See "HDMI error and message" for details. p p SET MENU TOP MENU . ;AUTO SETUP ;MANUAL - Yamaha RX V463 | Owner's Manual - Page 41
Using the sleep timer Use this feature to automatically set this unit to the standby mode after a certain amount of time. Press 5AMP and then press TSLEEP repeatedly to set the amount of time. Each time you press TSLEEP, the front panel display changes as shown below. SLEEP 120min SLEEP 90min - Yamaha RX V463 | Owner's Manual - Page 42
of voices as pivots. Downmixes multi-channel sources to 2 channel or plays back 2-channel sources as they are. CINEMA DSP processing. Using this program increases the taken in the actual concert hall, music venue, movie theater, etc. Thus, you may notice variations in the strength of the reflections - Yamaha RX V463 | Owner's Manual - Page 43
see page 38). Note Virtual CINEMA DSP will not be activated even when "SUR. L/R SP" is set to "NONE" (see page 64) in the following cases: - when "5ch Stereo" (see page 38) is selected. - when headphones are connected to the PHONES jack. ■ Enjoying multi-channel sources and sound field programs with - Yamaha RX V463 | Owner's Manual - Page 44
with the factory default parameters Movie Spacious and Movie Dramatic: DSP level DSP LEVEL Function: Adjusts the effect level wraparound effect. OFF, ON Dimension DIMENSION Function: Gradually adjusts the sound (center channel sound is output only from center speaker) to 7 (center channel sound is - Yamaha RX V463 | Owner's Manual - Page 45
balance of bass and treble for the front left and right speaker channels. y Speaker and headphone adjustments are stored independently. 1 Press KTONE in "AUTO SETUP" (see page 24) and "SP LEVEL" (see page 65). 1 Press 5AMP and then press 7LEVEL on the remote control and then 8k / n to select the - Yamaha RX V463 | Owner's Manual - Page 46
Using audio features Selecting the night listening mode The night listening modes are designed to improve listenability at lower volumes or at night. 1 Press 5AMP and then RNIGHT repeatedly to select "NIGHT:CINEMA" or "NIGHT:MUSIC". Choices: NIGHT:CINEMA, NIGHT:MUSIC, OFF • Select "NIGHT:CINEMA" - Yamaha RX V463 | Owner's Manual - Page 47
are strong and there is no interference. If the signal received from the station you want to select is weak, tune into it manually. 1 Press OINPUT l / h repeatedly so that "TUNER" is displayed in the front panel display. Note Manually tuning into an FM station automatically switches the tuner to - Yamaha RX V463 | Owner's Manual - Page 48
or manually. See page 43 for tuning instructions. 2 Press FMEMORY. The MEMORY indicator flashes in the front panel display for approximately 30 seconds. 3 Press DA/B/C/D/E and EPRESET/TUNING/CH l / h repeatedly to select a preset station group (A1 to E8) while the MEMORY indicator is flashing. Check - Yamaha RX V463 | Owner's Manual - Page 49
MHz Flashes E1:FM 88.9 MHz y You can select the desired preset station number (1 to 8) directly by pressing the numeric buttons on the remote control. 3 Select preset station "A5" using DA/B/C/D/E and EPRESET/TUNING/CH l / h. "A5" and the MEMORY indicator flash in the front panel display. Flashes - Yamaha RX V463 | Owner's Manual - Page 50
and Home Dock required (each sold separately) to receive XM service. It is prohibited to copy, decompile, disassemble, reverse engineer, hack, manipulate or otherwise make available any technology or software incorporated in receivers compatible with the XM Satellite Radio System. Installation costs - Yamaha RX V463 | Owner's Manual - Page 51
Ready® home audio system, and installed the antenna, you are ready to subscribe and begin receiving XM Troubleshooting" on page 78 for appropriate remedies. 2 Search for a channel by using one of the XM Satellite Radio search modes. • To select a channel from the all channel list, see "All Channel - Yamaha RX V463 | Owner's Manual - Page 52
channel number (1 to 8). y You can also select the preset channel number directly by pressing the numeric buttons (1 to 8) on the remote channels. For details, see "Setting XM Satellite Radio preset channels" on page 49. y All preset channels (A1 to E8) recalls "001 Preview" by the initial factory - Yamaha RX V463 | Owner's Manual - Page 53
one of the XM Satellite Radio search modes. See "Basic XM Satellite Radio operations" on page 47 for details. 043 XMU Currently selected channel number 2 Press FMEMORY (or 9MEMORY). The MEMORY indicator flashes in the front panel display for approximately 30 seconds. MEMORY Flashes Note You must - Yamaha RX V463 | Owner's Manual - Page 54
channel in the front panel display or in the OSD. Note If a status message or an error message appears in the front panel display or in the OSD, see the "XM Satellite Radio" section in "Troubleshooting -Tuner Dock cannot receive the signals, "NO , press 8ENTER on the remote control while it is being - Yamaha RX V463 | Owner's Manual - Page 55
100% commercial-free. SIRIUS also has more than 55 channels of world-class sports, news and entertainment. Included as on the area. Refer to the instruction manuals supplied with the SiriusConnect tuner for the To the AC wall outlet Notes • If "CHECK SR TUNER" or "ANTENNA ERROR" appears in the - Yamaha RX V463 | Owner's Manual - Page 56
it appears on the package of the SiriusConnect tuner, on the label of the SiriusConnect tuner and when you tune into the SIRIUS Satellite Radio Channel "0" (see below). ■ Displaying the Sirius ID of your SiriusConnect tuner 1 Press KSIRIUS. 2 Press F0 and then TENT to display the Sirius ID of your - Yamaha RX V463 | Owner's Manual - Page 57
y • To display the SIRIUS Radio ID (SID) number displayed in the front panel display, select channel "0". • To enter a one-digit or two-digit channel number, press the numeric buttons (G) on the remote control and then press TENT to confirm the input number. • Instead of pressing TENT to tune into - Yamaha RX V463 | Owner's Manual - Page 58
8PRESET/CH k / n). ■ Setting the code number and the locked channels Use this feature to set the Parental Lock code number (PIN) and select the channels to be locked. 1 Press 5AMP on the remote control and then press MMENU to display. 2 Press 8n to select "MANUAL SETUP" and then press 8ENTER. 54 En - Yamaha RX V463 | Owner's Manual - Page 59
in the list. 10 Press 8ENTER to lock the selected channel. Check mark appears before the selected channel. y When you select the locked channel and press 8ENTER, this unit unlocks the selected channel. 11 Repeat steps 9 and 10 to lock the channels you want. 12 Press 9RETURN repeatedly to exit from - Yamaha RX V463 | Owner's Manual - Page 60
channel in the front panel display or in the OSD. Note If a status message or an error message appears in the front panel display or in the OSD, see the "SIRIUS Satellite Radio" section in "Troubleshooting INFO e.g.) 043 ANTENNA - Channel number/Antenna reception level DSP PROG. INFO e.g.) 5ch - Yamaha RX V463 | Owner's Manual - Page 61
nano, and iPod mini are supported. • Some features may not be compatible depending on the model or the software version of your iPod. y • For a complete list of status messages that appear in the front panel display and in the OSD, see the "iPod" section in "Troubleshooting" on page 85. • Once your - Yamaha RX V463 | Owner's Manual - Page 62
Notes • Operations cannot be done with the controls on your iPod. • The Yamaha logo appears in the display window of your iPod. • There are some characters or video clips stored on your iPod in the OSD. Use the simple remote mode to enjoy watching the photos or video clips stored on your iPod. - Yamaha RX V463 | Owner's Manual - Page 63
in the front panel display. 4 Check that the Bluetooth component detects the Bluetooth adapter. If the Bluetooth component detects the Bluetooth adapter, "YBA-10 YAMAHA" (example) appears in the Bluetooth device list. 5 Select the Bluetooth adapter in the Bluetooth device list and then enter the - Yamaha RX V463 | Owner's Manual - Page 64
components. Refer to the operating instructions for those components. Notes input source is not output on the same OUT (REC) channel. • The analog audio signals input at the DOCK terminal can unit may distort the sound from other components. • Check the copyright laws in your country to record from - Yamaha RX V463 | Owner's Manual - Page 65
Manual setup MANUAL SETUP Use this feature to manually adjust speaker and system parameters. Sound menu 1 SOUND MENU Parameter A)SPEAKER SET B)SP LEVEL C)SP DISTANCE D)CENTER GEQ E)LFE LEVEL F)DYNAMIC RANGE G)AUDIO SET H)HDMI the output level of the LFE channel for Dolby Digital or DTS signals. - Yamaha RX V463 | Owner's Manual - Page 66
field programs. Pair the connected Yamaha Bluetooth adapter (such as YBA-10, sold separately) with a Bluetooth component (see page 59). Displays the current reception level of the XM Satellite Radio signals. Sets the SIRIUS Parental Lock code number and the channel lock configuration (see page 54 - Yamaha RX V463 | Owner's Manual - Page 67
delays when using LCD monitors or projectors. ;MANUAL SETUP 1 SOUND MENU 1/2 . A)SPEAKER SET B)SP LEVEL C)SP DISTANCE D)CENTER GEQ E)LFE LEVEL [ ]/[ ]:Up/Down [ENTER]:Enter ;MANUAL SETUP 1 SOUND MENU 2/2 . F)DYNAMIC RANGE G)AUDIO SET H)HDMI SET [ ]/[ ]:Up/Down [ENTER]:Enter Woofer section - Yamaha RX V463 | Owner's Manual - Page 68
" (or "SMALL") are directed to the subwoofer. The low-frequency signals of the front left and right channels are directed to the front left and right speakers and the subwoofer regardless of the "FRONT SP" setting (see page 63). When you do not use a subwoofer Select "FRNT" (front). The LFE signals - Yamaha RX V463 | Owner's Manual - Page 69
distance C)SP DISTANCE Use this feature to manually adjust the distance of each speaker and the delay applied to the respective channel. Ideally : meters (m), feet (ft) Initial setting: [U.S.A. and Canada models]: feet (ft) [Other models]: meters (m) • Select "meters" to adjust speaker distances in - Yamaha RX V463 | Owner's Manual - Page 70
equalizer D)CENTER GEQ Use this feature to adjust the built-in 5-frequency band (100Hz, 300Hz, 1kHz, 3kHz and 10kHz) graphic equalizer for the center channel so that the tonal quality of the center speaker matches that of the front speakers. You can make adjustments while listening to the currently - Yamaha RX V463 | Owner's Manual - Page 71
signals input at the HDMI input jacks to the HDMI out jack only when this unit is turned on even if "SUPPORT AUDIO" is set to "Other". • Available audio/video signals depend on the specification of the connected video monitor. Refer to the instruction manual of each connected component. ADVANCED - Yamaha RX V463 | Owner's Manual - Page 72
decoder mode or rename the input source. ;MANUAL SETUP 2 INPUT MENU . A)INPUT ASSIGNMENT B) You cannot select a specific item more than once. For HDMI jacks 1 and 2 HDMI IN [1] HDMI IN [2] Choices: (1) Press 5AMP and then press 8l / h on the remote control to place the "_" (underscore) under the - Yamaha RX V463 | Owner's Manual - Page 73
. • Select "DTS" when you play back a DTS-CD. ■ Multi channel input setup E)MULTI CH SET 2 INPUT MENU E)MULTI CH SET BGV;;;;;;;;;LAST Note You can only adjust the value for DOCK when your iPod is stationed in the Yamaha Universal Dock connected to this unit. ■ Decoder mode D)DECODER MODE p p 2 - Yamaha RX V463 | Owner's Manual - Page 74
BLUETOOTH SET . F)XM RADIO SET G)SIRIUS SET [ ]/[ ]:Up/Down [ENTER]:Enter ■ Display settings A)DISPLAY SET p p 3 OPTION MENU A)DISPLAY SET DIMMER;;;;;;;;;0 FL SCROLL;;;CONT . OSD SHIFT;;;;;;0 OSD-SOURCE;;;30s OSD-AMP title or a channel name) in accidental changes to DSP program parameter values - Yamaha RX V463 | Owner's Manual - Page 75
MEMORY GUARD" is set to "ON". 2 Check that the Bluetooth component detects the Bluetooth adapter. If the Bluetooth component the Bluetooth adapter, "YBA-10 YAMAHA" (example) appears in the Bluetooth device list. 3 Select the Bluetooth adapter in the Bluetooth device list and then enter the pass key - Yamaha RX V463 | Owner's Manual - Page 76
connected to this unit. In this case, check the antenna connections (see page 46). ■ SIRIUS Satellite Radio setting G)SIRIUS SET (U.S.A. and Canada models only) Use this feature to set the code number for locking the desired SIRIUS Satellite Radio channels. Refer to "Setting the Parental Lock" on - Yamaha RX V463 | Owner's Manual - Page 77
to control this unit. AMP *2 POWER POWER STANDBY POWER TV AV A XM SIRIUS MUTE CD MD/CD-R TUNER DVD DTV/CBL DVR TV CH V-AUX/DOCK B C AMP TV INPUT TV MUTE /CBL or not. Remote control Digital TV/Cable TV TV POWER Turns on or off the power. TV CH +/- Changes the channel number. TV VOL - Yamaha RX V463 | Owner's Manual - Page 78
CH IN AUDIO SEL 9 0 SLEEP 10 ENT [7] [8] [9] Remote control [1] AV POWER [2] TITLE [3] PRESET/CH k PRESET/CH n A-E/CAT. l A-E/CAT. h ENTER [4] RETURN [5] REC p w f e b a s [6] 1-9, 0, +10 [7] MENU [8] DISPLAY [9] ENT DVD player/ recorder VCR Digital TV/ Cable TV LD player CD player MD/CD - Yamaha RX V463 | Owner's Manual - Page 79
codes, refer to "List of remote control codes" at the end of this manual. Remote control code default settings Input source Component category Manufacturer Default code CD CD YAMAHA 5013 MD/CD-R CD-R YAMAHA 5001 TUNER TUNER YAMAHA 5007 DVD DVD YAMAHA 2000 DTV/CBL - - - V-AUX - Yamaha RX V463 | Owner's Manual - Page 80
on this unit. ■ Speaker impedance SP IMP. (U.S.A. and Canada models only) Use this feature to set factory setting. • Select "CANCEL" to set the code number to the initial factory setting. Note Even if you set "SSR PIN" to "RESET", this unit does not unlock the locked channels. The initial factory - Yamaha RX V463 | Owner's Manual - Page 81
other areas. ■ Initializing INIT. Use this feature to reset all the parameters of this unit to the initial factory settings (see page 87). Choices: CANCEL, RESET • Select "CANCEL" not to reset any parameters of this unit. • Select "RESET" to reset the parameters of this unit. Notes • This setting - Yamaha RX V463 | Owner's Manual - Page 82
Troubleshooting Refer to the table below when this unit does not function properly. If the problem you are experiencing is not listed below or if the instruction below does not help, turn off this unit, disconnect the power cable, and contact the nearest authorized Yamaha dealer or service - Yamaha RX V463 | Owner's Manual - Page 83
. Incorrect cable connections. Connect the cables properly. If the problem persists, the cables may be defective. Incorrect settings in "SP LEVEL". Adjust the "SP LEVEL" settings. When playing a monaural source with a CINEMA DSP program, the source signal is directed to the center channel, and - Yamaha RX V463 | Owner's Manual - Page 84
Troubleshooting Problem HDMI component. The HDMI component does not accept the Convert the multi-channel audio signals to the multi-channel audio signals. 2-channel audio signals at the source component such as a DVD player. "CHECK SP WIRES" appears in the front panel display. Speaker cables - Yamaha RX V463 | Owner's Manual - Page 85
Troubleshooting Problem Cause Remedy FM stereo reception is noisy. The characteristics of FM stereo broadcasts may cause this problem when the transmitter is too far away or the antenna input is poor. Check antenna. Use the manual tuning method. Previously wire. This will help somewhat, but it - Yamaha RX V463 | Owner's Manual - Page 86
check the antenna cable for damage. Replace the XM antenna if the cable is damaged. You may be attempting to tune to an XM channel that is blocked or that you cannot receive with your XM subscription package. Consult the latest channel guide to check the antenna reception level. See instructions - Yamaha RX V463 | Owner's Manual - Page 87
subscription is end. The SiriusConnect tuner is updating the firmware. The selected channel is not subscribed. The subscription information is updated. The selected channel is currently out of service. The operation you made is not available. Check the connection of the antenna and SiriusConnect - Yamaha RX V463 | Owner's Manual - Page 88
Troubleshooting ■ AUTO SETUP Before AUTO SETUP Error message SP E-2:NO SUR.SP E-4:NOISY E-6:NO MIC E-7:NO SIGNAL E-8:USER CANCEL E-9:INTERNAL ERROR Cause Remedy Front L/R channel signals are not detected. Check the front L/R speaker connections. A surround channel signal is not detected. Check - Yamaha RX V463 | Owner's Manual - Page 89
Yamaha service center. ■ iPod Note In case of a transmission error without a status message appearing in the front panel and in the OSD, check problem with the signal path from your iPod to this unit. The iPod being used is not supported by this unit. Your iPod is properly stationed in a Yamaha - Yamaha RX V463 | Owner's Manual - Page 90
Troubleshooting ■ Bluetooth Status message Searching... Completed Canceled BT connected Disconnected No BT Adapter Cause Remedy The Bluetooth adapter and the Bluetooth component is in the middle of the pairing. The Bluetooth adapter and the Bluetooth component is in the middle of establishing - Yamaha RX V463 | Owner's Manual - Page 91
. Try setting another code for the same manufacturer using "List of remote control codes" at the end of this manual. See page 23 - 3 75 75 ■ Resetting the system Use this feature to reset all the parameters of this unit to the initial factory settings. 1 Press ASTANDBY/ON on the front panel to set - Yamaha RX V463 | Owner's Manual - Page 92
on a wealth of actually measured data, Yamaha CINEMA DSP uses Yamaha original sound field technology to combine Dolby Pro Logic, Dolby Digital and DTS systems to provide the audiovisual experience of a movie theater in the listening room of your own home. ■ Component video signal With the component - Yamaha RX V463 | Owner's Manual - Page 93
a set-top box or AV receiver) and an audio/video monitor (such as a digital television), HDMI supports standard, enhanced or high-definition video as well as multi-channel digital audio using a single cable. HDMI transmits all ATSC HDTV standards and supports 8-channel digital audio, with bandwidth - Yamaha RX V463 | Owner's Manual - Page 94
H.P.F. (FRONT SP, CENTER SP, SUR. L/R SP: SMALL/SML model 1 (100 W maximum) [U.S.A., Canada and China models]... 2 (Total 100 W maximum) [Other models 2 (Total 50 W maximum) • Dimensions (W x H x D 435 x 151 x 352 mm (17-1/8" x 5-15/16" x 13-7/8") • Weight 8.5 kg (18 lbs 12 oz) * Specifications - Yamaha RX V463 | Owner's Manual - Page 95
setting, Option menu 71 BT connected, Bluetooth status message 86 ■C C)AUDIO SELECT, Option menu ...... 71 C)SP DISTANCE, Sound menu ..........65 C)VOLUME TRIM, Input menu .........69 CALL SIRIUS, SIRIUS Satellite Radio status message 83 Canceled, Troubleshooting 86 CAT SEARCH, XM tuning 53 - Yamaha RX V463 | Owner's Manual - Page 96
Adapter, Bluetooth status message 86 NO SIGNAL, XM tuning status message 82 Not Available, SIRIUS Satellite Radio status message 83 NOT SUPPORTED Remote control codes iii Remote control, Troubleshooting ........ 87 Rename, SCENE template 31 Repeat 58 Repeat, iPod controlling 58 Resetting the - Yamaha RX V463 | Owner's Manual - Page 97
level ...66 Specifications 90 SSR PIN, Advanced setup 76 STRAIGHT 39 Straight 39 SUB UPDATED, SIRIUS Satellite Radio status message 83 SUBWOOFER PHASE, Speaker settings 64 Subwoofer phase, Speaker settings ......64 SUPPORT AUDIO, HDMI set 67 Support audio, HDMI set 67 SUR. L/R SP, Speaker - Yamaha RX V463 | Owner's Manual - Page 98
■ Front panel A BC D E F GH I VOLUME STANDBY /ON PHONES SILENT CINEMA SPEAKERS A/B/OFF EDIT SEARCH MODE PRESET/TUNING BAND CATEGORY A/B/C/D/E 1 l PRESET/TUNING/CH h SCENE 2 3 4 OPTIMIZER MIC MEMORY INFO TUNING AUTO/MAN'L TONE CONTROL l PROGRAM h STRAIGHT DIRECT l INPUT h - Yamaha RX V463 | Owner's Manual - Page 99
■ Remote control 1 2 3 4 5 6 7 8 POWER POWER STANDBY POWER TV AV A XM SIRIUS MUTE CD MD/CD-R TUNER DVD DTV/CBL DVR TV CH V-AUX/DOCK B C AMP TV INPUT TV MUTE TV VOL SCENE 1 2 3 4 BAND LEVEL TITLE SRCH MODE MENU VOLUME ENTER 9 0 A B C D E F G RETURN MEMORY REC DISPLAY INFO l - Yamaha RX V463 | Owner's Manual - Page 100
List of remote control codes Blu-ray player Samsung 2137 CD player Yamaha 5000, 5013 CD Recorder Yamaha 5001 DVD Acoustic Solutions 2078 2077, 2098 H&B 2075 Haaz 2074 HE 2078 Hitachi 2032, 2072 Home Electronics 2078 Innovation 2072 Irradio 2134 JDB 2078 JVC 2033, 2045, - Yamaha RX V463 | Owner's Manual - Page 101
Akai 0059, 0065, 0127, 0129, 0130, 0200, 0204, 0208, 0209, 0213, 0217, 0218, 0255 Akiba 0209, 0218 Akura 0206, 0209, 0218 Alaron 0200 Alba 0200, 0207, 0208, 0209, 0217, 0218 ALBIRAL 0212 Allstar 0213 Amplivision 0207 Amstrad 0204, 0206, 0208, 0209, 0218 Amtron 0062 Anam 0208 - Yamaha RX V463 | Owner's Manual - Page 102
Lenco 0208 Lenoir 0207, 0208 Lesa 0214 Leyco 0206, 0213, 0217 LG 0016, 0038, 0039, 0127, 0128, 0157, 0158, 0163, 0164, 0166, 0188, 0189, 0200, 0201, 0207, 0208, 0210, 0213, 0214, 0215, 0217 Liesenk 0217 Life 0206, 0208 Lifetec 0206, 0208, 0218 Loewe 0063, 0128, 0203, 0204, - Yamaha RX V463 | Owner's Manual - Page 103
0063 Watson 0213, 0217, 0218 Watt Radio 0200, 0207, 0212, 0215 Wega 0205 Weltblick 0213, 0217 Weston 0215 White Westinghouse 0200, 0207, 0217 Yamaha 0000, 0001, 0002, 0003, 0004, 0005, 0060, 0061 Yamishi 0218 Yoko 0200, 0206, 0207, 0208, 0209, 0213, 0217, 0218 Yorx 0209, 0218 - Yamaha RX V463 | Owner's Manual - Page 104
ELECTRONIQUE FRANCE S.A. RUE AMBROISE CROIZAT BP70 CROISSY-BEAUBOURG 77312 MARNE-LA-VALLEE CEDEX02, FRANCE YAMAHA ELECTRONICS (UK) LTD. YAMAHA HOUSE, 200 RICKMANSWORTH ROAD WATFORD, HERTS WD18 7GQ, ENGLAND YAMAHA SCANDINAVIA A.B. J A WETTERGRENS GATA 1, BOX 30053, 400 43 VÄSTRA FRÖLUNDA, SWEDEN - Yamaha RX V463 | Owner's Manual - Page 105
The circled numbers and alphabets correspond to those in the Owner's Manual. Les nombres et lettres dans un cercle correspondent à ceux du mode d'emploi. ■ Front panel/Face avant UC RX-V463 A BC D E F GH I VOLUME STANDBY /ON PHONES SILENT CINEMA SPEAKERS A/B/OFF EDIT SEARCH MODE PRESET/ - Yamaha RX V463 | Owner's Manual - Page 106
■ Remote control/Boîtier de télécommande 1 2 3 4 5 6 7 8 POWER POWER STANDBY POWER TV AV A XM SIRIUS MUTE CD MD/CD-R TUNER DVD DTV/CBL DVR TV CH V-AUX/DOCK B C AMP TV INPUT TV MUTE TV VOL SCENE 1 2 3 4 BAND LEVEL TITLE SRCH MODE MENU VOLUME ENTER 9 0 A B C D E F G RETURN
-
 1
1 -
 2
2 -
 3
3 -
 4
4 -
 5
5 -
 6
6 -
 7
7 -
8
-
9
-
10
-
11
-
12
-
13
-
14
-
15
-
16
-
17
-
18
-
19
-
20
-
21
-
22
-
23
-
24
-
25
-
26
-
27
-
28
-
29
-
30
-
31
-
32
-
33
-
34
-
35
-
36
-
37
-
38
-
39
-
40
-
41
-
42
-
43
-
44
-
45
-
46
-
47
-
48
-
49
-
50
-
51
-
52
-
53
-
54
-
55
-
56
-
57
-
58
-
59
-
60
-
61
-
62
-
63
-
64
-
65
-
66
-
67
-
68
-
69
-
70
-
71
-
72
-
73
-
74
-
75
-
76
-
77
-
78
-
79
-
80
-
81
-
82
-
83
-
84
-
85
-
86
-
87
-
88
-
89
-
90
-
91
-
92
-
93
-
94
-
95
-
96
-
97
-
98
-
99
-
100
-
101
-
102
-
103
-
104
-
105
-
106
 |
 |

RX-V463
RX-V463
AV Receiver
OWNER’S MANUAL
U