Yamaha RX-V563 Owner's Manual
Yamaha RX-V563 - AV Receiver Manual
 |
UPC - 027108929972
View all Yamaha RX-V563 manuals
Add to My Manuals
Save this manual to your list of manuals |
Yamaha RX-V563 manual content summary:
- Yamaha RX-V563 | Owner's Manual - Page 1
U RX-V563 AV Receiver OWNER'S MANUAL - Yamaha RX-V563 | Owner's Manual - Page 2
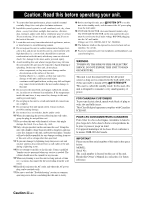
IMPORTANT SAFETY INSTRUCTIONS IMPORTANT SAFETY INSTRUCTIONS CAUTION RISK OF ELECTRIC SHOCK DO NOT OPEN CAUTION: TO REDUCE THE RISK OF ELECTRIC SHOCK, DO NOT REMOVE COVER (OR BACK). NO USER-SERVICEABLE PARTS INSIDE. REFER SERVICING TO QUALIFIED SERVICE PERSONNEL. • Explanation of Graphical Symbols - Yamaha RX-V563 | Owner's Manual - Page 3
SERVICE GROUNDING ELECTRODE SYSTEM (NEC ART 250. PART H) FCC INFORMATION (for US customers) 1 IMPORTANT NOTICE: DO NOT MODIFY THIS UNIT! This product, when installed as indicated in the instructions contained in this manual, meets FCC requirements. Modifications not expressly approved by Yamaha - Yamaha RX-V563 | Owner's Manual - Page 4
finest performance, please read this manual carefully. Keep it in a away from other electrical appliances, motors, or transformers to avoid humming sounds unit. Contact qualified Yamaha service personnel when any service is needed. Be sure to read the "Troubleshooting" section on common operating - Yamaha RX-V563 | Owner's Manual - Page 5
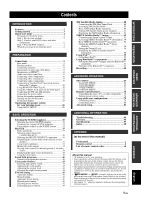
Getting started 3 Quick start guide 4 Preparation: Check the audio components 19 Connecting a Yamaha iPod™ universal dock or Troubleshooting 84 Glossary 94 Specifications 97 Index 98 APPENDIX (at the end of this manual of this manual for the information about each position of the parts. • - Yamaha RX-V563 | Owner's Manual - Page 6
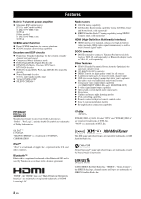
, enhanced or high-definition video (includes 1080p video signal transmission) as well as multi-channel digital audio DOCK terminal ◆ DOCK terminal to connect a Yamaha iPod universal dock (such as YDS-10, sold separately) or Bluetooth adapter (such as YBA-10, sold separately). Other features ◆ YPAO - Yamaha RX-V563 | Owner's Manual - Page 7
■ Supplied accessories Check that you received all of the following parts. ❏ Remote control ❏ Batteries (2) (AAA, R03, UM-4) set up the remote control code. We Want You Listening For A Lifetime Yamaha and the Electronic Industries Association's Consumer Electronics Group want you to get the - Yamaha RX-V563 | Owner's Manual - Page 8
Quick start guide Quick start guide The following steps describe the easiest way to enjoy DVD movie playback in your home theater. Video monitor Front left speaker Front right speaker Subwoofer - Yamaha RX-V563 | Owner's Manual - Page 9
subwoofer in the room. 2 Connect speaker cables to each speaker. Quick start guide Be sure to connect the left channel (L), right channel (R), "+" (red) touch each other. 4 Do not let the bare speaker wires touch any metal part of this unit. 4 Connect the subwoofer cable to the input jack of the - Yamaha RX-V563 | Owner's Manual - Page 10
Quick start guide Step 2: Connect your DVD player and other components recorder/ MD recorder ☞ P. 19 • Connecting a multi-format player or an external decoder ☞ P. 19 • Connecting an Yamaha iPod/Bluetooth dock ☞ P. 20 • Connecting the REMOTE IN/OUT jacks ☞ P. 20 • Using the VIDEO AUX jacks - Yamaha RX-V563 | Owner's Manual - Page 11
player. 4 Rotate L VOLUME to adjust the volume. Quick start guide ■ About SCENE function Just by pressing one SCENE button, you can Yamaha product that has capability of the SCENE control signals, this unit can automatically activate the component and start playback. Refer to the instruction manual - Yamaha RX-V563 | Owner's Manual - Page 12
Quick start guide ■ After using this unit... Press AMAIN ZONE ON/OFF on the front unit • Automatically optimizing the speaker parameters for your listening room (AUTO SETUP) ☞ P. 26 • Manually adjusting various parameters of this unit ☞ P. 63 • Setting the remote control ☞ P. 76 • - Yamaha RX-V563 | Owner's Manual - Page 13
PREPARATION Rear panel Connections 1 2 34 5 6 7 COAXIAL OPTICAL SPEAKERS DVD IN1 DTV/CBL IN2 HDMI REMOTE IN OUT +12V 15mA MAX. VIDEO TRIGGER OUT L DVD DTV/CBL R IN MD/ OUT (PLAY) CD-R (REC) DVD DTV/CBL AUDIO DVD DTV/CBL CD OUT 1 2 3 DIGITAL INPUT DVD PR COMPONENT VIDEO - Yamaha RX-V563 | Owner's Manual - Page 14
speakers and provide more realistic front-to-back transitions. Subwoofer (SW) The use of a subwoofer with a built-in amplifier, such as the Yamaha Active Servo Processing Subwoofer System, is effective not only for reinforcing bass frequencies from any or all channels, but also for high fidelity - Yamaha RX-V563 | Owner's Manual - Page 15
power plug is disconnected from the AC wall outlet. • Do not let the bare speaker wires touch each other or let them touch any metal part of this unit. This could damage this unit and/or the speakers. If the speaker wires are short-circuited, "CHECK SP WIRES" appears in the - Yamaha RX-V563 | Owner's Manual - Page 16
amplification connections to one speaker system. Check if your speakers support biamplification. To make the bi-amplification connections, use the shorting bars are put into the terminals appropriately. Refer to the instruction manuals of the speakers for details. • When you use bi-amplification - Yamaha RX-V563 | Owner's Manual - Page 17
PREPARATION Connections Information on jacks and cable plugs Connect one of the type of the audio jack(s) and/or video jack(s) that your input components are equipped with. Audio jacks and cable plugs Video jacks and cable plugs AUDIO L R DIGITAL AUDIO COAXIAL DIGITAL AUDIO OPTICAL VIDEO - Yamaha RX-V563 | Owner's Manual - Page 18
depending on the type of the DVD player. • This unit is not compatible with HDCP-incompatible HDMI or DVI components. • You can check the potential problem about the HDMI connection (see page 38). HDMI HDMI cable plug y • We recommend using an HDMI cable shorter than 5 meters (16 feet) with the - Yamaha RX-V563 | Owner's Manual - Page 19
and DTS signals input at the HDMI IN DVD or HDMI IN DTV/ CBL jack can be output at the HDMI OUT jack only when "SUPPORT AUDIO" is set to "Other" (see page 70). • Audio signals input at the HDMI IN jacks are not output at the AUDIO output jacks. VIDEO - Yamaha RX-V563 | Owner's Manual - Page 20
to play back HDMI audio signals on this unit or on another HDMI component connected to the HDMI OUT jack of this unit. Use the "SUPPORT AUDIO" parameter in "SOUND MENU" to select the component to play back HDMI audio signals (see page 70). Notes • Some video monitors connected to this - Yamaha RX-V563 | Owner's Manual - Page 21
Connections Connecting other components Make sure that this unit and other components are unplugged from the AC wall outlets. Notes • When "VIDEO CONV." is set to "OFF" (see page 73), be sure to make the same type of video connections as those made for your TV (see page 16). For example, if you - Yamaha RX-V563 | Owner's Manual - Page 22
Connections ■ Connecting a DVD recorder, PVR or VCR DVD IN1 DTV/CBL IN2 HDMI REMOTE IN OUT +12V 15mA MAX. VIDEO OUT DVD 1 DVD A DTV/CBL CD 2 3 DIGITAL INPUT COMPONENT VIDEO PR PB Y PR VIDEO MONITOR OUT XM PB SIRIUS DTV/CBL Y B DVR C TRIGGER OUT L R IN MD/ OUT (PLAY) CD-R ( - Yamaha RX-V563 | Owner's Manual - Page 23
PREPARATION Connecting audio components Connect the audio components as follows. ■ Connecting a CD player and a CD recorder/MD recorder Notes • When you connect your CD player via analog and digital connection, priority is given to the signal input at the DIGITAL INPUT jack. • To make a digital - Yamaha RX-V563 | Owner's Manual - Page 24
playback when you use one of the SCENE buttons. Refer to the owner's manuals for details about the capability of the SCENE control signals of the components. • If the component connected to the REMOTE OUT jack is not the Yamaha product, set "SCENE IR" in the advanced setup menu to "OFF" (see - Yamaha RX-V563 | Owner's Manual - Page 25
clearer reception than an indoor one. If you experience poor reception quality, install an outdoor antenna. Consult the nearest authorized Yamaha dealer or service center about outdoor antennas. MAIN ZONE ON/OFF PHONES SILENT CINEMA SPEAKERS A/B/OFF VOLUME SYSTEM OFF ZONE 2 ON/OFF EDIT - Yamaha RX-V563 | Owner's Manual - Page 26
Connections Connecting the wire of the AM loop antenna Open the lever Insert Close the lever Connecting the power cable Once all connections are complete, plug the power cable into the AC wall outlet. (U.S.A. model) y The wire of the AM loop antenna does not have any polarity and you can - Yamaha RX-V563 | Owner's Manual - Page 27
PREPARATION Connections Setting the speaker impedance Caution If you are to use 6 ohm speakers, set "SP IMP." to "6Ω MIN" as follows BEFORE using this unit. 1 Press CSYSTEM OFF on the front panel to set this unit to the standby mode. Refer to the right column for details. 2 Press and hold NTONE - Yamaha RX-V563 | Owner's Manual - Page 28
14). 2 DOCK indicator • Lights up when you station your iPod in a Yamaha iPod universal dock (such as the YDS-10, sold separately) connected to the the stationed iPod in the standby mode. • Flashes while the connected Yamaha Bluetooth adaptor (such as YBA-10, sold separately) and the Bluetooth component - Yamaha RX-V563 | Owner's Manual - Page 29
PREPARATION D CINEMA DSP indicator Lights up when you select a sound field program (see page 41). VIRTUAL indicator Lights up when Virtual CINEMA DSP is active (see page 41). SILENT CINEMA indicator Lights up when headphones are connected and a sound field program is selected (see page 41). E - Yamaha RX-V563 | Owner's Manual - Page 30
for your listening room This unit employs the YPAO (Yamaha Parametric Room Acoustic Optimizer) technology which lets you using the system menu that appears in the OSD or in the front panel display. This manual uses the OSD illustrations to explain the "AUTO SETUP" procedure. 1 Make sure of the - Yamaha RX-V563 | Owner's Manual - Page 31
PREPARATION Optimizing the speaker setting for your listening room 4 Make sure that "SETUP" is set to "AUTO" and the pointer is pointing at "START". y You can also select the following setup methods. In this case, press 8k to select "SETUP", press 8l / h to select the one of the following choises - Yamaha RX-V563 | Owner's Manual - Page 32
an error screen appears" on page 29. • When this unit detects potential problems during the "AUTO SETUP" procedure, "WARNING" and the number of warning you are not satisfied with the results or want to manually adjust each parameter, run "MANUAL SETUP" (see page 63). Note The distances displayed in - Yamaha RX-V563 | Owner's Manual - Page 33
the OSD. SET MENU TOP MENU . ;AUTO SETUP ;MANUAL SETUP .A;SIGNAL INFO [ ]/[ ]:Up/Down [ENTER]:Enter "WARNING" appears When this unit detects potential problems during the "AUTO SETUP" procedure, "WARNING , see the "AUTO SETUP" section in "Troubleshooting" on page 90. • When the corresponding - Yamaha RX-V563 | Owner's Manual - Page 34
SELECTING THE SCENE TEMPLATES Selecting the SCENE templates This unit is equipped with 17 preset SCENE templates for various situations of using this unit. As the initial factory setting, the following SCENE templates are assigned to each SCENE button: SCENE 1: DVD Viewing SCENE 2: Disc Listening - Yamaha RX-V563 | Owner's Manual - Page 35
Dock Listening TV programs Video games DTV/CBL V-AUX* TV Viewing 3 TV Sports Viewing Game Playing Note * When iPod is connected to the Yamaha iPod universal dock or a Bluetooth component is connected to the Bluetooth adapter, this unit plays back the audio sources input at the DOCK terminal - Yamaha RX-V563 | Owner's Manual - Page 36
Viewing 13 DOCK DTV/CBL MUSIC ENHANCER 7ch Enhancer Select this SCENE template when you play back music on your iPod stationed in a Yamaha iPod universal dock or Bluetooth component that is connected to the Bluetooth adapter. STRAIGHT Select this SCENE template when you enjoy general programs - Yamaha RX-V563 | Owner's Manual - Page 37
BASIC OPERATION Selecting the SCENE templates Creating your original SCENE templates You can create your original SCENE templates for each SCENE button. You can refer to the preset 17 SCENE templates to create the original SCENE templates. ■ Customizing the preset SCENE templates Use this feature - Yamaha RX-V563 | Owner's Manual - Page 38
Selecting the SCENE templates Using remote control on the SCENE feature ■ Controlling the input source components in the SCENE mode You can operate both this unit and the input source component by using the remote control. You must set the appropriate remote control code for each input source in - Yamaha RX-V563 | Owner's Manual - Page 39
speakers. Check whether your CD player supports CDs encoded in DTS. Also, instructions. • See page 48 for details about XM Satellite Radio tuning instructions. • See page 53 for details about SIRIUS Satellite Radio tuning instructions 38 for details. ■ A quick guide to contents When you want to... - Yamaha RX-V563 | Owner's Manual - Page 40
Playback Selecting audio input jacks (AUDIO SELECT) This unit comes with a variety of input jacks. Use this feature (audio input jack select) to switch between input jacks when more than one input jack is assigned to as the same input source. y • We recommend setting the audio input jack select to - Yamaha RX-V563 | Owner's Manual - Page 41
BASIC OPERATION Playback Displaying the current status of this unit on a video monitor You can display the operating information of this unit on a video monitor. 1 Turn on the video monitor connected to this unit. Using your headphones Connect a pair of headphones with a stereo analog audio cable - Yamaha RX-V563 | Owner's Manual - Page 42
the current input signal. 1 Press 5AMP and then MMENU. The top "SET MENU" display appears in the OSD. SET MENU TOP MENU . ;AUTO SETUP ;MANUAL SETUP .A;SIGNAL INFO [ ]/[ ]:Up/Down [ENTER]:Enter 2 Press 8n repeatedly to select "SIGNAL INFO" and then press 8ENTER. The audio information about the input - Yamaha RX-V563 | Owner's Manual - Page 43
Using the sleep timer Use this feature to automatically set the main zone to the standby mode after a certain amount of time. Press 5AMP and then press TSLEEP repeatedly to set the amount of time. Each time you press NSLEEP, the front panel display changes as shown below. SLEEP 120min SLEEP 90min - Yamaha RX-V563 | Owner's Manual - Page 44
SOUND FIELD PROGRAMS Sound field programs This unit is equipped with a variety of precise digital decoders that allow you to enjoy multi-channel playback from almost any stereo or multi-channel sound source. Press OPROGRAM l / h (or press 5AMP and then press BPROG l / h repeatedly). The name of - Yamaha RX-V563 | Owner's Manual - Page 45
BASIC OPERATION ■ Enjoying 2-channel sources using the standard decoders Signals input from 2-channel sources can also be played back on multi-channels. Press 5AMP and then press QSUR. DECODE repeatedly to select a decoder. You can select from the following decoders depending on the type of source - Yamaha RX-V563 | Owner's Manual - Page 46
Sound field programs ■ Editing sound fields parameters You can enjoy good quality sound with the factory default parameters. Although you do not have to change the initial settings, you can change some of the parameters to better suit the input source or your listening room. 1 While listening to a - Yamaha RX-V563 | Owner's Manual - Page 47
BASIC OPERATION Using audio features USING AUDIO FEATURES Enjoying high quality sound Use the DIRECT mode to enjoy the high quality sounds of the selected source. When the DIRECT mode is activated, this unit plays back the selected source with the least circuitry. Press QDIRECT (or press 5AMP and - Yamaha RX-V563 | Owner's Manual - Page 48
Using audio features Selecting the night listening mode The night listening modes are designed to improve listenability at lower volumes or at night. 1 Press 5AMP and then RNIGHT repeatedly to select "NIGHT:CINEMA" or "NIGHT:MUSIC". Choices: NIGHT:CINEMA, NIGHT:MUSIC, OFF • Select "NIGHT:CINEMA" - Yamaha RX-V563 | Owner's Manual - Page 49
/MAN'L so that the AUTO indicator disappears from the front panel display. A FM 88.9 MHz No colon (:) If a colon (:) appears in the front panel display, manual tuning is not possible. Press DPRESET/ TUNING to turn the colon (:) off. 4 Press GPRESET/TUNING/CH l / h to tune into the desired station - Yamaha RX-V563 | Owner's Manual - Page 50
up to 40 stations (A1 to E8: 8 preset station numbers in each of the 5 preset station groups) manually. 1 Tune into a station automatically or manually. See page 45 for tuning instructions. 2 Press HMEMORY. The MEMORY indicator flashes in the front panel display for approximately 30 seconds. 3 Press - Yamaha RX-V563 | Owner's Manual - Page 51
BASIC OPERATION FM/AM tuning Selecting preset stations You can tune into any desired station simply by selecting the preset station group and number under which it was stored. y When performing this operation with the remote control, press 4TUNER to select "TUNER" as the input source. 1 Press FA - Yamaha RX-V563 | Owner's Manual - Page 52
Canadian customers: http://www.xmradio.ca/ Note The XM Satellite Radio service is only available in the 48 contiguous United States (not available jack on the rear panel of this unit. For details, see the operating instructions provided with XM Mini-Tuner Dock. XM Mini-Tuner and XM Mini-Tuner Dock - Yamaha RX-V563 | Owner's Manual - Page 53
not use the letters "I", "O", "S" or "F". Activate your XM Satellite Radio service in the U.S. online at http://www.xmradio.com/ or call 1-800-XM- display or in the OSD, see the "XM Satellite Radio" section in "Troubleshooting" on page 84 for appropriate remedies. 2 Search for a channel by using - Yamaha RX-V563 | Owner's Manual - Page 54
XM Satellite Radio tuning y Before performing operations, press 3XM to select "XM" as the input source. ■ All Channel Search mode 1 Press DSEARCH MODE (or MSRCH MODE) repeatedly to select "ALL CH SEARCH". 3 Press GPRESET/TUNING/CH l / h (or 8PRESET/CH k / n) repeatedly to change the preset channel - Yamaha RX-V563 | Owner's Manual - Page 55
BASIC OPERATION Setting XM Satellite Radio preset channels You can use this feature to store up to 40 XM Satellite Radio channels (A1 to E8: 8 preset channel numbers in each of the 5 preset channel groups). You can then recall any preset channel easily by selecting the preset channel group and - Yamaha RX-V563 | Owner's Manual - Page 56
If a status message or an error message appears in the front panel display or in the OSD, see the "XM Satellite Radio" section in "Troubleshooting" on page 88 for appropriate remedies. ■ Displaying the XM Satellite Radio information in the front panel display Press IINFO (or AINFO) repeatedly to - Yamaha RX-V563 | Owner's Manual - Page 57
55 channels of world-class sports, news and entertainment. Included as part of your subscription, you get up to 16 NFL games a depending on the area. Refer to the instruction manuals supplied with the SiriusConnect tuner for the SUPPORTED" appears in the front panel display, this unit does not - Yamaha RX-V563 | Owner's Manual - Page 58
SIRIUS Satellite Radio™ tuning Activating SIRIUS Satellite Radio™ subscription Before using the SIRIUS Satellite feature, you need to activate your SIRIUS Satellite Radio subscription. To activate the subscription, you need the Sirius ID, which is uniquely assigned to the SiriusConnect tuner. - Yamaha RX-V563 | Owner's Manual - Page 59
Search mode in the following cases (it is not malfunction of this unit): - the channel is locked (see page 56). - the channel is out of service. - you do not subscribe to the channel. SIRIUS Satellite Radio™ tuning ■ Preset Search mode Prior to selecting a preset channel in the Preset Search mode - Yamaha RX-V563 | Owner's Manual - Page 60
locked. 1 Press 5AMP on the remote control and then press MMENU to display. MEMORY A- 023 Hair N Currently selected preset channel group 2 Press 8n to select "MANUAL SETUP" and then press 8ENTER. 56 En - Yamaha RX-V563 | Owner's Manual - Page 61
BASIC OPERATION SIRIUS Satellite Radio™ tuning [ p 3 Press 8n repeatedly to select "OPTION MENU" and then press 8ENTER. 4 Press 8k / n repeatedly to select "G)SIRIUS SET" and then press 8ENTER. The following menu screen appears. 3 OPTION MENU G)SIRIUS SET . PARENTAL LOCK [ ]/[ ]:Up/Down [p]/[[]: - Yamaha RX-V563 | Owner's Manual - Page 62
status message or an error message appears in the front panel display or in the OSD, see the "SIRIUS Satellite Radio" section in "Troubleshooting" on page 89 for appropriate remedies. ■ Displaying the SIRIUS Satellite Radio information in the front panel display Press IINFO (or AINFO) repeatedly to - Yamaha RX-V563 | Owner's Manual - Page 63
Notes • Only iPod (Click and Wheel), iPod nano, and iPod mini are supported. • Some features may not be compatible depending on the model or the software see the "iPod" section in "Troubleshooting" on page 91. • Once your iPod is stationed in a Yamaha iPod universal dock, this unit begins signal - Yamaha RX-V563 | Owner's Manual - Page 64
in the OSD by using the "OSDSOURCE" in "OPTION MENU" (see page 73) Notes • Operations cannot be done with the controls on your iPod. • The Yamaha logo appears in the display window of your iPod. • There are some characters that cannot be displayed in the front panel display or in the - Yamaha RX-V563 | Owner's Manual - Page 65
are to be established. If necessary, refer to the other component's operating instructions. There are two pairing methods: pairing by using "START PAIRING" in . If the Bluetooth component detects the Bluetooth adapter, "YBA-10 YAMAHA" (example) appears in the Bluetooth device list. 5 Select the - Yamaha RX-V563 | Owner's Manual - Page 66
RECORDING Recording Recording adjustments and other operations are performed from the recording components. Refer to the operating instructions for those components. Notes • When this unit is set to the standby mode, you cannot record between other components connected to this unit. • TONE CONTROL - Yamaha RX-V563 | Owner's Manual - Page 67
environment. ■ Auto setup AUTO SETUP Use this feature to automatically adjust speaker and system parameters (see page 26). ■ Manual setup MANUAL SETUP Use this feature to manually adjust speaker and system parameters. Sound menu 1 SOUND MENU Parameter A)SPEAKER SET B)SP LEVEL C)SP DISTANCE D)CENTER - Yamaha RX-V563 | Owner's Manual - Page 68
parameters of a group of sound field programs. Pair the connected Yamaha Bluetooth adapter (such as YBA-10, sold separately) with a ;AUTO SETUP .A;MANUAL SETUP ;SIGNAL INFO [ ]/[ ]:Up/Down [ENTER]:Enter 2 Press 8k / n to select "MANUAL SETUP". SET MENU TOPAMENU ;AUTO SETUP .A;MANUAL SETUP ;SIGNAL - Yamaha RX-V563 | Owner's Manual - Page 69
Front speakers FRONT SP Choices: SMALL, LARGE 1 SOUND MENU A)SPEAKER SET FRONT SP p p p p p p ■ Speaker settings A)SPEAKER SET Use this feature to manually adjust any speaker settings. FRONT B speaker setting FRONT B Use this feature to select the location of the front speakers connected to the - Yamaha RX-V563 | Owner's Manual - Page 70
SET MENU Surround left/right speakers SUR. L/R SP Choices: NONE, SML, LRG 1 SOUND MENU A)SPEAKER SET SUR. L/R SP NONE >SML LRG When the surround speakers are large Select "LRG" (large). When the surround speakers are small Select "SML" (small). When you do not use the surround speakers Select "NONE" - Yamaha RX-V563 | Owner's Manual - Page 71
: 40Hz, 60Hz, 80Hz, 90Hz, 100Hz, 110Hz, 120Hz, 160Hz, 200Hz 1 SOUND MENU A)SPEAKER SET CROSSOVER SET MENU ■ Speaker level B)SP LEVEL Use this feature to manually adjust the output level of each speaker. Control range: -10 to +10 dB Control step: 1 dB Initial setting: 0 dB 1 SOUND MENU B)SP LEVEL - Yamaha RX-V563 | Owner's Manual - Page 72
SET MENU ■ Speaker distance C)SP DISTANCE Use this feature to manually adjust the distance of each speaker and the delay applied to the respective channel. Ideally, each speaker should be the same distance from the main - Yamaha RX-V563 | Owner's Manual - Page 73
p p ■ Dynamic range F)DYNAMIC RANGE Use this feature to select the amount of dynamic range compression to be applied to your speakers or headphones. This setting is effective only when this unit is decoding Dolby Digital and DTS signals. 1 SOUND MENU F)DYNAMIC RANGE . SPEAKER;;;;;;MAX HEADPHONE - Yamaha RX-V563 | Owner's Manual - Page 74
to the HDMI out jack only when this unit is turned on even if "SUPPORT AUDIO" is set to "Other". • Available audio/video signals depend on the specification of the connected video monitor. Refer to the instruction manual of each connected component. Extended decoder select mode Use this feature to - Yamaha RX-V563 | Owner's Manual - Page 75
ADVANCED OPERATION p p p p 2 INPUT MENU Use this menu to reassign the input jacks, select the decoder mode or rename the input source. ;MANUAL SETUP 2 INPUT MENU . A)INPUT ASSIGNMENT B)INPUT RENAME C)VOLUME TRIM D)DECODER MODE E)MULTI CH SET [ ]/[ ]:Up/Down [ENTER]:Enter ■ Input assignment A)INPUT - Yamaha RX-V563 | Owner's Manual - Page 76
C)VOLUME TRIM DVD DVD ;;;;;0.0dB [p]/[[]:Adjust [RETURN]:Exit Note You can only adjust the value for DOCK when your iPod is stationed in the Yamaha Universal Dock connected to this unit. ■ Decoder mode D)DECODER MODE 2 INPUT MENU D)DECODER MODE . >AUTO LAST CD ;;;;AUTO DVD ;;;;AUTO DTV/CBL ;;;;AUTO - Yamaha RX-V563 | Owner's Manual - Page 77
3 OPTION MENU 1/2 . A)DISPLAY SET B)MEMORY GUARD C)AUDIO SELECT D)PARAM. INI [ ]/[ ]:Up/Down [ENTER]:Enter p p ;MANUAL SETUP 3 OPTION MENU 2/2 E)BLUETOOTH SET . F)XM RADIO SET G)SIRIUS SET [ ]/[ ]:Up/Down [ENTER]:Enter ■ Display settings A)DISPLAY SET 3 OPTION MENU A)DISPLAY SET 1/2 DIMMER - Yamaha RX-V563 | Owner's Manual - Page 78
SET MENU ■ Memory guard B)MEMORY GUARD Use this feature to prevent accidental changes to DSP program parameter values and other system settings. Choices: OFF, ON ■ Parameter initialization D)PARAM. INI Use this feature to set all the parameters of the sound field programs to the initial factory - Yamaha RX-V563 | Owner's Manual - Page 79
operation. You are recommended to read and fully understand all the instructions before starting. 1 Press 8ENTER to start pairing. The connected Bluetooth adapter. If the Bluetooth component the Bluetooth adapter, "YBA-10 YAMAHA" (example) appears in the Bluetooth device list. 3 Select the Bluetooth - Yamaha RX-V563 | Owner's Manual - Page 80
Remote control features Remote control features In addition to controlling this unit, the remote control can also operate other audiovisual components made by Yamaha and other manufacturers. To control your TV or other components, you must set up the appropriate remote control code for each input - Yamaha RX-V563 | Owner's Manual - Page 81
Remote control features ■ Controlling other components Press one of the input selector buttons (4) or A to C buttons to control other components. You must set the appropriate remote control code for each input source in advance (see page 78). The following table shows the function of each control - Yamaha RX-V563 | Owner's Manual - Page 82
manual. Remote control code default settings Input source Component category Manufacturer Default code CD CD YAMAHA 5013 MD/CD-R CD-R YAMAHA 5001 TUNER TUNER YAMAHA 5007 DVD DVD YAMAHA 2000 DTV/CBL - - - V-AUX TUNER YAMAHA 5011 DVR DVR YAMAHA 2011 XM TUNER YAMAHA - Yamaha RX-V563 | Owner's Manual - Page 83
use this unit in a multi-zone configuration, we recommend that you consult with your nearest authorized Yamaha dealer or service center about the Zone 2 connections that best meet your requirements. • Some Yamaha models are able to connect directly to the REMOTE jacks of this unit. If you own these - Yamaha RX-V563 | Owner's Manual - Page 84
"SIRIUS" is selected as the input source of Zone 2 (see page 53) (U.S.A. and Canada models only). • Enjoying music stored on your iPod stationed in a Yamaha iPod universal dock (such as YDS-10 sold separately) connected to the DOCK terminal of this unit when "V-AUX" is selected as the input source - Yamaha RX-V563 | Owner's Manual - Page 85
Operate the following operations after activating the Zone 2 operation mode. Operating Zone 2 Using multi-zone configuration ■ Controlling Zone 2 with the remote control Turning on Zone 2 Press RINPUT l / h to select the desired input source while the ZONE2 indicator is flashing in the front panel - Yamaha RX-V563 | Owner's Manual - Page 86
Advanced setup Advanced setup This unit has additional menus that are displayed in the front panel display. The advanced setup menu offers additional operations to adjust and customize the way this unit operates. Change the initial settings (indicated in bold under each parameter) to reflect the - Yamaha RX-V563 | Owner's Manual - Page 87
This unit automatically sends the remote control signals to the component. • Select "OFF" when the component connected to the REMOTE OUT jack is not the Yamaha component and does not have the capability of the SCENE control signals. Note If noises are output when you operate the SCENE function, set - Yamaha RX-V563 | Owner's Manual - Page 88
Troubleshooting Refer to the table below when this unit does not function properly. If the problem you are experiencing is not listed below or if the instruction below does not help, turn off this unit, disconnect the power cable, and contact the nearest authorized Yamaha dealer or service - Yamaha RX-V563 | Owner's Manual - Page 89
Troubleshooting Problem The sound suddenly goes off. Sound is heard from the speaker or NVOLUME +/- to resume audio output. Incorrect cable connections. Connect the cables properly. If the problem persists, the cables may be defective. Incorrect settings in "SP LEVEL". Adjust the "SP LEVEL" - Yamaha RX-V563 | Owner's Manual - Page 90
Troubleshooting Problem Cause Remedy Dolby Digital or DTS sources cannot be played. (Dolby . Audio input jack select is set to "ANALOG". Make an appropriate setting following the operating instructions for your component. Set Audio input jack select to "AUTO". A humming sound is Incorrect - Yamaha RX-V563 | Owner's Manual - Page 91
■ Tuner Troubleshooting Problem Cause Remedy FM stereo reception is noisy. The characteristics of FM stereo broadcasts may cause this problem when the the manual tuning method. AM There are continuous crackling and hissing noises. Noise can result from lightning, fluorescent lamps, motors, - Yamaha RX-V563 | Owner's Manual - Page 92
Troubleshooting the video monitor to check the antenna reception level. See instructions supplied with the XM Mini-Tuner and Dock for antenna not received XM's signal for an extended period. Consult the latest channel guide at http://www.xmradio.com/ (US residents) and http:// www.xmradio. - Yamaha RX-V563 | Owner's Manual - Page 93
Troubleshooting connected to the AC wall outlet. This unit does not support the connected SIRIUS Satellite Radio tuner. The signal is too The subscription information is updated. The selected channel is currently out of service. The operation you made is not available. Select another channel. See - Yamaha RX-V563 | Owner's Manual - Page 94
Troubleshooting ■ AUTO SETUP Before AUTO SETUP Error message Connect MIC! Unplug HP! Cause Optimizer microphone is not connected. Headphones are connected. Remedy Connect the supplied optimizer - Yamaha RX-V563 | Owner's Manual - Page 95
Troubleshooting an error message "E-9" occurs repeatedly, please contact a qualified Yamaha service center. ■ iPod Note In case of a transmission problem with the signal path from your iPod to this unit. The iPod being used is not supported by this unit. Your iPod is properly stationed in a Yamaha - Yamaha RX-V563 | Owner's Manual - Page 96
Troubleshooting ■ Bluetooth Status message Searching... Completed Canceled BT connected Disconnected No the connection. The paring is completed. The paring is canceled. The connection between the Yamaha Bluetooth adapter (such as YBA-10, sold separately) and the Bluetooth component is established. - Yamaha RX-V563 | Owner's Manual - Page 97
■ Remote control Troubleshooting Problem The remote control does not work nor function properly. Cause Wrong distance code correctly using "List of remote control codes" at the end of this manual. Try setting another code for the same manufacturer using "List of remote control codes" at the end of - Yamaha RX-V563 | Owner's Manual - Page 98
can differ so widely, it is inevitable that there are differences in the sound heard. Based on a wealth of actually measured data, Yamaha CINEMA DSP uses Yamaha original sound field technology to combine Dolby Pro Logic, Dolby Digital and DTS systems to provide the audiovisual experience of a movie - Yamaha RX-V563 | Owner's Manual - Page 99
receiver) and an audio/video monitor (such as a digital television), HDMI supports standard, enhanced or high-definition video as well as multi-channel digital single cable. HDMI transmits all ATSC HDTV standards and supports 8channel digital audio, with bandwidth to spare to accommodate future - Yamaha RX-V563 | Owner's Manual - Page 100
. Using the S VIDEO jack eliminates video signal transmission loss and allows recording and playback of even more beautiful images. ■ Virtual CINEMA DSP Yamaha has developed a Virtual CINEMA DSP algorithm that allows you to enjoy DSP sound field surround effects even without any surround speakers by - Yamaha RX-V563 | Owner's Manual - Page 101
Specifications Specifications AUDIO SECTION • Minimum RMS Output Power for Front, Center, Surround, Surround Back [U.S.A. and Canada models] 1 kHz, 0.9% THD, 8 90 W [Other models] 1 kHz, 0.9% THD, 6 90 W • Maximum Power for Front, Center, Surround, Surround Back (JEITA) [U.S.A. and Canada models - Yamaha RX-V563 | Owner's Manual - Page 102
Manual setup ........ 63 2 INPUT MENU, Manual setup .......... 63 2ch Stereo, Sound field program ......... 40 3 OPTION MENU 73 3 OPTION MENU, Manual Radio status message 89 Canceled, Troubleshooting 92 CAT SEARCH, XM tuning components ...........16 Connection, Yamaha iPod universal dock - Yamaha RX-V563 | Owner's Manual - Page 103
setup result 28 ■M Manual preset tuning, FM/AM tuning 46 MANUAL SETUP, SET MENU .........63 Manual setup, SET MENU 63 Manual tuning, FM/AM message 88 Not Available, SIRIUS Satellite Radio status message 89 NOT SUPPORTED, SIRIUS Satellite Radio status message 89 Number of speakers 28 Number - Yamaha RX-V563 | Owner's Manual - Page 104
18 ■R Remote control codes iii Remote control, Troubleshooting ........ 93 REMOTE IN/OUT jacks 20 Rename, Sound field programs with headphones 41 Sound menu, Manual setup 63 Source feature OSD display time, Display Speaker settings ......67 SUPPORT AUDIO, HDMI set 70 Support audio, HDMI set - Yamaha RX-V563 | Owner's Manual - Page 105
, Option menu 75 XM Satellite Radio tuning 48 XM Satellite Radio, Status message 88 ■Y Yamaha iPod universal dock, Connection 20 Yamaha Parametric Room Acoustic Optimizer 26 YPAO 26 YPAO (Yamaha Parametric Room Acoustic Optimizer 26 YPAO indicator 24 ■Z Zone 2 79 ZONE2 indicator 24 Index - Yamaha RX-V563 | Owner's Manual - Page 106
■ Front panel A BC D E F G H IJ K L MAIN ZONE ON/OFF PHONES SILENT CINEMA SPEAKERS A/B/OFF VOLUME SYSTEM OFF ZONE 2 ON/OFF EDIT SEARCH MODE PRESET/TUNING BAND CATEGORY A/B/C/D/E l PRESET/TUNING/CH h SCENE 1 2 3 4 OPTIMIZER MIC MEMORY INFO TUNING AUTO/MAN'L ZONE CONTROL TONE - Yamaha RX-V563 | Owner's Manual - Page 107
■ Remote control 1 2 3 4 5 6 7 8 POWER POWER STANDBY POWER TV AV A XM SIRIUS MUTE CD MD/CD-R TUNER DVD DTV/CBL DVR TV CH V-AUX/DOCK B C AMP TV INPUT TV MUTE TV VOL SCENE 1 2 3 4 BAND LEVEL TITLE SRCH MODE MENU VOLUME ENTER 9 0 A B C D E F G RETURN MEMORY REC DISPLAY INFO l - Yamaha RX-V563 | Owner's Manual - Page 108
2122, 2123, 2130, 2131 2004, 2125, 2132 2132 2133 2132 2132 2011 2132 HD DVD Toshiba 2136 iPod Yamaha 5011 LD player Yamaha 2002 MD Yamaha 5002, 5003, 5004 TAPE DECK Yamaha 5005, 5006 TUNER Yamaha 5007, 5008, 5009, 5010, 5012, 5014, 5015, 5016, 5017, 5018 TV Acer Acme Acura ADA ADC - Yamaha RX-V563 | Owner's Manual - Page 109
Akai 0059, 0065, 0127, 0129, 0130, 0200, 0204, 0208, 0209, 0213, 0217, 0218, 0255 Akiba 0209, 0218 Akura 0206, 0209, 0218 Alaron 0200 Alba 0200, 0207, 0208, 0209, 0217, 0218 ALBIRAL 0212 Allstar 0213 Amplivision 0207 Amstrad 0204, 0206, 0208, 0209, 0218 Amtron 0062 Anam 0208 - Yamaha RX-V563 | Owner's Manual - Page 110
Lenco 0208 Lenoir 0207, 0208 Lesa 0214 Leyco 0206, 0213, 0217 LG 0016, 0038, 0039, 0127, 0128, 0157, 0158, 0163, 0164, 0166, 0188, 0189, 0200, 0201, 0207, 0208, 0210, 0213, 0214, 0215, 0217 Liesenk 0217 Life 0206, 0208 Lifetec 0206, 0208, 0218 Loewe 0063, 0128, 0203, 0204, - Yamaha RX-V563 | Owner's Manual - Page 111
0063 Watson 0213, 0217, 0218 Watt Radio 0200, 0207, 0212, 0215 Wega 0205 Weltblick 0213, 0217 Weston 0215 White Westinghouse 0200, 0207, 0217 Yamaha 0000, 0001, 0002, 0003, 0004, 0005, 0060, 0061 Yamishi 0218 Yoko 0200, 0206, 0207, 0208, 0209, 0213, 0217, 0218 Yorx 0209, 0218 - Yamaha RX-V563 | Owner's Manual - Page 112
ELECTRONIQUE FRANCE S.A. RUE AMBROISE CROIZAT BP70 CROISSY-BEAUBOURG 77312 MARNE-LA-VALLEE CEDEX02, FRANCE YAMAHA ELECTRONICS (UK) LTD. YAMAHA HOUSE, 200 RICKMANSWORTH ROAD WATFORD, HERTS WD18 7GQ, ENGLAND YAMAHA SCANDINAVIA A.B. J A WETTERGRENS GATA 1, BOX 30053, 400 43 VÄSTRA FRÖLUNDA, SWEDEN - Yamaha RX-V563 | Owner's Manual - Page 113
The circled numbers and alphabets correspond to those in the Owner's Manual. Les nombres et lettres dans un cercle correspondent à ceux du mode d'emploi. ■ Front panel/Face avant UC RX-V563 A BC D E F G H IJ K L MAIN ZONE ON/OFF - Yamaha RX-V563 | Owner's Manual - Page 114
■ Remote control/Boîtier de télécommande 1 2 3 4 5 6 7 8 POWER POWER STANDBY POWER TV AV A XM SIRIUS MUTE CD MD/CD-R TUNER DVD DTV/CBL DVR TV CH V-AUX/DOCK B C AMP TV INPUT TV MUTE TV VOL SCENE 1 2 3 4 BAND LEVEL TITLE SRCH MODE MENU VOLUME ENTER 9 0 A B C D E F G RETURN
-
 1
1 -
 2
2 -
 3
3 -
 4
4 -
 5
5 -
 6
6 -
 7
7 -
8
-
9
-
10
-
11
-
12
-
13
-
14
-
15
-
16
-
17
-
18
-
19
-
20
-
21
-
22
-
23
-
24
-
25
-
26
-
27
-
28
-
29
-
30
-
31
-
32
-
33
-
34
-
35
-
36
-
37
-
38
-
39
-
40
-
41
-
42
-
43
-
44
-
45
-
46
-
47
-
48
-
49
-
50
-
51
-
52
-
53
-
54
-
55
-
56
-
57
-
58
-
59
-
60
-
61
-
62
-
63
-
64
-
65
-
66
-
67
-
68
-
69
-
70
-
71
-
72
-
73
-
74
-
75
-
76
-
77
-
78
-
79
-
80
-
81
-
82
-
83
-
84
-
85
-
86
-
87
-
88
-
89
-
90
-
91
-
92
-
93
-
94
-
95
-
96
-
97
-
98
-
99
-
100
-
101
-
102
-
103
-
104
-
105
-
106
-
107
-
108
-
109
-
110
-
111
-
112
-
113
-
114
 |
 |

RX-V563
RX-V563
AV Receiver
OWNER’S MANUAL
U