Yamaha RY20 Owner's Manual
Yamaha RY20 Manual
 |
View all Yamaha RY20 manuals
Add to My Manuals
Save this manual to your list of manuals |
Yamaha RY20 manual content summary:
- Yamaha RY20 | Owner's Manual - Page 1
- Yamaha RY20 | Owner's Manual - Page 2
SPECIAL MESSAGE SECTION This product utilizes batteries or an external power supply (adapter). DO NOT connect this product to any power supply or adapter other than one described in the manual, on the name plate, or specifically recommended by Yamaha. WARNING: Do not place this product in a position - Yamaha RY20 | Owner's Manual - Page 3
uses radio frequencies and, if not installed and used according to the instructions found in the users manual to eliminate the problem by using one of the following measures: contact Yamaha Corporation of America, Electronic Service Division batteri das Gerät: Rhythm Programmer Typ : RY20 (Gerät, - Yamaha RY20 | Owner's Manual - Page 4
dust. • Strong vibrations. s Power Supply Always use the supplied Yamaha AC Adaptor to power your RY20. Other adaptors may cause damage to the RY20. Also, make sure that the adaptor you have is appropriate for the AC mains supply voltage in the area where you intend to use the RY20. NOTE The correct - Yamaha RY20 | Owner's Manual - Page 5
when you turn the power ON. When this happens, have the back-up battery replaced by qualified Yamaha service personnel. WARNING DO NOT ATTEMPT TO REPLACE THE BACK-UP BATTERY YOURSELF. Transfer important data from your RY20 to a MIDI data recorder such as the Yamaha MDF2 MIDI Data Filer for safe - Yamaha RY20 | Owner's Manual - Page 6
" common to conventional rhythm machines by using the built-in swing and groove functions. The RY20 includes full MIDI capabilities (including General MIDI compatible drum mapping) to allow full communication with the rest of your MIDI set-up. Please read this owner's manual carefully in order to - Yamaha RY20 | Owner's Manual - Page 7
-149) PATTERN 149 PATTERN 000 6 SECTIONS INTRO MAIN A MAIN B FILL AB FILL BA ENDING 4 TRACKS BD SD HH OTHERS DRUM KIT MODE (40 Drums) • Preset Drum Kits (00-19) • User Drum Kits (20-39) DRUM KIT 39 DRUM KIT 00 PAD BANK PAD BANK A PAD BANK B PAD BANK C PAD BANK D PAD BANK E PAD BANK BASS EFFECT - Yamaha RY20 | Owner's Manual - Page 8
v - Yamaha RY20 | Owner's Manual - Page 9
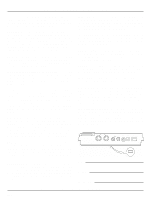
Rear Panel 8 Making Connections 9 Turn on the RY20 11 2 Playing the Demo Song 12 3 Playing the Preset Patterns 14 Changing Reset Procedure 120 Pattern List 121 Drum Kit List 122 Voice List 124 Troubleshooting 126 LCD Messages 127 Specifications 128 MIDI Data Format 129 MIDI - Yamaha RY20 | Owner's Manual - Page 10
POWER RHYTHM PROGRAMMER 1 VOLUME 2 + 3 MIN MAX - OTHERS 4TRACK SELECT/ HH MUTE SD BD PATTERN SONG TEMPO 567 MIDI DRUM parameters needed to operate the RY20 with ease and efficiency. Each screen full The various display pages in each mode are accessed using the [ PAGE- ] and [ PAGE+ ] - Yamaha RY20 | Owner's Manual - Page 11
Shuttle Dials The Jog and Shuttle Dials allow rapid control over the various features of the RY20. The Jog Dial is a continuously rotating control. By rotating it you can quickly change the current value. You use it to select patterns or songs, to change the tempo, or to modify any of a number - Yamaha RY20 | Owner's Manual - Page 12
The Controls and Connections POWER RHYTHM PROGRAMMER + VOLUME MIN MAX - OTHERS HH TRACK SELECT/ MUTE SD BD DELETE CLEAR INSERT COPY AUDITION SECTION PATTERN SONG TEMPO MIDI DRUM KIT EFFECT 890 PAGE - PAGE + A PAD BANK B ENTER C -1 +1 D E 0 TOM 1 1 TOM 2 2 TOM 3 3 TOM 4 - Yamaha RY20 | Owner's Manual - Page 13
Buttons The [ +1 ] (increment) and [ -1 ] (decrement) buttons are used along with the Jog Dial or the Shuttle Dial to select patterns or songs, to button switches the RY20 into Record Mode in either Pattern Mode or Song Mode. The red Record LED lights up and the Rhythm Programmer is ready for you - Yamaha RY20 | Owner's Manual - Page 14
POWER RHYTHM PROGRAMMER + VOLUME MIN MAX - OTHERS HH TRACK SELECT/ MUTE SD BD PATTERN SONG TEMPO MIDI DRUM COPY I Top Button The [ TOP ] button resets the current position to the beginning of the pattern or Delete Button The [CLEAR] button is used to clear all the data in the selected pattern - Yamaha RY20 | Owner's Manual - Page 15
is used with one of the lower row Drum Pads to select another section in a pattern. SECTION P Drum Pads The RY20 has 12 velocity-sensitive drum pads of the RY20 are fully programmable and can be assigned to any pad. The drum pads are labeled [ 0 ] through [ 11 ] and also have a drum name printed - Yamaha RY20 | Owner's Manual - Page 16
The DC output cable from the supplied AC Adaptor should be connected here. CAUTION Always use the supplied Yamaha AC Adaptor to power your RY20. The use of an incompatible adaptor may cause irreparable damage to the RY20, and might pose a serious shock hazard. U Power Switch Press this switch to - Yamaha RY20 | Owner's Manual - Page 17
s Making Connections Using the Supplied Power Adaptor When connecting the power supply, make sure the RY20 Power switch is in the OFF position (extended), then plug the AC Adaptor cable into the DC IN Jack, and finally the adaptor's AC plug into a convenient AC mains outlet. OUT MIDI IN OUTPUT - Yamaha RY20 | Owner's Manual - Page 18
If you intend to use other MIDI instruments with your RY20, you must connect them properly. The following diagram shows a simple connection. MIDI OUT RHYTHM PROGRAMMER MIDI IN 10 RY20 MIDI IN RHYTHM PROGRAMMER MDF2 MIDI OUT RY20 For further details on MIDI and MIDI connections, see page 110 - Yamaha RY20 | Owner's Manual - Page 19
connecting the power supply, make sure the RY20 Power switch is in the OFF position (extended), then plug the AC Adaptor cable into the DC IN Jack, and finally the adaptor's AC plug into a convenient AC mains outlet. CAUTION Always use the Yamaha PA-3 AC Adaptor to power your RY20. The use of an - Yamaha RY20 | Owner's Manual - Page 20
Demo Song 2 Playing the Demo Song SONG The RY20 is programmed with a demonstration song that will give you an example of the various capabilities of your Rhythm Programmer Number 2 Select the demonstration song by rotating the Jog Dial or by using the [ +1 ] and [ -1 ] buttons. SONG PAD BANK A - Yamaha RY20 | Owner's Manual - Page 21
Demo Song 3 Press the [ PLAY ] button to start the demonstration song. The green Play LED will flash in time with the programmed tempo setting and the song will begin playback. NOTE As the song plays, the Voice Level Indicator for the active drum repeats until you stop the RY20 by pressing the [ STOP - Yamaha RY20 | Owner's Manual - Page 22
Playing the Preset Patterns 3 Playing the Preset Patterns PATTERN + -1 +1 VOLUME The RY20 is programmed with 50 preset patterns covering a wide variety of musical styles which you can use to construct combination patterns or songs. 1 Press the [PATTERN] button to place the unit in Pattern - Yamaha RY20 | Owner's Manual - Page 23
PATTERN OTHERS HH SD BD PAD BANK A CHASE MAIN A MEASURE PATTERN Voice Level Indicators Each drum pad is associated with a Voice Level Indicator. As each voice sounds, the Voice Level Indicator lights ] button to reset the position. Then press the [ PLAY ] button to play the pattern again. 15 - Yamaha RY20 | Owner's Manual - Page 24
Pattern Numbers During Playback A new pattern can be selected while another pattern is already playing on the RY20. Select the next pattern by rotating the Jog Dial or by using the [ +1 ] and [ -1 ] buttons. PATTERN NEXT The "NEXT" indicator lights up until the current pattern has finished. The - Yamaha RY20 | Owner's Manual - Page 25
section is used to make the ENDING" section has completed, it stops the playback and sets the RY20 back to "MAIN A" to prepare for playing the next pattern the "INTRO" indicator. There are labels below the lower row of drum pads indicating the different sections. SECTION 6 BD INTRO 6 BD INTRO - Yamaha RY20 | Owner's Manual - Page 26
up. Selecting a Measure Each section consists of one or more measures. While the RY20 is stopped, you can select one of the measures of the current pattern. The another measure by rotating the Jog Dial or by using the [ +1 ] or [ -1 ] buttons. Press the [ > ] cursor button to return - Yamaha RY20 | Owner's Manual - Page 27
RY20 are programmed with an initial tempo. As long as the machine is stopped when you select a pattern, its initial tempo is loaded. If you select another pattern while the RY20 by rotating the Jog Dial or by using the [ +1 ] and [ -1 [ -1 ] buttons simultaneously resets the tempo to its default - Yamaha RY20 | Owner's Manual - Page 28
Playing the Preset Patterns s Muting a Track OTHERS TRACK HH SELECT/ MUTE SD BD The RY20 records its patterns into four tracks. The tracks are Bass Drum, Snare Drum, High Hat, and Others. 1 To mute a track, press the appropriate Track Select/Mute button. For example, to mute the percussion - Yamaha RY20 | Owner's Manual - Page 29
be selected and played using the 12 drum pads, or you can use a MIDI instrument connected to the MIDI IN connector. Internal Layout There are 20 preset drum kits and 20 user drum kits, each containing five drum banks and a bass bank. 20 PRESET DRUM KITS (00 - 19) 20 USER DRUM KITS (20 - 39) 39 - Yamaha RY20 | Owner's Manual - Page 30
4 HH OPEN 10 HH CLOSED FILL BA 5 RIDE 11 CRASH ENDING NOTE The voices of the RY20 are fully programmable and can be assigned to any pad. The drum pads are labeled [ 0 ] through [ 11 ] and also have a drum name printed on each. The voice assigned to the pad may not correspond to the name - Yamaha RY20 | Owner's Manual - Page 31
Jog Dial or by using the [ +1 ] and [ -1 ] buttons. There are 20 preset drum kits, numbered "00" to "19", and 20 user drum kits, numbered "20" to "39", in the RY20. Refer to the Drum Kit list provided on page 124. NOTE Pressing the [DRUM KIT] button again will switch the RY20 back to the previously - Yamaha RY20 | Owner's Manual - Page 32
kits will affect the voices of each pattern. This is because only the pad numbers are recorded in a pattern. s Playing the Bass Voices When the RY20 is in bass mode, the drum pads function as a keyboard, with each key playing the bass voice at a different pitch. The following diagram shows how the - Yamaha RY20 | Owner's Manual - Page 33
contains one bass bank. The bass bank is subdivided into five octaves (pad numbers "60" to "119"): 20 PRESET DRUM KITS (00 - 19) 20 USER DRUM KITS (20 - 39) 39 DRUM KIT 00 DRUM KIT 0 - 11 PAD BANK A 12 - 23 PAD BANK B 24 - 35 PAD BANK C 36 - 47 PAD BANK D 48 - 59 0 TOM 1 6 BD INTRO - Yamaha RY20 | Owner's Manual - Page 34
voices and bass voices. PATTERN OTHERS HH SD BD PAD BANK A CHASE MAIN A 2 Change the type from "DRUM" to "BASS" by rotating the Jog Dial or by using the [ +1 ] and [ -1 ] buttons. Notice the Pad Bank indicator is now set to "BASS". PATTERN OTHERS HH SD BD PAD BANK BASS CHASE MAIN A 3 To - Yamaha RY20 | Owner's Manual - Page 35
pad bank. See page 83 for more information. 5 Place the unit in Drum Kit Mode by pressing the [DRUM KIT] button. The "DRUM KIT" indicator flashes beside the current kit number. 6 Select a kit by rotating the Jog Dial or by using the [ +1 ] and [ -1 ] buttons. To play a voice, tap the appropriate - Yamaha RY20 | Owner's Manual - Page 36
50 patterns by "combining" the preset and user patterns. s Recording Modes Each method has its own advantages and uses. Step Record Mode is good for precision and for entering percussion sounds whose note placement has been determined, such as a bass drum that plays every beat of a measure. Real - Yamaha RY20 | Owner's Manual - Page 37
User Pattern In this mode you enter one note at a time, rather than playing along with the click sounds. You can create very complex patterns that would be difficult to record using Press and hold the [SECTION] button, then press the Drum Pad button for the section you want to record. The - Yamaha RY20 | Owner's Manual - Page 38
by pressing the [DRUM KIT] button. The "DRUM KIT" indicator flashes. Select another drum kit by rotating the Jog Dial or by using the [ +1 ] and [ -1 ] buttons. If a suitable kit cannot be found, you should create one with one of the user drum kits. See page 83 for instructions. Selecting a Pad Bank - Yamaha RY20 | Owner's Manual - Page 39
User . Refer to page 46. 5 Use the drum pads to record your pattern. 0 drum voices are all assigned to the "SD" track. The tracks cannot be muted in Pattern Record Mode. Each time you tap a pad, the voice is recorded, the note " " indicator also lights up for the appropriate track, and the RY20 - Yamaha RY20 | Owner's Manual - Page 40
Recording a User Pattern AUDITION HINT The RY20 provides the [AUDITION] button to allow you to play a drum pad while pattern record is active, without actually recording the voice associated with the pad. Press and hold the [AUDITION] button, then tap any drum pad. The voice will sound, but will - Yamaha RY20 | Owner's Manual - Page 41
to use a MIDI data storage device such as the Yamaha MDF2 MIDI Data Filer to save your important data to floppy disk for later loading and use. WARNING Turning the power off while Pattern Record Mode is active may cause irretrievable loss of ALL the user data. Play the Pattern You can review your - Yamaha RY20 | Owner's Manual - Page 42
a User Pattern 6 BD INTRO NOTE This example will record a bass drum on every 1/4 note. These instructions assume the defaults: a "04/04" pattern and 16th note quantization. See page 46 for information about changing the meter and page 44 for quantization details. Tap the [6 - BD] drum pad - Yamaha RY20 | Owner's Manual - Page 43
a User Pattern Mode Real-time recording allows you to record a pattern as you play the drum pads in real time. You can switch to and from real-time mode at current tempo setting, you will hear the click sound, and the RY20 will countdown two measures before you begin. PATTERN PAD BANK A OTHERS HH - Yamaha RY20 | Owner's Manual - Page 44
Recording a User Pattern NOTE You can adjust both the volume level and the quantization of the click sound. Refer to page 47. 3 Play the drum pads to record your pattern. 0 TOM 1 1 TOM 2 2 TOM 3 3 TOM 4 4 HH OPEN 5 RIDE 6 BD INTRO 7 SD MAIN A 8 SIDE STICK MAIN B 9 HH PEDAL FILL AB 10 HH - Yamaha RY20 | Owner's Manual - Page 45
A Drum Pad Bank B Drum Pad Bank C Drum Pad Bank D Drum Pad Bank E Bass Pad Bank Oct -2 Bass Pad Bank Oct -1 Bass Pad Bank Oct 0 Bass Pad Bank Oct +1 Bass Pad Bank Oct +2 0 TOM 1 6 BD 1 TOM 2 7 SD 2 TOM 3 8 SIDE STICK 3 TOM 4 9 HH PEDAL 4 HH OPEN 10 HH CLOSED 5 RIDE 11 CRASH As the RY20 loops - Yamaha RY20 | Owner's Manual - Page 46
RY20 is its ability to create "combination" patterns. A combination pattern is constructed by selecting tracks from the preset and user patterns. 1 Select a section of the pattern. Press and hold the [SECTION] button, then press the Drum into by rotating the Jog Dial or by using the [ +1 ] and [ -1 ] - Yamaha RY20 | Owner's Manual - Page 47
yourself against loss, you should use a MIDI data storage device such as the Yamaha MDF2 MIDI Data Filer to save your valuable data to floppy disk. The procedure for MIDI back-up is shown starting on page 118. s Editing Patterns The RY20 has extensive features to support the creation and editing of - Yamaha RY20 | Owner's Manual - Page 48
by using the [ +1 ] and [ -1 ] buttons. 2 Start recording by pressing the [RECORD] button. The red Record LED lights and the "QUANTIZE" indicator and the current position " " indicator both flash. LCD Panel The following illustration points out some key indicators on the LCD panel when the RY20 is - Yamaha RY20 | Owner's Manual - Page 49
Recording a User Pattern The Voice Name is the preset five character name ] buttons are designed to allow you to move quickly through the pattern and efficiently edit your pattern data. Use the [FORWARD] button to move forward through your pattern. It stops at each available note position. The - Yamaha RY20 | Owner's Manual - Page 50
CLOCK LEVEL CHASE QUANTIZE PAD MAIN A If there is more than one note recorded at a position, the RY20 steps through each event, in the recorded order, as you press the [FORWARD] button. Use the [BACKWARD] button to go back to a previous note. It functions in a similar fashion to the [FORWARD - Yamaha RY20 | Owner's Manual - Page 51
Recording a User Pattern Press the appropriate drum pad, for example, the [ 6 - BD ] pad. The note will be deleted. ENTER Modifying the Level or Pad You can change the level or pad of an event. Use the [FORWARD] and [BACKWARD] buttons to locate the note event. Press the [ < ] cursor button to - Yamaha RY20 | Owner's Manual - Page 52
Mode. Adjust the tempo by rotating the Jog Dial or by using the [ +1 ] and [ -1 ] buttons. The tempo can be set to any value from 40 to 250 beats per minute. NOTE Pressing the [ +1 ] and [ -1 ] buttons simultaneously resets the tempo of the user pattern to 120 beats per minute. 2 Press the [PATTERN - Yamaha RY20 | Owner's Manual - Page 53
Recording a User Pattern 2 Set a new quantization value by rotating the Jog Dial or by using the [ +1 ] and [ -1 ] buttons. The RY20 has seven levels of quantization. The coarsest level of quantization is resolution to eighth notes and the finest level is no quantization, "OFF", which resolves - Yamaha RY20 | Owner's Manual - Page 54
Recording a User Pattern 2 Change the value by rotating the Jog Dial or using the [ +1 ] and [ -1 ] buttons. The range is position in the pattern. Press the [ PAGE- ] button to return to Pattern Record Mode. Use the [FORWARD] or [BACKWARD] button to select a new position. Then repeat the preceding - Yamaha RY20 | Owner's Manual - Page 55
User Pattern 3 Set the number of measures by using the [ > ] cursor button to change the focus to the "MEASURE" prompt. Change the number of measures by rotating the Jog Dial or using RY20 has a built-in click sound which sounds on each beat of the measure to serve as a rhythmic guide or using the - Yamaha RY20 | Owner's Manual - Page 56
Recording a User Pattern 3 Set the quantization by using the [ > ] cursor button to change the focus to the "QUANTIZE" prompt. Change the value by rotating the Jog Dial or using the [ +1 ] and [ -1 ] buttons. The default quantization is quarter note. The quantization values are: • = quarter note. - Yamaha RY20 | Owner's Manual - Page 57
swing setting. You can modify the swing at anytime, while the RY20 is stopped or during playback. 1 Press the [PATTERN] button to put the RY20 into Pattern Mode. Select a pattern by rotating the Jog Dial or using the [ +1 ] and [ -1 ] buttons. PATTERN 2 Select the Swing display page by pressing - Yamaha RY20 | Owner's Manual - Page 58
by rotating the Jog Dial or using the [ +1 ] and [ -1 ] buttons. The values are = eighth notes or = 16th notes. NOTE Pressing the [ +1 ] and [ -1 ] buttons simultaneously resets both the Swing and Quantize values to their default. s Groove Groove adds a human rhythm feel by changing the velocity - Yamaha RY20 | Owner's Manual - Page 59
("OFF") flashes. PATTERN OTHERS HH SD BD PAD BANK A LEVEL TIMING MAIN A CHASE QUANTIZE PAGE - PAGE + 3 Select the groove by rotating the Jog Dial or using the [ +1 ] and [ -1 ] buttons. NOTE The "GROOVE" indicator will appear on the top of the LCD when any groove parameter other than "OFF" is - Yamaha RY20 | Owner's Manual - Page 60
forward. Loose Loose If there is more than one note being played on a beat, delay each note by an equal amount, causing a smear of the rhythm. Squez Squeeze Advance the timing of the notes in the first half of the quarter note and delay the notes in the last half. Groove - Yamaha RY20 | Owner's Manual - Page 61
Pattern Functions All three settings can be reset to their default values by pressing the [ +1 ] and [ -1 ] buttons simultaneously. 4 Change the focus to the "LEVEL" prompt using the [ > ] cursor button. 5 Modify the value by rotating the Jog Dial or using the [ +1 ] and [ -1 ] buttons. The range is - Yamaha RY20 | Owner's Manual - Page 62
the rate of velocity and the offset from the recorded values. 1 Press the [PATTERN] button to put the RY20 into Pattern Mode. Select a pattern by rotating the Jog Dial or using the [ +1 ] and [ -1 ] buttons. 2 Select Velocity display page by pressing the [PAGE+] button until the display indicates - Yamaha RY20 | Owner's Manual - Page 63
reset each parameter to its default setting by pressing the [ +1 ] and [ -1 ] buttons simultaneously. s Clearing a Pattern Clearing data from a user . 1 Press the [PATTERN] button to put the RY20 into Pattern Mode. Select a pattern by rotating the Jog Dial or using the [ +1 ] and [ -1 ] buttons. - Yamaha RY20 | Owner's Manual - Page 64
pattern you want to clear. Press and hold the [SECTION] button, then press the appropriate Drum Pad button. The appropriate Section indicator lights up, for example, the "INTRO" indicator. 4 the prompt "PLEASE WAIT" as the RY20 clears the data from the pattern. When you see the "END" prompt, the - Yamaha RY20 | Owner's Manual - Page 65
This allows you, for example, to copy a preset pattern into a user pattern where you can then modify it. 1 Press the [PATTERN] button to put the RY20 into Pattern Mode. Select a pattern to copy from by rotating the Jog Dial or using the [ +1 ] and [ -1 ] buttons. You can select any pattern from "000 - Yamaha RY20 | Owner's Manual - Page 66
PAGE- ] buttons. 3 Select the pattern to copy to by rotating the Jog Dial or using the [ +1 ] and [ -1 ] buttons. The pattern you just selected is the section of the pattern you want to copy by pressing the appropriate Drum Pad button while holding the [SECTION] button. WARNING Be careful - Yamaha RY20 | Owner's Manual - Page 67
THAT THIS IS WHAT YOU INTEND TO DO. NOTE If you forget to select any tracks, the RY20 will prompt you with the error message "SELECT TRACK". 7 Select another section to copy by pressing the appropriate Drum Pad button while holding the [SECTION] button. The pad bank selection and the tempo, swing - Yamaha RY20 | Owner's Manual - Page 68
. WARNING Turning the power off during the execution of the copy function may cause the irretrievable loss of ALL user data. s Setting the to a user/combination pattern. 1 Press the [PATTERN] button to put the RY20 into Pattern Mode. Select a pattern by rotating the Jog Dial or using the [ - Yamaha RY20 | Owner's Manual - Page 69
Other Pattern Functions NOTE The RY20 contains the following character set, allowing you to use numbers, upper and lower case letters and symbols for your name. (Space) 0123456789:;?@ABCDEFGHIJKLMNOPQRSTUVWX YZ[¥]^_'abcdefghijklmnopqrstuvwxyz{|}→← 4 To move to the next character, press the [ > - Yamaha RY20 | Owner's Manual - Page 70
RY20 can record 50 original songs, each consisting of as many patterns as you want, in its internal memory. The internal memory saves your pattern and song data even if the power no pattern data recorded. If the song position you want to use already has pattern data in it, you may want to clear the - Yamaha RY20 | Owner's Manual - Page 71
some key indicators on the display when the RY20 is in Song Record Mode. Song numSObeNrG Select your first pattern by rotating the dial Jog Dial or by using the [ +1 ] or [ -1 ] buttons. You can select and hold the [SECTION] button. Then press the Drum Pad button for the section you want to record, - Yamaha RY20 | Owner's Manual - Page 72
next part. HINT Most songs consist of an intro, a number of measures of verse and chorus, optionally a bridge, and an ending. The patterns of the RY20 follow this design. For example, start your song off with an "INTRO" section. Then select the "MAIN A" section and record four parts. Record a single - Yamaha RY20 | Owner's Manual - Page 73
to appear in. 2 While holding down the [SECTION] button, press the Drum Pad button for the transition section you want to play, for example the [9 Jog Dial or use the [ +1 ] and [ -1 ] buttons to select the precise point at which you want the transition or fill to replace the currently selected - Yamaha RY20 | Owner's Manual - Page 74
to use a MIDI data storage device such as the Yamaha MDF2 MIDI Data Filer to save your important data to floppy disk. WARNING Turning the power off will begin playback. NOTE You can change the tempo as the song plays. The RY20 always remembers the last tempo you entered for a song. 2 Press the [ - Yamaha RY20 | Owner's Manual - Page 75
] button and pressing the Drum Pad button for the section you want to record. Then select the first pattern by rotating the Jog Dial or by using the [ +1 ] and [ -1 ] buttons. 3 Press tempo setting, you will hear the click sounds, and the RY20 will count down two measures. SONG PAD BANK A OTHERS - Yamaha RY20 | Owner's Manual - Page 76
or by using the [ +1 ] and [ -1 ] buttons. Alternatively, you can select another section. Press and hold the [SECTION] button. Then press the drum pad See page 16 for further details. If you select the "ENDING" section, the RY20 will play (and record) it and stop real-time recording at the end of - Yamaha RY20 | Owner's Manual - Page 77
place the unit in Tempo Mode. Adjust the tempo by rotating the Jog Dial or by using the [ +1 ] and [ -1 ] buttons. The tempo can be set to any Mode. NOTE Pressing the [TEMPO] button again is another method of switching the RY20 back to Song Record Mode. TEMPO s Deleting a Part 1 In Song Record - Yamaha RY20 | Owner's Manual - Page 78
Recording a Song ENTER 3 Press the [ ENTER ] button to delete the part. WARNING BE CERTAIN THAT THIS IS WHAT YOU INTEND BEFORE YOU PRESS THE [ ENTER ] BUTTON. IMPORTANT If you decide that you DO NOT want to delete a part from the song, you can cancel this operation by simply selecting another - Yamaha RY20 | Owner's Manual - Page 79
or [BACKWARD] button. 3 Select a pattern to insert by rotating the Jog Dial or by using the [ +1 ] and [ -1 ] buttons. Alternatively, select another section to insert. Press and hold the [SECTION] button. Then press the drum pad button for the section you want to record. 4 Press the [ ENTER ] button - Yamaha RY20 | Owner's Manual - Page 80
Adjusting the Click PAGE - PAGE + The RY20 has a built-in click which you can use as a "count-in" in Real-time "15". NOTE Pressing the [ +1 ] and [ -1 ] buttons simultaneously resets the level to "00". 3 Set the quantization by using the [ > ] cursor button to change the focus to the "QUANTIZE" - Yamaha RY20 | Owner's Manual - Page 81
Playing a Song 1 Press the [ SONG ] button to put the RY20 into Song Mode. Select the song you want to play by rotating the Jog Dial or using the [ +1 ] and [ -1 ] buttons. SONG PAD BANK , press the [ TOP ] button to reset the position. Then press the [ PLAY ] button to play the song again. 73 - Yamaha RY20 | Owner's Manual - Page 82
through the parts of the song. Each time you press the button, the RY20 moves to the next part. Press the [ PLAY ] button to start playback to start playback from the selected part. NOTE This is an alternative method to using the [FORWARD] and [BACKWARD] buttons as shown above. 2 Select the "MEASURE - Yamaha RY20 | Owner's Manual - Page 83
the currently selected song to be played continuously. 1 Press the [ SONG ] button to put the RY20 into Song Mode. 2 Select the song you want to play by rotating the Jog Dial or using the [ +1 ] and [ -1 ] buttons. 3 Select the Repeat display page by pressing the [ PAGE+ ] or [ PAGE- ] buttons - Yamaha RY20 | Owner's Manual - Page 84
. If the next song is empty, song play stops. 1 Press the [ SONG ] button to put the RY20 into Song Mode. 2 Select the song with which to start the chain playback by rotating the Jog Dial or using the [ +1 ] and [ -1 ] buttons. 3 Select the Chain display page by pressing the [ PAGE+ ] or [ PAGE - Yamaha RY20 | Owner's Manual - Page 85
Playing the Songs NOTE When Chain is turned on, it applies to all the songs. When you play the songs using the Chain function, the RY20 plays each song in order until it encounters a song with no data or until it finishes playing the last song. 5 Cancel this mode by rotating - Yamaha RY20 | Owner's Manual - Page 86
buttons. ENTER 3 Select a song to clear by rotating the Jog Dial or using the [ +1 ] and [ -1 ] buttons. 4 Clear the song by you may see the prompt "PLEASE WAIT" as the RY20 clears the data. WARNING When you press the [ ENTER power off while clearing a song may cause the irretrievable loss of ALL - Yamaha RY20 | Owner's Manual - Page 87
1 Press the [ SONG ] button to put the RY20 into Song Mode. Select a song to copy from by rotating the Jog Dial or using the [ +1 ] and [ -1 ] buttons. The pattern you have selected already contains data, the copy function will replace that data. 4 Copy the song by pressing the [ ENTER ] button - Yamaha RY20 | Owner's Manual - Page 88
the source song contains a lot of data, you may see the prompt "PLEASE WAIT" as the RY20 copies the data to the destination song. NOTE The message "MEMORY FULL" may appear on the display TO DO. WARNING Turning the power off during execution of the copy function may cause the irretrievable loss of ALL - Yamaha RY20 | Owner's Manual - Page 89
allows you to assign a name of up to five characters to a song. 1 Press the [ SONG ] button to put the RY20 into Song Mode. Select a song by rotating the Jog Dial or using the [ +1 ] and [ -1 ] buttons. 2 Select the Name display page by pressing the [PAGE+] button until the display reads "NAME - Yamaha RY20 | Owner's Manual - Page 90
drum kits on the RY20 in the section "Playing the Pads" starting on page 21. The RY20 has 20 preset drum kits and 20 user drum kits. Each drum kit has five drum pad banks and a bass pad bank. Each drum key keyboard. The user drum kits "20" to "39" initially contain the same data as the preset drum - Yamaha RY20 | Owner's Manual - Page 91
initial display page. + 2 Select a user drum kit from "20" to "39" by rotating the Jog Dial or by using the [ +1 ] and [ -1 ] buttons. NOTE Use one of the user locations from "20" to "39" to create your own customized drum kit. As shipped from the factory, the user drum kits contain the same data - Yamaha RY20 | Owner's Manual - Page 92
Mode, press the [PAGE+] button to access the Type display page. Change the type from "DRUM" to "BASS" by rotating the Jog Dial or by using the [ +1 ] and [ -1 ] buttons. NOTE When you switch the RY20 to "BASS", the Pad Bank indicator also changes. PAD BANK BASS CHASE Press the [PAGE-] button - Yamaha RY20 | Owner's Manual - Page 93
the current pad by rotating the Jog Dial or by using the [ +1 ] and [ -1 ] buttons. HINT You can also select a drum pad by changing the focus area. Press the [ > voices. NOTE You can assign any of the 300 voices of the RY20 to any drum pad. If you have selected the Bass Pad Bank, the voice will - Yamaha RY20 | Owner's Manual - Page 94
the Jog Dial or by using the [ +1 ] and [ -1 ] buttons. The volume level setting ranges from "00" to "15". As you adjust the level, tap the pad to listen to the level changes. Pressing the [ +1 ] and [ -1 ] buttons simultaneously resets the level to "15". NOTE Each pad in your drum kit can be set - Yamaha RY20 | Owner's Manual - Page 95
still hear that voice in the other channel due to the effects processing performed by the built-in DSP. All drum voices have a pre-assigned pan. Selecting "OFF" uses that value. Pressing the [ +1 ] and [ -1 ] buttons simultaneously resets the pan to the "OFF" setting. -1 +1 NOTE Each pad in your - Yamaha RY20 | Owner's Manual - Page 96
Drum Kits s Pitch PAGE - PAGE + The RY20 DRUM KIT PAD -1 +1 2 Press the pad you want to modify after selecting the Pad Bank. 3 Adjust the pitch of the pad by rotating the Jog Dial or by using the [ +1 ] and [ -1 ] buttons simultaneously resets the pitch to "0000". NOTE If you have selected - Yamaha RY20 | Owner's Manual - Page 97
audible effect. Pressing the [ +1 ] and [ -1 ] buttons simultaneously resets the decay to "0". -1 +1 NOTE If you have selected the Bass Pad Bank, the decay setting applies to all the pads. You can use the [ < ] and [ > ] cursor buttons to access the "DECAY", "DRUM KIT" and "PAD" settings. 89 - Yamaha RY20 | Owner's Manual - Page 98
the Drum Kits s Sensitivities The RY20 allows you to set four sensitivity parameters. These parameters determine the effect of tapping a drum after selecting the Pad Bank. 3 Adjust the level sensitivity of the drum pad by rotating the Jog Dial or by using the [ +1 ] and [ -1 ] buttons. The range is - Yamaha RY20 | Owner's Manual - Page 99
the [ +1 ] and [ -1 ] buttons simultaneously resets the level sensitivity to "3". -1 +1 NOTE If you have selected the Bass Pad Bank, the level sensitivity setting applies to all the pads. You can use the [ < ] and [ > ] cursor buttons to access the "SENS LVL", "DRUM KIT" and "PAD" settings - Yamaha RY20 | Owner's Manual - Page 100
Pressing the [ +1 ] and [ -1 ] buttons simultaneously resets the pitch sensitivity to "0". NOTE If you have selected the Bass Pad Bank, the pitch sensitivity setting applies to all the pads. You can use the [ < ] and [ > ] cursor buttons to access the "SENS PCH", "DRUM KIT" and "PAD" settings. Decay - Yamaha RY20 | Owner's Manual - Page 101
sensitivity setting applies to all the pads. You can use the [ < ] and [ > ] cursor buttons to access the "SENS DCY", "DRUM KIT" and "PAD" settings. Balance Sensitivity Some of the voices of the RY20 are two-layered. For example, a snare drum will have both a center snare and a rim shot voice - Yamaha RY20 | Owner's Manual - Page 102
the Drum Kits 2 Press the pad you want to modify after selecting the Pad Bank. 3 Adjust the balance sensitivity of the voice by rotating the Jog Dial or by using the . Pressing the [ +1 ] and [ -1 ] buttons simultaneously resets the balance sensitivity to "0". NOTE If you have selected the Bass - Yamaha RY20 | Owner's Manual - Page 103
+ 2 Press the pad you want to modify after selecting the Pad Bank. 3 The voice polyphony of the drum pad is either "OFF" or "ON". Set the value by rotating the Jog Dial or by using the [ +1 ] and [ -1 ] buttons. NOTE This mode applies to the individual voices, not the overall instrument. The voice - Yamaha RY20 | Owner's Manual - Page 104
using the [ +1 ] and [ -1 ] buttons. You have seven groups to choose from. The range is "OFF" or from "1" to "7". Pressing the [ +1 ] and [ -1 ] buttons simultaneously resets the setting to "OFF". NOTE In a real drum playing the closed hi-hat pad. The RY20 has individual voices for each hi-hat sound - Yamaha RY20 | Owner's Manual - Page 105
Drum Kits You can set each drum pad to receive Note-Off information. Once "NOTE" Driven is selected, its sound is cut immediately when you release the pad or when the internal sequencer or an external MIDI a drum pad is either "TRIG" or "NOTE". Select a value by rotating the Jog Dial or by using the - Yamaha RY20 | Owner's Manual - Page 106
CHASE MAIN A 2 Select the pad sensitivity by rotating the Jog Dial or by using the [ +1 ] and [ -1 ] buttons. The RY20 has four pad sensitivity settings: "EASY", "LINER" (Linear), "HARD", and "CONST" (Constant): • EASY sets the drum pads to the most sensitive level. You do not have to tap very - Yamaha RY20 | Owner's Manual - Page 107
Kits The Chase function controls whether the RY20 uses the currently selected Drum Kit or the Drum Kit that was used to record the pattern, to play back a pattern. Like the Pad Sensitivity, the Chase function affects the entire system. 1 Select the Chase display page by - Yamaha RY20 | Owner's Manual - Page 108
KIT PAGE - PAGE + This function lets you copy the current drum kit to another user kit. 1 Place the unit in Drum Kit Mode by pressing the [DRUM KIT] button. Select the drum kit to copy from by rotating the Jog Dial or by using the [ +1 ] and [ -1 ] buttons. The kit you just selected is the Source - Yamaha RY20 | Owner's Manual - Page 109
the first character is flashing. PATTERN OTHERS HH SD BD DRUM KIT PAD BANK A CHASE DRUM KIT PAGE - PAGE + MAIN A 3 Select the first character of the name by rotating the Jog Dial or by using the [ +1 ] and [ -1 ] buttons. NOTE The RY20 contains the following character set, allowing you to - Yamaha RY20 | Owner's Manual - Page 110
and delay effects. s Enabling Effects EFFECT If you have a rack of reverbs, delays, and other effects devices, you may want to use just the drum sounds of the RY20. The first display page of the Effect Mode allows you to quickly and conveniently bypass the DSP effects, switching from a "wet - Yamaha RY20 | Owner's Manual - Page 111
current effect flashes under the "TYPE" prompt. PATTERN OTHERS HH SD BD PAD BANK A EFFECT CHASE DRUM KIT MAIN A PAGE - PAGE + 2 Set the desired type by rotating the Jog Dial or by using the [ +1 ] and [ -1 ] buttons. The effect types are: Reverb Delay HALL1 HALL2 ROOM1 ROOM2 PLAT1 PLAT2 - Yamaha RY20 | Owner's Manual - Page 112
2 Press the pad you want to modify. HINT You can also select another drum kit or pad by changing the focus area with the [ > ] cursor button, then selecting a drum kit or pad by rotating the Jog Dial or by using the [ +1 ] and [ -1 ] buttons. 3 Set the send level by rotating the Jog Dial or - Yamaha RY20 | Owner's Manual - Page 113
. The current level flashes under the "RTNLVL" prompt. PATTERN OTHERS HH SD BD PAD BANK A EFFECT CHASE DRUM KIT MAIN A PAGE - PAGE + 2 Set the return level by rotating the Jog Dial or by using the [ +1 ] and [ -1 ] buttons. The range is from "00" to "31". A level of "31" is the maximum signal - Yamaha RY20 | Owner's Manual - Page 114
- ] button. The current level flashes under the "R.TIME" prompt. PATTERN OTHERS HH SD BD PAD BANK A EFFECT CHASE DRUM KIT MAIN A 2 Set the reverb time by rotating the Jog Dial or by using the [ +1 ] and [ -1 ] buttons. The range is from "00" to "31". NOTE With a setting at or near "00", the - Yamaha RY20 | Owner's Manual - Page 115
under the "F.GAIN" prompt. PATTERN OTHERS HH SD BD PAD BANK A EFFECT CHASE DRUM KIT MAIN A PAGE - PAGE + NOTE Feedback gain can only be applied to the displayed. 2 Set the feedback gain by rotating the Jog Dial or by using the [ +1 ] and [ -1 ] buttons. The range is from "00" to " - Yamaha RY20 | Owner's Manual - Page 116
level flashing. PATTERN OTHERS HH SD BD PAD BANK A EFFECT CHASE DRUM KIT MAIN A NOTE As with feedback gain, the delay time setting --" is displayed. 2 Set the left channel delay time by rotating the Jog Dial or by using the [ +1 ] and [ -1 ] buttons. For the delays "DELY1" and "DELY2", - Yamaha RY20 | Owner's Manual - Page 117
. This is because the RY20 can only work within a maximum delay time of approximately 380 milliseconds. The synchronized delays may be incorrectly reproduced when they are controlled through an external MIDI device's clock. Changing the tempo during playback while using the synchronized delays may - Yamaha RY20 | Owner's Manual - Page 118
connectors. You can play its voices from another instrument or you can use it to control other MIDI devices, such as keyboards or tone generators. You can connect your RY20 to a MIDI data storage device, such as the Yamaha MDF2 MIDI Data Filer, to perform back-ups of your valuable pattern, song and - Yamaha RY20 | Owner's Manual - Page 119
device, this function MUST be set to "INT" (internal clock). "INT" is the normal setting when the RY20 is being used by itself. s Drum Instruments MIDI Channel Set the transmission and reception channel for the drum instruments. A separate channel is provided for the bass instrument. 1 Select the - Yamaha RY20 | Owner's Manual - Page 120
The default channel is "10". Pressing the [ +1 ] and [ -1 ] buttons simultaneously resets the channel to "10". Use "OFF" if you do not want the RY20's drum instruments to respond to MIDI commands. s Bass Instrument MIDI Channel PAGE - PAGE + Set the transmission and reception channel for the bass - Yamaha RY20 | Owner's Manual - Page 121
s Program Change MIDI Channel MIDI Functions The RY20 receives program change messages from external MIDI devices. They are used to change the drum kit number. Program change messages are transmitted, for example, by a MIDI keyboard whenever one of its voice selectors is pressed. 1 Select the - Yamaha RY20 | Owner's Manual - Page 122
You must select one of the user tables, "USER1" to "USER3", in order to change the note assignments in the next display page. Factory Set Values: PREST USER1 USER2 USER3 GM (General MIDI Level 1) GM (same as PREST but available for editing) Yamaha RX series Keyboard linear (Note 36 = Pad 0 to - Yamaha RY20 | Owner's Manual - Page 123
can assign a MIDI note number in the range of "000" to "127". However, all the note numbers will be affected by the change. (The note number range depends on which pad you select.) NOTE You can use Pad Bank Mode to select another group of drum pads. See page 84 for instructions regarding Pad - Yamaha RY20 | Owner's Manual - Page 124
-] button. The current instrument flashes below the "VOLUME" prompt. PATTERN OTHERS HH SD BD MIDI PAD BANK A CHASE MAIN A 2 Select the instrument "DR" (drums) or "BS" (bass) by rotating the Jog Dial or by using the [ +1 ] and [ -1 ] buttons. 3 Change the focus area to the volume data by pressing - Yamaha RY20 | Owner's Manual - Page 125
MIDI PAD BANK A CHASE PAGE - PAGE + MAIN A 2 Select the instrument "DR" (drums) or "BS" (bass) by rotating the Jog Dial or by using the Jog Dial or by using the [ +1 ] and drum pads, or note events from the internal sequencer or an external MIDI device. The expression setting is always reset - Yamaha RY20 | Owner's Manual - Page 126
RY20 powers up in Pattern Play Mode.) IMPORTANT Do NOT select one of the sub-functions. The RY20 cannot receive MIDI Bulk Data when it is set to one of its sub-functions. 2 Send the bulk data from the external device. For instructions about sending bulk data, please refer to the owner's manual for - Yamaha RY20 | Owner's Manual - Page 127
transmission. PATTERN OTHERS HH SD BD PAD BANK A CHASE MAIN A MEASURE PATTERN WARNING When the RY20 receives bulk data, it is stored in the same locations it was in when it was dumped to the external MIDI data storage device. This means that any pattern or song data which you recorded after - Yamaha RY20 | Owner's Manual - Page 128
to save any data you want to keep on a MIDI data storage device such as the Yamaha MDF2 MIDI Data Filer before you carry out the total reset procedure. 1 Turn the RY20 power OFF. 2 Press and hold both the [ +1 ] and [ -1 ] buttons. Turn the power back on. "FACTRY SET" will momentarily appear on the - Yamaha RY20 | Owner's Manual - Page 129
Rock 13 7/8Rk 7/8 Rock 14 Ballad Bald1 Piano Ballad 15 Bald2 R&B Ballad 16 Bald3 Ballad 17 Bald4 6/8 Ballad 18 Bald5 Analog Ballad 19 Rhythm Blues 20 & Blues Gspl1 6/8 Blues 6/8 Gospel 21 Gspl2 Fast Gospel 22 Funk Funk 23 Dance Disco Disco Funk 24 Euro EuroBeat Time - Yamaha RY20 | Owner's Manual - Page 130
s Drum Kit List Preset Kit Number Program No. User Kit Number (defaults) Program No Cabas Marac Shakr Clap BFngr 3 3 23 67 R&B Rhythm & Blues ROOM2 TDryH TDryM TDryL TDryF HOMid RdHi KDry3 Cabas Marac Shakr Clap BPick 8 17 28 81 Power Power PLAT2 TPwrH TPwrM TPwrL TPwrF HOSt5 RdHi KRck2 SPwr1 - Yamaha RY20 | Owner's Manual - Page 131
Preset Kit Number Program No. User Kit Number (defaults) Program No. LCD Name Kit Name Effect Pad No. Note No. Note 0 1 2 3 4 5 6 7 8 9 10 11 12 13 14 15 16 17 18 19 - Yamaha RY20 | Owner's Manual - Page 132
Rim snare 5 Rock snare 1 Rock snare 2 Rock snare 3 Rock snare 4 Rock snare 5 Rock snare 6 Rock snare 7 Rock snare 8 Power snare 1 Power snare 2 Power snare 3 Processed snare 1 Processed snare 2 Processed snare 3 Processed snare 4 Processed snare 5 Processed snare 6 Processed snare 7 Processed snare - Yamaha RY20 | Owner's Manual - Page 133
high Light tom mid Light tom low Light tom floor Room tom high Room tom mid Room tom low Room tom floor Power tom high Power tom mid Power tom low Power tom floor Jazz tom high Jazz tom mid Jazz tom low Jazz tom floor Brush tom high Brush tom mid Brush tom - Yamaha RY20 | Owner's Manual - Page 134
control(s) on your external sound system is turned up to a reasonable level. Make certain that the RY20 is properly connected to the Yamaha AC adaptor that is included and that the power is turned ON. Distorted sound Bad connections and faulty audio cables can cause distorted sound. Make sure - Yamaha RY20 | Owner's Manual - Page 135
Take your RY20 to an authorized Yamaha Service Center to have the battery replaced. DO NOT ATTEMPT TO REPLACE THE BACK-UP BATTERY YOURSELF. Unrecognizable MIDI data was received by the RY20. Make sure that all bulk data sent to the RY20 conforms with the RY20 MIDI specifications. If a MIDI bulk data - Yamaha RY20 | Owner's Manual - Page 136
LCD (66 × 42mm), Play LED, Record LED Connectors Headphones, Output (L/Mono and R), MIDI In/Out, DC In Included Accessory PA-3 AC Adaptor (except in the UK) Electrical Power Consumption 3.5 W Characteristics Output Impedance - Line: 1kΩ; Headphones: 47Ω Dimensions (W × D × H) 240 × 176 × 48 - Yamaha RY20 | Owner's Manual - Page 137
16 0ddddddd Data ... 17 0sssssss Checksum ... 18 11110111 (F7H) EOX The RY20 can only receive bulk data while it is in Pattern or Song Select Mode. of the following data: System data MIDI set-up data Drum kit data Pattern data Song data 2. MIDI Transmit 2.1. Note: 2.2. Note: Note - Yamaha RY20 | Owner's Manual - Page 138
YAMAHA [Rhythm Programmer] Date:21-APR-1994 Model RY20 MIDI Implementation Chart Version : 1.01 | | Transmitted | Recognized | Remarks | | Mes- :Active Sense | o | o | | |sages:Reset | x | x | | |Note: *1 = Drum voice=a different voice sounds by each note. | | Bass - Yamaha RY20 | Owner's Manual - Page 139
42, 74 D D.TIME (Delay time 108 DC In jack 8, 9 DECAY 89 DEL (Delete 42, 69 Delay 103 DEMO 12 DRUM (Pad bank 23, 84 DRUM CH (Drum channel 111 Drum Kit button 4, 22, 83 Drum Kit mode 22, 83 Drum pads 7, 22, 31 E Effect button 4, 102 Effect mode 102 EMPTY 16 Enter button 5, 43, 56, 59 - Yamaha RY20 | Owner's Manual - Page 140
-
 1
1 -
 2
2 -
 3
3 -
 4
4 -
 5
5 -
 6
6 -
 7
7 -
8
-
9
-
10
-
11
-
12
-
13
-
14
-
15
-
16
-
17
-
18
-
19
-
20
-
21
-
22
-
23
-
24
-
25
-
26
-
27
-
28
-
29
-
30
-
31
-
32
-
33
-
34
-
35
-
36
-
37
-
38
-
39
-
40
-
41
-
42
-
43
-
44
-
45
-
46
-
47
-
48
-
49
-
50
-
51
-
52
-
53
-
54
-
55
-
56
-
57
-
58
-
59
-
60
-
61
-
62
-
63
-
64
-
65
-
66
-
67
-
68
-
69
-
70
-
71
-
72
-
73
-
74
-
75
-
76
-
77
-
78
-
79
-
80
-
81
-
82
-
83
-
84
-
85
-
86
-
87
-
88
-
89
-
90
-
91
-
92
-
93
-
94
-
95
-
96
-
97
-
98
-
99
-
100
-
101
-
102
-
103
-
104
-
105
-
106
-
107
-
108
-
109
-
110
-
111
-
112
-
113
-
114
-
115
-
116
-
117
-
118
-
119
-
120
-
121
-
122
-
123
-
124
-
125
-
126
-
127
-
128
-
129
-
130
-
131
-
132
-
133
-
134
-
135
-
136
-
137
-
138
-
139
-
140
 |
 |