Yamaha TSS-10 Owner's Manual - Page 8
Adjusting the front angle of the front, center/rear speakers
 |
View all Yamaha TSS-10 manuals
Add to My Manuals
Save this manual to your list of manuals |
Page 8 highlights
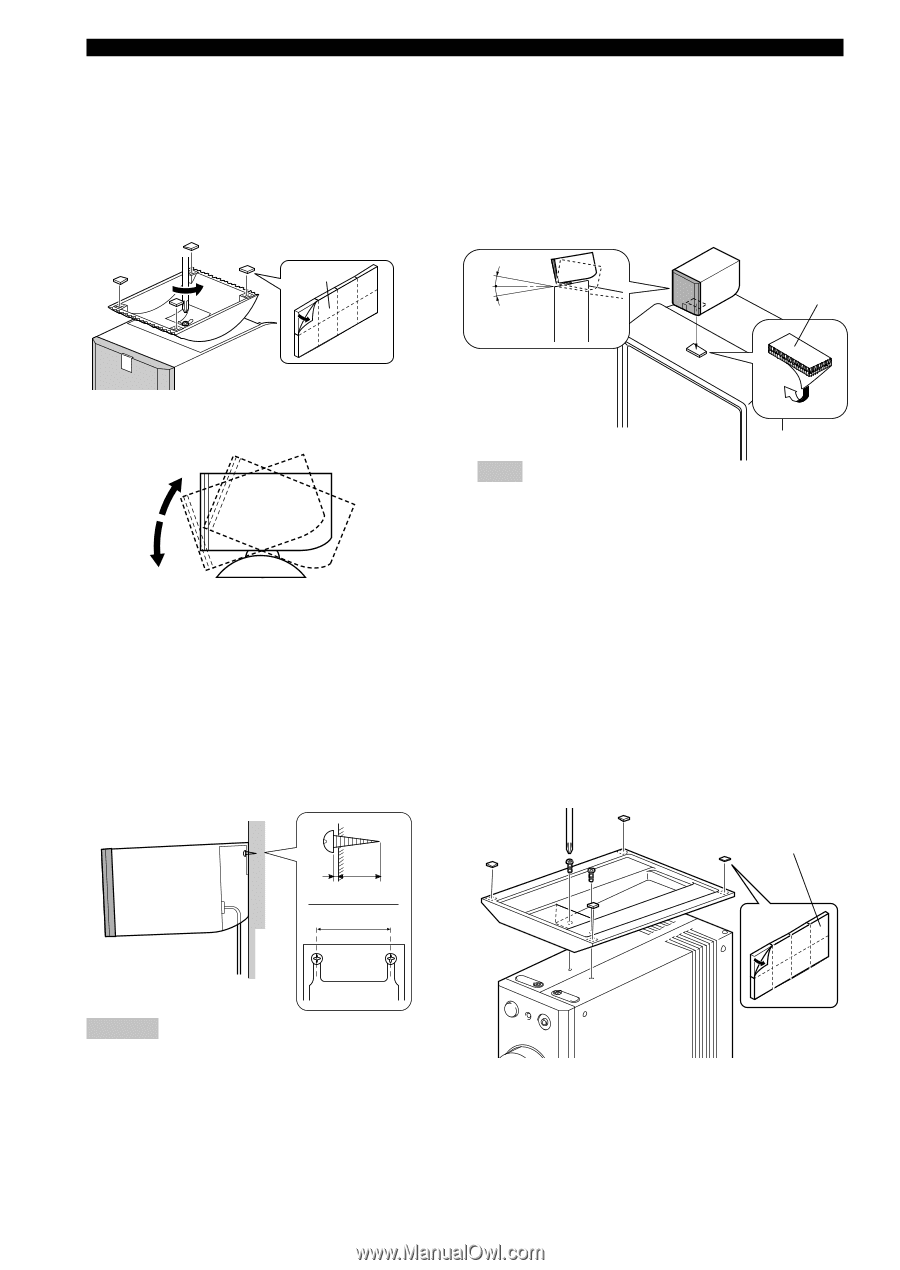
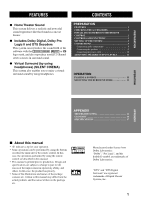
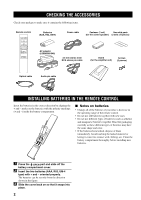
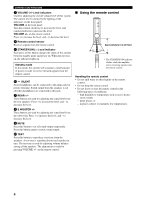
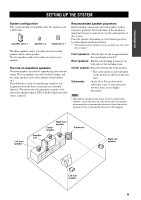
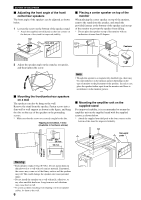
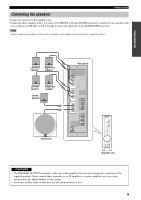
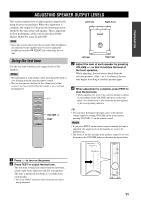
SETTING UP THE SYSTEM Ⅵ Adjusting the front angle of the front/ center/rear speakers The front angle of the speakers can be adjusted as shown below. 1 Loosen the screw on the bottom of the speaker stand. * Attach the supplied non-skid pads at the four corners on the bottom of the stand for improved stability. Ⅵ Placing a center speaker on top of the monitor When placing the center speaker on top of the monitor, remove the stand from the speaker, and attach the provided fastener at the bottom of the speaker and on top of the monitor to prevent the speaker from falling. * Do not place the speaker on top of the monitor with an inclination of more than 10 degrees. Non-skid 10؇ pads 10؇ Fastener 2 Adjust the speaker angle on the stand as you prefer, and then tighten the screw. Note • Though this speaker is a magnetically shielded type, there may be some influence on the monitor picture depending on the type of monitor or the placement of the speaker. In such a case, place the speaker further apart from the monitor until there is no influence on the monitor picture. Ⅵ Mounting the front/center/rear speakers on a wall The speakers can also be hung on the wall. Remove the stand from the speaker. Fasten screws into a firm wall or wall support as shown in the figure, and hang the slits on the rear of the speaker on the protruding screws. * Make sure that the screws are securely caught by the slits. Tapping screw (Diam. 4 mm) (Available in hardware stores) Ⅵ Mounting the amplifier unit on the supplied stand For improved stability, it is recommended to mount the amplifier unit on the supplied stand with the supplied screws as shown below. * Attach the supplied non-skid pads at the four corners on the bottom of the stand for improved stability. 5 mm Min. 20 mm 50 mm Non-skid pads Wall/ wall support Warning • Each speaker weighs 0.4 kg (0.9 lbs.). Do not mount them on thin plywood or a wall with soft surface material. If mounted, the screws may come out of the flimsy surface and the speakers may fall. This could damage the speakers and cause personal injury. • Do not install the speakers on a wall with nails, adhesives, or any other unstable hardware. Long-term use and vibrations may cause them to fall. • To avoid accidents resulting from tripping over loose speaker cables, fix them to the wall. 6
-
 1
1 -
2
-
 3
3 -
 4
4 -
 5
5 -
 6
6 -
 7
7 -
 8
8 -
 9
9 -
 10
10 -
 11
11 -
 12
12 -
 13
13 -
14
-
15
-
16
-
17
-
18
-
19
-
20
 |
 |