Yamaha Tyros2 Owner's Manual
Yamaha Tyros2 Manual
 |
View all Yamaha Tyros2 manuals
Add to My Manuals
Save this manual to your list of manuals |
Yamaha Tyros2 manual content summary:
- Yamaha Tyros2 | Owner's Manual - Page 1
Owner's Manual EN - Yamaha Tyros2 | Owner's Manual - Page 2
indicated in the safety instruction section. CAUTION RISK OF ELECTRIC SHOCK DO NOT OPEN CAUTION: TO REDUCE THE RISK OF ELECTRIC SHOCK. DO NOT REMOVE COVER (OR BACK). NO USER-SERVICEABLE PARTS INSIDE. REFER SERVICING TO QUALIFIED SERVICE PERSONNEL. See bottom of Keyboard enclosure for graphic symbol - Yamaha Tyros2 | Owner's Manual - Page 3
be dealer assembled or installed. Please make sure that benches are stable and any optional fixtures (where applicable) are well secured BEFORE using. Benches supplied by Yamaha are designed for seating only. No other uses are recommended. PLEASE KEEP THIS MANUAL 92-469-2 Tyros2 Owner's Manual 3 - Yamaha Tyros2 | Owner's Manual - Page 4
not open • This instrument contains no user-serviceable parts. Do not attempt to disassemble or modify instrument inspected by qualified Yamaha service personnel. CAUTION Always follow the outlet you are using is easily accessible. If some trouble or malfunction occurs Tyros2 Owner's Manual (2)-10 1/2 - Yamaha Tyros2 | Owner's Manual - Page 5
risk losing ALL your USER drive data-including all voices, styles, Multi Pad banks and Registration Memory presets you've saved to the USER drive. This caution also applies to creating a new folder on the USER drive or using the factory reset operation (page 196). Yamaha cannot be held responsible - Yamaha Tyros2 | Owner's Manual - Page 6
cord x 1 ● Music rest and brackets ● CD-ROM ● Owner's Manual (this book), Data List, Installation Guide ● Screws for installing the optional hard disk drive ■ About the included CD-ROM The accompanying CD-ROM features special software for use with the Tyros2. Included is a Voice Editor, which - Yamaha Tyros2 | Owner's Manual - Page 7
, MIDI Data Format, MIDI Implementation Chart. Installation Guide (separate) Included with the Tyros2 are some software programs (on the CD-ROM) that let you use your computer with the Tyros2 for creating voices. Refer to this guide for instructions on installing the included software. Tyros2 Owner - Yamaha Tyros2 | Owner's Manual - Page 8
between the Style and the Keyboard 36 Turning Style Parts On/Off and Changing Voices ..... 37 The Multi Pads 38 Playing the Multi Pads 38 Using Chord Match 38 Voice Effects 39 Applying Harmony to Your Right-hand Melody ......... 39 Calling Up Ideal Setups for Your Music -Music Finder 40 - Yamaha Tyros2 | Owner's Manual - Page 9
171 Music Finder Record Editing 171 Saving Music Finder Records as a single file 171 Registration Memory 173 Freeze 173 Registration Sequence 173 Using a Microphone 175 Vocal Harmony Edit 175 Talk Setting 177 Microphone Overall Settings 177 Mixing Console 179 Part Settings 180 Song Auto - Yamaha Tyros2 | Owner's Manual - Page 10
playback Song Score Page 112 Guide Page 49 Selecting the programs and settings of the Tyros2 ● Voices ...Page 25 ● Custom voices ...Page 94 ● Styles ...Page 31 ● Multi Pad banks ...Page 38 ● Songs (MIDI)...Page 43 ● Songs (audio) ...Page 59 ● Music Finder records ...Page 40 ● Registration Memory - Yamaha Tyros2 | Owner's Manual - Page 11
Music Finder Pages 40, 171 ● Changing setups to match the style Programmable One Touch Setting (OTS) ........Pages 36, 155 ● Saving and recalling custom panel setups Registration Memory Pages 52, 173 Creating sounds, styles, songs, and more ● Data that can be created using the Tyros2 - Yamaha Tyros2 | Owner's Manual - Page 12
Page 187 ● Synchronizing the Tyros2 to other MIDI instruments Page 215 Learning about MIDI ● About MIDI note events (playing the keyboard Page 210 ● About MIDI program changes (selecting voices Page 210 ● About MIDI events in songs, styles, and Multi Pads Page 210 12 Tyros2 Owner's Manual - Yamaha Tyros2 | Owner's Manual - Page 13
116 Computer applications ● What you can do with MIDI using a computer and the Tyros2 Page 66 ● Connecting a computer to the Tyros2 using a USB cable Page 66 ● Using the Voice Editor software ...Page 67, 111 ● Using the installed hard disk drive as a drive for your computer Page 67 Other Tips - Yamaha Tyros2 | Owner's Manual - Page 14
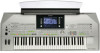
!6 !7 !8 !9 #1 #2 Headphones PHONES Keyboard The keyboard of the Tyros2 is equipped with a touch response fea- ture (initial touch and after touch) that lets you dynamically and expressively control the level of the voices with your playing strength-just as on an acoustic instrument. Page - Yamaha Tyros2 | Owner's Manual - Page 15
!9 REGISTRATION MEMORY buttons Pages 52, 173 @0 PROGRAMMABLE MUSIC FINDER button Pages 40, 171 @1 FUNCTION button Page 187 @2 VOICE CREATOR button Page 94 @3 DIGITAL RECORDING button Pages 121, 161, 169 @4 HARD DISK RECORDER buttons Pages 59, 135 @5 VOICE buttons Pages 25, 85 @6 PART SELECT - Yamaha Tyros2 | Owner's Manual - Page 16
an effect on a Super Articulation voice, and control a range of other important functions. An optional Yamaha FC7 Foot Controller connected to one of these jacks can be used to control volume and a range of other important functions. See page 189. MFC10 The sophisticated MIDI functions give you - Yamaha Tyros2 | Owner's Manual - Page 17
If you are connecting the Tyros2 to a mono sound system, use only the L/L+R jack. When only this jack is connected (using a standard phone plug), the left and right channels are combined and output through this jack-allowing you have a mono mix of the Tyros2's stereo sound. 17 Tyros2 Owner's Manual - Yamaha Tyros2 | Owner's Manual - Page 18
the Tyros2 has no built-in speakers, you'll need to use an external speaker system-such as the optional TRS-MS02, which is designed specifically for the Tyros2. For instructions on installing the TRS-MS02 to the Tyros2, see page 219. 18 Tyros2 Owner's Manual Shown here is the optional L-7S Keyboard - Yamaha Tyros2 | Owner's Manual - Page 19
below) are included before following the instructions below. Supplied with the Tyros2 Music rest brackets (2) Music rest 1 Attach the two music rest brackets to the rear panel of the Tyros2. Use the inside slots (as shown). 2 Attach the music rest to the brackets. 19 Tyros2 Owner's Manual - Yamaha Tyros2 | Owner's Manual - Page 20
using the Tyros2's features to the User drive or external devices. See page 75. If necessary, save any data you've created using to "MIN" and turn the Tyros2 off by pressing the [POWER ON/OFF] switch. 20 Tyros2 Owner's Manual Turn off the optional TRS-MS02 speaker system. CAUTION • Do not turn - Yamaha Tyros2 | Owner's Manual - Page 21
Raising and Closing the Display Panel Starting Up The Tyros2 features a semi-detachable display panel that can be tilted and adjusted-with four different latch points- to the the position is vertical, then push it down until it locks into place. Setting the LCD contrast 21 Tyros2 Owner's Manual - Yamaha Tyros2 | Owner's Manual - Page 22
Quick Guide Turning the Power On and Playing the Demos The Tyros2 features an extensive variety of Demo songs that showcase its rich, authentic voices and its dynamic rhythms and styles. [POWER ON/OFF] switch. [FUNCTION] button Turning the Power On and Viewing the Main Display After setting up - Yamaha Tyros2 | Owner's Manual - Page 23
display messages (page 69). Select the desired language by following the instructions below. 1 Press the [FUNCTION] button. 2 Press the [I] button to select UTILITY. 3 Use the [TAB] buttons to select the OWNER tab. 4 Use the [4] [5] buttons to select the desired language. 23 Tyros2 Owner's Manual - Yamaha Tyros2 | Owner's Manual - Page 24
Quick Guide Turning the Power On and Playing the Demos Playing the Demos The Demos are more than just songs-they also provide helpful, easy-to-understand introductions to the features, functions and operations of the Tyros2. In a way, the Demos are an interactive "mini-manual" complete with sound - Yamaha Tyros2 | Owner's Manual - Page 25
list in the separate Data List booklet. Selecting a Voice (RIGHT 1) and playing the keyboard 1 Turn the RIGHT 1 part on by pressing the [PART ON/OFF] button. 2 Press one of the [VOICE] buttons to call up the Voice selection dis- play. If necessary, use the [TAB] buttons to call up the PRESET page - Yamaha Tyros2 | Owner's Manual - Page 26
Sweet! Flute Sweet! Oboe Sweet! PanFlute S.Articulation! ConcertGuitar S.Articulation! SteelGuitar S.Articulation! WarmSolid S.Articulation! HeavyRock Live!Drums PowerKit1 / PowerKit2 Live!SFX PopLatinKit FrenchMusette Sweet! Harmonica S.Articulation! MagicBell Oxygen 26 Tyros2 Owner's Manual - Yamaha Tyros2 | Owner's Manual - Page 27
the left hand. Adjusting the Octave Setting The [UPPER OCTAVE] button allows the RIGHT 1, RIGHT 2, and RIGHT 3 parts to be simultaneously transposed up or down by one octave. NOTE • Press the [+] and [-] buttons simultaneously to instantly reset the octave value to 0. 27 Tyros2 Owner's Manual - Yamaha Tyros2 | Owner's Manual - Page 28
Quick Guide Playing Voices Organ Flutes The Tyros2 uses advanced digital ORGAN FLUTES] button to call up the Organ Flutes voice selection display. 2 Select the desired Organ voice and play the keyboard. 3 Press the upper [5] button to call other Organ Flutes voices. 28 Tyros2 Owner's Manual - Yamaha Tyros2 | Owner's Manual - Page 29
-28), styles (page 31), songs (page 43), and Registration Memory banks (page 53)-as well as save the various files to the User drive, USB drive and Hard Disk drive. 1 Press the [USER DRIVE] button to call up the Voice selection (Open/Save) display for the User drive. In this case, any keyboard part - Yamaha Tyros2 | Owner's Manual - Page 30
Quick Guide Playing Voices 3 Copy your favorite voices from the Preset drive to the User drive. In this case, any keyboard part (RIGHT 1-3) can be selected. Press the [COPY] LCD button (lower [3] button). Select the voice(s) to be copied. Press the [TAB] button. Press the [OK] LCD button (lower - Yamaha Tyros2 | Owner's Manual - Page 31
Style. NOTE • To select a drive other than PRESET, use the [TAB] buttons. 3 Turn Auto Accompaniment on. Press the [ACMP] button so that its indicator lights. The specified left-hand section of the keyboard becomes the Chord section, and chords played while Sync Start is on. 31 Tyros2 Owner's Manual - Yamaha Tyros2 | Owner's Manual - Page 32
is very versatile covering many songs, but this shows the power of Tyros2 whether you are listening to Orchestral realism or straight forward organ music. It's all unbelievable. World IrishHymn A great Celtic sound which has become very popular over recent years. Play either Intro which will take - Yamaha Tyros2 | Owner's Manual - Page 33
fingerings (page 152) are recognized and the chord root/type are shown in the LCD. Since the Tyros2 properly recognizes the chord, you can also use the Chord Match function (page 38) with the Multi Pads or the Harmony effect (page 39) without having to play back a style. 33 Tyros2 Owner's Manual - Yamaha Tyros2 | Owner's Manual - Page 34
section. The length of the intro (in measures) differs depending on the selected style. The Tyros2 also features three different intros. ● MAIN This is used for playing the main part of the song. It plays a rhythm pattern of several measures, and repeats indefinitely until another section's button - Yamaha Tyros2 | Owner's Manual - Page 35
Stop ..........When the Synchro Stop function is engaged, accompaniment playback will stop completely when all keys in the auto-accompaniment section of the key- board are released. Accompaniment playback will start again as soon as a chord or note is played. page 155 35 Tyros2 Owner's Manual - Yamaha Tyros2 | Owner's Manual - Page 36
playback and your right-hand keyboard performance by using LCD buttons [2], [5], [6], [7], and [8]. Determines the volume of song playback (page 43) Determines the volume of style playback 36 Tyros2 Owner's Manual Determines the volume of the keyboard part (page 80) Determines the volume of the - Yamaha Tyros2 | Owner's Manual - Page 37
the channel to set the channel to SOLO. To cancel SOLO, simply press the appropriate channel button again. From this display, you can change the voice used by the style. Select the desired voice in the same way as described on page 25. 37 Tyros2 Owner's Manual - Yamaha Tyros2 | Owner's Manual - Page 38
Quick Guide The Multi Pads Reference on page 169 The Multi Pads can be used to play a number of short pre-recorded rhythmic and melodic sequences that can be used to add impact and variety to your keyboard performances. BANK 01 Playing the Multi Pads 1 Select a Multi Pad Bank. Press the [SELECT] - Yamaha Tyros2 | Owner's Manual - Page 39
in the right-hand range of the keyboard. You can also use the Harmony effect with the style stopped (with the Stop Accompaniment function; page 33). Simply hold down a chord with your left hand and play a melody with your right. Try out Harmony/Echo with some of the voices below... Many of the - Yamaha Tyros2 | Owner's Manual - Page 40
on the Record list. Once the desired song name or music genre is highlighted, press the [ENTER] button to call up the corresponding Music Finder setup. Keep in mind that the panel setup actually called up is the one pre-programmed as the One Touch Setting. 3 Play the styles. 40 Tyros2 Owner's Manual - Yamaha Tyros2 | Owner's Manual - Page 41
the entered item at left. Select the desired music genre. Press the [START SEARCH] LCD button to execute the search. The Search 1 display appears, showing the results of the search. 3 Select the desired record from the list on the SEARCH 1 display and play the music style. 41 Tyros2 Owner's Manual - Yamaha Tyros2 | Owner's Manual - Page 42
Guide Calling Up Ideal Setups for Your Music-Music Finder Creating a Set of Favorite Records As convenient as the Search function is in plumbing the depths of the Music Finder records, you may want to create a "folder" of favorite records-so you can quickly call up those styles and settings you use - Yamaha Tyros2 | Owner's Manual - Page 43
see page 77. 3 Select a song in the USB storage device. Selecting a song is done in the same way as selecting a voice or style. 4 Press the SONG CONTROL [PLAY/PAUSE] button to start the selected song. This button lets you record your keyboard performance as MIDI song data. Page 55 During playback - Yamaha Tyros2 | Owner's Manual - Page 44
cannot be copied/moved/saved to ex- ternal devices. Indicates Yamaha-protection-formatted Songs. These cannot be copied. These can be moved/ saved only to the User drive and USB storage devices with ID. Indicates edited "Prot. 2 Orig" Songs. Make sure to save these to the same folder containing the - Yamaha Tyros2 | Owner's Manual - Page 45
Using markers in loop playback Try using the markers you registered in step #2 above to play back the separate "sections" of the song in loops. 1 Go to the top of the song passed.) Top of the song [SP1] [SP2] [SP3] [SP4] End of the song Green Red Green Green 45 Tyros2 Owner's Manual - Yamaha Tyros2 | Owner's Manual - Page 46
) on or off by using the lower LCD [1]-[8] buttons during song playback. Pressing the [CHANNEL ON/OFF] button repeatedly switches among the style parts (channels) and song channels. Press the LCD button corresponding to the part (channel) you wish to turn on or off. 46 Tyros2 Owner's Manual - Yamaha Tyros2 | Owner's Manual - Page 47
VOLUME] control to "MIN." Singing Along with Lyrics Try playing a song that contains lyric data, then sing along with it using the connected microphone. 1 Select a song that contains lyric data (page 44). 2 Press the [LYRICS/TEXT] button to call up the Lyrics display. 47 Tyros2 Owner's Manual - Yamaha Tyros2 | Owner's Manual - Page 48
microphone. • Turn down the MASTER VOLUME, STYLE volume or SONG volume control. ■ Vocal Harmony Chords Vocal Harmony is triggered by the chords you play. In the example instructions above, the chords played in the style chord section of the keyboard are used to trigger the Vocal Harmony. Depending - Yamaha Tyros2 | Owner's Manual - Page 49
of the keyboard do not sound.) ■ Guide menu for sing-along ● Karao-Key This function lets you control the song and accompaniment playback with just one finger, while you sing along. Simply play a key on the keyboard in time with music (any key is fine) and the accompaniment parts of the song follow - Yamaha Tyros2 | Owner's Manual - Page 50
the [GUIDE] button on. 5 Start song playback. 6 Song playback automatically pauses, indicating that you should play a certain melody note. Look at the notation in the LCD to see which note to play. 7 To stop the practice session in the middle of the song, stop song playback. 50 Tyros2 Owner's Manual - Yamaha Tyros2 | Owner's Manual - Page 51
Quick Guide Keyboard and Vocal Practice using the Guide function Vocal Practice using "Vocal Cue Time" 1 Connect a microphone to the Tyros2 (page 47). 2 Select the desired song for singing. 3 Call up the SONG SETTING display by following the procedure described on page 49 and select "Vocal Cue TIME - Yamaha Tyros2 | Owner's Manual - Page 52
memorized to the selected REGISTRATION MEMORY button (indicator is green or red) will be erased and replaced by the new settings. NOTE • To delete all eight current panel setups, turn the [POWER] button ON while holding the B6 key (right-most B key on the keyboard). 52 Tyros2 Owner's Manual - Yamaha Tyros2 | Owner's Manual - Page 53
of the Tyros2. Tyros2 panel settings Memorize Save Bank 04 Bank 03 Bank 02 Bank 01 Internal memory (RAM) User drive USB drive (optional) Hard disk drive (optional) For future recall, you'll need to save your Registration Memory settings to the drive. In these example instructions, we'll - Yamaha Tyros2 | Owner's Manual - Page 54
to the User drive. For instructions on entering names, see page 76. Recalling a Registration Memory Setup keyboard. By assigning a footswitch to control Registration Sequence, you can use your foot to step through the Registration Memory presets-in the order you've specified. 54 Tyros2 Owner's Manual - Yamaha Tyros2 | Owner's Manual - Page 55
(Right 1-3, LEFT, Multi Pad, each part of the selected style, etc) is assigned to each MIDI channel before recording. Save Memory drives for saving the recorded song • User drive • USB drive (optional) • Hard disk drive (optional) Load a song to be recorded/edited to this area. • When creating - Yamaha Tyros2 | Owner's Manual - Page 56
] LCD button (upper [8] button up button) to save the song file name and recorded data to the User drive. For instructions on entering names, see page 76. 56 Tyros2 Owner's Manual CAUTION • The recorded song will be lost if you change to another song or you turn the power off without executing the - Yamaha Tyros2 | Owner's Manual - Page 57
Quick Guide Recording Your Performances and Creating Songs-Song Recording ■ One song-sixteen MIDI channels On the Tyros2, a single song can contain separate data for up to sixteen MIDI channels. When recording your own performance, you'll need to assign each part you play to a separate MIDI - Yamaha Tyros2 | Owner's Manual - Page 58
sure to save the song data to the USER or USB drive when recording is completed. Call up the USER or USB page of the Song selection (Open/Save) display and execute the save. For details, see step #8 on page 56. ■ Re-recording or editing the already-recorded song Here in the "Quick Guide," you've - Yamaha Tyros2 | Owner's Manual - Page 59
Recording the Sound of the Tyros2 In this section, you'll play the keyboard and record the sound of the Tyros2 to the Hard Disk Recorder. You can record a maximum of 80 minutes to one audio song. 1 Select a voice for the RIGHT 1 part. For instructions on selecting a voice, see page 25. 2 Press the - Yamaha Tyros2 | Owner's Manual - Page 60
7 Press the [REC] button to enable recording. To cancel recording, press the [REC] button again. 8 Now you're ready to record. Press the [PLAY/PAUSE] button to start recording. Play the keyboard and record your performance. 9 When finished recording, press the [STOP] button. 60 Tyros2 Owner's Manual - Yamaha Tyros2 | Owner's Manual - Page 61
previous/next audio song Press the HARD DISK RECORDER [PREV]/[NEXT] button. This only selects the previous/next song in the same folder level. NOTE • The HARD DISK RECORDER [PREV] [NEXT] buttons cannot be used when the VOLUME, REC MODE or START END POINT display is shown. 61 Tyros2 Owner's Manual - Yamaha Tyros2 | Owner's Manual - Page 62
microphone, see page 47. 2 Select a style and enable auto accompaniment. For instructions on selecting a style and using auto accompaniment, see page 31. 3 Select a voice for the RIGHT 1 part. For instructions on selecting a voice, see page 25. 4 Press the HARD DISK RECORDER [REC] and [STOP] buttons - Yamaha Tyros2 | Owner's Manual - Page 63
Quick Guide Recording Audio to the Tyros2-Hard Disk Recorder 7 Practice the part you want to record and check the levels on the REC MONITOR meters. Start the style (see page 31), play the keyboard and sing at the same time. Check that the level doesn't constantly go into the "red" and light up the - Yamaha Tyros2 | Owner's Manual - Page 64
list at end of the Owner's Manual) for advice, or see the following web page: http://music.yamaha.com/tyros2 NOTE • If you are connecting two or three devices to a USB TO DEVICE terminal at the same time (such as two USB storage devices and a LAN adaptor), use a USB hub device. The USB hub must be - Yamaha Tyros2 | Owner's Manual - Page 65
, make sure to disable write-protect. ■ Formatting USB storage media When a message appears prompting you to format the device/media, execute the Format operation (page 194). CAUTION • The format operation overwrites any previously existing data. Proceed with caution. 65 Tyros2 Owner's Manual - Yamaha Tyros2 | Owner's Manual - Page 66
voices. There is also software on our website that lets you use your computer to manage files in the USER/USB/ HD (optional) drive. Tyros2 USB A type B type USB cable NOTE • There are two ways to connect the Tyros2 to a computer: MIDI cable and USB cable. In the following instructions, we'll use - Yamaha Tyros2 | Owner's Manual - Page 67
"normal" mode the USB connection can be used for MIDI control. The USB interface does not directly handle audio signals. 1 Confirm that the hard disk drive is installed to the Tyros2 and turn the computer's power on. 2 Turn the Tyros2's power on while holding the [MUSIC FINDER] button. 3 Manage files - Yamaha Tyros2 | Owner's Manual - Page 68
color), then use the [DATA ENTRY] dial to adjust it. This convenient technique also works well with pop-up parameters such as Tempo and Transpose. Simply press the appropriate button (ex., [TEMPO +], then rotate the [DATA ENTRY] dial and press [ENTER] to close the window. 68 Tyros2 Owner's Manual - Yamaha Tyros2 | Owner's Manual - Page 69
on. Display Messages Thanks to the large LCD panel, the Tyros2 can display comprehensive messages and prompts that clearly guide you through the various operations. When such messages appear, simply follow the instructions as shown by pressing the corresponding LCD button. 69 Tyros2 Owner's Manual - Yamaha Tyros2 | Owner's Manual - Page 70
[EXIT] button. Basic Structure of File/Folder and Memory Drives The Tyros2 utilizes a variety of data types-including voices, styles, songs and registration memory settings. Much of this data is already programmed and contained in the Tyros2; you can also create and edit your own data with some of - Yamaha Tyros2 | Owner's Manual - Page 71
using the respective Open/Save display. ● Voices (of musical instruments pages 25, 84 ● Custom Voices page 100 ● Library files ...page 108 ● Styles ...pages 31, 152 ● Songs...pages 43, 112 ● Audio data pages 59, 135 ● Multi Pad Banks pages 38, 169 ● Registration Memory Banks pages 52, 173 ● User - Yamaha Tyros2 | Owner's Manual - Page 72
the Preset drive cannot be copied or moved to the USB drive or HD drive because of copyright restrictions. Data can be written to these drives-allowing you to use all the file/folder operations above, including changing file names, deleting files, and creating new folders. 72 Tyros2 Owner's Manual - Yamaha Tyros2 | Owner's Manual - Page 73
Tyros2 data library grows, you'll want to organize it in various folders. This operation lets you create new folders on the User, optional USB storage devices and optional Hard Disk drives. The basic procedure is described below; for a specific example (using Voices), see page 29 in the Quick Guide - Yamaha Tyros2 | Owner's Manual - Page 74
Files (Copy & Paste) Folders and files can be freely copied among the installed drives, with the exception of the Preset drive-data can be copied from the Preset drive, but not to it. The basic procedure is described below; for a specific example (using Voices), see page 29 in the Quick Guide drive - Yamaha Tyros2 | Owner's Manual - Page 75
screen instructions. Saving Files This operation lets you save your original custom data (such as songs and voices you've created) to the User, optional USB storage devices or optional Hard Disk drives. Note button). 6 Press the [OK] button again to actually save the file. 75 Tyros2 Owner's Manual - Yamaha Tyros2 | Owner's Manual - Page 76
by using the upper [1] button. ate button for a while. • CASE capital letters, numbers, marks • case lowercase letters, numbers, marks 6 Press the [OK] LCD button (upper [8] button) to actually enter the new name for the item and return to the original display. 76 Tyros2 Owner's Manual - Yamaha Tyros2 | Owner's Manual - Page 77
File Operations using voice number 128, for example, press the [1], [2] and [8] buttons in sequence as shown below, and press the [ENTER] button. Entering one- or two-digit numbers is done in the same way. When you select the next or previous file, press the [1]-[6] buttons. 77 Tyros2 Owner's Manual - Yamaha Tyros2 | Owner's Manual - Page 78
is to be memorized. 3 Call up the other path (for example, the Open/Save display for voices) and press the same button as in step #2. You will see the display same as shown in step #1. Paths for style files can also be memorized, as explained above. See page 156 for details. 78 Tyros2 Owner's Manual - Yamaha Tyros2 | Owner's Manual - Page 79
or the parameter to be adjusted. ■ Cursor indication of files (voices, styles, songs, etc The currently selected voice which will sound when you play the keyboard. You can move the cursor around the Open/Save display by using the [DATA ENTRY] dial. The highlighted item is not actually selected - Yamaha Tyros2 | Owner's Manual - Page 80
or sound-effect voice. VOICE RIGHT 1 + RIGHT 2 Synchro Start On/Off The convenient Synchro Start function lets you start style or song playback by simply playing a key on the keyboard. Naturally, it should be set to on (standby) when you want to use it. ● Synchro Start-Style Playback (page 31 - Yamaha Tyros2 | Owner's Manual - Page 81
!3 TEMPO buttons !4 TRANSPOSE buttons --- Starting/stopping the Metronome 193 --- Tapping out the tempo of the style playback 154 (Pop-up window) Changing the tempo of the Style/Multi Pad/Song playback 154 (Pop-up window) Transposing the pitch up or down 88 81 Tyros2 Owner's Manual - Yamaha Tyros2 | Owner's Manual - Page 82
FOOT PEDAL KEYBOARD/PANEL REGIST SEQUENCE/ FREEZE/VOICE SET REGISTRATION SEQUENCE FREEZE VOICE SET HARMONY/ECHO SCREEN OUT MIDI SYSTEM TRANSMIT RECEIVE BASS CHORD DETECT MFC10 UTILITY CONFIG 1 CONFIG 2 MEDIA OWNER SYSTEM RESET Setting the overall pitch of the Tyros2 Tuning each individual - Yamaha Tyros2 | Owner's Manual - Page 83
that match the selected style Transposing Upper parts (RIGHT 1-3) up or down by one octave 36, 155 27 #1 PITCH BEND wheel --- Bending notes played on the keyboard up or down 88 #2 MODULATION wheel --- Applying a vibrato effect to notes played on the keyboard 88 83 Tyros2 Owner's Manual - Yamaha Tyros2 | Owner's Manual - Page 84
effective when used with style playback. For example, if you play and release a chord in the Chord section of the keyboard (with the Left part on and the Left voice set to Strings), the strings part sustains, adding a natural richness to the overall accompaniment sound. 84 Tyros2 Owner's Manual - Yamaha Tyros2 | Owner's Manual - Page 85
...Your original voices created by using the Voice Creator function (page 94) or with the Voice Editor software (pages 66, 111) can be saved to the Preset drive as Custom voice data. Custom Voices saved to the Preset drive can be called up via the [CUSTOM VOICE] button. 85 Tyros2 Owner's Manual - Yamaha Tyros2 | Owner's Manual - Page 86
notes, the full 128 notes will not be available on the keyboard when a style is played back. The same applies to the Voice RIGHT 1, RIGHT 2, RIGHT 3, LEFT, Multi Pad, and Song functions. When the maximum polyphony is exceeded, notes are played using last-note priority. 86 Tyros2 Owner's Manual - Yamaha Tyros2 | Owner's Manual - Page 87
Processor) effect on or off for the currently selected keyboard part. • The [DSP VARIATION] button lets you switch between two variations of the DSP effect.You could use this while you play, for example, to change the rotating speed (slow/fast) of the rotary speaker effect. 87 Tyros2 Owner's Manual - Yamaha Tyros2 | Owner's Manual - Page 88
to more than 1200 cents (1 octave) via MIDI, the pitch of some voices may not be raised or lowered completely. ■ MODULATION Wheel ...The Modulation function applies a vibrato effect to notes played on the keyboard. This is applied to all the keyboard parts (RIGHT 1-3 and LEFT). Moving the MODULATION - Yamaha Tyros2 | Owner's Manual - Page 89
. The [1] buttons are used to adjust either the 16' or 5-1/3' footages. Select the desired footage here, then adjust it with the [1] buttons. 4 Press the [SAVE] LCD button to call up the Open/Save display of the User drive and save the settings here as a User voice to the drive. For details, see - Yamaha Tyros2 | Owner's Manual - Page 90
on or off for the selected organ voice. PARAMETER Indicates the parameter to which the variation is applied depending on the selected DSP type. VALUE Adjusts the degree of the DSP variation parameter. These determine the Frequency and Gain of the Low and High EQ bands. 90 Tyros2 Owner's Manual - Yamaha Tyros2 | Owner's Manual - Page 91
R1/R2/R3 parameter is available; when the edited voice is used as the LEFT part, the LEFT parameter is available. Determines whether the edited voice is played monophonically or polyphonically (page 87). Sets the portamento time when the edited voice is set to "MONO" above. 91 Tyros2 Owner's Manual - Yamaha Tyros2 | Owner's Manual - Page 92
Reference Voice Editing (Voice Set) ■ CONTROLLER ● MODULATION The Modulation Wheel can be used to modulate the parameters below as well as the pitch (vibrato). Here, you These frequencies are "passed" by the filter. Cutoff range Frequency (pitch) Frequency (pitch) 92 Tyros2 Owner's Manual - Yamaha Tyros2 | Owner's Manual - Page 93
Determines the amount of time that elapses between the playing of a key and the start of the Vibrato effect (see diagram edited voice when turning the [SUSTAIN] button in the VOICE EFFECT section on. ■ HARMONY Same as in the [FUNCTION] → HARMONY/ECHO display. See page 191. 93 Tyros2 Owner's Manual - Yamaha Tyros2 | Owner's Manual - Page 94
be selected and played in the same way as all other Tyros2 voices. You can save your original voices to a USB storage device or an installed hard disk drive, as well as the User drive. You can also edit Preset voices or Custom voices on a computer by using the Voice Editor software (contained in the - Yamaha Tyros2 | Owner's Manual - Page 95
appears letting you know an empty voice will be created. Select "OK" to create a new voice. When the new voice is created, playing the keyboard does not produce any sound. 5 Select the desired Element. NOTE • The created element can be edited by using the Voice Editor. 95 Tyros2 Owner's Manual - Yamaha Tyros2 | Owner's Manual - Page 96
however, that multiple loops are not supported.) • Audio files recorded with the Hard Disk Recorder cannot be used as is with the Voice Creator. If you want to use a Hard Disk Recorder file, export the file (using the Hard Disk Recorder's Export function) in .wav data format. 96 Tyros2 Owner's Manual - Yamaha Tyros2 | Owner's Manual - Page 97
[IMPORT] LCD button (lower [6] button). Reference Voice Creator-Custom Voice Edit NOTE • Double-clicking on the corresponding LCD button Hz, 44100 Hz, 32000 Hz, 22050 Hz or 11025 Hz. Otherwise, the data may not play back at the correct pitch. 10 Press the [OK] LCD button (lower [7] button). The - Yamaha Tyros2 | Owner's Manual - Page 98
LCD buttons) • By simultaneously holding down the [DIRECT KEY] LCD button and pressing the desired key on the keyboard. When you want to delete Wave, select the Wave to be deleted from the "WAVE" parameter in the KEY MAPPING display and press the [DELETE WAVE] LCD button. 98 Tyros2 Owner's Manual - Yamaha Tyros2 | Owner's Manual - Page 99
time. (At the confirmation prompt, select [YES] with the [F] button.) • Saving the voice to the USER drive is not recommended since the USER drive does not have much memory space-only about 3 MB. • Do not use any special characters (umlaut, accent, etc.) in the voice name. 99 Tyros2 Owner's Manual - Yamaha Tyros2 | Owner's Manual - Page 100
voice button) and press the [VOICE CREATOR] button to select the WAVE IMPORT menu. If you select the WAVE IMPORT menu after creating a Custom voice without selecting another voice, you cannot create another Custom voice-just add another element in the current Custom voice. 100 Tyros2 Owner's Manual - Yamaha Tyros2 | Owner's Manual - Page 101
that you need to customize the voice and make it ready for playing. 1 Select a Custom voice. Press the [CUSTOM VOICE] button and select the desired voice. NOTE • If you have a computer, you can also use the Voice Editor software to edit Custom voices. (For details, see page 111.) 2 Press - Yamaha Tyros2 | Owner's Manual - Page 102
are used to play the keyboard. The Drum folder contains the voices which are used in playing back styles. You cannot create the DRUM voices by editing the Wave data; you can only create them by editing the drum voices in the PRESET drive. You can use the DRUM voices by replacing them in styles from - Yamaha Tyros2 | Owner's Manual - Page 103
wave assignment information. A maximum of 512 waveforms is available. ● File Property NAME PATH VOICE SIZE WAVE SIZE WAVE COUNT WAVEFORM COUNT Name of the file. Location of the file. Size of the Custom voice. Total wave size in the voice. See Memory Status list above. 103 Tyros2 Owner's Manual - Yamaha Tyros2 | Owner's Manual - Page 104
or device containing the desired Custom voice by using the [TAB] buttons. If, for example, you have a hard disk drive installed and a USB storage device connected to the Tyros2, there will be three choices: USER, HD1, and USB1. 4 Select the desired Custom voice by pressing the corresponding LCD - Yamaha Tyros2 | Owner's Manual - Page 105
] LCD button (lower [8] button). NOTE • File loading may take as little as a couple of seconds or as long as a few minutes, depending on how much data is contained in the voice. 9 When you press the [CUSTOM VOICE] button, the newly loaded Custom voice will be available. 105 Tyros2 Owner's Manual - Yamaha Tyros2 | Owner's Manual - Page 106
voice Library by using the [TAB] buttons. If, for example, you have a hard disk drive installed and a USB storage device connected to the Tyros2, there will be three choices: USER, HD1, and USB1. 4 Select the desired Library file by pressing the corresponding LCD button. 106 Tyros2 Owner's Manual - Yamaha Tyros2 | Owner's Manual - Page 107
all the rest. The displayed voice in the prompt will not be replaced. Cancels loading the library file. 6 Press the [EXIT] button repeatedly to return to the MAIN display. 7 When you press the [CUSTOM VOICE] button, the newly loaded Custom voices will be available. 107 Tyros2 Owner's Manual - Yamaha Tyros2 | Owner's Manual - Page 108
are used to play the keyboard. The Drum folder contains the voices which are used in playing back styles. You cannot create the DRUM voices by editing the Wave data; you can only create them by editing the drum voices in the PRESET drive. You can use the DRUM voices by replacing them in styles from - Yamaha Tyros2 | Owner's Manual - Page 109
[7] button). Reference Voice Creator-Custom Voice Edit 6 Select the destination for saving the data by using the [TAB] but- tons. If, for example, you have a hard disk drive installed and a USB storage device connected to the Tyros2, there will be three destination choices: USER, HD1, and USB1 - Yamaha Tyros2 | Owner's Manual - Page 110
of files are saved to the same drive but are shown in different Open/Save displays. Example of saving a library file with the "ALL DATA" selection to hard disk, using the Custom voices in a USB storage device Custom voice files USB A F B G C H D I E J Save with the "ALL DATA" selection - Yamaha Tyros2 | Owner's Manual - Page 111
to create your original voice. For details, refer to the Voice Editor documentation on the included CD-ROM. 4 When you've finished editing, save and assign the edited voice on the Tyros2. 5 Exit the Voice Editor. 6 Press the [CUSTOM VOICE] button and play your Custom voice. 111 Tyros2 Owner's Manual - Yamaha Tyros2 | Owner's Manual - Page 112
(page 55) and saved to one of the drives. In addition, the Tyros2 can display music notation and lyrics, and you can use the sophisticated Guide functions to practice the keyboard and your singing as well. This section explains detailed settings about song playback that are not covered in "Quick - Yamaha Tyros2 | Owner's Manual - Page 113
page) LEFT CH (channel)/RIGHT CH (channel) KEY SIGNATURE QUANTIZE NOTE NAME Determines which MIDI channel in the song data is used for the left-hand/righthand part. This setting returns to AUTO when a different song is selected. AUTO The MIDI channels in the song data for the right- and left-hand - Yamaha Tyros2 | Owner's Manual - Page 114
of useful possibilities: • The phrases to be sung are highlighted in time with the music, making it easy to follow the words and sing along with the song. Connect a microphone and you can even have your voice mixed with the song accompaniment as it plays. • Connect an external monitor to the Tyros2 - Yamaha Tyros2 | Owner's Manual - Page 115
Lyrics display. Clears the text from the screen (the text data itself is not erased). Use this function when you want to clear the text from the display-both the display of When the background color is specified in the song data, the BACKGROUND setting cannot be changed. 115 Tyros2 Owner's Manual - Yamaha Tyros2 | Owner's Manual - Page 116
is called up on the instrument itself. This lets you select other displays and still have the lyrics or text shown on the external monitor. 4 Play the song by following the Basic Procedure (Lyrics/Text) on pages 114 and 115. 116 Tyros2 Owner's Manual - Yamaha Tyros2 | Owner's Manual - Page 117
This is because of limitations in the effect processors of the Tyros2. • When using the Guide function (the [GUIDE] lamp is on) with jump playback, keep in mind that the Guide indication may not be able to stay in time with the jumps. If the song is playing back between SPJ-02 and the second SPJ-01 - Yamaha Tyros2 | Owner's Manual - Page 118
Open/Save display for songs. 2 Press the desired song LCD button so that the NEXT mark appears inside the file box indicating that the selected song has been set to play next. You can cancel this setting by pressing the [NEXT/CANCEL] LCD button and selecting another song. 118 Tyros2 Owner's Manual - Yamaha Tyros2 | Owner's Manual - Page 119
number is repeatedly played back (page 117) ■ MIDI Channel parameters LEFT CH RIGHT CH AUTO CH SET This parameter is available when the AUTO CH SET below is set to "OFF." This parameter determines which MIDI channel in the song data is assigned to the Lefthand part of the Guide function and the - Yamaha Tyros2 | Owner's Manual - Page 120
right hand. Play several notes one after the other with different fingers of your right hand. Play three notes at the same time with your right hand. 5 Press the SONG CONTROL [STOP] button to stop playback. 6 Press the [P. A. T.] button again to turn the feature off. 120 Tyros2 Owner's Manual - Yamaha Tyros2 | Owner's Manual - Page 121
re-record the already-recorded song. Re-record the song by following the instructions (from step #2 to end) in the Quick Guide. 4 This page lets you edit the already-recorded song data by converting for each channel. These pages let you create the song data by using the MIDI event list. CAUTION - Yamaha Tyros2 | Owner's Manual - Page 122
the [REC] button to re-record an existing song by following the instructions (from step #2 to end) in the "Quick Guide." ■ REC START settings... NORMAL FIRST KEY ON PUNCH IN AT Pressing the SONG CONTROL [PLAY/PAUSE] button or playing the keyboard with [SYNC START] on starts overwrite recording - Yamaha Tyros2 | Owner's Manual - Page 123
(assuming 4/4 meter) Quantizing strength =100 Quantizing strength =50 ■ Delete...This lets you delete recorded data of the specified channel in the song data. Select the channel to be deleted by using the upper/lower LCD [1]-[8] buttons and press the [EXECUTE] LCD button. 123 Tyros2 Owner's Manual - Yamaha Tyros2 | Owner's Manual - Page 124
items are recorded to the song. SONG KEYBOARD VOICE SCORE SETTING GUIDE SETTING LYRICS SETTING MIC SETTING Records the tempo setting and all settings made from the Mixing Console. Records the current panel settings, including the voice of the keyboard-played parts (RIGHT 1, 2, 3, and LEFT) and - Yamaha Tyros2 | Owner's Manual - Page 125
Sect: Indicates the Section change event. Chord: Indicates the Chord change event. NOTE • Make sure to turn [AUTO FILL IN] off. Select this resolution and play chords as shown at right. MAIN D 001 : 3 : 000 Dm7 002 : 1 : 000 Em7 CM7 Dm7 Em7 125 Tyros2 Owner's Manual - Yamaha Tyros2 | Owner's Manual - Page 126
to the top of the song by using this LCD button. 126 Tyros2 Owner's Manual IMPORTANT • The chord progression can be played back only from this STEP RECORD display. To play the chords, you'll need to press the [EXPAND] LCD button (next page) on the CHORD display to convert the events recorded here - Yamaha Tyros2 | Owner's Manual - Page 127
display are the same as that of the channel data editing display (1-16 page) described on page 132. Press this to convert the recorded chord and section entries into song data. You'll need to execute the Expand operation to properly play back the data you entered in the STEP RECORD page (described - Yamaha Tyros2 | Owner's Manual - Page 128
, as specified in the example. Value Normal Tenuto Staccato Staccatissimo Manual Actual recorded velocity 80% 99% 40% 20% The gate time (note length) can be set to any desired percentage by using the [DATA ENTRY] dial. 2 Play the keys C, D, E, F, G, A, B and C in order, as specified in the example - Yamaha Tyros2 | Owner's Manual - Page 129
note (as a percentage). Here, we'll select "Staccato," as specified in the example. Use these buttons to set the resolution of the next notes. Here, we'll set the resolution to an 1/8 note, as specified in the example. 4 Play the keys E, F and A, as specified in the example. 129 Tyros2 Owner's Manual - Yamaha Tyros2 | Owner's Manual - Page 130
ed in the example. 6 Play an A on the keyboard, as specified in the example. 7 Set the parameters below in sequence. Use these buttons to set the up the Song Open/Save display for saving your data, then save the data in the Open/Save display (page 75). 130 Tyros2 Owner's Manual CAUTION • - Yamaha Tyros2 | Owner's Manual - Page 131
the following steps. While holding the keys C3 and E3, press the 1/8 note LCD button. 4 Enter the note G3. Do not release C3, E3 and G3 yet. Keep holding the notes as you execute the following steps. While holding the keys C3, E3 and G3, press the 1/8 note LCD button. 131 Tyros2 Owner's Manual - Yamaha Tyros2 | Owner's Manual - Page 132
keyboard is played. Each message includes a specific note number which corresponds to the key which is pressed, plus a velocity value based on how hard the key is played. Ctrl (Control Change) Controller settings such as volume, pan (edited booklet (MIDI Data Format). 132 Tyros2 Owner's Manual - Yamaha Tyros2 | Owner's Manual - Page 133
paste the data. HDR (HDR play control) This controls Audio song playback via song data. This event is used to playback a MIDI song and Audio song in succession; the Audio song cannot be synchronized to the MIDI song playback. Step Recording for Lyrics using the Event List The explanations here - Yamaha Tyros2 | Owner's Manual - Page 134
Song Creator (Digital Recording) Customizing the Event List-Filter Because the Event List displays (CHORD, 1-16, SYS/EX. and LYRICS) contain a wide variety of events, it may be difficult to pinpoint the ones you want to edit events. STYLE : Displays all types of style playback Tyros2 Owner's Manual - Yamaha Tyros2 | Owner's Manual - Page 135
play the listed files when you want. (For details on the Playlist mode, see page 147.) Hard Disk File many files. If this is the case, select all files by using "ALL" in the copy pop-up hard disk drive or USB storage device. (Page 139) For creating a new audio file. (Page 60) 135 Tyros2 Owner's Manual - Yamaha Tyros2 | Owner's Manual - Page 136
path of the file. Indicates the sample rate of the recorded audio. Indicates the bit size or resolution of the recorded audio. Indicates the configuration of the audio. Indicates the time between Start and End points of the audio, in hours/minutes/ seconds/milliseconds. 136 Tyros2 Owner's Manual - Yamaha Tyros2 | Owner's Manual - Page 137
'll use a USB flash drive here. 2 Press the HARD DISK RECORDER [SELECT] button to call up the AUDIO display. 3 Press the [CHANGE MENU] LCD button (lower [8] button) if neces- sary, then call up the Import function by pressing the [WAVE IMPORT] LCD button (lower [7] button). 137 Tyros2 Owner's Manual - Yamaha Tyros2 | Owner's Manual - Page 138
Reference Recording Audio with the Hard Disk Recorder 4 Select the desired device by using the [TAB] buttons. Generally, a USB device will show up as "USB1" in the display. When the device is selected, all file, press the [EXIT] button to display the AUDIO Open/Save display. 138 Tyros2 Owner's Manual - Yamaha Tyros2 | Owner's Manual - Page 139
with the Hard Disk Recorder Exporting an Audio File This function allows you to transfer your recorded audio files to a computer (via a USB storage device) for further editing and/or recording. (For instructions on importing the edited audio back to the Tyros2, see "Importing an Audio File" on page - Yamaha Tyros2 | Owner's Manual - Page 140
Reference Recording Audio with the Hard Disk Recorder 6 Select the desired destination for exporting by using the [TAB] but- tons. Generally, a USB device will show up as "USB1" in the display. When the device les will be exported and unaffected by cancelling the operation. 140 Tyros2 Owner's Manual - Yamaha Tyros2 | Owner's Manual - Page 141
you can add other parts. 2 Press the HARD DISK RECORDER [SETTING] button, then use the [TAB] buttons to select the REC MODE tab. 3 Use the [A]/[B] buttons to select a recording method. Replace the whole data: NORMAL REC Mix the recorded data: NORMAL REC (PLUS PLAYBACK) 141 Tyros2 Owner's Manual - Yamaha Tyros2 | Owner's Manual - Page 142
the Hard Disk Recorder 4 If you select NORMAL REC (PLUS PLAYBACK) in the step above, play back the recorded audio and practice the part that you want to overdub while the audio is playing. Change the volume settings if necessary. If you wish to add a keyboard-played voice from the Tyros2, select - Yamaha Tyros2 | Owner's Manual - Page 143
ending points at sections in the data where the volume is low. 3 Use the [A]/[B] buttons to select a recording method. Re-record over a specific part of the already-recorded material: PUNCH IN/OUT Mix a specific part of the already-recorded material: PUNCH IN/OUT (MERGE) 143 Tyros2 Owner's Manual - Yamaha Tyros2 | Owner's Manual - Page 144
above the [8] buttons. 3-2 Press the HARD DISK RECORDER [REC] button and press the [PLAY/ PAUSE] button. The audio song is played back repeatedly starting four seconds before the punch in point to four seconds after the punch out point. Play the keyboard or sing the desired part in practice. In this - Yamaha Tyros2 | Owner's Manual - Page 145
Recording Audio with the Hard Disk Recorder 5 Record the specific part of the audio song using the one of the methods below. ● Manual Press the HARD DISK RECORDER [REC] button and press the [PLAY/PAUSE] button to engage the record mode, then press the [REC] and [PLAY/PAUSE] buttons simultaneously to - Yamaha Tyros2 | Owner's Manual - Page 146
Hard Start/End points is same as specifying the punch in/out points. For instructions, see "Specify the recording range in AUTO mode" on page 144. 5 NOTE • When exporting a song for which the Start/End points have been specified, only the specified range will be exported. 146 Tyros2 Owner's Manual - Yamaha Tyros2 | Owner's Manual - Page 147
number of recorded or imported audio files on the installed hard disk drive, you can assign those files to the Playlist. using the LCD buttons. 3 Press the [CHANGE MENU] LCD button (lower [8] button) if neces- sary, then press [Add to PLAYLIST] LCD button (lower [6] button). 147 Tyros2 Owner's Manual - Yamaha Tyros2 | Owner's Manual - Page 148
of the files in the folder, a quick method is to use the [ALL] LCD button to select all of the files, then use the [A]-[J] buttons to deselect specific files. To select all cannot be saved except to the installed hard disk drive, and only one Playlist can be saved to the drive. 148 Tyros2 Owner's Manual - Yamaha Tyros2 | Owner's Manual - Page 149
mode is active, the HARD DISK RECORDER [PREV]/[ use the [PLAY/PAUSE] button to start playback of the Playlist from the selected file. NOTE • To select a file, you can also use the [DATA ENTRY] dial to move the cursor and press the [ENTER] button to actually select the song. 149 Tyros2 Owner's Manual - Yamaha Tyros2 | Owner's Manual - Page 150
Reference Recording Audio with the Hard Disk Recorder 4 Press the HARD DISK RECORDER [STOP] button to stop playback. To disengage the Playlist mode, press the [AUDIO] LCD button ([6] buttons) to show the AUDIO Open/Save display and select an audio song. 150 Tyros2 Owner's Manual - Yamaha Tyros2 | Owner's Manual - Page 151
a hard disk drive or USB storage devices. (See "Exporting an Audio File" on page 139.) y HDR PLAY BALANCE LCD button (upper [3] button) and select the desired file entry by using the [DATA ENTRY] dial and [SELECT] LCD button (lower [5] button). song at the cursor position. 151 Tyros2 Owner's Manual - Yamaha Tyros2 | Owner's Manual - Page 152
the instructions below. 152 Tyros2 Owner's Manual Selects the fingering type, which determines how the chords are specified (which notes you should play). See below for details. Chord Tutor Specify the Chord Root and Type here, and the notes of the chord are indicated in the keyboard illustration - Yamaha Tyros2 | Owner's Manual - Page 153
, the Tyros2 will automatically create appropriate accompaniment while you play just about anything, anywhere on the keyboard using both hands. You don't have to worry about specifying the style chords. Although the AI Full Keyboard type is designed to work with many songs, some arrangements may not - Yamaha Tyros2 | Owner's Manual - Page 154
[FADE IN/OUT] button can be used to produce smooth fade-ins and fade-outs when starting and stopping the style/song playback. This affects the overall sound of the Tyros2-including the your keyboard performance and the Multi Pads, as well as the styles and songs. 1 Press the [FADE IN/OUT] button - Yamaha Tyros2 | Owner's Manual - Page 155
the style as soon as you play a left-hand chord on the keyboard. • Custom panel settings (for voices, keyboard parts, effects, etc.) designed to best match the selected style are automatically called up-letting you instantly reconfigure the instrument to suit the music you play. The Tyros2 actually - Yamaha Tyros2 | Owner's Manual - Page 156
pressing the appropriate STYLE button. 4 Call up the other path (for example, the Open/Save display for voices) and call up the path memorized in step #3 by following the instructions below. Turn [FILE ACCESS] on and press appropriate STYLE button (set in step #3 above). 156 Tyros2 Owner's Manual - Yamaha Tyros2 | Owner's Manual - Page 157
to normal, letting you release the keys and still have the style play. ■ Style Touch ...Turns touch response for the style playback on/off. When this is set to "ON," the style volume changes in response to your playing strength in the chord section of the keyboard. 157 Tyros2 Owner's Manual - Yamaha Tyros2 | Owner's Manual - Page 158
are maintained (HOLD) or all parts are reset to on when you select another style. Simultaneously Playing a Song and a Style When playing back a song and a style at the same time, channels 9-16 of the song data are replaced with style channels-allowing you to use the styles and features in place of - Yamaha Tyros2 | Owner's Manual - Page 159
ways to create MIDI sequence data of each part: Recording, which allows you to record parts from the keyboard (using Realtime or Step Recording), and Assembly, which lets you bring various pattern data together by copying from other styles. Both methods, Recording and Assembly, replace the original - Yamaha Tyros2 | Owner's Manual - Page 160
Source Pattern are to be converted in response to chord changes. ● Other Settings page 167 Using the parameters of this group, you can fine-tune how style playback responds to the chords you play. For example, the Note Limit parameter allows you to have the voices of the style sound as realistic as - Yamaha Tyros2 | Owner's Manual - Page 161
above for information about the basic style creation parameters. For actual instruction steps for recording, see the sections below. ■ Recording note events to a Rhythm part (channel 1 Select one of the Rhythm parts as a recording part on the BASIC display (above). 161 Tyros2 Owner's Manual - Yamaha Tyros2 | Owner's Manual - Page 162
. You can start recording in one of two ways: • Press the STYLE CONTROL [START/STOP] button. • Press the STYLE CONTROL [SYNC START] button to enable Synchro Start standby, then play a key on the keyboard. Turn the playback parts on/off as desired. The recording repeats indefinitely (until stopped) in - Yamaha Tyros2 | Owner's Manual - Page 163
or Dynamics parameters (see next page). CAUTION After you've finished creating/editing a style, make sure to execute the Save operation. The recorded style will be lost if you change to another style or you turn the power off without executing the save operation (page 75). 163 Tyros2 Owner's Manual - Yamaha Tyros2 | Owner's Manual - Page 164
to the music or change the "feel" of the beat by making subtle shifts in the timing (clock) of the style. The Groove settings are applied to all parts of the selected style. ORIGINAL BEAT BEAT CONVERTER SWING FINE the overall velocity, while values below 100% reduce it. 164 Tyros2 Owner's Manual - Yamaha Tyros2 | Owner's Manual - Page 165
when playing the chords in the left-hand range of the keyboard. Parameter settings on this display are available only when any of the nonrhythm parts are set to "REC" on the RECORD pop-up window on the BASIC page. For details about the relationship between the parameters, refer to "Style File Format - Yamaha Tyros2 | Owner's Manual - Page 166
previous note range. For example, the notes C3, E3 and G3 in the key of C become C3, F3 and A3 when they are transposed to F. Use this setting for channels that contain chord parts. When playing a C major chord. When playing an F major chord. ● NTT (Note Transposition Table) This sets the note - Yamaha Tyros2 | Owner's Manual - Page 167
all sections and parts (channels) using a CM7 (C major seventh) chord. • Record the parts on the MIDI channels listed at right, using the Tyros2's internal tone generator. If the Tyros2 is not used during recording, make sure to use XG voices on an XG- and SFF- (Style File Format) compatible tone - Yamaha Tyros2 | Owner's Manual - Page 168
Style Creator (Digital Recording) • The Initial Setup area from 1|2|000 through 1|4|479 is used for voice and effect settings. Do not include note event data. • The Main A data begins at 2|1|000. Any number of measures from 1 to 255 can be used Change (Multi Part) DRY LEVEL Tyros2 Owner's Manual - Yamaha Tyros2 | Owner's Manual - Page 169
Multi Pad Banks. Instructions for these operations are the same as in the other Open/Save displays (such as voices, songs, and styles). These operations can be used on each individual pad, just as with the banks on the display at left. Settings here can be saved to User drive or external devices - Yamaha Tyros2 | Owner's Manual - Page 170
begins automatically as soon as you play on the keyboard. You can also start recording by pressing the STYLE CONTROL [START/STOP] button. This voicing of the guitar. Because of this, if the Chord Match setting is set to off, the Multi Pads may not sound appropriately. 170 Tyros2 Owner's Manual - Yamaha Tyros2 | Owner's Manual - Page 171
MUSIC FINDER lets you save the Music Finder file to the User drive or external devices. All records can be saved together as a single file. Record Record Preset Records (editable) Records added from the Music Finder display. Up to 2500 records can be created and saved. 171 Tyros2 Owner's Manual - Yamaha Tyros2 | Owner's Manual - Page 172
RESET → MUSIC FINDER. Select the desired Music Finder file from the User drive or external devices. All Music Finder records can be stored together as a single file. When selecting a stored file, a message appears prompting you to replace or append the records as desired. REPLACE All Music Finder - Yamaha Tyros2 | Owner's Manual - Page 173
not covered in the "Quick Guide." ■ About User Voices and Registration Memory When you memorize a panel setup to Registration Memory that uses a User voice (on the User drive or external devices), keep in mind that the actual User voice is not memorized to Registration Memory-only its settings are - Yamaha Tyros2 | Owner's Manual - Page 174
first sequence will be selected by pressing one of the [TAB] buttons or by pressing the pedal. 5 Call up the Open/Save display for the Registration Memory Bank and save the Regis- tration Sequence setting as a Registration Memory Bank file. 174 Tyros2 Owner's Manual - Yamaha Tyros2 | Owner's Manual - Page 175
. This turns the Vocal Harmony effect on or off. If you connect a microphone to the Tyros2, you can sing along with the song or style and have vocal harmony parts added automatically. Vocal Harmony Edit This section explains briefly how to create your own Vocal Harmony types, and lists the detailed - Yamaha Tyros2 | Owner's Manual - Page 176
converts it to note data for the tone generator. Keep in mind, however, that dynamic changes in your voice do not affect the volume of the tone generator.) Determines which of the Tyros2 parts will be controlled by the lead vocal when the Pitch to Note parameter is "ON." 176 Tyros2 Owner's Manual - Yamaha Tyros2 | Owner's Manual - Page 177
Using a Microphone Talk Setting This function is ideal for making announcements between your singing performances. When singing a song desired effects to your voice as you speak . If necessary, use the [TAB] buttons be saved to the User drive or external devices your voice and The Tyros2 features - Yamaha Tyros2 | Owner's Manual - Page 178
1-16, note data (played from a song on disk or external MIDI sequencer) contained on the corresponding channel is used to control the harmony. Keyboard control over harmony is turned off. Notes played to the right of the . Adjusts the output volume of the microphone sound. 178 Tyros2 Owner's Manual - Yamaha Tyros2 | Owner's Manual - Page 179
the separate Data List booklet. • The settings of the keyboard parts, Style part, Maulti Pad part, and Microphone sound part can be memorized to the Registration Memory (page 52). • The settings of the Song part can be saved as a song to the User drive or external devices. After setting, call up the - Yamaha Tyros2 | Owner's Manual - Page 180
. • When playing GM song data, channel 10 (in the SONG CH 9- 16 page) can only be used for a Drum Kit voice. • When changing the rhythm/percussion voices (drum kits, etc.) of the style and song from the VOICE parameter, the detailed settings related to the drum voice are reset, and in some cases you - Yamaha Tyros2 | Owner's Manual - Page 181
the settings. Effects The Tyros2 has a wide variety of high-quality effects-including Reverb, Chorus, and a diverse selection of DSP (Digital Signal Processor) effects-that can be used to independently enhance or change the sound of the various parts (keyboard, style, song, Multi Pads, and - Yamaha Tyros2 | Owner's Manual - Page 182
style parts (channels). Note that the same problem may occur when starting or selecting a style during song playback. • About DSP 2-5 The effect blocks DSP 2 through 5 are available independently for the keyboard parts and song parts. Only that part which has been assigned to an effect block can use - Yamaha Tyros2 | Owner's Manual - Page 183
the name of the edited Effect type. Enter the desired name and press the [OK] LCD button to save the edited effect to the location specified at left. NOTE • Keep in mind that in some cases noise may result if you adjust the effect parameters while playing the instrument. 183 Tyros2 Owner's Manual - Yamaha Tyros2 | Owner's Manual - Page 184
band appears above the Q and FREQ controls. The Q and FREQ controls can then be used to adjust the Q (bandwidth) and the FREQ (center frequency) of the selected band. The higher the Q setting, the narrower the bandwidth. The available FREQ range is different for each band. 184 Tyros2 Owner's Manual - Yamaha Tyros2 | Owner's Manual - Page 185
-Part songs. However, there may be times when you want to "sweeten" or process a certain Voice or sound with a favorite outboard effect unit, or record a Part to a separate track of a tape recorder. The Line Out settings are designed just for these kinds of applications. 185 Tyros2 Owner's Manual - Yamaha Tyros2 | Owner's Manual - Page 186
jacks on the rear panel • PHONES jack • LOOP SEND jack • Optional Speaker ■ SUB jacks The part, channel, or percussion sound of which the SUB1, SUB2, or SUB1&2 box sound of the Part will be output through the MAIN jacks, even if one of the SUB1/SUB2/SUB1&2 is checkmarked. 186 Tyros2 Owner's Manual - Yamaha Tyros2 | Owner's Manual - Page 187
current tuning of each note is shown in the corresponding key. NOTE • The Scale Tune settings here can be memorized to the Registration Memory. Select the desired note and tune it. Select the part to which the Scale Tune setting here is applied by checkmarking the box. 187 Tyros2 Owner's Manual - Yamaha Tyros2 | Owner's Manual - Page 188
Beethoven, and even now it is often used when performing period music on the harpsichord. Use these tunings when playing Arabic music. Voice Set Parameters set on the VOICE SET display called up via the [FUNCTION] → REGISTRATION MEMORY/FREEZE/VOICE SET→VOICE SET are explained here. When changing - Yamaha Tyros2 | Owner's Manual - Page 189
the function off. If necessary, use this setting to reverse the keyboard part The portamento effect (a smooth slide between notes) can be produced while the pedal is pressed. Portamento is produced when notes are played legato style (i.e., a note is played keyboard part 189 Tyros2 Owner's Manual - Yamaha Tyros2 | Owner's Manual - Page 190
Setting. Recalls next lower One Touch Setting. * For best results, use an optional Yamaha FC7 Foot Controller. NOTE • The Sostenuto and Portamento functions will not affect the Organ Flutes and Super Articulation Voices, even they have been assigned to the Foot Pedals. 190 Tyros2 Owner's Manual - Yamaha Tyros2 | Owner's Manual - Page 191
or not to the notes for each part. ● TRANSPOSE ASSIGN page 88 You can determine to which parts the [TRANSPOSE] button is applied. KEYBOARD SONG MASTER When this is selected, the [TRANSPOSE] button affects the pitch of the keyboardplayed voices, style playback (controlled by the performance in - Yamaha Tyros2 | Owner's Manual - Page 192
to selectively apply the harmony by your playing strength, letting you create harmony accents in the melody. The harmony effect is applied when you play the key strongly (above the set value). This parameter is available for all types with the exception of "Multi Assign." 192 Tyros2 Owner's Manual - Yamaha Tyros2 | Owner's Manual - Page 193
to the selected style or song is set. ● Parameter Lock This function is used to "lock" the specified parameters so that they can only be changed directly via the panel controls-in other words, instead of being changed via Registration Memory, One Touch Setting, Music Finder, or song and sequence - Yamaha Tyros2 | Owner's Manual - Page 194
USB storage device and optionally installed hard disk drive. Checking remaining memory on the media (see below). Formatting a media (see below) IMPORTANT • If you use the floppy disk, make sure to read the section "Handling the floppy disk drive (FDD) and floppy disks" on page 231. Turns the Song - Yamaha Tyros2 | Owner's Manual - Page 195
the main picture loaded from an external device is not displayed, copy the picture from the device to the USER drive in the instrument and set it as the main background picture. Sometimes the Main display is loaded prior to loading of the picture from an external device. 195 Tyros2 Owner's Manual - Yamaha Tyros2 | Owner's Manual - Page 196
Voices (page 85) on the Preset drive. ● Custom Reset-Recalling your own custom settings The four categories of settings below allow you to call up your own custom reset settings from files saved to the User of Disk drive. SYSTEM SETUP FILES MIDI SETUP FILES USER EFFECT FILES MUSIC FINDER FILES - Yamaha Tyros2 | Owner's Manual - Page 197
, etc.) via a router or a modem equipped with a router. For specific instructions on connecting (as well as information on compatible LAN adapters, routers, etc.), refer to the Yamaha Tyros2 website: http://music.yamaha.com/tyros2 Use a computer to connect to the Internet and get online before - Yamaha Tyros2 | Owner's Manual - Page 198
Tyros2 Website From the special Tyros2 website, you can audition and purchase Song . • Entering characters For instructions on entering characters in the Use the [DATA ENTRY] dial to scroll through the display and view those parts of the page that are not shown. Scroll bar 198 Tyros2 Owner's Manual - Yamaha Tyros2 | Owner's Manual - Page 199
display. 2 4 3 5 1 2 Select the desired character type by pressing the [A]/[B] buttons. 3 Use the [] LCD buttons to move the red highlight to the desired character. You can also use the [DATA ENTRY] dial to move the red highlight to the desired position. 199 Tyros2 Owner's Manual - Yamaha Tyros2 | Owner's Manual - Page 200
(upper [8] button) to enter the character. Entering a Space 1 Move the cursor to the desired position. Use the same operation as in step 1 of "Deleting Characters" above. 2 Press the [SPACE] LCD button ( ] LCD button ([1] button), press the [FORWARD] LCD button ([2] button). 200 Tyros2 Owner's Manual - Yamaha Tyros2 | Owner's Manual - Page 201
data to the USB storage device, only use devices whose compatibility has been confirmed by Yamaha as listed on the following web page: http://music.yamaha.com/tyros2 CAUTION • The purchased data will be lost if you turn the power to the instrument off during download. 201 Tyros2 Owner's Manual - Yamaha Tyros2 | Owner's Manual - Page 202
Reference Connecting the Tyros2 Directly to the Internet Saving Bookmarks of Your Favorite Pages You can "bookmark" the page you're viewing, and or press the [CANCEL] LCD button to cancel ([8] button). 5 To return to the browser, press the [CLOSE] LCD button ([8] button). 202 Tyros2 Owner's Manual - Yamaha Tyros2 | Owner's Manual - Page 203
press the [MOVE] LCD button ([6] button). The lower part of the display changes, letting you select the new position Used when saving a bookmark (page 202). Jump Opens the web page of the selected bookmark. Cursor up/down Moves the selection position in the Bookmark list. 203 Tyros2 Owner's Manual - Yamaha Tyros2 | Owner's Manual - Page 204
the setting "Set this page as Home." 5 Use the [EDIT] LCD buttons ([2], [3] buttons) to actually set the selected page as your new Home page. 6 To return to the browser, press the [EXECUTE] LCD button ([7] button). To cancel, press the [CANCEL] LCD button ([8] button). 204 Tyros2 Owner's Manual - Yamaha Tyros2 | Owner's Manual - Page 205
LCD button ([2] button) to select the setting or change the value. This can also be done by using the [DATA ENTRY] dial. NOTE • Entering Characters When the character input display is opened, you can button). To cancel, press the [CANCEL] LCD button (lower [3] button). 205 Tyros2 Owner's Manual - Yamaha Tyros2 | Owner's Manual - Page 206
to "ASCII," the keys are arranged as a conventional "QWERTY" keyboard. This determines the time setting for the browser. ■ LAN ...Both the wired LAN and wireless LAN need to be set in this display. Make a written note of the settings here, in case you have to enter them again. Use DHCP DNS server1 - Yamaha Tyros2 | Owner's Manual - Page 207
the Tyros2 Directly to the Internet ■ Wireless LAN For a wireless LAN setup, make sure to set both the LAN settings (page 206) and the Wireless LAN settings below. Make a written note of the settings here, in case you have to enter them again. SSID Channel Encryption WEP key type WEP key length - Yamaha Tyros2 | Owner's Manual - Page 208
when using the Initialize operation of the Tyros2; Internet settings must be initialized separately, as explained here. Initializing will reset to bookmarks, use the appropriate operations in the OTHERS tab display (page 207). NOTE • Cookies contain personal information. 208 Tyros2 Owner's Manual - Yamaha Tyros2 | Owner's Manual - Page 209
system's hard drive or other local storage device-much like copying files from your hard disk drive to a floppy disk. For this instrument, this refers to the process of transferring Song and other that allows data transfer through a wireless, cable-free connection. 209 Tyros2 Owner's Manual - Yamaha Tyros2 | Owner's Manual - Page 210
note) 120 (strong) As described above, your keyboard performance and panel operations such as voice selection are handled as MIDI events. All the data of Style, Song, and Multi Pad played back or recorded consist of MIDI messeages. MIDI (Musical Instrument Digital Interface) allows electronic - Yamaha Tyros2 | Owner's Manual - Page 211
MIDI ports, allowing simultaneous use of thirty-two channels. Tyros2 part Voice R1 Voice R2 Voice R3 Voice L Multi Pad 1 Multi Pad 2 Multi Pad 3 Multi Pad 4 Style Rhythm 1 (sub) Style Rhythm 2 (main) Style Bass Style Chord 1 Style Chord 2 Style Pad Style Phrase 1 Style Phrase 2 MIDI cable or USB - Yamaha Tyros2 | Owner's Manual - Page 212
the SMF (Standard MIDI File) standard with greater functionality and open-ended expandability for the future. The Tyros2 is capable of displaying lyrics when an XF file containing lyric data is played. ● STYLE FILE The Style File Format-SFF-is Yamaha's original style file format which uses a unique - Yamaha Tyros2 | Owner's Manual - Page 213
parts). This template lets you play/control the chord root in style playback with a MIDI pedal unit (connected to MIDI B only). This template lets you play the bass part for style playback by using a MIDI pedal unit (connected to MIDI B only). No MIDI signals are sent or received. 213 Tyros2 Owner - Yamaha Tyros2 | Owner's Manual - Page 214
MIDI receive (page 217) Settings for a connected MFC10 MIDI Foot Controller (page 217) 4 Press the [EDIT] LCD button to call up the display for setting the MIDI parameters. Here you can see and edit the detailed settings that correspond to the MIDI template selected in step #3. 214 Tyros2 Owner - Yamaha Tyros2 | Owner's Manual - Page 215
no sound is output when you play the keyboard or use the controllers. For example, this allows you to use an external MIDI sequencer to play the Tyros2's internal voices, and use the Tyros2 keyboard to record notes to the external sequencer and/or play an external tone generator. ■ Clock setting - Yamaha Tyros2 | Owner's Manual - Page 216
the desired Registration Memory via MIDI (1) Set "PART" to "KEYBOARD." (2) Send the following MIDI messages from an external device in the following sequence. BANK MSB/LSB: Target Registration Memory Bank File number(*) * File Number corresponds to the sorted order of the current drive. The value - Yamaha Tyros2 | Owner's Manual - Page 217
for Style Playback via MIDI MIDI OUT terminals of the Tyros2 by using a MIDI cable. MFC10 MIDI IN MIDI OUT NOTE • Do not connect the MIDI OUT terminal of the MFC10 to the MIDI IN of the Tyros2 in this step. If desired, connect additional foot controllers to the MFC10. 217 Tyros2 Owner's Manual - Yamaha Tyros2 | Owner's Manual - Page 218
MFC10 to confirm whether you can properly control the Tyros2 from the MFC10 as set in step #4. 7 Go back to the MIDI template selection display and save the settings above to the User drive if necessary. ■ Using a computer or another MIDI instrument instead of the MFC10 The following two settings - Yamaha Tyros2 | Owner's Manual - Page 219
it from the bracket by rotating the lever, then adjust the speaker position as desired, and fasten it to the bracket again. 4 Use the RCA pin cables to connect the speakers to the respective outputs on the Tyros2. NOTE • Either cable can be used for either location. 219 Tyros2 Owner's Manual - Yamaha Tyros2 | Owner's Manual - Page 220
Appendix Installing the Optional Speakers 5 Use the RCA pin/8-pin combination cable to connect the subwoofer speaker to the respective outputs on the Tyros2. Tyros2 Sub-Woofer 6 Connect the power plugs of the Tyros2 and the subwoofer to an appropriate AC outlet. 7 First, set the volume controls ( - Yamaha Tyros2 | Owner's Manual - Page 221
end of this owner's manual. Install a hard disk at your own risk. Yamaha will not be held responsible for any damage or injury resulting from improper installation or the use of a hard disk other than one of the types recommended by Yamaha. http://music.yamaha.com/tyros2 Before following the steps - Yamaha Tyros2 | Owner's Manual - Page 222
PSR-9000/ 9000Pro/Tyros. However, to properly use the style, Multi Pad, and Registration Memory files from the PSR-9000/ 9000Pro/Tyros, you will need to convert the data using a computer and the File Converter software (available for free download on the Tyros2 website). 222 Tyros2 Owner's Manual - Yamaha Tyros2 | Owner's Manual - Page 223
Before purchasing DIMMs, please consult your Yamaha dealer, or an authorized Yamaha distributor (see list at end of the Owner's Manual) for advice, or see the following page: http://music.yamaha.com/tyros2 ■ DIMM Type and DIMM Configuration • Yamaha recommends that you purchase DIMMs that conform - Yamaha Tyros2 | Owner's Manual - Page 224
installation ↑ Rear panel (Underside of the Tyros2) DIMM sockets Installing the DIMM modules to Check that the installed DIMMs are functioning properly. Set the Tyros2 right-side up, and connect the power cord to RAM in the PROPERTY pop-up of the Voice Creator function (page 103). If the DIMMs have - Yamaha Tyros2 | Owner's Manual - Page 225
Troubleshooting Appendix PROBLEM When using a mobile phone, noise is produced. No sound results. The voice selected from the Open/Save display will not be sounded. Not all simultaneously-played notes sound. Style playback seems to "skip" when the keyboard is played. The style or song does not play - Yamaha Tyros2 | Owner's Manual - Page 226
/Hard Disk Recorder (pages 122, 143), Registration Sequence (page 173) and many functions from the Function display (page 189). If you assign multiple functions to the pedal, the priority is: Punch in/out of Song or Hard Disk Recorder > Registration Sequence > Functions 226 Tyros2 Owner's Manual - Yamaha Tyros2 | Owner's Manual - Page 227
Event List A useful Song/Style/Multi Pad Creator tool that arranges all events in a song in chronological order (in measures, beats, clocks), and allows you to make detailed changes to those events. F Factory Reset Refers to the original, factory-programmed settings of User drive memory, loaded to - Yamaha Tyros2 | Owner's Manual - Page 228
. Right-hand section of the keyboard The section of keys to the right of the split point, used to play the RIGHT 1-3 voices. Revoice A function that changes the voice for each part or channel of the selected style or song to one of the specially created voices of the Tyros2. ROM An acronym for "Read - Yamaha Tyros2 | Owner's Manual - Page 229
Sound Source Keyboard LCD Display Voice Music Score, Lyrics Text RAM Capacity per a text Wallpaper Customize Polyphony (max) Voice Selection MegaVoices Sweet! Voices Super Articulation Voices Live! Voices Live! Drums Cool! Voices Organ Flutes! Orchestration Voice Expandability Hard Disk - Yamaha Tyros2 | Owner's Manual - Page 230
for user drive Hard Disk Drive (Internal) Storage devices (via USB to DEVICE) Registration Memory Buttons Control Others Demo Language for Display Direct Access Scale Type Metronome Terminals USB to HOST USB to DEVICE MIDI Control Video Out RGB Out Audio For Option Speaker Power - Yamaha Tyros2 | Owner's Manual - Page 231
protective cases when they are not in use. • drive in optimum working order Yamaha recommends that you use a commercially-available dry-type head cleaning disk to clean the head about once a month. Ask your Yamaha dealer about the availability of proper headcleaning disks. 231 Tyros2 Owner's Manual - Yamaha Tyros2 | Owner's Manual - Page 232
69 F Factory Reset 196 FADE IN TIME 193 FADE IN/OUT.. 35, 81, 154, 190, 193 FADE OUT HOLD TIME 193 FADE OUT TIME 193 FF (Fast Forward 43, 81, 117 File 71 FILE ACCESS 81, 156 FILL BREAK 190 FILL DOWN 190 FILL IN 34 FILL SELF 190 FILL UP 190 232 Tyros2 Owner's Manual - Yamaha Tyros2 | Owner's Manual - Page 233
GM 85 GM2 85 GROOVE 83, 163 GS 212 GUIDE 49, 81 H HARD DISK RECORDER 59, 83, 135 Harmonic Content 92, 180 HARMONIC MINOR 166 Harmony Mode 48 Harmony Types 192 HARMONY/ECHO .. 39, 83, 190, 191 HD drive 29, 71 HDR PLAY/PAUSE 190 HIGH KEY 160, 167 I IDC (Internet Direct Connection)... 197 - Yamaha Tyros2 | Owner's Manual - Page 234
, 80, 190 RIGHT 2 26, 80, 190 RIGHT 3 80, 190 rit 34 ROOT FIXED 166 ROOT TRANS 166 Rotary Speaker Speed 89 RTR 160, 167 S S. ARTICULATION 16, 190 S. Articulation! voices 86 Save 75 SCALE TUNE 82, 187 SCORE 81, 112 SCORE PAGE 190 SCREEN OUT 82, 188 Search 41 234 Tyros2 Owner's Manual - Yamaha Tyros2 | Owner's Manual - Page 235
121 STOP 81, 82, 83 Stop Accompaniment 33, 157 STRENGTH 123 STYLE 31, 71, 81, 152, 156 STYLE CONTROL 34, 81 STYLE CREATOR 83, 159 Style Touch 157 SUB 17 SUB jacks 186 Super Articulation 86 SUSTAIN 16, 39, 83, 87, 189 Sweet! voices 86 Swing 164 SYNC START .... 31, 80, 81, 155, 190 SYNC - Yamaha Tyros2 | Owner's Manual - Page 236
Tyros2 Owner's Manual - Yamaha Tyros2 | Owner's Manual - Page 237
product you have purchased in the spaces provided below. Model Serial Sales Slip Purchased from Date Retailer) YAMAHA CORPORATION OF AMERICA Electronic Service Division 6600 Orangethorpe Avenue Buena Park, CA 90620 KEEP THIS DOCUMENT FOR YOUR RECORDS. DO NOT MAIL! Tyros2 Owner's Manual - Yamaha Tyros2 | Owner's Manual - Page 238
the problem by using one user manual instructions if interference to radio reception is suspected. * This applies only to products distributed by YAMAHA CORPORATION OF AMERICA. (mercury) * This applies only to products distributed by YAMAHA CORPORATION OF AMERICA. (FCC DoC) Tyros2 Owner's Manual - Yamaha Tyros2 | Owner's Manual - Page 239
: +507-269-5311 EUROPE THE UNITED KINGDOM Yamaha-Kemble Music (U.K.) Ltd. Sherbourne Drive, Tilbrook, Milton Keynes, MK7 8BL, England Tel France Tel: 01-64-61-4000 ITALY Yamaha Musica Italia S.P.A. Viale Italia 88, 20020 Lainate (Milano), Italy Tel: 02-935-771 SPAIN/PORTUGAL Yamaha-Hazen Música, S.A. - Yamaha Tyros2 | Owner's Manual - Page 240
is printed on chlorine free (ECF) paper. Yamaha Home Keyboards Home Page (English Only) http://music.yamaha.com/homekeyboard Yamaha Manual Library http://www.yamaha.co.jp/manual/ U.R.G., Pro Audio & Digital Musical Instrument Division, Yamaha Corporation © 2005 Yamaha Corporation WE86550 602POCP4
-
 1
1 -
 2
2 -
 3
3 -
 4
4 -
 5
5 -
 6
6 -
 7
7 -
8
-
9
-
10
-
11
-
12
-
13
-
14
-
15
-
16
-
17
-
18
-
19
-
20
-
21
-
22
-
23
-
24
-
25
-
26
-
27
-
28
-
29
-
30
-
31
-
32
-
33
-
34
-
35
-
36
-
37
-
38
-
39
-
40
-
41
-
42
-
43
-
44
-
45
-
46
-
47
-
48
-
49
-
50
-
51
-
52
-
53
-
54
-
55
-
56
-
57
-
58
-
59
-
60
-
61
-
62
-
63
-
64
-
65
-
66
-
67
-
68
-
69
-
70
-
71
-
72
-
73
-
74
-
75
-
76
-
77
-
78
-
79
-
80
-
81
-
82
-
83
-
84
-
85
-
86
-
87
-
88
-
89
-
90
-
91
-
92
-
93
-
94
-
95
-
96
-
97
-
98
-
99
-
100
-
101
-
102
-
103
-
104
-
105
-
106
-
107
-
108
-
109
-
110
-
111
-
112
-
113
-
114
-
115
-
116
-
117
-
118
-
119
-
120
-
121
-
122
-
123
-
124
-
125
-
126
-
127
-
128
-
129
-
130
-
131
-
132
-
133
-
134
-
135
-
136
-
137
-
138
-
139
-
140
-
141
-
142
-
143
-
144
-
145
-
146
-
147
-
148
-
149
-
150
-
151
-
152
-
153
-
154
-
155
-
156
-
157
-
158
-
159
-
160
-
161
-
162
-
163
-
164
-
165
-
166
-
167
-
168
-
169
-
170
-
171
-
172
-
173
-
174
-
175
-
176
-
177
-
178
-
179
-
180
-
181
-
182
-
183
-
184
-
185
-
186
-
187
-
188
-
189
-
190
-
191
-
192
-
193
-
194
-
195
-
196
-
197
-
198
-
199
-
200
-
201
-
202
-
203
-
204
-
205
-
206
-
207
-
208
-
209
-
210
-
211
-
212
-
213
-
214
-
215
-
216
-
217
-
218
-
219
-
220
-
221
-
222
-
223
-
224
-
225
-
226
-
227
-
228
-
229
-
230
-
231
-
232
-
233
-
234
-
235
-
236
-
237
-
238
-
239
-
240
 |
 |

Owner
’
s Manual
EN