Yamaha Tyros4 Internet Connection Guide (version 1.10) - Page 9
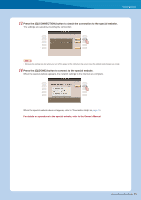
Press the [F]YES button, then within 2 minutes hold down the WPS button of the access
 |
UPC - 086792947280
View all Yamaha Tyros4 manuals
Add to My Manuals
Save this manual to your list of manuals |
Page 9 highlights
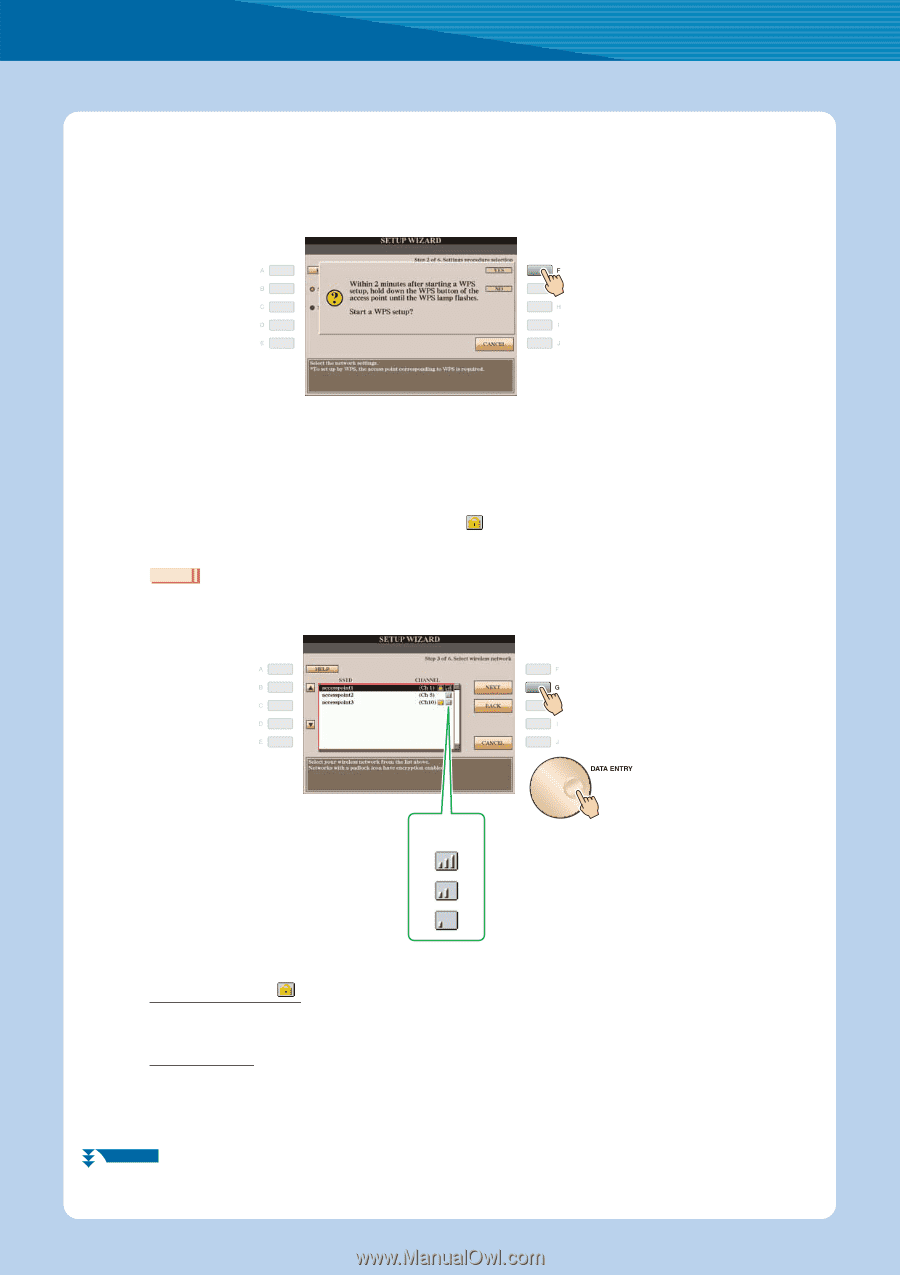
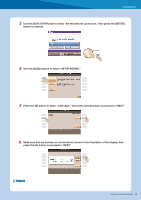
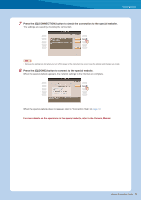
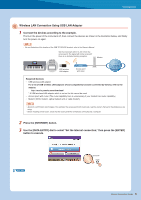
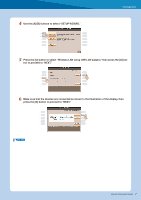
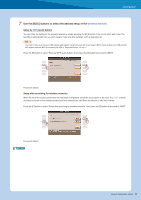
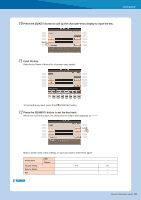
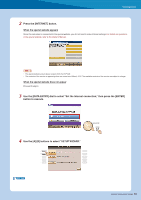
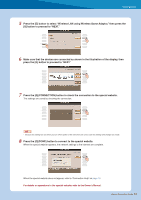
Connection 8 Press the [F](YES) button, then within 2 minutes hold down the WPS button of the access point with router. For details about the operations in the setting of the access point on the router side, read the owner's manual for the product you are using. Proceed to step 13. 9 Use the [DATA ENTRY] dial to select the desired access point, then press the [G] button to proceed to "NEXT." The SSID, channel and security format of the selected access point are automatically set. An access point that is security-enabled is displayed with a padlock icon " ," Input the key. Make sure that the settings are the same as those for the access point on the router side. NOTE • For details on confirmation and changes in the setting of the access point on the router side, refer to the owner's manual for the product you are using. Signal strength The signal strength may not be displayed depending on the particular USB wireless LAN adaptor you are using. With padlock icon " " Since the security is set to your access point with router, proceed to step 10, then input the key. No padlock icon If your access point with router has not been security-enabled, you don't need to make a setting for the wireless LAN. Proceed to step 13 on page 11. If you want to set the security to the access point, change this in the settings of your access point with router. NEXT PAGE Internet Connection Guide 9
-
 1
1 -
2
-
3
-
 4
4 -
 5
5 -
 6
6 -
 7
7 -
 8
8 -
 9
9 -
 10
10 -
 11
11 -
 12
12 -
 13
13 -
 14
14 -
15
-
16
-
17
-
18
-
19
-
20
-
21
-
22
 |
 |