Zenith Z19LCD3 Operation Guide
Zenith Z19LCD3 - 720p LCD HDTV Manual
 |
UPC - 719192172425
View all Zenith Z19LCD3 manuals
Add to My Manuals
Save this manual to your list of manuals |
Zenith Z19LCD3 manual content summary:
- Zenith Z19LCD3 | Operation Guide - Page 1
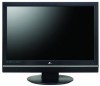
Installation and Operating Guide Model Numbers [ Z19LCD3, Z22LCD3 [ LCDTV o zenl:D @ ENERGY STAR is a set of power-saving guidelines issued by the U.S. Environmental this product meets the ENERGY STAR guidelines for energy efficiency. © Copyright 2007, [6 Electronics USA, Inc. zenith - Zenith Z19LCD3 | Operation Guide - Page 2
in accordance with the instructions, may cause harmful cause harmful interference to radio or television reception, which can be determined by the dealer or an experienced radio/TV technician for help. Any changes or of the National Electric Code (U.S.A.). The code provides guidelines for - Zenith Z19LCD3 | Operation Guide - Page 3
be used. The important safety instructions shall be entitled "Important Safety Instructions". The following safety instructions shall be included where applicable by When mounting a TV it on the wall, make sure not to install TV by hanging power and signal cables on the back of the TV. O Unplug - Zenith Z19LCD3 | Operation Guide - Page 4
and do not drop onto the screen with something. Refer all servicing to qualified service personnel. Servicing is required when the apparatus has been damaged in any way this owner's manual to be certain. Do not overload wall outlets. Overloaded wall outlets, loose or damaged wall outlets, extension - Zenith Z19LCD3 | Operation Guide - Page 5
your display 13 VESA Wall Mounting 14 Desktop Pedestal Installation 14 Kensington Security System 15 Antenna or Cable Connection 16 HD Receiver Setup 17 DVD Setup 20 VCR Setup 22 Headphone Setup 24 PC Setup 25 Remote Control Functions 28 Turning On TV 30 Channel Selection 30 - Zenith Z19LCD3 | Operation Guide - Page 6
Clock Setting - Auto Clock Setup 57 - Manual Clock Setup 58 Auto On/Off Time Setting 59 Sleep Time Setting 60 Auto Shut-off Setting 61 Set Password & Lock System 62 Movie & TV Rating 64 Troubleshooting 67 Maintenance 69 Product Specifications 70 5 - Zenith Z19LCD3 | Operation Guide - Page 7
cold to the touch, there may be a small "flicker" when it is turned on. This is normal, there is nothing wrong with TV. Some minute dot defects may be visible on the screen, appearing as tiny red, green, or blue spots. However, they have no adverse effect on - Zenith Z19LCD3 | Operation Guide - Page 8
product. -O User must use shielded signal interface cables (D-sub 15 pin cable) with ferrite cores to maintain standard _o compliance for the product. _o © z Owner's Manual CD Manual Remote Control, Batteries Power Cord 75ohm Round Cable Cable Management D-sub 15 pin Cable 7 - Zenith Z19LCD3 | Operation Guide - Page 9
PREPARATION FRONT PANELINFORMATION Here shown may be somewhat different from your TV. _o m _o vlENU VOLUME CHANNEL © z _utton (_1,1_)Buttons (V,A)Buttons Remote Control Sensor Power/Standby Indicator Illuminates red in standby mode. Illuminates green when the set is switched on. 8 - Zenith Z19LCD3 | Operation Guide - Page 10
BACK PANELINFORMATION ,,,IHere shown may be somewhat different from your TV. -O m © z SERVICEONLY RS-232C IN (SERVICE ONLY) PORT For service. @ HDMI/DVI IN Connect a HDMI signal to this jack. Or DVI (Video) Socket For operation with AC power. Caution: Never attempt to operate the TV on DC power. 9 - Zenith Z19LCD3 | Operation Guide - Page 11
PREPARATION STAND INSTALLATION ""_Here shown may be somewhat different from your TV. m Carefully place the product screen side down on a cushioned surface that will into a COVER BASE until clicking sound. Once assembled take the TV up carefully and face the front side. STAND BODY COVER BASE 10 - Zenith Z19LCD3 | Operation Guide - Page 12
DETACHING STAND Here shown may be somewhat different from your TV. Carefully place the product screen side down on a cushioned surface that will protect product and screen from damage. m @ Pull the COVER BASE backward while pressing - Zenith Z19LCD3 | Operation Guide - Page 13
PREPARATION BACK COVERFORWIREARRANGEMENT ,,,_Here shown may be somewhat different from your TV. _D m Connect the cables as necessary. To connect an additional equipment, see the EXTERNAL EQUIPMENT SETUP section. _D © z Install the CABLE MANAGEMENT as shown. me : - Zenith Z19LCD3 | Operation Guide - Page 14
POSITIONING YOUR DISPLAY Here shown may be somewhat different from your TV. Adjust the position of the panel in various ways for maximum comfort. _D rT1 • Tilt range _D © z 13 - Zenith Z19LCD3 | Operation Guide - Page 15
MOUNTING This product accepts a VESA-compliant mounting interface pad. (optional) There 4 threaded holes are available for attaching the bracket. 100 mm -0 _o m 100 mm _o .-I © z DESKTOP PEDESTALINSTALLATION For proper ventilation, allow a clearance of 4inches on all four sides from the wall - Zenith Z19LCD3 | Operation Guide - Page 16
KENSINGTONSECURITYSYSTEM - The TV is equipped with a Kensington Security System connector on the back panel. Connect the Kensington Security System cable as shown below. - For the detailed installation and use of the Kensington Security System, refer to the user's guide provided with the - Zenith Z19LCD3 | Operation Guide - Page 17
antenna direction if needed. © z Wall Multi-family Dwellings/Apartments (Connect to wall antenna socket) Antenna Socket Ou:d:n__ please purchase a signal amplifier 01_If the antenna needs to be split for two TV's, install a 2-Way Signal Splitter. ,,,_If the antenna is not installed properly - Zenith Z19LCD3 | Operation Guide - Page 18
until you have finished connecting all equipment. HD RECEIVERSETUP This TV can receive Digital Over-the-air/Cable do receive digital (Refer to the owner's manual for the digital set-top box. operation) Select Component input source by using the INPUT button on the remote control. Y, CB/PB, - Zenith Z19LCD3 | Operation Guide - Page 19
audio connection is necessary. _D HDMI supports both audio and video. c 2. How to use m z Turn on the digital set-top box. m (Refer to the owner's manual for the digital set-top box.) c -O Select HDMI input source by using the INPUT button on the remote control. HDMI/DVI-DTV mode 51 - Zenith Z19LCD3 | Operation Guide - Page 20
box to the AUDIO IN (RGB/DVI) jack on the set. 2. How to use 01T_urn on the digital set-top box. (Refer to the owner's manual for the digital set-top box.) 01S_elect HDMI input source by using the INPUT button on the - Zenith Z19LCD3 | Operation Guide - Page 21
Component input source by using the INPUT button on the remote control. 01_Refer to the DVD player's manual for operating instructions. iiiiiiiiiiiiiiiii!_iiiiiiiii!i!iiiiiiiiiiiiiiiiii_i!ii_!!!i!! iiiiiiiiiiiiiiiiiiiiiiiiiiiiiiiiiiiiiiiiiiiiiiiiiiiiiiiiiiiiiii Component Input ports To get - Zenith Z19LCD3 | Operation Guide - Page 22
HDMI output of the DVD to the HDMI/DVI IN jack on the set. @ No separated audio connection is necessary. HDMI supports both audio and video. 2. How to use 01_Select HDMI input source by using the INPUT button on the remote control. immRel fer to the DVD player's manual for operating instructions. - Zenith Z19LCD3 | Operation Guide - Page 23
an adequate distance between the VCR and TV. If the 4:5 picture format is used an antenna m z m JC) c m z .-t m c Wall Jack Antenna 1. How to connect Connect the RF antenna out socket VCR output switch to 3 or 4 and then tune TV to the same channel number. 01_Insert a video tape into the VCR - Zenith Z19LCD3 | Operation Guide - Page 24
connecting with a RCA cable 1. How to connect Connect the AUDIO/VIDEO jacks between TV and VCR. Match the jack colors (Video = yellow, Audio Left = white, PLAY on the XD VCR. (Refer to the VCR owner's manual.) C 01S_elect AV input source by using the INPUT button on the m z remote control - Zenith Z19LCD3 | Operation Guide - Page 25
EXTERNALEQUIPMENT SETUP HEADPHONE SETUP You can listen to the sound through the headphone. 1. How to connect m x Plug the headphone into the headphone socket. m _o z To adjust the headphone volume_ press the VOL + or m - button. If you press the MUTE button_ the sound _D from the headphone - Zenith Z19LCD3 | Operation Guide - Page 26
the AUDIO IN m (RGB/DVI) jack on the set. X_ c "O 2. How to use m z 01_Turn on the PC and the TV. m c 01_Select RGB-PC input source by using the INPUT button -O on the remote control. When connecting HDMI to DVI cable I. How to connect Connect the DVI output of the PC to the - Zenith Z19LCD3 | Operation Guide - Page 27
EXTERNALEQUIPMENT SETUP m X m z m x:) C m z m C Supported Display Specifications RGB-PC, HDMI/DVI-PC mode 31 469 70 08 31.469 3Z879 48.363 59.94 60.31 60.00 4Z776 59.87 4Z712 60.01 4Z720 59.799 4Z13 59.65 55.50 59.90 64.744 59.948 62.290 59.954 26 * RGB-PC mode only - Zenith Z19LCD3 | Operation Guide - Page 28
Screen Setup for PC mode Overview When the RGB input of the set is connected to a PC output, select the RGB-PC as the main input mode. After connecting RGB-PC to PC output and checking the screen qual- ity. m When you change the resolution, select the proper resolution in pre- x sent input - Zenith Z19LCD3 | Operation Guide - Page 29
CONTROL FUNCTIONS When using the remote control, aim it at the remote control sensor on the TV. SAP o Analog mode: Selects MTS sound (Mono, to the previous menu. EXIT Clear all on-screen displays and return to TV viewing from any menu. THUMBSTICK (Up/Down/Left Right/ENTER) Navigate the on-screen - Zenith Z19LCD3 | Operation Guide - Page 30
AV, Component, RGB-PC, and HDMI input sources, screen returns to the last TV channel. iNPUT External input modes rotate in regular sequence: TV, AV, Component, RGB-PC, and HDMI. (AV, Component, RGB-PC, and HDMI input sources are linked automatically, only if a device is connected.) NUMBER button - Zenith Z19LCD3 | Operation Guide - Page 31
which power state it was last set -r" to, even if the power cord is out. z When finished using the TV, press the POWER button on the remote < control. The TV reverts to standby mode. N I > z z fT1 N © Z © CHANNELSELECTION Press the CH (+ or -) or NUMBER buttons to select a channel number - Zenith Z19LCD3 | Operation Guide - Page 32
ON-SCREEN MENUS SELECTION Your TV's OSD (On Screen Display) may differ slightly from what is shown in this manual. Press the MENU button and then use • or • button to select the each menu. Press the • button and then use • • _1 • button to display the - Zenith Z19LCD3 | Operation Guide - Page 33
WATCHING TV / CHANNEL CONTROL CHANNELSEARCH Auto Scan (Auto Tuning) Automatically finds all channels available through antenna or cable inputs, and stores them in memory on the channel - Zenith Z19LCD3 | Operation Guide - Page 34
A password is required to gain access to Manual Tuning menu if the Lock System is turned on •ualbutTtounninagn. d then use • or • button to Press the • button and then use • or • button to select TV, DTV, CATV, and CADTV. @ Press the • button and then use • or • button to select channel you want - Zenith Z19LCD3 | Operation Guide - Page 35
button. You can create your own Favorite List. Use the FAV button on the remote control when a channel is highlighted and N -r" then add or delete the channel Channel Edit. Press the • button and then use • or • button to select TV, DTV, CATV, and CADTV. Press the • button and then use • or • - Zenith Z19LCD3 | Operation Guide - Page 36
that it can only be used with the remote control. This feature can be used to prevent unauthorized viewing by locking out the front panel controls. This TV is programmed to remember which option it was last set to even if you turn the TV off. Press the MENU button and then use - Zenith Z19LCD3 | Operation Guide - Page 37
PICTURE SIZE (ASPECT RATIO) CONTROL This feature allows an analog picture with a 4:5 aspect ratio is displayed on your TV. When you receive an analog picture with a 4:5 aspect ratio on your 16:9 TV, you need to specify how the picture is to be displayed. RGB-PC input source use 4:5 or 16:9 aspect - Zenith Z19LCD3 | Operation Guide - Page 38
Set by program Selects the proper picture proportion the source's image. to match (4:3"* 4:3) Zoom Choose Zoom when you want to view the picture without any alteration. However, the top and bottom portions of the picture will be cropped. (16:9-_ 16:9) "O c _o m © 7 _o © 4:3 Choose 4:3 when - Zenith Z19LCD3 | Operation Guide - Page 39
CONTROL PRESETPICTURE SETTINGS Picture Mode - Preset Picture Mode adjusts the TV for the best picture appearance. Select the preset value in and User (your own settings). © Z © Press the EXIT button to save and return to TV viewing. You can also use the PICTURE menu to adjust Picture Mode. 38 - Zenith Z19LCD3 | Operation Guide - Page 40
Color Temperature. Press the • button and then use • or • button to select either Cool, Medium, Warm or User. Press the EXIT button to return to TV viewing or press the BACK button to return to the previous menu. "0 N C _D rT1 N © Z _D © @ @0 39 - Zenith Z19LCD3 | Operation Guide - Page 41
PICTURE CONTROL MANUAL PICTURE ADJUSTMENT Picture Mode - User Mode Adjust the picture appearance to suit your preference and use _1 or • button to make appropriate adjustments. Press the EXIT button to return to TV viewing or press the BACK button to return to the previous menu. 4O @ @@ @ @ - Zenith Z19LCD3 | Operation Guide - Page 42
_I or • button to make appropriate adjustments. The adjustment range of Red, Green, or Blue is 20- +20. Press the EXIT button to return to TV viewing or press the BACK button to return to the previous menu. "O N C _D N © Z _D © @ @@ @ @ 41 - Zenith Z19LCD3 | Operation Guide - Page 43
PICTURE menu. N © Z _D Press the • button and then use • or • button to © select D B. Press the • button and then use • or • button to select Auto or Manual. Press the EXIT button to return to TV viewing or press the BACK button to return to the previous menu. 42 @ @@ - Zenith Z19LCD3 | Operation Guide - Page 44
• button to select Black level Low or High. 0_Low The screen gets darker. olH_ igh The screengets brighter. Press the EXIT button to return to TV viewing or press the BACK button to return to the previous menu. i ii ii _ i i "0 N C m N 0 Z 0 @ @@ 43 - Zenith Z19LCD3 | Operation Guide - Page 45
• button to © select Back Light. @ Press the • button and then use _1 or • button to make appropriate adjustments. Press the EXIT button to return to TV viewing or press the BACK button to return to the previous menu. @ @ 44 - Zenith Z19LCD3 | Operation Guide - Page 46
and then use • or • button to select On or Off. 01W_ hen you select On, the screen darkens. Press the EXIT button to return to TV viewing or press the BACK button to return to the previous menu. "O N C _D m N O Z _D O @ 00 4S - Zenith Z19LCD3 | Operation Guide - Page 47
PICTURE CONTROL PICTURERESET Use to quickly reset all the Picture menu options to their original factory preset values. "0 N Press the MENU button and then use • or • button C to select the PICTURE menu. _D m N © Z Press the • button and then use • or • button to _D © select Picture Reset - Zenith Z19LCD3 | Operation Guide - Page 48
S CONTROL PRESETSOUND SETTINGS (SOUND MODE) Sound Mode lets you enjoy the best sound without any special adjustment because the TV sets the appropriate sound options based on the program content. Standard, Music, Movie, and Sports are preset for good sound quality at the factory and - Zenith Z19LCD3 | Operation Guide - Page 49
sound option (Treble or Bass). Press the • button and then use _1 or • button to make appropriate adjustments. Press the EXIT button to return to TV viewing or press the BACK button to return to the previous menu. 48 0 00 0 0 - Zenith Z19LCD3 | Operation Guide - Page 50
• or • button to select Balance. Press the • button and then use _1 or • button to make appropriate adjustments. Press the EXIT button to return to TV viewing or press the BACK button to return to the previous menu. O c z @ z c l'rl N 0 Z --I 0 @ @ 49 - Zenith Z19LCD3 | Operation Guide - Page 51
TV can receive MTS stereo programs and any SAP (Secondary Audio Program) that accompanies the stereo program if the station transmits an additional sound signal as well as the original one and when you select Stereo or SAP on the remote to the mono sound in remote areas during stereo/SAP broadcasting - Zenith Z19LCD3 | Operation Guide - Page 52
and then use _I or • button to select Audio. O Use • or • button to select English, Spanish, or French. Press the EXIT button to return to TV viewing or press the BACK button to return to the previous menu. 0 c z @ z c l'rl N 0 Z .-I 0 @@@ 51 - Zenith Z19LCD3 | Operation Guide - Page 53
your desired language. 0 From this point on, the on-screen menus will be shown in the selected language. Press the EXIT button to return to TV viewing or press the BACK button to return to the previous menu. @ @@@ 52 - Zenith Z19LCD3 | Operation Guide - Page 54
be provided to help people with hearing loss watch TV. Use the CC button to select Caption On or Off. When selecting Off, Sub-menus for Analog, DTV, and Digital Option become disabled. Press the EXIT button to save and return to TV viewing. 01_Youcan also adjust Caption in the OPTION menu - Zenith Z19LCD3 | Operation Guide - Page 55
the program's dialog. Caption/Text, if provided available for both digital Antenna/Cable. by the broadcaster, would be and analog channels on the This TV is programmed to memorize the caption/text mode which was last set when you turn the power off. This function is only available when Caption - Zenith Z19LCD3 | Operation Guide - Page 56
the • button and then use _I or • button to select Digital. O Use • or • button to select Servicel - Service6. Press the EXIT button to return to TV viewing or press the BACK button to return to the previous menu. 0 c z @ z c l'rl N 0 Z .-I 0 @@0 SS - Zenith Z19LCD3 | Operation Guide - Page 57
opacity for the background color. 01E_dge Type : Select an edge type. 01E_dge Color : Select a color for the edges. Press the EXIT button to return to TV viewing or press the BACK button to return to the previous menu. 56 @@ @@ - Zenith Z19LCD3 | Operation Guide - Page 58
includes information for the current time provided by the broadcasting station. Set the clock manually if the current time is set incorrectly by the auto clock function. Press the the EXIT button to return to TV viewing or press the BACK button to return to the previous menu. m @ rT1 z C_ @0 @@ - Zenith Z19LCD3 | Operation Guide - Page 59
to select Clock. r_ r_ 0 Press the • button and then use • or • button to z select Manual. c_ Press the • button and then use _1 or • button to select either the year, date, or Press the EXIT button to return to TV viewing or press the BACK button to return to the previous menu. 58 @ @@ - Zenith Z19LCD3 | Operation Guide - Page 60
function if they are both set to the same time. The TV must be in standby mode for the On Time to work. If you do not press any button within 2 hours after the TV turns on with the On Time function, the TV will automatically revert to standby mode. Press the MENU button and then - Zenith Z19LCD3 | Operation Guide - Page 61
press the ENTER button. The timer begins to count r'l-i .-I down from the number of minutes selected. .-I z To check the remaining minutes before the TV turns off, press the TIMER button once. To cancel the Sleep Time, press the TIMER button repeatedly to select Off. 01_Youcan also set up the - Zenith Z19LCD3 | Operation Guide - Page 62
SHUT-OFF SETTING If set to on and there is no input signal, the TV turns off automatically after 10 minutes. Press the MENU button and then use • or or • button to select On or Off. Press the EXIT button to return to TV viewing or press the BACK button to return to the previous menu. m m z 00 61 - Zenith Z19LCD3 | Operation Guide - Page 63
Specify a password 3. Enable the lock V-Chip rating and categories Rating guidelines are provided by broadcasting stations. Most television programs and television movies can be blocked by TV Rating and/or Individual Categories. Movies that have been shown at the theaters or direct-to-video movies - Zenith Z19LCD3 | Operation Guide - Page 64
4 digits are entered, re-enter the same 4 digits on the Confirm. Then your changed password has been memorized. Press the EXIT button to return to TV viewing or press the BACK button to return to the previous menu. Lock System Enables or disables the blocking scheme you set up previously. After - Zenith Z19LCD3 | Operation Guide - Page 65
blocking out all the movies with the ratings above a specified level. Keep in mind that the movie ratings limit only applies to movies shown on TV, not TV programs, such as soap operas. After inputting the password, use the • or • button to choose Movie Rating. Press the • button and then use the - Zenith Z19LCD3 | Operation Guide - Page 66
to select block options. 01A_ge(applies to TV-G,TV-PG,TV-14,TV-MA) 0,_Dialogue-sexual dialogue (applies to TV-PG,TV-14) Language-adult language (applies to TV-PG,TV-14,TV-MA) 01S_ex-sexual situations (applies to TV-PG,TV-14,TV-MA) 01V_iolence (applies to TV-PG,TV-14,TV-MA) Press the EXIT button to - Zenith Z19LCD3 | Operation Guide - Page 67
Dim3. Press the • button and then use the • or • button to select D1 L1, D1 L2, or D1 L3. Press EXIT button to return to TV viewing or press BACK button to return to the previous menu. @ _D m z @ N O Based on rating table, your - Zenith Z19LCD3 | Operation Guide - Page 68
APPENDIX TROUBLESHOOTING I,I,CI heck to see if there is any object between the product and the remote control causing obstruction. Ensure you are pointing the remote control directly at the TV. i,i,Ei nsure that the batteries are installed with correct polarity (+ to +, - to -). i,i,Ei nsure that - Zenith Z19LCD3 | Operation Guide - Page 69
mmPr_ess the VOL or VOLUME button. miSnoi und muted? Press MUTE button. miTnriy another channel. The problem may be with the broadcast. miAnrie the audio cables installed properly? mmAdffjust Balance in menu option. miAndi just resolution, horizontal frequency, or vertical frequency. mmCfhfeck - Zenith Z19LCD3 | Operation Guide - Page 70
regular cleaning can extend the amount of time you can enjoy your new TV. Caution: Be sure to turn the power off and unplug the power water is off the screen, and then let it air-dry before you turn on your TV. Cleaning the Cabinet 01T_o remove dirt or dust, wipe the cabinet with a soft, dry, - Zenith Z19LCD3 | Operation Guide - Page 71
PRODUCTSPECIFICATIONS 01_The specifications shown above may be changed without prior notice for quality improvement. 18.0 x 15.6 x 9.1 inches 456.8 x 395.0 x 230.0 mm 18.0 x 14.5 x 2.8 inches 456.8 x 368.5 x 70.5 mm 20.7 x 1Z3 x 9.1 inches 525.4 x 439.0 x 230.0 mm 20.7 x 16.3 x 2.7 inches 525.4 x - Zenith Z19LCD3 | Operation Guide - Page 72
zenith ®
-
 1
1 -
 2
2 -
 3
3 -
 4
4 -
 5
5 -
 6
6 -
 7
7 -
8
-
9
-
10
-
11
-
12
-
13
-
14
-
15
-
16
-
17
-
18
-
19
-
20
-
21
-
22
-
23
-
24
-
25
-
26
-
27
-
28
-
29
-
30
-
31
-
32
-
33
-
34
-
35
-
36
-
37
-
38
-
39
-
40
-
41
-
42
-
43
-
44
-
45
-
46
-
47
-
48
-
49
-
50
-
51
-
52
-
53
-
54
-
55
-
56
-
57
-
58
-
59
-
60
-
61
-
62
-
63
-
64
-
65
-
66
-
67
-
68
-
69
-
70
-
71
-
72
 |
 |

Installation
and
Operating
Guide
Model
Numbers
[
Z19LCD3,
Z22LCD3
[
LCDTV
o
zenl:-
D
@
ENERGY
STAR
is a set
of
power-saving
guidelines
issued
by the
U.S.
Environmental
Protection
Agency(EPA).
H
As an ENERGY STAR
Partner LGE U. S. A.,Inc.
has determined
that this
product
meets the
ENERGY STAR guidelines
for energy efficiency.
©
Copyright 2007,
[6
Electronics
USA, Inc.
zenith