Zenith Z50PX2D Operating Guide
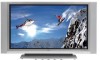
Zenith Z50PX2D - 50" Plasma HDTV Manual
 |
UPC - 044642702182
View all Zenith Z50PX2D manuals
Add to My Manuals
Save this manual to your list of manuals |
Zenith Z50PX2D manual content summary:
- Zenith Z50PX2D | Operating Guide - Page 1
Installation and Operating Guide | Warranty Model Numbers | Z42PX1D / Z50PX2D | PLASMA TV © Copyright 2005, LG Electronics USA, Inc. - Zenith Z50PX2D | Operating Guide - Page 2
OR BACK). NO USER SERVICEABLE PARTS INSIDE. REFER TO QUALIFIED SERVICE PERSONNEL. LG Electronics U.S.A., Inc. 1000 Sylvan Avenue, Englewood Cliffs, NJ 07632 http://www.zenith.com WARNING/CAUTION TO REDUCE THE RISK OF FIRE AND ELECTRIC SHOCK, DO NOT EXPOSE THIS PRODUCT TO RAIN OR MOISTURE. 2 Plasma TV - Zenith Z50PX2D | Operating Guide - Page 3
. Protect the power cord from being walked on or pinched particularly at plugs, convenience receptacles, and the point where they exit from the apparatus. 11. Only use attachments/accessories specified by the manufacturer. 12. Use only with the cart, stand, tripod, bracket, or table specified by the - Zenith Z50PX2D | Operating Guide - Page 4
Safety Instructions Safety Instructions 13. Unplug this apparatus during lightning storms or when unused for long periods of time. 14. Refer all servicing to qualified service personnel. Servicing is required when the apparatus has been damaged in any way, such as power-supply cord or plug is - Zenith Z50PX2D | Operating Guide - Page 5
Unpack TV and all accessories. 5. Turn video source equipment on. 2. Connect all external video and audio equipment. see pages 13~18. 6. Select viewing source for TV. See pages 25. 3 Install batteries in remote control. See page 9. 4. Turn TV on. See page 22. 7. Fine-tune source image and sound - Zenith Z50PX2D | Operating Guide - Page 6
browsing. Versatile The light weight and thin size makes it easy to install your plasma display in a variety of locations where conventional TVs will not fit. The PDP Manufacturing Process: a few minute colored dots may be present on the PDP screen The PDP (Plasma Display Panel), which is the - Zenith Z50PX2D | Operating Guide - Page 7
Panel Controls Introduction TV/VIDEO MENU VOL CH 1 23 4 5 7 8 TV/VIDEO MENU ENTER VOL CH 2 1 456 7 8 1. POWER Button 2. Remote Control Sensor 3. Power Standby Indicator 4. TV/VIDEO Button 5. MENU Button 6. ENTER Button 7. VOLUME (F , G) Buttons 8. CHANNEL (E, D) Buttons Z50PX2D - Zenith Z50PX2D | Operating Guide - Page 8
Socket Connect the monitor This TV operates on output connector from a PC to the appropriate input port. an AC power. The Remote voltage is indicated on Control Port the Specifications Connect your page. Never attempt wired remote to operate the TV on control here. DC power. 8 Plasma TV - Zenith Z50PX2D | Operating Guide - Page 9
of time before your TV turns itself off automatically. MUTE Switches the sound on or off.(Refer to p.40) EZ PIC Selects a factory preset picture mode depending on the viewing environment. TV INPUT TV/VIDEO MODE DAY - GUIDE DAY + EXIT TIMER CC FLASHBK FREEZE TV/VIDEO External input modes - Zenith Z50PX2D | Operating Guide - Page 10
Introduction Remote Control Key Functions POWER Turns your TV or any other programmed equipment on or off, depending on mode. THUMBSTICK (Up/Down/Left/Right/ENTER) Allows you to navigate the on-screen menus - Zenith Z50PX2D | Operating Guide - Page 11
Power Cord 75Ω Round Cable TV INPUT TV/VIDEO MODE DAY - GUIDE DAY + EXIT TIMER CC FLASHBK Remote Control 2-Wall brackets 2-eye-bolts Installation Instructions Joining the TV assembly to the wall to protect the set tumbling - Secure the TV assembly by joining it to a wall by using - Zenith Z50PX2D | Operating Guide - Page 12
by connecting it to telephone wires, lightening rods, or gas pipes. Desktop Pedestal Installation Power Supply Short-circuit Breaker For proper ventilation, allow a clearance of 4" on each side and the top, 2.36" on the bottom, and 2" from the wall. Detailed installation instructions are included - Zenith Z50PX2D | Operating Guide - Page 13
Installation Antenna or Cable Connection 1. Analog and Digital TV signals provided on antenna - Wall Antenna Socket or Outdoor Antenna without a Cable Box Connections - For optimum picture quality, adjust antenna direction if needed. Multi-family Dwellings/Apartments (Connect to wall antenna - Zenith Z50PX2D | Operating Guide - Page 14
to the S-VIDEO input, the picture quality is improved; compared to connecting a regular VCR to the Video input. 2. Insert a video tape into the VCR and press PLAY on the VCR. (Refer to the VCR owner's manual.) 3. Select the input source with using the TV/VIDEO button on the remote control. Note that - Zenith Z50PX2D | Operating Guide - Page 15
. 2. Use the TV/VIDEO button on the remote control to select Component 1 or Component 2. (If connected to S-VIDEO, select the Video or Front Video external input source.) 3. Refer to the DVD player's manual for operating instructions. • Component Input ports To get better picture quality, connect - Zenith Z50PX2D | Operating Guide - Page 16
box connector. Then, make the corresponding audio connections. How to use 1. Turn on the digital set-top box. (Refer to the owner's manual for the digital set-top box.) 2. Use TV/VIDEO on the remote control to select Component 1, Component 2, RGB-DTV, or HDMI/DVI source. Signal 480i 480p 720p 1080i - Zenith Z50PX2D | Operating Guide - Page 17
this TV with an HDMI-to-DVI cable(not supplied with this product). 2. If the PC(or the sound card of the PC) has an analog audio output connector, connect the PC's audio output to RGB/DVI AUDIO INPUT port located on the upper side of RGB INPUT port. How To Use 1. To get the best picture - Zenith Z50PX2D | Operating Guide - Page 18
amplifers or speakers, please turn the TV speakers off.(Refer to p.28) Caution: Do not look into the optical output port. Looking at the laser beam may damage your vision. HDMI /DVI (VIDEO) INPUT DIGITAL AUDIO OPTICAL OUTPUT RS-232C INPUT (CONTROL/SERVICE) 18 Plasma TV External Audio Equipment - Zenith Z50PX2D | Operating Guide - Page 19
both video and audio. - If the source device has a DVI output and no HDMI output, a separated audio connection is necessary. How To Connect 1. Connect the source device to HDMI/DVI port of this TV with an HDMI cable(not supplied with - Zenith Z50PX2D | Operating Guide - Page 20
Installation Reference Cable sample 20 Plasma TV HDMI Cable (not supplied with the product) HDMI to DVI Cable (not supplied with the product) Fiber Optic Digital Audio Cable (not supplied with the product) Analog Audio Cable(RCA type) (not supplied with the product) Analog Audio Cable(Stereo to RCA - Zenith Z50PX2D | Operating Guide - Page 21
Installation How to use 1. Connect the HDMI/DVI Source Devices(DVD Player or Set Top Box or PC) and the TV SET. 2. Turn on the display by pressing the POWER button on the TV SET and HDMI/DVI Source Devices remote control. 3. Select HDMI/DVI Input source in input source option of SETUP menu.(Refer to - Zenith Z50PX2D | Operating Guide - Page 22
, connect power cord correctly. At this moment, the TV switches to standby mode. In standby mode to turn TV on, press the , TV/VIDEO , CH (D / E) button on the TV or press the POWER, TV INPUT, TV/VIDEO, CH (D / E), Number (0 ~ 9) button on the remote control. 2. Select the viewing source by using TV - Zenith Z50PX2D | Operating Guide - Page 23
Scan menu if the Lock System is turned on. 1. Press the MENU button and then use D / E button to select the SETUP menu. 2. Press the G button and then use D / E button to select Manual Scan. 3. Press the G button and then use D / E button to select TV, DTV, CATV, and CADTV. 4. Press the G button - Zenith Z50PX2D | Operating Guide - Page 24
List. Use the FAV button on the remote control when a use D / E button to select DTV Signal. 3. View the on-screen signal strength monitor to see the quality of the signal being received. 4. Press EXIT button to return to TV viewing or press MENU button to return to the previous menu. 24 Plasma TV - Zenith Z50PX2D | Operating Guide - Page 25
D / E button to select Input Source. 3. Press the G button and then use D / E button to select the source: Antenna, Cable, Video, Front Video, Component1, Component2, RGB-DTV (or RGB-PC), HDMI/DVI. 4. Press EXIT button to return to TV viewing or press MENU button to return to the previous menu. Note - Zenith Z50PX2D | Operating Guide - Page 26
, Night Time, Movie, Video Game, and Sports. • You can also use the VIDEO menu to adjust EZ Picture. 2. Press the EXIT button to save and return to TV viewing or press MENU button to return to the previous menu. Manual Picture Control (Custom option) - Adjust the picture appearance to suit your - Zenith Z50PX2D | Operating Guide - Page 27
menu. 2. Press EXIT button to save and return to TV viewing or press MENU button to return to the previous menu. Manual Sound Control (Custom option) - Adjust the sound to suit your taste and room situations. 1. Press the MENU button and then use D / E button to select the AUDIO menu. 2. Press the - Zenith Z50PX2D | Operating Guide - Page 28
that produces an immersive sound experience from standard stereo material. 4. Press EXIT button to return to TV viewing or press MENU button to return to the previous menu. TV Speakers On/Off Setup - Turn TV speakers off if using external audio equipment. Feature turns the TV Speakers option On or - Zenith Z50PX2D | Operating Guide - Page 29
signal as well as the original one. - When having selected Stereo or SAP button on the remote control, this TV can only receive the signal when the TV station transmits the proper signals. - Mono sound is automatically received if the broadcast is only in Mono; even though Stereo or SAP has been - Zenith Z50PX2D | Operating Guide - Page 30
6. For only On timer function Press the G button and then use D / E button to select the channel at turn-on. Press the G button and then use D / E button to set the sound level at turn-on. 7. Press EXIT button to return to TV viewing or press MENU button to return to the previous menu. 30 Plasma TV - Zenith Z50PX2D | Operating Guide - Page 31
to select Off. Auto Off - If set to on and there is no input signal, the TV turns off automatically after 10 minutes. 1. Press the MENU button and then use D / E button to select the TIME menu. 2. Press the G button and then use D / E button to select Auto Off. 3. Press the G button and then - Zenith Z50PX2D | Operating Guide - Page 32
use D / E button to select Cinema 3:2 Mode. 3. Press the G button and then use D / E button to select On or Off. 4. Press EXIT button to return to TV viewing or press MENU button to return to the previous menu. Note: This feature operates only in Component 480i, S-Video, Video mode. 32 Plasma TV - Zenith Z50PX2D | Operating Guide - Page 33
for a data service. - Caption/Text, if being provided by the broadcaster, would be available for both digital and analog channels on the Antenna/Cable. - This TV is programmed to memorize the caption/text mode which was last set to, when you turn the power off. 1. Use the CC button repeatedly to - Zenith Z50PX2D | Operating Guide - Page 34
once per 2 minutes: Left → Right → Upside → Downside → Right → Left → Downside → Upside. • Inversion Inversion will automatically invert the plasma display panel color every 30 minutes. 4. Press EXIT button to return to TV viewing or press MENU button to return to the previous menu. 34 Plasma TV - Zenith Z50PX2D | Operating Guide - Page 35
Low Power - Low power reduces the plasma display power consumption. 1. Press the MENU button and then use D / E button to select the OPTION menu. 2. Press the G button and then use D / E button to select Low Power. 3. Press the G button and then use D / E button to select On or Off. • When you - Zenith Z50PX2D | Operating Guide - Page 36
Control Function (V-Chip) is used to TV-G, TV-PG, TV-14, TV-MA) (applies to TV-PG, TV-14) (applies to TV-PG, TV-14, TV-MA) (applies to TV-PG, TV-14, TV-MA) (applies to TV-PG, TV-14, TV-MA) Input Block • Video, Front Video • Component 1, 2 • RGB, HDMI/DVI (On, Off) (On, Off) (On, Off) 36 Plasma TV - Zenith Z50PX2D | Operating Guide - Page 37
to select a source to block from the external source devices you have hooked up. 3. Press EXIT button to return to TV viewing or press MENU button to return to the previous menu. Note: • If you ever forget your password, key in '7', '7', '7', '7' on the remote control. Operation Operating Guide 37 - Zenith Z50PX2D | Operating Guide - Page 38
Operation Remote Control EPG (Electronic Program Guide) (In DTV mode) - This system has an Electronic Program Guide (EPG) to help your navigate through all the possible viewing options. - The EPG supplies information such as program listings, start and end times for all available services. - This - Zenith Z50PX2D | Operating Guide - Page 39
/DVI modes. - Press the INFO button or EXIT button to exit. Operation: • Watching TV/DTV/CATV/CADTV • Watching Video, Front Video • In Component1, Component2, RGB, HDMI/DVI modes, INFO button is not working. Function: • Show the present screen information. • On Watching with the upper Input signal - Zenith Z50PX2D | Operating Guide - Page 40
mode is changed in turn. (Refer to the picture below) Mute Mute : Sound is muted. 24 Mute Off : Sound is enabled. Freeze - Freezes the currently-viewed picture. 1. Press the FREEZE button to freeze the screen section. 2. To return to normal viewing, press the FREEZE button again. 40 Plasma TV - Zenith Z50PX2D | Operating Guide - Page 41
and select the RGB-PC, this function is used. • When HDMI/DVI connect to PC input and select HDMI/DVI input, this function is used. • In RGB-DTV mode, SIZE and PHASE is not available. Adjustment for screen Position, Size, Phase, Reset •After connecting RGB-PC or HDMI/DVI to PC input and checking the - Zenith Z50PX2D | Operating Guide - Page 42
control device to the RS-232C jack on the Monitor back panel. - RS-232C connection cables are not supplied with the Monitor. RS-232C Setup MONITOR OUTPUT (MONO) A/V INPUT L R VIDEO AUDIO DVD /DTV INPUT S-VIDEO COMPONENT INPUT 2 COMPONENT INPUT 1 L R VIDEO AUDIO HDMI /DVI (VIDEO) INPUT - Zenith Z50PX2D | Operating Guide - Page 43
. Remote Control Lock Mode k 14. Treble k 15. Bass k 16. Balance k 17. Color Temperature k 18. ISM Method j 19. Low Power When selecting Set ID '0', every connected the TV is controlled. Set ID is indicated as decimal Data 1: Illegal Code 2: Not supported function 3: Wait more time COM - Zenith Z50PX2D | Operating Guide - Page 44
2: Video 3: Front Video 4: Component 1 5: Component 2 6: RGB-DTV 7: RGB-PC 8: HDMI/DVI Acknowledgement [b][ ][Set ID][ ][OK][Data][x] 03. Aspect Ratio (Command2:c) (Main picture format) G To adjust the screen format. You can also adjust the screen format using the RATIO button on remote control - Zenith Z50PX2D | Operating Guide - Page 45
You can also adjust tint in the Video menu. Transmission [k][j][ ][Set ID][ ][Data][Cr] Data Red : 0 ~ Green : 64 • Refer to 'Real data External Control Device Setup 13. Remote Control Lock Mode (Command2:m) G To lock the remote control and the front panel controls OK][Data][x] Operating Guide 45 - Zenith Z50PX2D | Operating Guide - Page 46
3, Data 4: Minor Channel Number Data3: High byte Data4: Low byte Data 5: Main 7 Picture 0 Main 1 Two/One Using 4 6 Part Channel 5 Physical Reserv Channel ed 3 2 1 0 Two 0 Use x 0 00 1 One 1 No Use x 0 00 x 0 01 x 0 01 x 0 10 x 0 10 x 0 11 x 0 11 0 Step 0 NTSC Air 1 NTSC - Zenith Z50PX2D | Operating Guide - Page 47
Picture Input) G To select input source for TV. Transmission [x][b][][Set ID][][Data][Cr] Data Structure DATA(Hex) INPUT 00 DTV (Antenna) 01 DTV (Cable) 10 Analog (Antenna) 11 Analog (Cable) 20 Video 21 Front Video 40 Component 1 41 Component 2 50 RGB DTV 60 RGB PC 90 HDMI - Zenith Z50PX2D | Operating Guide - Page 48
IR Codes IR Codes How to Connect G Connect your wired remote control to the Remote Control port on the TV. Remote Control IR Codes G Output waveform Single pulse, modulated with 37.917KHz signal at 455KHz TC as long as a key is depressed. Tf Tf 0.56 ms 2.24 ms 48 Plasma TV Tf=108ms @455KHz - Zenith Z50PX2D | Operating Guide - Page 49
76 77 AF 98 Function TV/VIDEO TV INPUT POWER POWER ON POWER OFF RATIO TIMER Number Key 0~ 9 - (Dash) FLASHBK MUTE VOL D VOLE CH D CH E FAV INFO CC D E F G ENTER MENU GUIDE EZ SOUND EZ PIC EXIT FREEZE SAP ADJUST TV VIDEO Front Video COMPONENT 1 COMPONENT 2 RGB-PC RGB-DTV HDMI/DVI Ratio 4:3 Ratio 16 - Zenith Z50PX2D | Operating Guide - Page 50
the button, the light blinks at a time. If the device turned off, the programming is successful. 4. Press the MENU button to store the code. After blinking twice, this code is stored. 5. Test the remote functions to see if the device responds properly. If not, repeat from step 2. 50 Plasma TV - Zenith Z50PX2D | Operating Guide - Page 51
FISHER FUNAI GE GO VIDEO HARMAN KARDON HITACHI 130 150 152 Brand KENWOOD LG (GOLDSTAR) LLOYD LXI RESEARCH VICTOR VIDEO CONCEPTS VIDEOSONIC WARDS YAMAHA ZENITH Codes 039 CHANNEL HAMLIN HITACHI HOSPITALITY JERROLD LG (GOLDSTAR) M-NET MACOM UNITED CABLE UNIVERSAL VIEWSTAR ZENITH Codes 047 078 002 - Zenith Z50PX2D | Operating Guide - Page 52
KATHREIN 108 LEGEND 057 LG 001 LUTRON 132 SERVICE CO 028 035 047 057 085 SCIENTIFIC ATLANTA 032 138 SONY 103 STARCAST 041 SUPER GUIDE 020 124 125 TEECOM 023 026 075 087 Brand TOSHIBA UNIDEN VIEWSTAR WINEGARD ZENITH ZENITH Codes 007 005 006 019 008 009 018 010 016 025 52 Plasma TV - Zenith Z50PX2D | Operating Guide - Page 53
Checklist No picture & No sound • Check whether the TV is turned on. • Is the power cord inserted into wall power outlet? • Test the wall power outlet, plug another product's power cord into the outlet where the TV's power cord was plugged in. Picture OK & No sound The remote control doesn't work - Zenith Z50PX2D | Operating Guide - Page 54
TV. Be sure to turn the power off and unplug the power cord before use a wet cloth. Extended Absence If you expect to leave your TV dormant for a long time (such as a vacation), it's a good idea to unplug the power cord to protect against possible damage from lightning or power surges. 54 Plasma TV - Zenith Z50PX2D | Operating Guide - Page 55
Depth (inches / mm) Weight (pounds / kg) Resolution Power requirement Television System Program Coverage External Antenna Impedance Operating Temperature Range Operating Humidity Range Z42PX1D Z50PX2D 47.6 / 1210 27.6 / 701 11.6 / 295 79 / 35.9 852 x 480 (Dot) AC100-240V ~ 50/60Hz 55 / 1400 32 - Zenith Z50PX2D | Operating Guide - Page 56
Notes 56 Plasma TV - Zenith Z50PX2D | Operating Guide - Page 57
Notes Operating Guide 57 - Zenith Z50PX2D | Operating Guide - Page 58
Notes 58 Plasma TV - Zenith Z50PX2D | Operating Guide - Page 59
ELECTRONICS CORPORATION PLASMA TV Z42PX1D / Z50PX2D LIMITED WARRANTY - USA Zenith will repair or replace your product, at Zenith's option, if it proves to be defective in material or workmanship under normal use, during the warranty period ("Warranty Period") listed below, effective from the date - Zenith Z50PX2D | Operating Guide - Page 60
please use the carton and packaging from that unit in returning the defective unit to Zenith. G Parts and service in accordance with the Zenith warranty are Zenith's responsibility and will be provided without charge. Other service requirements will be at the owner's expense. If you have problems in
-
 1
1 -
 2
2 -
 3
3 -
 4
4 -
 5
5 -
 6
6 -
 7
7 -
8
-
9
-
10
-
11
-
12
-
13
-
14
-
15
-
16
-
17
-
18
-
19
-
20
-
21
-
22
-
23
-
24
-
25
-
26
-
27
-
28
-
29
-
30
-
31
-
32
-
33
-
34
-
35
-
36
-
37
-
38
-
39
-
40
-
41
-
42
-
43
-
44
-
45
-
46
-
47
-
48
-
49
-
50
-
51
-
52
-
53
-
54
-
55
-
56
-
57
-
58
-
59
-
60
 |
 |

©
Copyright 2005, LG
Electronics USA, Inc.
Installation and Operating Guide | Warranty
Model Numbers
|
Z42PX1D / Z50PX2D
|
PLASMA TV