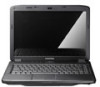
eMachines D520 eMachines Notebook User Guide (All Series) - Page 46
ENTER, Saving Changes, When you reboot, Windows will be installed from the recovery disc.
 |
View all eMachines D520 manuals
Add to My Manuals
Save this manual to your list of manuals |
Page 46 highlights
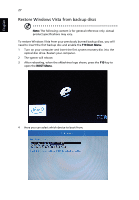
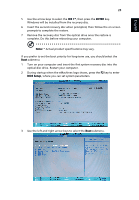
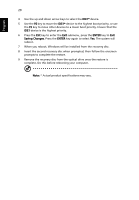
English 29 4 Use the up and down arrow keys to select the IDE1* device. 5 Use the F6 key to move the IDE1* device to the highest boot priority, or use the F5 key to move other devices to a lower boot priority. Ensure that the IDE1 device is the highest priority. 6 Press the ESC key to enter the Exit submenu, press the ENTER key to Exit Saving Changes. Press the ENTER key again to select Yes. The system will reboot. 7 When you reboot, Windows will be installed from the recovery disc. 8 Insert the second recovery disc when prompted, then follow the onscreen prompts to complete the restore. 9 Remove the recovery disc from the optical drive once the restore is complete. Do this before rebooting your computer. Note: * Actual product specifications may vary.
-
 1
1 -
2
-
3
-
4
-
5
-
6
-
7
-
8
-
9
-
10
-
11
-
12
-
13
-
14
-
15
-
16
-
17
-
18
-
19
-
20
-
21
-
22
-
23
-
24
-
25
-
26
-
27
-
28
-
29
-
30
-
31
-
32
-
33
-
34
-
35
-
36
-
37
-
38
-
39
-
40
-
 41
41 -
 42
42 -
 43
43 -
 44
44 -
 45
45 -
 46
46 -
 47
47 -
 48
48 -
 49
49 -
 50
50 -
 51
51 -
52
-
53
-
54
-
55
-
56
-
57
-
58
-
59
 |
 |