eMachines E19T6W 8512499 - eMachines Flat Panel Monitor User Guide - Page 10
Setting up the optional stand, Attaching the USB stand - emachine monitors
 |
UPC - 827103137347
View all eMachines E19T6W manuals
Add to My Manuals
Save this manual to your list of manuals |
Page 10 highlights
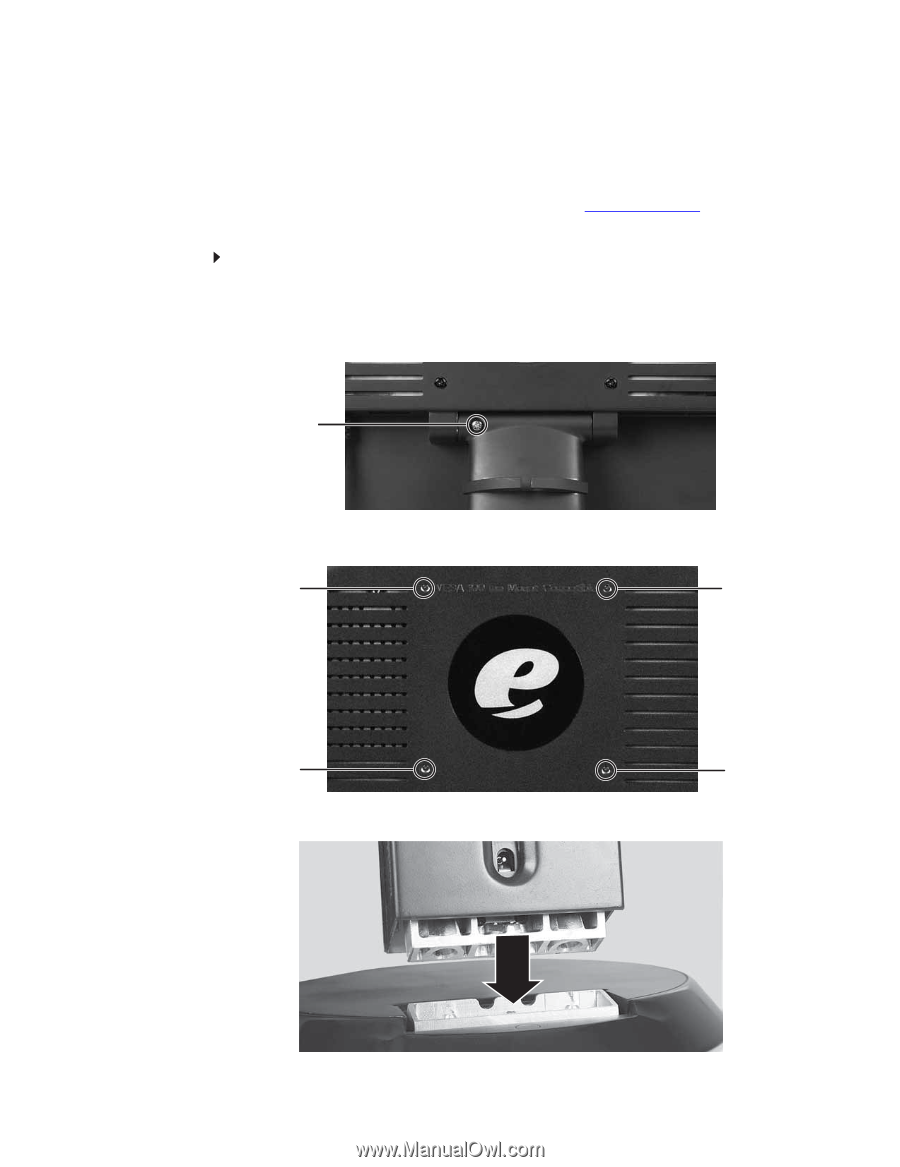
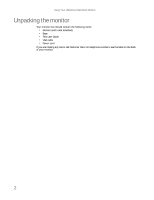
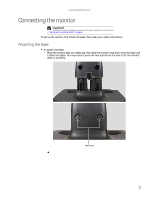
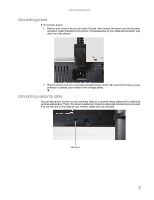
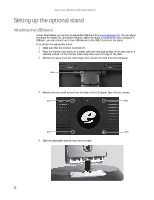
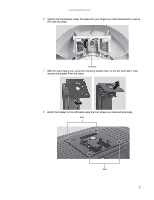
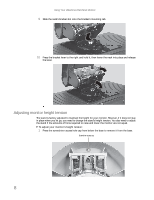
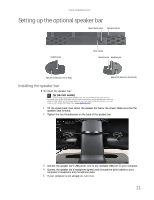
Using Your eMachines Flat-Panel Monitor Setting up the optional stand Attaching the USB stand In the United States, you can buy an adjustable USB stand from www.gateway.com. You can adjust the stand for height, tilt, and screen rotation. When the stand is connected to your computer's USB port, you can connect up to four USB devices to the USB 2.0 ports on the stand. To attach the adjustable stand: 1 Make sure that the monitor is turned off. 2 Place the monitor face-down on a stable, soft (non-marring) surface. A non-slip mat on a tabletop is ideal. Let the monitor base hang down over the edge of the table. 3 Remove the screw from the neck hinge, then remove the neck from the LCD panel. Screw 4 Remove the four small screws from the back of the LCD panel. Save the four screws. Screw Screw Screw Screw 5 Slide the adjustable stand's neck onto the base. 6
-
 1
1 -
2
-
3
-
4
-
 5
5 -
 6
6 -
 7
7 -
 8
8 -
 9
9 -
 10
10 -
 11
11 -
 12
12 -
 13
13 -
 14
14 -
 15
15 -
16
-
17
-
18
-
19
-
20
-
21
-
22
-
23
-
24
-
25
-
26
-
27
-
28
-
29
-
30
-
31
-
32
-
33
-
34
 |
 |