eMachines M5309 eMachines 5000 Series Notebook User's Guide
eMachines M5309 - Athlon XP-M 1.8 GHz Manual
 |
View all eMachines M5309 manuals
Add to My Manuals
Save this manual to your list of manuals |
eMachines M5309 manual content summary:
- eMachines M5309 | eMachines 5000 Series Notebook User's Guide - Page 1
User's Guide - eMachines M5309 | eMachines 5000 Series Notebook User's Guide - Page 2
stylized "e" and figure logo are trademarks of eMachines, Inc. in the United States and/or other countries. Windows XP is the trademark of Microsoft Corporation. All other product and brand names are trademarks of their respective owners. 5000 series notebook user's guide Part number: AACR53700001K4 - eMachines M5309 | eMachines 5000 Series Notebook User's Guide - Page 3
with the best product possible. Please read this manual carefully to familiarize yourself with our range of services and support. We've highlighted some basic care and safety information to help you keep your notebook in good operating condition. eMachines stands behind our value proposition to our - eMachines M5309 | eMachines 5000 Series Notebook User's Guide - Page 4
eMachines notebook is protected by a warranty that's effective from the date of purchase. Details about your warranty are included in the box your notebook was shipped in. Our warranty includes: ❂ guarantee on parts and labor ❂ technical support on the bottom of your notebook. ❂ exact text of any - eMachines M5309 | eMachines 5000 Series Notebook User's Guide - Page 5
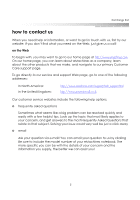
emachines.com/support/tech_support.html http://www.pcservicecall.co.uk Our customer service websites include the following help options: ❂ frequently asked questions Sometimes what seems like a big problem of your eMachines notebook. The more specific you can be with the details of your concern - eMachines M5309 | eMachines 5000 Series Notebook User's Guide - Page 6
and ready to help answer your questions, troubleshoot any problems, or direct you to other service options if necessary. Our goal is to solve your problem on the first call, so you can get back to enjoying your eMachines notebook. To speak with a support representative, call the phone number for - eMachines M5309 | eMachines 5000 Series Notebook User's Guide - Page 7
your notebook and basic instructions for its use and care. Online help is included in the software preloaded on your notebook. You can find the latest information about your notebook and get help on the following websites: eMachines home page: http://www.emachines.com North America support page - eMachines M5309 | eMachines 5000 Series Notebook User's Guide - Page 8
this guide before you use your notebook. Retain this information for future use. ❂ Always set your notebook on a stable work surface. ❂ Do not use your notebook near water or heat sources. ❂ Avoid exposing your notebook to extreme temperature changes. ❂ When using AC power: - Use only the AC adapter - eMachines M5309 | eMachines 5000 Series Notebook User's Guide - Page 9
. Do not use household chemicals to clean your notebook; they may damage it. ❂ Use only recommended upgrade or replacement parts and accessories. ❂ Other than the indicated user-replaceable components, your notebook should be serviced by an authorized technician. ❂ When using your modem: - Use - eMachines M5309 | eMachines 5000 Series Notebook User's Guide - Page 10
getting started ❂ This notebook contains an internal, lithium battery-powered, real-time clock. Only an authorized service technician should replace this internal battery. There is a risk of explosion and injury if the battery is incorrectly replaced or handled. Do not disassemble, crush or puncture - eMachines M5309 | eMachines 5000 Series Notebook User's Guide - Page 11
first things first 3 eMachines Customer Care 4 before you contact us 4 how to contact us 5 help tools 7 basic care and safety 8 contents 11 getting started 13 quick tour 19 open 20 left side 21 right side 22 back 23 bottom 24 using your notebook 25 using the power button 26 changing - eMachines M5309 | eMachines 5000 Series Notebook User's Guide - Page 12
battery charge 49 changing your power-related settings 51 recalibrating your battery 53 disposing of your battery 54 upgrades and replacements 55 battery 56 memory 58 hard drive assembly 61 system restore 63 troubleshooting 65 battery and power Notice 79 notebook specifications 80 12 - eMachines M5309 | eMachines 5000 Series Notebook User's Guide - Page 13
eMachines notebook has been designed so that you can set it up quickly and start using it right away. We're going to walk you through each of the following steps as you use your notebook for the first time: ❂ installing the included battery pack ❂ connecting the power adapter ❂ opening the notebook - eMachines M5309 | eMachines 5000 Series Notebook User's Guide - Page 14
only the AC adapter and power cord that were shipped with your notebook. Using a different AC adapter or power cord may result in fire or damage to your notebook. Important: When using your notebook for the first time, leave the AC adapter connected to your notebook until the yellow battery status - eMachines M5309 | eMachines 5000 Series Notebook User's Guide - Page 15
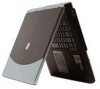
getting started 3. Open your notebook: Slide the latch on the front of the notebook to the right 1 and, at the same time, lift the top panel 2. Adjust the position of the display to a comfortable viewing angle. 15 - eMachines M5309 | eMachines 5000 Series Notebook User's Guide - Page 16
top right of the keyboard area to turn on your notebook. A blue light bar to the right of the power button lights up, showing you that your notebook is on. As your notebook starts up, you'll see the eMachines logo. When you turn on your notebook for the first time, you will be prompted to - eMachines M5309 | eMachines 5000 Series Notebook User's Guide - Page 17
all programs you may have opened. Important: Always save open documents and files before turning off your notebook. b. From the Windows desktop, click Start 1 > Turn Off Computer 2. c. At the prompt, click Turn Off 3. When the blue power bar goes off, your notebook is completely powered down. 17 - eMachines M5309 | eMachines 5000 Series Notebook User's Guide - Page 18
2 quick tour Before you begin using your eMachines notebook, let's look at it from different views and tour its basic features. This chapter looks at your notebook from the following views: ❂ open ❂ left side ❂ right side ❂ back ❂ bottom This chapter provides a quick overview of the external - eMachines M5309 | eMachines 5000 Series Notebook User's Guide - Page 19
getting started open To begin with, look at your opened notebook and locate its main features. 1 display 2 quick action buttons and power button 3 touchpad 4 speakers 5 power and battery status lights 6 system status lights 7 keyboard area 20 - eMachines M5309 | eMachines 5000 Series Notebook User's Guide - Page 20
left side quick tour 1 modem port 2 Ethernet/network port 3 microphone connector 4 headphone connector 5 PC Card eject button 6 PC Card slot 7 hard drive 21 - eMachines M5309 | eMachines 5000 Series Notebook User's Guide - Page 21
right side getting started 1 Kensington lock slot 2 CD/DVD drive 3 CD/DVD eject button 4 CD/DVD manual eject button 22 - eMachines M5309 | eMachines 5000 Series Notebook User's Guide - Page 22
(VGA) port 3 S-Video (TV out) 4 FireWire (1394) port (on select models) 5 USB ports (3) 6 air vents 7 AC power connector Do not obstruct the air vents. They are necessary for proper airflow and cooling. If any of these vents are partially blocked or obscured, your notebook may overheat. 23 - eMachines M5309 | eMachines 5000 Series Notebook User's Guide - Page 23
bottom getting started 1 mini-PCI 2 air vents 3 memory 4 battery release button 5 battery Do not obstruct the air vents. They are necessary for proper airflow and cooling. If any of these vents are partially blocked or obscured, your notebook may overheat. 24 - eMachines M5309 | eMachines 5000 Series Notebook User's Guide - Page 24
3 using your notebook In this chapter, we'll discuss all of the basics you need to know when using your notebook, including: ❂ using the power button ❂ using the touchpad ❂ using the keyboard ❂ using quick action buttons ❂ interpreting status lights ❂ using the display ❂ using CDs and DVDs 25 - eMachines M5309 | eMachines 5000 Series Notebook User's Guide - Page 25
in Hibernate mode, the system remembers all programs you have open, saves all information to the hard drive and then turns off the notebook. When you next power on your notebook, all programs that were open when you turned off your notebook are reopened, so your desktop looks like it did when you - eMachines M5309 | eMachines 5000 Series Notebook User's Guide - Page 26
using your notebook using the touchpad The built-in touchpad includes all the functionality of a traditional mouse. Just like a mouse, the touchpad lets you point to items on - eMachines M5309 | eMachines 5000 Series Notebook User's Guide - Page 27
with this feature, you may find it helpful. Because inadvertent taps may confuse new users, by default this feature is turned off on your notebook. changing touchpad settings If you want to enable tapping or make any other touchpad-related changes (such as changing the settings for a left-handed - eMachines M5309 | eMachines 5000 Series Notebook User's Guide - Page 28
with the application or access its online help. To use a standard function key, press the desired key. Special function keys are unique to your eMachines notebook and can be used to perform specific tasks. The special function keys are identified by the image on the key. See the following page for - eMachines M5309 | eMachines 5000 Series Notebook User's Guide - Page 29
for definitions of the special function keys. Fn + F2 wireless network card (select models only): toggle on/off Fn + F3 Sleep mode: toggle notebook display (default) external monitor (if connected) both the notebook display and the external monitor (if an external monitor is connected) S-Video - eMachines M5309 | eMachines 5000 Series Notebook User's Guide - Page 30
using your notebook numeric keypad To lock in the numeric keypad, press Fn + . When the numeric keypad is locked in, the letters on the number keys are deactivated. - eMachines M5309 | eMachines 5000 Series Notebook User's Guide - Page 31
buttons are located along the top right of the keyboard area. These buttons are used to launch programs, perform specific activities, or power the notebook on and off. To use a quick action button, just press it! 1 Internet access 2 email access 3 search 4 music player 5 volume up 6 volume down - eMachines M5309 | eMachines 5000 Series Notebook User's Guide - Page 32
status lights using your notebook 1 AC power on: AC power is connected off: AC power is not connected 2 caps battery charge blinking: battery has a low charge on: charging off: battery is charged 7 notebook power blinking: notebook is "sleeping" on: notebook is on off: notebook is powered - eMachines M5309 | eMachines 5000 Series Notebook User's Guide - Page 33
household chemicals to clean your notebook. These cleaners may damage your display as well as the finish of your notebook. adjusting the brightness To power. You can reduce your power consumption (important when using battery power) by reducing the display brightness. When using battery power, - eMachines M5309 | eMachines 5000 Series Notebook User's Guide - Page 34
the internal wide screen (1280x800 default), the notebook will auto-adjust to an optimum resolution to support the external image. Your image on the end of the cable to the S-Video port on the back of your notebook. Connect the other end of the cable to the video input port on the TV, monitor, - eMachines M5309 | eMachines 5000 Series Notebook User's Guide - Page 35
getting started 3. If you want to change the settings for the TV, click Start > Control Panel > Appearance and Themes > Display. Click the Settings tab. Then click the Advanced button and then the Displays tab. a. If the image on the TV is not clear, you may need to adjust the country identification - eMachines M5309 | eMachines 5000 Series Notebook User's Guide - Page 36
Class 1 laser product. The CD/DVD drive in this notebook employs a laser system. To ensure proper and safe use of this drive: ❂ Follow the instructions in this manual. ❂ If the CD/DVD drive needs service, contact an authorized service technician. ❂ Use only the controls, adjustments, and procedures - eMachines M5309 | eMachines 5000 Series Notebook User's Guide - Page 37
. Touching the reflective surface of the disc may damage it. inserting a disc 1. Press the eject button on the CD/DVD drive to open the tray. 2. After the tray pops open, slide it completely out. 3. Place the disc in the tray with the label facing up. Press gently on the disc until it - eMachines M5309 | eMachines 5000 Series Notebook User's Guide - Page 38
1. Insert your CD into the CD/DVD drive. Wait a moment for your notebook to recognize the CD. 2. One of the following three things will happen: ❂ automatically and you are not asked what you want to do with the disc. Open Windows Media Player by doing one of the following: - Press the music player - eMachines M5309 | eMachines 5000 Series Notebook User's Guide - Page 39
into the CD/DVD drive. Wait a moment for the notebook to recognize the disc and begin playback. 2. If your DVD does not play automatically, open PowerDVD from the Windows desktop. Click Start > All Programs > eMachines PowerDVD. The emachines PowerDVD player is displayed. 3. Click the play button to - eMachines M5309 | eMachines 5000 Series Notebook User's Guide - Page 40
standard CD-R or CD-RW into the CD drive. Wait a moment for your notebook to recognize the disc. If Windows displays a screen for the CD drive (D:) or asks what you want to do with the disc, close the window. 2. Open Windows Media Player by doing one of the following: ❂ Press the music player quick - eMachines M5309 | eMachines 5000 Series Notebook User's Guide - Page 41
you want, click the red Copy Music button. Windows Media Player will begin copying the songs to your CD. A progress bar is displayed while your notebook copies the selected songs to the CD. 7. When Windows Media Player finishes copying to the CD, the disc tray pops - eMachines M5309 | eMachines 5000 Series Notebook User's Guide - Page 42
using your notebook creating a data CD This section walks you through the process of creating a detail below. 1. Insert a standard CD-R or CD-RW into the CD drive. Wait a moment for your notebook to recognize the disc. If the screen displays a window for the CD drive (D:) or a message window asking - eMachines M5309 | eMachines 5000 Series Notebook User's Guide - Page 43
as the destination and then click Copy. This copy process assembles the selected files in a temporary holding area. A progress bar is displayed while your notebook copies the selected files to the temporary holding area. An icon and a message will pop up in the system tray, showing that you have - eMachines M5309 | eMachines 5000 Series Notebook User's Guide - Page 44
using your notebook 3. After you have selected and assembled all of the items that you want, you are ready to copy the files to the CD. a. Click the - eMachines M5309 | eMachines 5000 Series Notebook User's Guide - Page 45
You can use your notebook on either battery or AC power. Your choice of power source depends on your preference and the availability of AC power. When choosing your power source, consider the length of time you plan to use your notebook and the amount of charge in your battery. The life of your - eMachines M5309 | eMachines 5000 Series Notebook User's Guide - Page 46
you always have plenty of battery power, recharge your battery frequently. initial charge As mentioned in chapter 1, "getting started," to properly charge your battery the first time, you must leave the AC adapter connected to the notebook until the yellow battery status light goes off. Depending - eMachines M5309 | eMachines 5000 Series Notebook User's Guide - Page 47
the charge gets low, take action right away! Connect to an AC power source or save and close your work session. If your battery charge gets critically low, your notebook will automatically enter Hibernate mode. Be aware that if you have files open, you may experience data loss as a result of this - eMachines M5309 | eMachines 5000 Series Notebook User's Guide - Page 48
, a message (illustrated below) is displayed, showing you how much charge your battery has left. status lights If your battery status light begins to flash, you have little power left in your battery and need to either connect to an AC power source or save and close your work session right away. See - eMachines M5309 | eMachines 5000 Series Notebook User's Guide - Page 49
AC power source or save and close your work session. changing your power-related settings Your notebook comes configured for optimal battery usage. You may want to view and change the power and Maintenance > Power Options. Brief instructions for accessing and using the Power Options window are - eMachines M5309 | eMachines 5000 Series Notebook User's Guide - Page 50
level at which you want each to occur. power meter This tab displays current power and battery-status information. advanced Advanced options include settings for what to do when you: ❂ close the lid of your notebook ❂ press the power button ❂ press the Fn + F3 (Sleep) key Hibernate If you enable - eMachines M5309 | eMachines 5000 Series Notebook User's Guide - Page 51
inaccurate, you need to recalibrate your battery. To recalibrate your battery: 1. Close all open files and programs. 2. Connect your notebook to AC power and allow the battery to completely charge. 3. After the battery is completely charged, disconnect the AC adapter and either turn on or restart - eMachines M5309 | eMachines 5000 Series Notebook User's Guide - Page 52
After the battery is completely drained, reconnect your notebook to AC power. 6. Charge the battery completely, until the yellow battery status light goes off. 7. When you're ready to use your notebook again, do the following to go to the Windows Control Panel and reset your power-related settings - eMachines M5309 | eMachines 5000 Series Notebook User's Guide - Page 53
turning off all system power, unplugging all cables, and touching a bare metal surface on the notebook (such as the nuts for the printer port) or wearing a grounding wrist-strap. All user-replaceable components are accessed from the bottom of the notebook. 1 battery 2 memory 3 hard drive 55 - eMachines M5309 | eMachines 5000 Series Notebook User's Guide - Page 54
or equivalent type recommended by eMachines. 1. Power off your notebook and close the display. Disconnect all cables, including the AC power adapter, modem, and network cables. 2. Place your notebook upside down on a stable work surface. 3. To remove an existing battery pack, slide and release the - eMachines M5309 | eMachines 5000 Series Notebook User's Guide - Page 55
so that it can be inserted in only one direction. If the battery does not slide in easily, verify that the connector end of the battery lines up with the connector in the battery compartment. Slide the connector end of the battery into position and then press down on the other end of the - eMachines M5309 | eMachines 5000 Series Notebook User's Guide - Page 56
all cables, including the AC power adapter, modem, and network cables. 2. Place your notebook upside down on a stable work surface. To prevent damage to your notebook, remove the installed battery pack before replacing this component. For instructions on removing an installed battery pack, see the - eMachines M5309 | eMachines 5000 Series Notebook User's Guide - Page 57
upgrades and replacements 4. To remove an existing memory module, gently press outward on the retaining clips on both sides of the memory module 1 until the memory module is released and tilts upward. Then, pull the module out of the slot 2. 59 - eMachines M5309 | eMachines 5000 Series Notebook User's Guide - Page 58
does not slide in easily, verify that the notch in the module lines up with the tab in the memory slot. Gently press down on the module until the retaining clips click into place 2. 6. Replace the memory compartment cover and retaining screw. Insert the battery pack and reconnect your cables. 60 - eMachines M5309 | eMachines 5000 Series Notebook User's Guide - Page 59
all cables, including the AC power adapter, modem, and network cables. 2. Place your notebook upside down on a stable work surface. To prevent damage to your notebook, remove the installed battery pack before replacing this component. For instructions on removing an installed battery pack, see the - eMachines M5309 | eMachines 5000 Series Notebook User's Guide - Page 60
into the open compartment. 5. Replace the hard drive retaining screw, reinsert the battery pack, and reconnect your cables. 6. Perform a system restore to load your notebook's original shipping configuration onto this hard drive. See chapter 6, "system restore," for instructions. 7. Reload the - eMachines M5309 | eMachines 5000 Series Notebook User's Guide - Page 61
, use the restore CDs that were shipped inside the box with your notebook. The restore CDs contain a copy of all software that was preinstalled on your notebook. The restore process erases all data and files from your notebook's hard drive. Any programs, files, or data that you have added to - eMachines M5309 | eMachines 5000 Series Notebook User's Guide - Page 62
CD is still in the CD/DVD drive, the notebook will boot off the CD and the Microsoft Windows Startup Menu will be reopened. Remove the CD from the CD/DVD drive and restart your notebook again. 9. As your notebook starts up, follow the onscreen instructions to enter system setup information. 64 - eMachines M5309 | eMachines 5000 Series Notebook User's Guide - Page 63
software are designed to be trouble free. However, if you do encounter problems, this chapter may help you solve them. For minor problems, first try the following suggestions: ❂ Make sure that the notebook is powered on. ❂ Make sure that the AC adapter is properly connected to the computer - eMachines M5309 | eMachines 5000 Series Notebook User's Guide - Page 64
room temperature. ❂ Check your power management settings in the Windows Control Panel. See "managing your battery consumption" in chapter 4 for instructions. ❂ Recalibrate the battery. See "recalibrating your battery" in chapter 4 for instructions. ❂ Replace your battery. Q My notebook won't turn on - eMachines M5309 | eMachines 5000 Series Notebook User's Guide - Page 65
troubleshooting keyboard and touchpad Q My notebook is not responding to the keyboard or the touchpad. How do I enable tapping on my touchpad? A Your notebook has locked up. Try one of the following to restart it: ❂ Press ctrl + alt + delete. ❂ Press and hold down the Power button for approximately - eMachines M5309 | eMachines 5000 Series Notebook User's Guide - Page 66
getting started Q My cursor jumps to a different location on the display or does not respond at all. What's wrong? A It is probably one of two things: ❂ Your touchpad is dirty. Clean the touchpad with a damp cloth (water only) and wipe it dry. ❂ Your touchpad is set to accept tapping. See "using the - eMachines M5309 | eMachines 5000 Series Notebook User's Guide - Page 67
troubleshooting display brightness and resolution Q My display is blank. What's wrong? A It could be several things: ❂ Your notebook may be "Sleeping." Press any key to "wake" the notebook or TV, or both. ❂ Your notebook may be "Hibernating." Press the Power button once to resume from Hibernate mode. - eMachines M5309 | eMachines 5000 Series Notebook User's Guide - Page 68
and volume Q There is no sound coming from my notebook. What's wrong? A The volume is turned down too I do? A Your notebook must be turned on to remove CDs and DVDs. If you do not want to turn on your notebook, manually eject the disk by inserting an opened paper clip into the manual eject hole. See - eMachines M5309 | eMachines 5000 Series Notebook User's Guide - Page 69
troubleshooting printer Q My notebook is connected to a printer, but it's not working. What should I do? A Try the following: ❂ Make sure that the printer power cable is plugged into a working electrical outlet and that the printer is powered on. ❂ Check the cable connections between your notebook - eMachines M5309 | eMachines 5000 Series Notebook User's Guide - Page 70
comply with the limits for a Class B digital device, pursuant to Part 15 of the FCC Rules. These limits are designed to provide reasonable frequency energy and, if not installed and used in accordance with the instructions, may cause harmful interference to radio communications. However, there is no - eMachines M5309 | eMachines 5000 Series Notebook User's Guide - Page 71
operated with a minimum distance of 20 centimeters between the radiator and your body. Declaration of Conformity - United States This device complies with Part 15 of the FCC Rules. Operation is subject to the following two conditions: 1. This device may not cause harmful interference, and 2. This - eMachines M5309 | eMachines 5000 Series Notebook User's Guide - Page 72
EN55022 (CISPR 22): Electromagnetic Interference ❂ EN55024 (IEC61000-4-2,3,4,5,6,8,11): Electromagnetic Immunity ❂ EN61000-3-2 (IEC61000-3-2): Power Line Harmonics ❂ EN61000-3-3 (IEC61000-3-3): Power Line Flicker ❂ EN60950 (IEC60950): Product Safety For devices with built-in wireless equipment, the - eMachines M5309 | eMachines 5000 Series Notebook User's Guide - Page 73
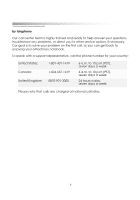
getting started telephone 0141-9512461 To identify this product, refer to the model number found on the product. Canadian Notice This Class B digital apparatus meets all requirements of the Canadian Interference-Causing Equipment Regulations. Avis Canadien Cet appareil numerique de la classe B - eMachines M5309 | eMachines 5000 Series Notebook User's Guide - Page 74
Modems This equipment complies with Part 68 of the FCC Rules causes harm to the telephone network, the telephone company may discontinue your service temporarily. If possible, they will line to determine if it is causing the problem. If the problem is with the equipment, discontinue use and contact - eMachines M5309 | eMachines 5000 Series Notebook User's Guide - Page 75
telephone network run by certain licensed public telecommunication operators or system connected thereto (direct exchange lines only, not shared service the approval is for connection to the PSTN via the telephone line interface supplied with it. Connection of a modem to the PSTN by any other means - eMachines M5309 | eMachines 5000 Series Notebook User's Guide - Page 76
calling / automatic answering ❂ tone detection ❂ loud-speaking facility This modem is not approved for connection to U.K. / private speech-band services. This modem does not support an automatic redial function. Any other usage will invalidate the approval of your modem, if as a result, it then - eMachines M5309 | eMachines 5000 Series Notebook User's Guide - Page 77
notebook specifications dimensions depth: 10 in (254 mm) width: 13.8 in (352 mm) operating temperature 50°F to 90°F (10°C to 35°C) shipping/storage temperature 4°F to 140°F (-20°C to 60°C) humidity 20% to 80% maximum expandable memory 1 GB video display 15.4'' WXGA TFT LCD panel getting started 80 - eMachines M5309 | eMachines 5000 Series Notebook User's Guide - Page 78
AACR53700001K4
-
 1
1 -
 2
2 -
 3
3 -
 4
4 -
 5
5 -
 6
6 -
 7
7 -
8
-
9
-
10
-
11
-
12
-
13
-
14
-
15
-
16
-
17
-
18
-
19
-
20
-
21
-
22
-
23
-
24
-
25
-
26
-
27
-
28
-
29
-
30
-
31
-
32
-
33
-
34
-
35
-
36
-
37
-
38
-
39
-
40
-
41
-
42
-
43
-
44
-
45
-
46
-
47
-
48
-
49
-
50
-
51
-
52
-
53
-
54
-
55
-
56
-
57
-
58
-
59
-
60
-
61
-
62
-
63
-
64
-
65
-
66
-
67
-
68
-
69
-
70
-
71
-
72
-
73
-
74
-
75
-
76
-
77
-
78
 |
 |
User’s
Guide