eMachines T2385 User Guide
eMachines T2385 Manual
 |
View all eMachines T2385 manuals
Add to My Manuals
Save this manual to your list of manuals |
eMachines T2385 manual content summary:
- eMachines T2385 | User Guide - Page 1
instructions carefully. 1 Save these instructions for later use. 2 Follow all of the instructions and warnings marked on this product or included in this manual a builtin installation unless proper points or short out parts that could result in fit into a grounding-type power outlet. This is a safety - eMachines T2385 | User Guide - Page 2
been damaged. 5 If the product exhibits a distinct change in performance indicating a need for service. Stop If you ever have to remove the main system unit cover, observe the following precautions: 1 The power supply cord must be unplugged before the main system unit cover is removed. (Separe le - eMachines T2385 | User Guide - Page 3
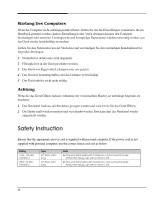
Wichtige Sicherheitsvorschriften Unbedingt Beachten Allgemeine Sicherheit Die nachfolgenden Anweisungen betreffen die Gefahr von Verletzungen durch elektrische Spannung, Feuer und mechanische Einwirkung. Bitte lesen Sie diese Anweisungen sorgfältig. 1 Beachten Sie alle Hinweise, die am Gerät selbst - eMachines T2385 | User Guide - Page 4
monitiert und verschraubt werden. Erst dann darf das Netzkabel wieder eingesteckt werden. Safety Instruction Ensure that the appropriate power cord is supplied with personal computer. If the power cord is not supplied with personal computer, use the correct listed cord sets as below: Rating 125V - eMachines T2385 | User Guide - Page 5
You Read The information in this user's guide is subject to change without notice. eMachines, Inc. shall not be liable for technical performance, or use of this material. eMachines, stylized "e" and figure logo are either trademarks or registered trademarks of eMachines, Inc. in the United States - eMachines T2385 | User Guide - Page 6
Blank vi - eMachines T2385 | User Guide - Page 7
Your Peripheral Devices 2-3 4. Turning the Computer On and Off 2-4 Turning On the Computer 2-4 Turning Off the Computer 2-4 Using Your Computer Using an Optional Floppy Disk Drive 3-1 Using an Optional Media Reader 3-2 Inserting the Media 3-2 Removing the Media 3-3 Using an Optical - eMachines T2385 | User Guide - Page 8
6-2 Appendix A. Solving Common Problems Power ...A-1 Hard Disk Drive ...A-1 Optical Drive ...A-2 Audio ...A-2 Floppy Disk Drive A-3 Display & Monitor A-3 Keyboard ...A-4 Mouse ...A-4 Appendix B. Approval Statements Battery Warning Instruction B-1 Fuse Warning Instruction B-1 Laser Product - eMachines T2385 | User Guide - Page 9
(optional) Power indicator Hard disk drive access indicator IEEE 1394 connectors (optional) USB 2.0 connectors (optional) Headphone jack Microphone jack USB 2.0 connectors (optional) NOTE Chapter 1 Your optical drives may differ from the illustrations described in this user's guide. Introduction - eMachines T2385 | User Guide - Page 10
Blank 1-2 Introduction - eMachines T2385 | User Guide - Page 11
to support the weight of your system and all of its components. A flat and hard surface . Soft surfaces like beds and carpeted floors attract static electricity, which can erase data on your disks or any other source of heat. Appropriate power sources. To prevent static charges, connect - eMachines T2385 | User Guide - Page 12
selection switch on the system back panel can be used to set the power supply to operate at 115V or 230V. To verify that your system has the correct setting for your environment, check the voltage selection switch. WARNING If - eMachines T2385 | User Guide - Page 13
To connect the peripheral devices, refer to the Setting Up Your Computer. WARNING To avoid generating an electric shock, be sure to plug the power cord into the system before plugging it into the wall socket. CAUTION For protection of your computer and other devices during a lightning storm, or - eMachines T2385 | User Guide - Page 14
Computer On and Off Follow the instructions below to turn on the computer or to turn it off. Turning On the Computer To turn on your computer, follow these steps: 1. Turn on the monitor, and any other peripheral devices connected to your computer. 2. Press the power button on the front panel of - eMachines T2385 | User Guide - Page 15
as OS/2 Warp or UNIX, see the manual that came with that system for instructions on installation and use. The procedures in this manual assume that you are using Windows® with your computer. Using an Optional Floppy Disk Drive To use your floppy disk drive, insert the diskette with the label facing - eMachines T2385 | User Guide - Page 16
Using an Optional Media Reader The media reader can use six types of memory cards and the IBM MICRODRIVE disk drive. You can insert media in one of the card slots. NOTE Do not insert several media in the slots. Insert only one media in a slot - eMachines T2385 | User Guide - Page 17
Right Slot You can use the CF (CompactFlashTM) memory card or MICRODRIVETM disk drive in this right slot. Card type CF (CompactFlashTM) MICRODRIVETM Insertion Facing up Facing up CF MICRODRIVE NOTE You can see four Removable Disk drive letters and icons in My Computer. When you insert the media - eMachines T2385 | User Guide - Page 18
is slightly open, carefully pull it out. Your computer references the upper optical drive as D: and the lower optical drive (optional) as E: unless you have more than one hard disk drive or partition. The high speed DVD-ROM drive (above 6x) may take few seconds to stop the running of the spindle - eMachines T2385 | User Guide - Page 19
; changes back to lowercase when pressed again. The numeric/symbol keys on the top row of the keyboard and the symbol keys in the main part of the keyboard are not affected. Produces uppercase characters or the top symbols on the keys when used with the main character keys. Produces lowercase - eMachines T2385 | User Guide - Page 20
Options" of the Control Panel. NOTE Depending on the model, your keyboard may differ from the illustrations described in this user's guide. Using a Mouse Generally a mouse functions as follows: Click ( ) : Press and release the left mouse button once. Double click ( ) : Quickly press and - eMachines T2385 | User Guide - Page 21
the color depth from the Color quality area and the resolution from the Screen resolution area. 4. Click the OK button. Controlling the Audio Volume You can control the audio volume level by using the volume control box or Master Volume window. To control the volume by using the Master Volume window - eMachines T2385 | User Guide - Page 22
Blank 3-8 Using Your Computer - eMachines T2385 | User Guide - Page 23
chapter describes how to install or remove system cover, optional drives, and optional cards in your computer. NOTE Turn off the computer. Then disconnect the computer from its power source and from any telecommunications links, networks, or modems before performing any of the procedures described - eMachines T2385 | User Guide - Page 24
touching your system every time you remove the cover. If you are not properly grounded, you could generate an electric shock when you touch a component. 4-2 Installing and Removing Drives - eMachines T2385 | User Guide - Page 25
the cover to the chassis with the screws you removed. 3. Reconnect the monitor, keyboard, mouse, and any other peripheral device's cable connectors to your system. Installing and Removing Drives 4-3 - eMachines T2385 | User Guide - Page 26
install an expansion card in your computer. Follow these steps to install an expansion card: 1. Remove the system cover according to the instructions gold-edged connector. 4. Hold the card along the top corners and guide it into the connector. When the expansion card connector reaches the connector - eMachines T2385 | User Guide - Page 27
5. Secure the end of the card to the computer with retaining screw. 6. Connect any cables that should be attached to the card. 7. Replace the system cover according to the instructions in "Replacing the Cover" in this chapter. Installing and Removing Drives 4-5 - eMachines T2385 | User Guide - Page 28
an Additional Hard Disk Drive Your hard disk drive is installed in the HDD bracket attached on the chassis. You can install one additional hard disk drive in it. Follow these steps to install the hard disk drive: 1. Remove the system cover according to the instructions in "Removing the Cover - eMachines T2385 | User Guide - Page 29
4. Set the jumper of the new hard disk drive to CS (Cable Select). 5. Slide the hard disk drive into the HDD bracket. 6. With using the screws, secure the hard disk drive to the HDD bracket. Installing and Removing Drives 4-7 - eMachines T2385 | User Guide - Page 30
screw, as shown below. 8. Connect the power and hard disk drive cable to your hard disk drive. (If you removed the hard disk drive cable from the motherboard, replace it.) 9. Replace the system cover according to the instructions in "Replacing the Cover" in this chapter. 4-8 Installing and Removing - eMachines T2385 | User Guide - Page 31
can add an optional device such as a CD/DVD-ROM drive, hard disk drive, LS-120 drive, or ZIP drive in the empty peripheral bay. To install an optional device in the bay, follow these steps: 1. Remove the cover according to the instructions in "Removing the Cover" in this chapter. 2. Remove the HDD - eMachines T2385 | User Guide - Page 32
or break the front panel. When you remove the front panel from the chassis, you have to carefully apart the cover not to split the power and LED cables from the front panel. 4-10 Installing and Removing Drives - eMachines T2385 | User Guide - Page 33
a tool such as a screwdriver. EMI shield 8. Make sure the jumper of optional drive you want to install is set to CS (Cable Select). NOTES Like a hard disk drive, most optional devices have jumpers that must be set for the drive to work properly with your computer. You must set the jumper of your - eMachines T2385 | User Guide - Page 34
9. Slide the device into the bay and secure it to the computer case with two screws. 10. Connect the power and interface cables to the device installed. Secondary EIDE connector 11. To reassemble the front panel to the system, press the front panel toward the system until the tabs on the front - eMachines T2385 | User Guide - Page 35
12. Slide the optical drive into the bay and secure it to the system with screws. 13. Connect the power, audio, and interface cables to the optical drive. Installing and Removing Drives 4-13 - eMachines T2385 | User Guide - Page 36
14. Replace the HDD bracket to the chassis. 15. Replace the system cover according to the instructions in "Replacing the Cover" in this chapter. 4-14 Installing and Removing Drives - eMachines T2385 | User Guide - Page 37
drivers, and application programs) originally preinstalled on your hard disk. (This process may take about 20 minutes.) WARNING Chapter 1 If you restore your hard disk any software not originally installed on your hard disk. And you don't want to lose your personal data on your hard disk, copy it to - eMachines T2385 | User Guide - Page 38
following message will appear in the screen. To continue the procedures, press any key. THIS PROCESS WILL RE-INSTALL WINDOWS XP ON YOUR PC !!Warning!! ALL CONTENTS OF HARD DRIVE (C:) WILL BE LOST! ** BACK UP YOUR FILES BEFORE PROCEEDING AND RESTART ** Press any key to continue... 6. The following - eMachines T2385 | User Guide - Page 39
with #2 in the optical drive. And press Enter to continue. 9. All data in the Restore CD #2 will be copied to your hard disk. 10. If the "Insert drivers for your system are in the Drivers folder of you Restore CDs. If you lose drivers, install these by using the Restore CDs. You can update drivers - eMachines T2385 | User Guide - Page 40
Blank 5-4 Using the Restore CDs - eMachines T2385 | User Guide - Page 41
drive model. About DVD Digital Versatile Disc (DVD) is a high-density storage device. A standard DVD can hold 4.7 gigabytes of data - a seven times the data capacity to emachines PowerDVD, and then click PowerDVD. And press the play button on the PowerDVD. NOTE When you play the DVD that supports 16 - eMachines T2385 | User Guide - Page 42
button Status display panel Video position slider Mute button Decrease volume button Capture frame button Go-up button Repeat button Menu button Go to bookmark button This button is not supported Zoom button Step backward button Play button Pause button Minimize button Power off button Step forward - eMachines T2385 | User Guide - Page 43
10 seconds for complete discharge and re-plug the power cord. Then press the power button. Hard Disk Drive Cause Hard disk drive operation seems slow Hard disk drive access indicator light stays on Solution The files stored on your hard disk may be fragmented. Check for lost allocation units by - eMachines T2385 | User Guide - Page 44
operates well, the CD/DVD is defected. The high speed DVD-ROM drive takes few seconds to stop the running of the spindle motor when you , you can drag the volume bar up or down to adjust the audio volume level. Audio has been muted. Click the Start button, point to All Programs, Common Problems - eMachines T2385 | User Guide - Page 45
Disk. (For detail information, refer to the Windows Help. To open Windows Help, click the Start button, and then click Help and Support video connector of your computer. Monitor is not properly connected to a grounded wall outlet. Make sure the power utility installed or your computer entered power - eMachines T2385 | User Guide - Page 46
the mouse ball by unscrewing the bottom of the mouse. Then clean the mouse ball with a damp cloth and replace the mouse ball. A-4 Solving Common Problems - eMachines T2385 | User Guide - Page 47
. Entsorgung gebraushter Batterien nach Angaben des Herstellers. Fuse Warning Instruction Caution For continued protection against risk of fire, replace only with same type and rating of fuse. Disconnect input power before servicing. Only connect this equipment to an earthed socket outlet. Vorsicht - eMachines T2385 | User Guide - Page 48
top cover of the drive and never touch the internal parts in order to avoid EXPOSURE TO INVISIBLE LASER RADIATION. When the power switch is On, do kenieswegs versuchen das Gehäuse zu Öffnen. Lassen Sie den Service nur durch qualifizierte Servicestellen durchfuhern. Attention Pour reduire les risques - eMachines T2385 | User Guide - Page 49
Wanung Um die Gefahr eines Feuers oder eines elektrischen Schlages zu vermeiden, setzen sie dieses Gerät niemals Regen oder Feuchtigkeit aus. Use of controls or performance of procedures other than those specified herein may result in hazardous radiation exposure. Approva Statements B-3 - eMachines T2385 | User Guide - Page 50
PRODUCT COMPLIES WITH DHHS RULES 21 C.F.R. SUB-CHAPTER J, IN EFFECT AT THE DATE OF MANUFACTURE. CLASS 1 LASER PRODUCT LASER KLASSE 1 LUOKAN 1 LASERLAITE KLASS 1 LASER APPARAT APPAREIL A LASER DE CLASSE 1 EN60825 CAUTION - INVISIBLE LASER RADIATION WHEN OPEN DO NOT STARE INTO BEAM OR VIEW DIRECTLY
-
 1
1 -
 2
2 -
 3
3 -
 4
4 -
 5
5 -
 6
6 -
 7
7 -
8
-
9
-
10
-
11
-
12
-
13
-
14
-
15
-
16
-
17
-
18
-
19
-
20
-
21
-
22
-
23
-
24
-
25
-
26
-
27
-
28
-
29
-
30
-
31
-
32
-
33
-
34
-
35
-
36
-
37
-
38
-
39
-
40
-
41
-
42
-
43
-
44
-
45
-
46
-
47
-
48
-
49
-
50
 |
 |

i
The following instructions pertain to the risk of fire, electric shock or bodily injury. Please read all of these
instructions carefully.
1
2
3
4
5
6
7
8
9
10
11
Save these instructions for later use.
Follow all of the instructions and warnings marked on this product or included in this manual.
Do not use this computer on an unstable cart, stand or table. The product may fall, causing
seriousdamage to the product.
Slots and openings in the cabinet and the back have been provided for ventilation. To ensure
reliableoperation of your computer, and to protect it from overheating, do not block or cover these
openings. Don't use this product on a bed, sofa, rug or other similar surface. This product should
never be placed near or over a radiator or heat register. This product should not be placed in a built-
in installation unless proper ventilation is provided.
Never push objects of any kind into the computer through the cabinet openings. Objects may touch
dangerous voltage points or short out parts that could result in a fire or electrical shock. Never spill
liquid of any kind on the product.
This computer should only be connected to the AC power source indicated on your computer
system's information label. If you are not sure of the type of AC power available, consult your dealer
or local power company. Only connect this computer to a power outlet that matches the power
requirements of this computer.
Do not allow anything to rest on the power cord. Do not locate this product where people will walk
on the cord.
If you have to use an extension cord with this computer, make sure that the total amperage rating of
all equipment plugged into it does not exceed the amperage rating of the extension cord. Also, make
sure that the total of all products plugged into the main AC power outlet does not exceed 15 amps.
Unplug your computer from the main electrical power outlet before cleaning. Do not use liquid
cleaners or aerosol cleaners. Use a damp cloth for cleaning.
Do not use this computer near water.
This product is eqiupped with a 3-wire grounding type plug, a plug having a third (grounding) pin.
This plug will only fit into a grounding-type power outlet. This is a safety feature. If you are unable
to insert or replace your obsolete outlet, contact your electrician to replace your obsolete outlet. Do
not defeat the purpose of the grounding-type plug.
Important Safety Instructions